Mini Zippered Bag Tutorial
I started working on this little bag because we have quite a bit of travel planned for this summer, and I’ve found that when we travel I use way too many disposable zipper bags for miscellaneous things, like markers, toys, legos, snacks, etc. This little reusable bag will be perfect to fill with those little things and throw in the kids’ backpacks that I made a few weeks ago. (It would also be a great little cosmetic bag.)
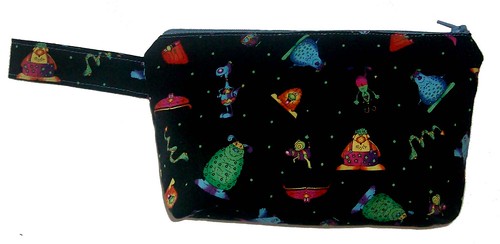
The finished size of this bag is approximately 9″ X 5 1/2″, not including the handle. You could easily increase the size, though, and turn it into a larger bag. If you increase the size, you could also line it with diaper-makers PUL and use it as a wet bag for soiled cloth diapers or damp swimsuits.
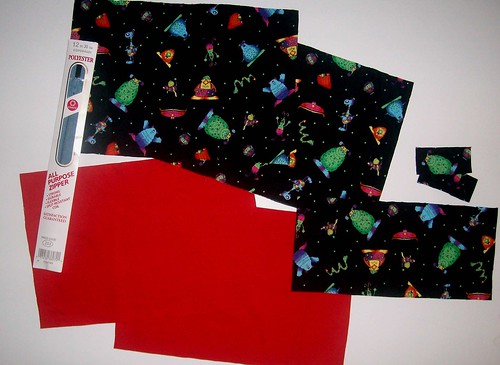
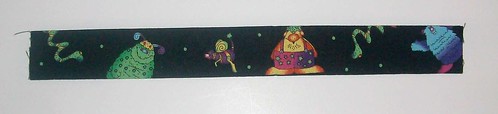
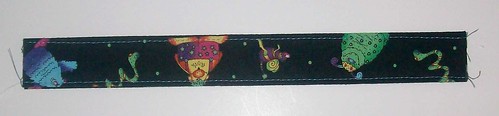
For this project you’ll need two pieces of cotton woven fabric cut to 10″ X 6 1/2″ for the outside of the bag and two pieces of a medium weight fabric like cotton twill cut to 10″ X 6 1/2″ for the inside of the bag. You’ll also need to cut two pieces of your outer fabric 1″ X 2 1/2″, and one piece of outer fabric 9″ X 4″. And, of course, you’ll need a zipper with a length of at least 9″. (I used a 12″ zipper because it’s what I had on hand.) Seam allowances are 1/2″.
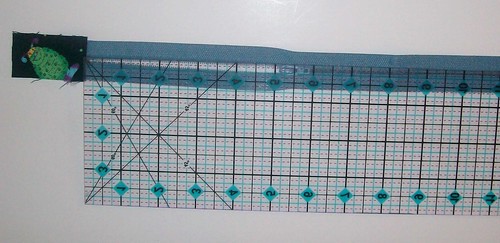
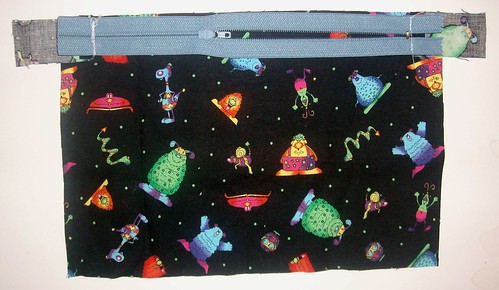
Start with preparing your zipper. Pin your zipper to one of the 1″ X 2 1/2″ pieces of fabric with right sides facing at the top end of the zipper, as shown, and stitch across.

Fold the fabric out at that end of the zipper and lay it out flat with the top facing you. Now, measure 8″ from that seam and mark your zipper at that point.
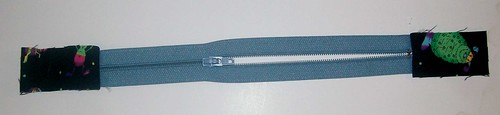
Line your second 1″ X 2 1/2″ piece of fabric up at that line and pin with right sides facing. Sew across, backstitching and forward stitching a few times to secure the end of the zipper. Fold the fabric out and trim off excess zipper.
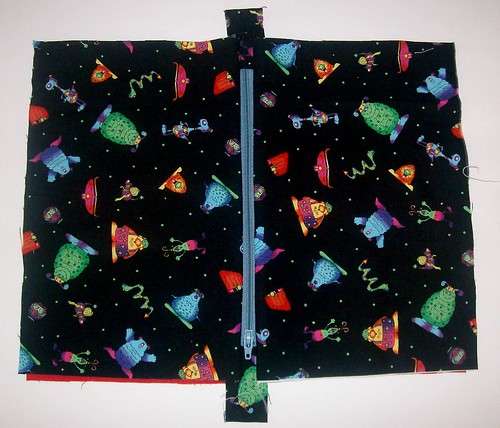
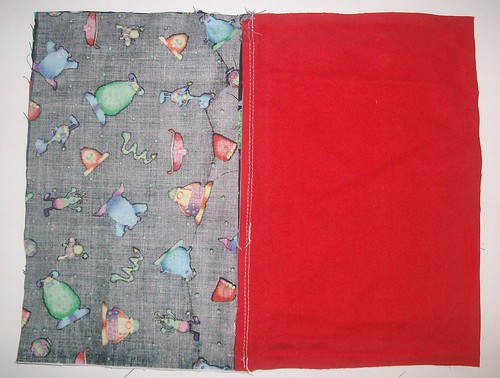
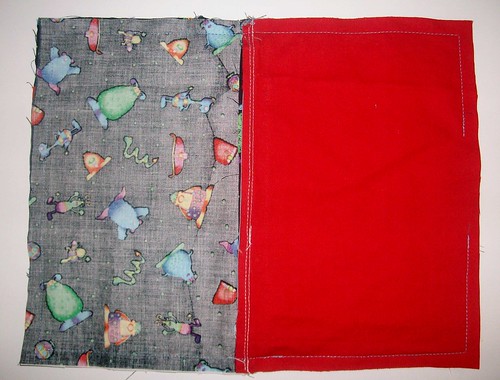
Now lay one of your outer pieces of fabric out with the right side facing you. Center your zipper on top with the right side down and raw edges lined up.
Lay one of your inner pieces on top of the zipper with the right side facing down. Line up the raw edges, and line up the inner piece with the outer piece under it. Pin in place. You should now have a “sandwich” with your outer fabric on bottom, zipper in the middle and inner fabric on top.
Sew in your zipper now using a zipper foot. I put my zipper pull about halfway down, sew to just before the foot, backstitch, remove the fabric from the machine, pull the zipper pull pass where I’ve already sewn, then backstitch across where I just stopped my stitching and stitch all the way to the end.
Repeat this process to attach the other outer and inner layers of fabric to the opposite side of your zipper. Now your bag should look like this when it’s layed out flat:
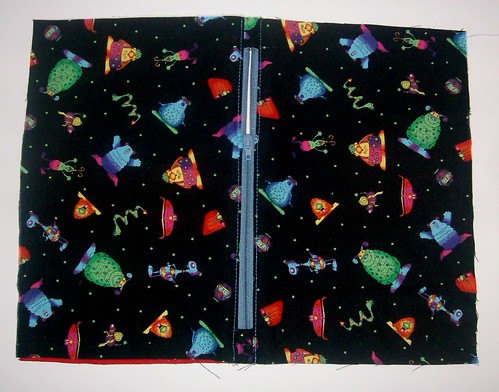
Now you’ll topstitch your zipper, but before you do each side, flip the inner layer to the other side, so you’re just topstitching through the outer layer and the seam allowance. Sew to the zipper pull, put your needle down, lift your sewing machine foot, pull the zipper pull past the foot, put the foot back down and continue sewing. Repeat on the other side. Trim excess fabric from ends of zipper.
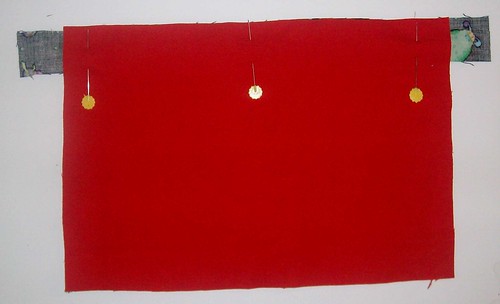
To prepare the strap for your bag, take your 9″ X 4″ piece and press it in half the long way with wrong sides facing. Unfold, then fold each long edge into the middle and press again.

Fold in the center again and press.
Topstitch each long edge at approximately 1/8″.
Fold handle in half and line up raw edges about 1/2″ below the zipper and pin to outer layer of fabric only. I angled my handle up slightly. Stitch at about 1/4″, backstitching and foward stitching to reinforce.

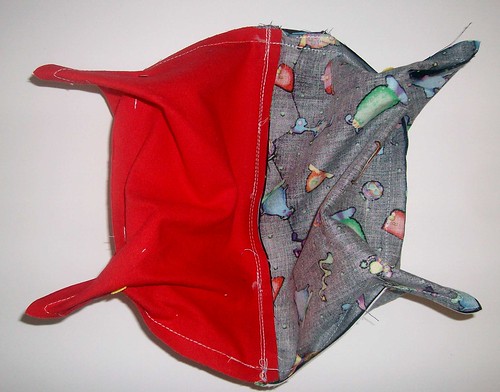
Now, open your zipper up to halfway — don’t forget this step or you won’t be able to turn your bag all the way. Next, flip your inner and outer pieces towards each other, lining them up with right sides facing, like this:
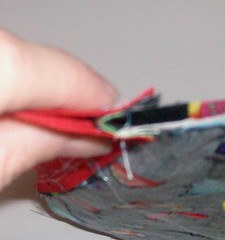
Pin fabrics in place like this. At the zipper, you’ll have a bit of extra fabric. That fabric should be folded towards the inner side of the bag. Here’s a picture to show you what I mean. (I apologize that the picture is blurry. I’ll try to get a better one with the next bag I sew.)
Now begin sewing your pieces together about 2/3 of the way across the bottom of the inner pieces. Sew all the way around the big rectangle, forward and backstitching a few times across the handle to secure it well. Leave about a 3″ opening in the bottom of the inner pieces.
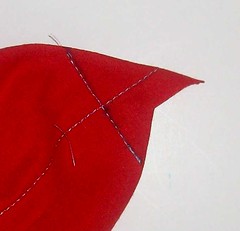
This next step is a little hard to understand until you do it once, then you’ll see that it’s really easy. Grab each corner, individually, and pinch it so that the side seam meets the bottom seam and pin it across. Your bag will now look like it has four little cat ears.
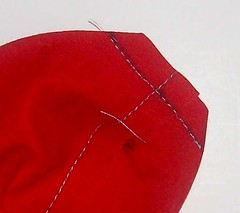
Next, at each corner, use your ruler to determine where the width across the little triangle measures 2″ and draw a line.

Stitch on that line, then trim off the excess fabric.
Now, you’re ready to turn your bag right side out. Turn it through the opening, then push the inner layer inside the outer layer, pushing out all your corners. If everything looks nice, pull the inner back out and pin and sew your opening closed.

Push the inner back inside and fill it with fun stuff!


17 Responses to Mini Zippered Bag Tutorial


Pingback: Pens, Pencil Cases and Getting out there. | Zeens and Roger
Pingback: QUILTED ZIPPER POUCH - 3 Fat Chicks Give the Skinny