Bonnie
Summer 2009 Support Trip: And . . We’re Off!
Ray and I are on the road today with Sean, Samantha, Allen and Jamie, headed out on our annual support trip. We serve as full-time staff missionaries with Gospel for Asia at their U. S. home office in Carrollton, Texas. GFA does not take out a percentage of donations received for administration, instead, 100% of all donations go to the area where they are designated. As staff members, we raise our own prayer and financial support. Our list of supporters includes churches, family and friends. Each year, we travel to visit with our supporters, to encourage and pray with them, and, prayerfully, to add new supporters to our team.
We’re heading into Biloxi, Mississippi tonight, where we’ll visit supporters tomorrow. Then, we’ll drive into Florida, where we’ll spend the remainder of our trip, before returning to Texas the last week of June.
As we left the Dallas area yesterday, we noticed that the fields of wheat along the sides of the road were “ripe to harvest”. It was a beautiful reminder of why God called us to serve in full-time ministry, supporting native missionaries in the field, and it was a great encouragement as we set out on this trip.
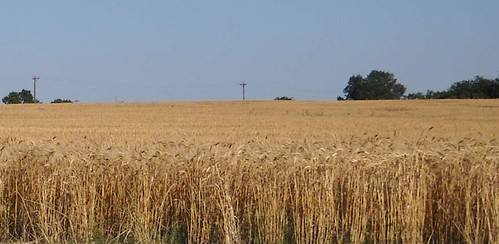
When He saw the crowds, He had compassion on them, because they were like sheep without a shepherd. Then he said to his disciples, “The harvest is plentiful but the workers are few. Ask the Lord of the harvest, therefore, to send out workers into his harvest field.”
Matthew 9:36-38
If you’d like to know more about GFA, stop in at www.gfa.org and request the free book, Revolution in World Missions. I pray that it will be a huge blessing to you!
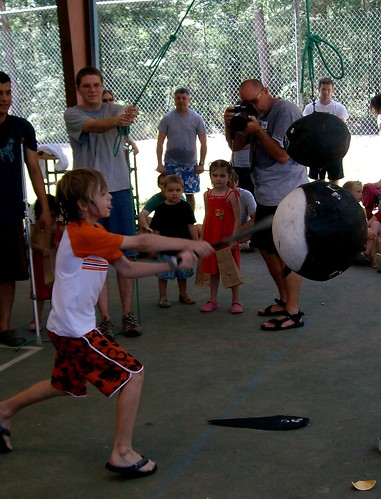
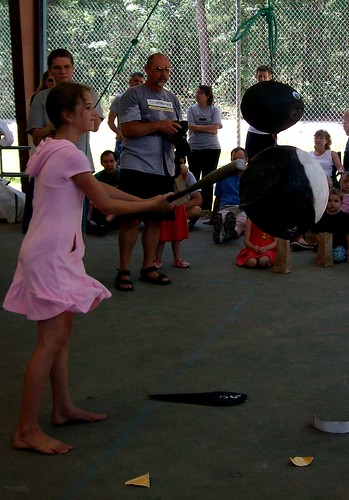
A Last Minute Kilting Project
Yep, I said, “kilting”, and not “quilting”.
I love to sew, and I love a challenge, so when I received an email last Tuesday asking if I could find time to sew up a kilt before the weekend retreat, I jumped right on it. Rather than actually using the pattern that I was given, I just measured my husband and looked at the pictures on the front of the pattern, and made things up as I went along. The kilt needed to be adjustable because it was to be used for a “pole-throwing contest” by multiple contestants, so it’s fastened with Velcro (actually it’s Aplix because that’s what I had on hand).
Front:

Back:

Modeled by my champion pole-throwing husband, Ray:

Ray’s winning pole throw:

Fun and Refreshing at the GFA Staff Retreat
We had a great time of worship, fellowship and fun at the GFA Staff Retreat this past weekend. I enjoyed being out of the city so much. It was such a blessing!
There was canoeing.
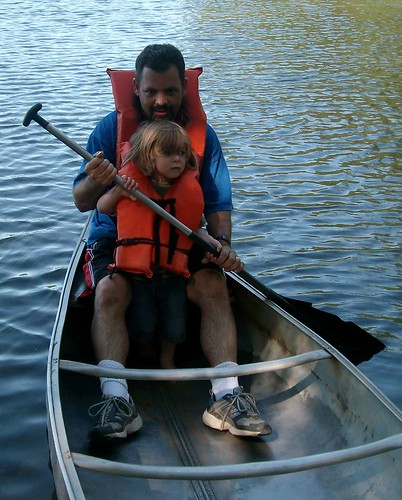
Ray, Allen, Jamie and I went out together, but we didn’t stay out long. Jamie’s wiggling made the canoe really rocky which made mama a little nervous.
There was a pinata.
Jamie was so excited about his candy–he wanted to eat it all. I got him down for a nap not too long after the pinata. I thought I’d put the candy away, and he would have forgotten about it when he woke up. Ha! The first words out of his mouth when he sat up were, “Where’s my candy?”
There were basketball, volleyball, soccer and capture the flag.
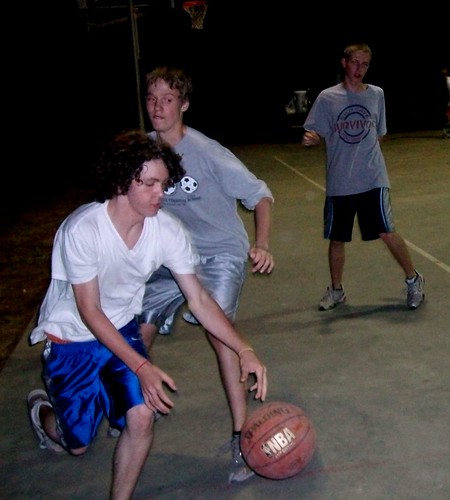
I’m pretty sure that Sean and his friends played basketball every waking moment of the weekend.
There was plenty of swimming.
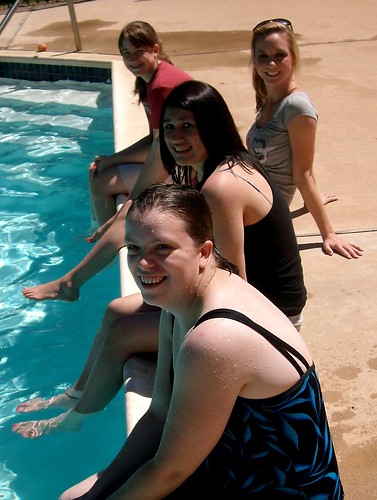
And, some just hanging out at the pool. I don’t think Morgan and her friends stayed dry much after this picture was taken. There were at least a dozen kids in the pool who were determined for them to be soaked.
And, there was the excitement of launching people into the air on the Blob.

That’s my husband flying through the air! I opted for the safer choice of watching and snapping pictures.
Winner of my Sew Mama Sew Giveaway!
Whew! How exciting! I had 539 entrants in my giveaway and got to know alot of amazing crafters. I’m still going through and looking at everyone’s blogs. I love getting inspiration from what others are doing!
On to the winner . . . I used random.org to select a winner:

And the winner is Tiffany of Tiggle Giggles. Congratulations, Tiffany! I can’t wait to see all the great bags you create!
My “Up-cycled” Purse Set
My Sew Mama Sew Giveaway is open for a few more days: Giveaway. I can’t wait to see who the winner is!
I’m heading out of town for a weekend retreat this morning, but thought I’d leave you with one of my latest projects. I’ve really been wanting to make myself a unique Sammi Grace Bag, so I went hunting at my local thrift store for ideas. I found this corduroy skirt during one of my trips:

See the middle seam and the little tabs on the waistband?

Aren’t they just perfect for a bag?

I love how it turned out! Here’s the inside:

And, what purse is complete without a matching wallet and key fob?


The wallet pattern is one of my favorite patterns from Wired Up Designs.
See you on Sunday!
Sew Mama Sew May Giveaway Day
Closed for entering now, mamas! Thanks so much! I’ll do the drawing and announce the winner tomorrow morning, June 1st.


I’m so excited about participating in Sew Mama Sew’s May Giveaway Day! If you haven’t heard of it, just click the link above and read all about it. You’ll have the chance to check out some really cool blogs and win prizes!
The Sammi Grace Bag is one of my favorite patterns. It has so many options including a full-size bag, a shallow bag and a mini bag. The outer part of the bag can be flat or gathered. And, there are multiple options for dividers and pockets, inside and out.


Like all my Fishsticks Designs patterns, the Sammi Grace Bag pattern is computer-drawn and is printed on 20# paper for durability and ease of tracing, folding and reinserting into its storage envelope. The instructions are printed in booklet form with pictures of each step. And, I’m always available by email if you have any questions while you’re sewing!
On to the giveaway . . . I am giving away a copy of the Sammi Grace Bag pattern and a yard each of two of my favorite fabrics from Joel Dewberry’s Aviary collection. To enter to win, just leave a comment on this post before May 31st. I’ll draw a random winner on June 1st. I’d be happy to ship internationally, too, for those of you outside of the U. S.
I hope you’ll take a few minutes to explore my Tutorials and my Sewing/Crafting posts. I really enjoy sewing and love to share that joy with others! Feel free to add a comment on any of my posts, if you have any questions for me.

Mini Zippered Bag Tutorial
I started working on this little bag because we have quite a bit of travel planned for this summer, and I’ve found that when we travel I use way too many disposable zipper bags for miscellaneous things, like markers, toys, legos, snacks, etc. This little reusable bag will be perfect to fill with those little things and throw in the kids’ backpacks that I made a few weeks ago. (It would also be a great little cosmetic bag.)
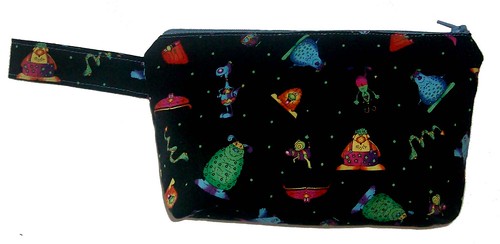
The finished size of this bag is approximately 9″ X 5 1/2″, not including the handle. You could easily increase the size, though, and turn it into a larger bag. If you increase the size, you could also line it with diaper-makers PUL and use it as a wet bag for soiled cloth diapers or damp swimsuits.
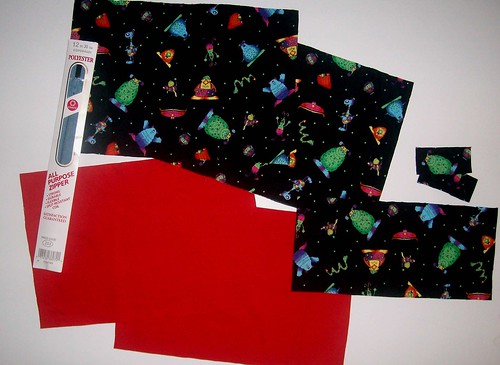
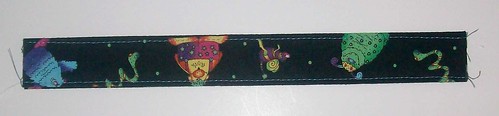
For this project you’ll need two pieces of cotton woven fabric cut to 10″ X 6 1/2″ for the outside of the bag and two pieces of a medium weight fabric like cotton twill cut to 10″ X 6 1/2″ for the inside of the bag. You’ll also need to cut two pieces of your outer fabric 1″ X 2 1/2″, and one piece of outer fabric 9″ X 4″. And, of course, you’ll need a zipper with a length of at least 9″. (I used a 12″ zipper because it’s what I had on hand.) Seam allowances are 1/2″.
Start with preparing your zipper. Pin your zipper to one of the 1″ X 2 1/2″ pieces of fabric with right sides facing at the top end of the zipper, as shown, and stitch across.

Fold the fabric out at that end of the zipper and lay it out flat with the top facing you. Now, measure 8″ from that seam and mark your zipper at that point.
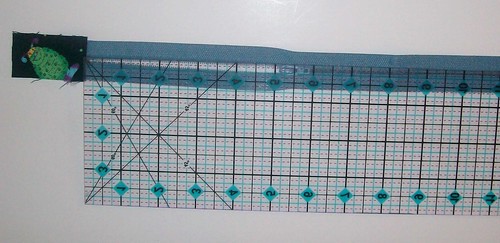
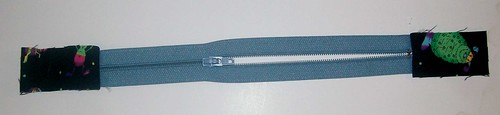
Line your second 1″ X 2 1/2″ piece of fabric up at that line and pin with right sides facing. Sew across, backstitching and forward stitching a few times to secure the end of the zipper. Fold the fabric out and trim off excess zipper.
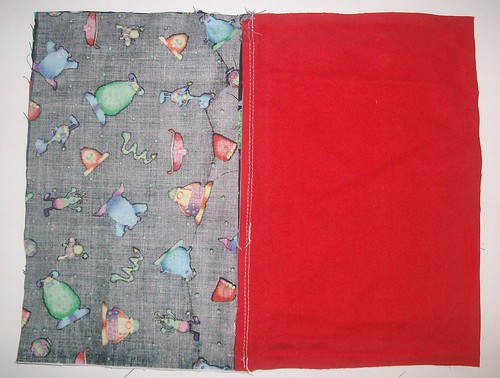
Now lay one of your outer pieces of fabric out with the right side facing you. Center your zipper on top with the right side down and raw edges lined up.
Lay one of your inner pieces on top of the zipper with the right side facing down. Line up the raw edges, and line up the inner piece with the outer piece under it. Pin in place. You should now have a “sandwich” with your outer fabric on bottom, zipper in the middle and inner fabric on top.
Sew in your zipper now using a zipper foot. I put my zipper pull about halfway down, sew to just before the foot, backstitch, remove the fabric from the machine, pull the zipper pull pass where I’ve already sewn, then backstitch across where I just stopped my stitching and stitch all the way to the end.
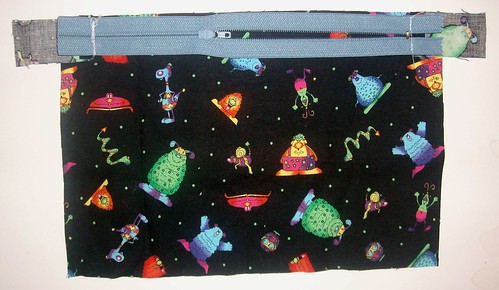
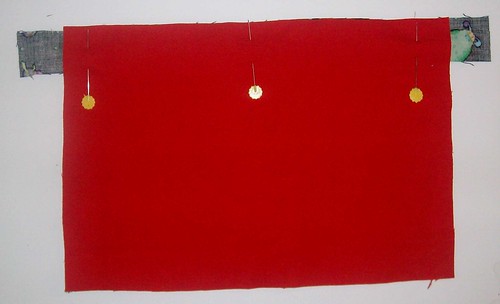
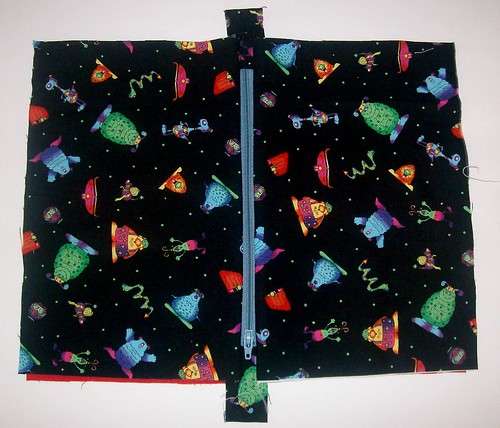
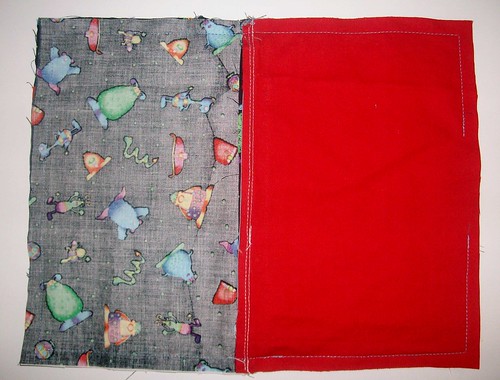
Repeat this process to attach the other outer and inner layers of fabric to the opposite side of your zipper. Now your bag should look like this when it’s layed out flat:
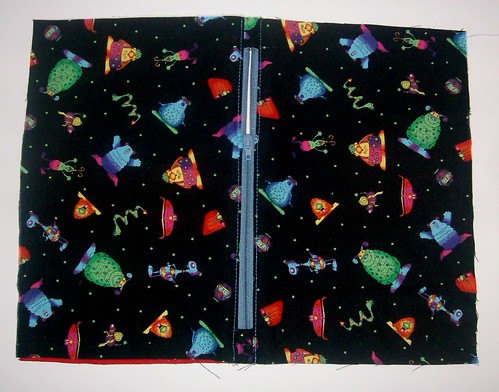
Now you’ll topstitch your zipper, but before you do each side, flip the inner layer to the other side, so you’re just topstitching through the outer layer and the seam allowance. Sew to the zipper pull, put your needle down, lift your sewing machine foot, pull the zipper pull past the foot, put the foot back down and continue sewing. Repeat on the other side. Trim excess fabric from ends of zipper.
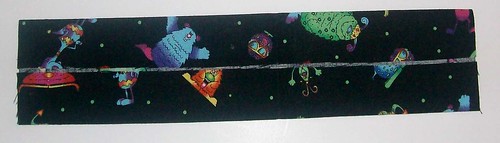
To prepare the strap for your bag, take your 9″ X 4″ piece and press it in half the long way with wrong sides facing. Unfold, then fold each long edge into the middle and press again.
Fold in the center again and press.
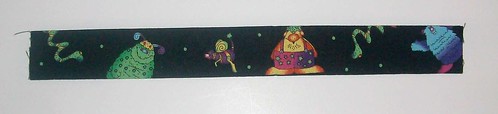
Topstitch each long edge at approximately 1/8″.
Fold handle in half and line up raw edges about 1/2″ below the zipper and pin to outer layer of fabric only. I angled my handle up slightly. Stitch at about 1/4″, backstitching and foward stitching to reinforce.

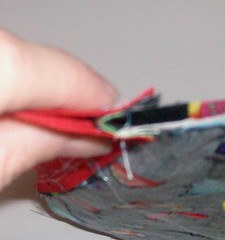
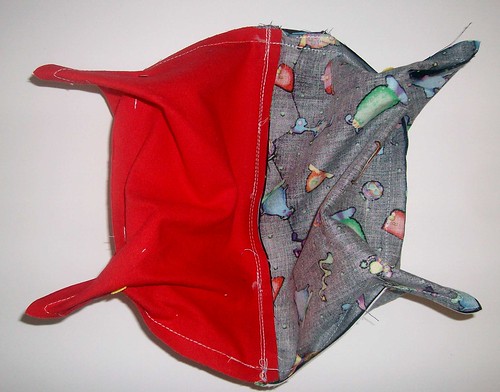
Now, open your zipper up to halfway — don’t forget this step or you won’t be able to turn your bag all the way. Next, flip your inner and outer pieces towards each other, lining them up with right sides facing, like this:
Pin fabrics in place like this. At the zipper, you’ll have a bit of extra fabric. That fabric should be folded towards the inner side of the bag. Here’s a picture to show you what I mean. (I apologize that the picture is blurry. I’ll try to get a better one with the next bag I sew.)
Now begin sewing your pieces together about 2/3 of the way across the bottom of the inner pieces. Sew all the way around the big rectangle, forward and backstitching a few times across the handle to secure it well. Leave about a 3″ opening in the bottom of the inner pieces.
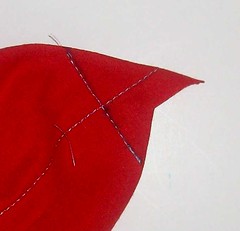
This next step is a little hard to understand until you do it once, then you’ll see that it’s really easy. Grab each corner, individually, and pinch it so that the side seam meets the bottom seam and pin it across. Your bag will now look like it has four little cat ears.
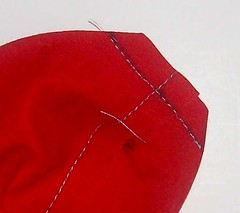
Next, at each corner, use your ruler to determine where the width across the little triangle measures 2″ and draw a line.

Stitch on that line, then trim off the excess fabric.
Now, you’re ready to turn your bag right side out. Turn it through the opening, then push the inner layer inside the outer layer, pushing out all your corners. If everything looks nice, pull the inner back out and pin and sew your opening closed.
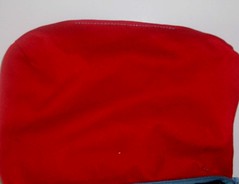
Push the inner back inside and fill it with fun stuff!

If You Give a Cat a Cupcake for United through Reading

This Size 3T Set is for the United Through Reading Charity Auction that starts today at Kukae & Mimi. This is my second year participating, and I enjoy it so much! Each participant chooses a children’s book and then she works her donation around the book. My selection this year is If You Give a Cat a Cupcake. Proceeds and books go to the United through Reading program which gives deployed military members a great way stay connected with their children at home.
The top in this set is a slightly modified version of my Emmy pattern. I curved the bodice and pushed the gathers to the middle, and I made the sleeves a little wider and the armband a little narrower. The skort is the size 3T bloomers from the AJ Bottoms pattern with a skirt attached. (I love the bloomers under the skirt!) The purse is a Mini Sammi Grace bag, modified to make it toddler-size. (I took about 2 inches off of the pattern each way and made the strap 3 inches shorter.)
More pictures:


There are tons more handmade items up for auction, so go check it out! Auctions run through June 1st.
Handmade Dolls for the Casa Bernabe Orphanage

Craft Hope is running it’s second project, and I’m so excited that I was able to get involved and help a little! These sweet dolls that I just finished will be heading to an orphanage in Nicaragua where I pray they’ll receive lots of love. To read more about the project, click the button at the top of this post.

I used the free Little Miss Missy pattern for these. I embroidered the faces with my embroidery machine and sewed up the outfits from a simple pattern that I drew out myself.
These are the first dolls that I’ve ever sewn, and I was surprised by how quickly and easily they went together! I even got Samantha involved in picking fabrics for the clothes and stuffing arms and legs.
If you’re a sewer, and you have some time to sew up a doll or two, I hope that you’ll consider donating, too!
Made by Rae Backpacks
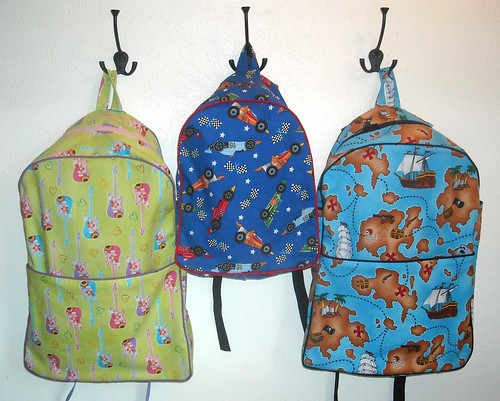
I really wanted to make new backpacks for my three youngest (since I’m not afraid of zippers anymore). I thought I’d try out the really cute pattern that Rae of Made By Rae has available on her Etsy store: Toddler Backpack. I love the way that she uses piping in her patterns. It always makes the finished item look professional. She includes suggestions for increasing the size for bigger kids, too.
The kids picked out their own fabrics at Joanns. Jamie saw the racecar fabric and would not be swayed to anything else! I had them choose from cotton woven fabrics and then I just backed each pattern piece with cotton twill to give the finished bag some structure. (Rae suggests using bottom weight fabrics.)
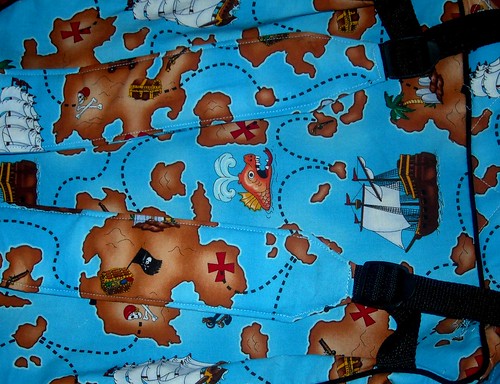
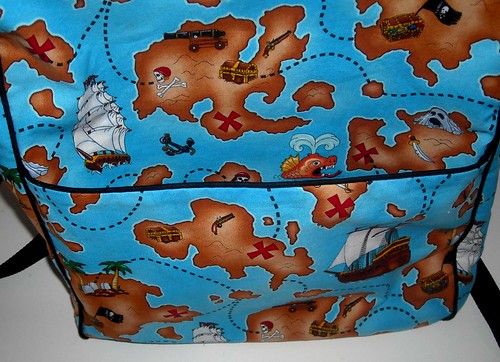
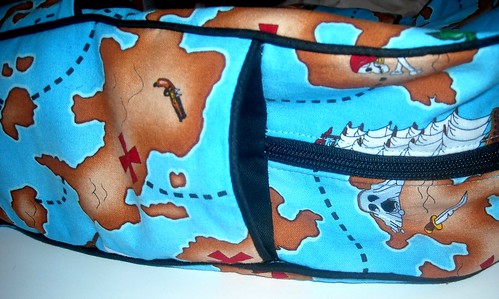
I sewed Jamie’s backpack according to the directions, and it’s perfect for him! For Samantha and Allen, though, I increased the size, modified the straps a little and added front and side pockets:
Ready for Adventure!


