Bonnie
Handmade Christmas Projects – Coasters
I really like giving Christmas gifts that are handmade. I also enjoy giving practical gifts. There are two very sweet moms who have watched my three youngest children this year so that I could volunteer in the GFA office two days a week, and we wanted to do something special for them. This project was the perfect practical, handmade gift that the kids could have a hand in making, and I think they turned out really nice!
For this project, we followed the Coaster Tutorial at Two Hippos Blog. We bought 12 four-inch ceramic tiles, glue, varnish and scrapbook paper. I precut the paper into four inch squares, and we layed them all out.

Samantha and Allen glued the paper squares on to the tiles. Then they added a second coat of glue to the top of the paper.

Once the papers were dry, I painted them with another coat of glue.

When that was dry, we added three coats of varnish to seal the coasters. We allowed them to dry and added some felt “feet” to the bottoms, and they’re all ready for giving!


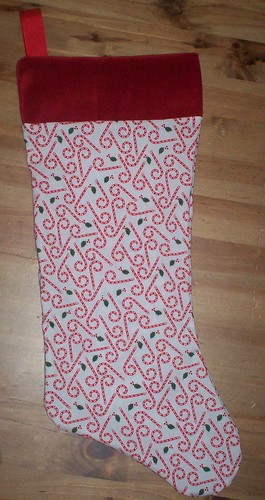
Christmas Stocking Tutorial
The stockings are hung by the . . . well, we don’t actually have a chimney, so they’re hung in the dining room from the quilt rack.

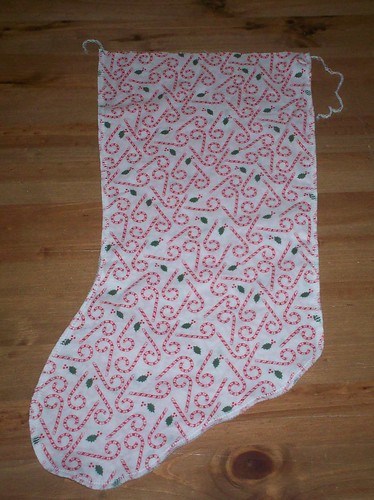
I sewed these stockings up last year so that we’d all have nice coordinating ones, and I thought I’d share my pattern and instructions with you. I love the simple design, and the size, in my opinion, is perfect. They’re big enough to hold a DVD or video game but not so huge that you have to spend your whole Christmas budget on stocking stuffers.
For each stocking, you’ll need 1/2 yard of print woven fabric for the body, 1/4 yard of fabric for the top (velvet works beautifully) and ribbon for hanging. The body pattern can be found here. When you print, be sure that the “Fit to page” option is not selected. The pattern will print in two pages which you should butt up against each other to make a complete pattern. 1/2″ seam allowance is included.
STEP 1
Cut out your pieces. You’ll need to cut two body pieces from the pattern linked above in opposite directions. For the top of the stocking, you’ll need to cut two 17″ X 3 3/4″ strips.

STEP 2
Line body pieces up with right sides facing and sew or serge using 1/2″ seam allowance around all sides except the top.
STEP 3
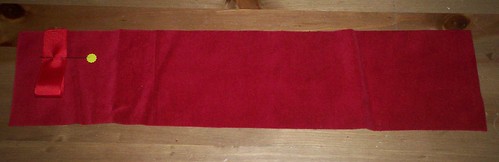
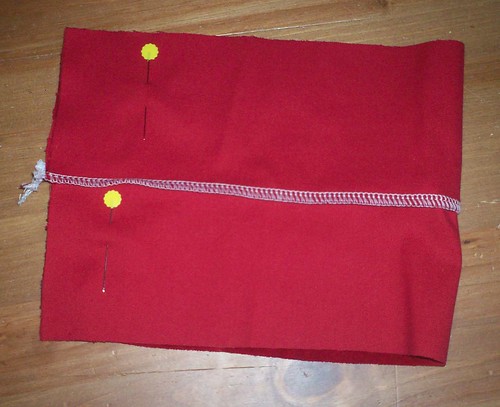
Cut a piece of ribbon to 5 1/2 inches. I used 1″ grossgrain ribbon for ours. Pin the ribbon on the right side 1″ from the end of one of your top strips as shown.
STEP 4
Line your second strip up on top of the first strip with right sides facing and sew or serge along the edge where the ribbon is pinned, securing the ribbon inside.
STEP 5
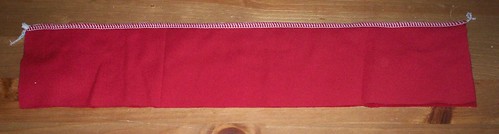
Flip your two strips apart exposing the ribbon inside.

Fold over, matching up the short ends and sew or serge across the short edge.

STEP 6
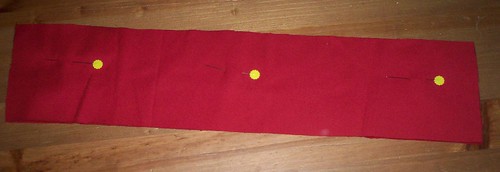
Fold the finished top piece right-side out as shown, being sure that the ribbon is now at the back and on your left hand side.

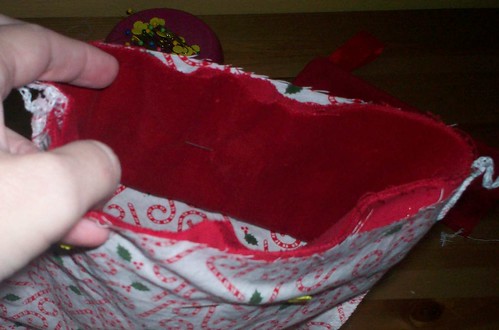
STEP 7
Now pin the top of your stocking upside down inside the two body pieces which are still right-sides facing, as shown. Match up the seam on your top piece with the seam on the heal side of your stocking.
STEP 8
Sew or serge around the raw edges, attaching the top to the body of the stocking.
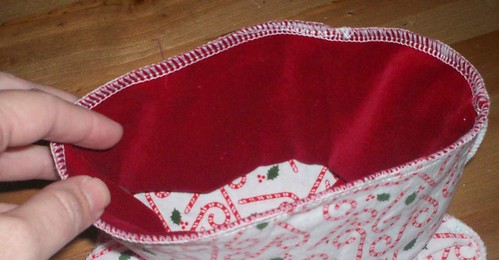
STEP 9
Flip the top out of the stocking . . .
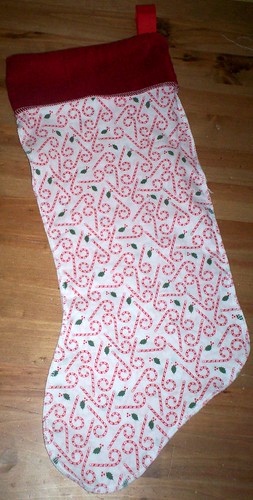
. . . and turn right-side out.
READY FOR SANTA!
Please let me know if you have any questions, and I’d love to hear if you use this tutorial to make your own stockings!
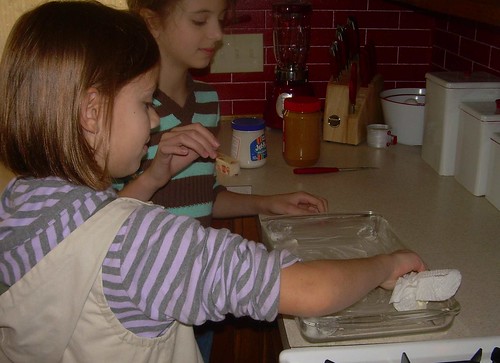
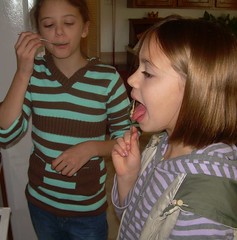
Christmas Traditions – Peanut Butter Fudge
Ray’s mom gave me this recipe the first Christmas that Ray and I spent together. It’s one of their family’s Christmas favorites. They love to offer an unsuspecting guest a drink of soda to go with the fudge and watch the reaction to the “explosion” that results from the combination.
The Recipe

Ingredients
1 stick of butter
1 small can of evaporated milk
2 1/2 cups of sugar
1 cup of creamy peanut butter
1/2 tsp of vanilla
1 7-ounce jar of marshmallow cream
A few willing assistants

Grease a 9X12 dish
Put butter and evaporated milk in pan. Do a little math while measuring the sugar into the pan: how many 1/2 cups make 2 1/2 cups total?

Heat and stir to boiling. Allow to boil for five minutes stirring often.
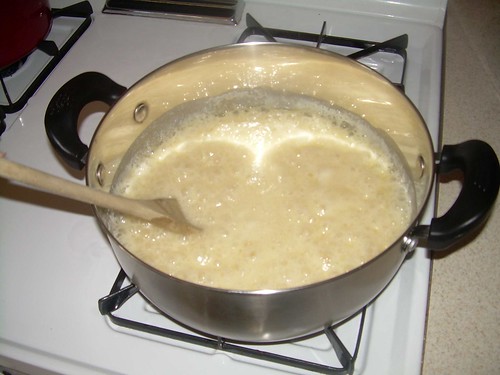
Remove from heat. Stir in peanut butter until smooth.

Add vanilla and marshmallow cream. Stir until smooth.


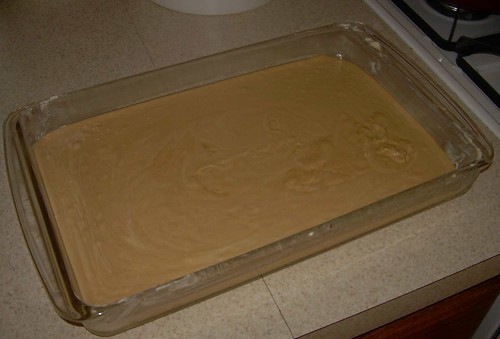
Pour into 9X12 pan.

Let cool.
Lick the spoons.
Cut into squares and store in a covered container, dividing the layers with waxed paper.

Christmas Traditions – Decorating the Tree
We traditionally put our tree up the day after Thanksgiving. Ray usually gets it out and puts it together with the kids while I’m out doing Black Friday shopping, and we decorate it together in the evening after dinner. After having real trees for many years, Ray convinced me to pick up an artificial one after Christmas a few years ago, and though I do miss picking out the tree and the nice smell, the convenience of our artificial has definitely won me over.
This year, Morgan got up and went out shopping early with me after spending the night with a friend. I think she slept two hours . . . she was tired by tree decorating time, but still beautiful, of course. I love this picture of her and Samantha. The look so much alike and so much different at the same time.

Jamie was really excited about the tree and wanted to “help”, of course.


The kids might think it’s corny, but they always make sure that Ray and I hang the first ornament on the tree. We bought this one our first Christmas together.

After the first ornament, we let the the kids decorate the tree. (Shhh . . . I do go back after everyone leaves to make sure the ornaments are all spread out evenly.)

Samantha was calling it a “Kiss-Mas” tree, so Jamie kept trying to kiss the tree. Morgan convinced him to give her a kiss instead.

Our ornaments are almost all handmade by the kids. There are a few thrown in that are special ones to us, like the “Baby’s First Christmas” ornaments. There are several really special ones that Ray’s mom saved for him that he made when he was a kid.
All done!

Art-on-the-Go Kit Tutorial
 I sold these from my Hyena Cart last year and thought mamas might enjoy making them for their own children this year. It’s a just a slightly different take on the colored pencil roll-up. This one fastens with elastic which is much easier for little hands than a ribbon that needs to be tied. It also hold a 3″ X 5″ doodle pad which I buy in packs of 12 at Staples for $4.99: Doodle Pads. These art kits are great for carrying in the diaper bag to keep little hands busy while you’re waiting at the doctor’s office or your favorite restaurant. They’re also great for coloring in the car since colored pencils are less messy than markers and won’t melt like crayons.
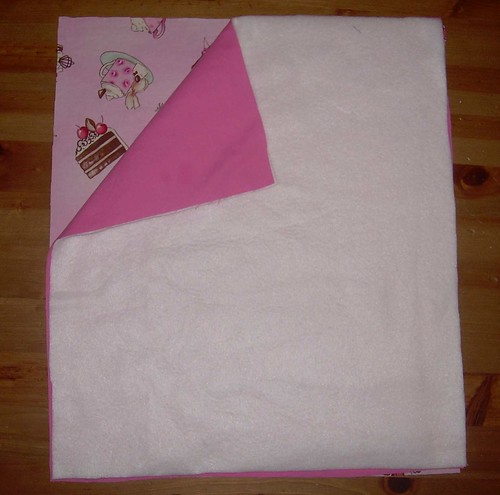
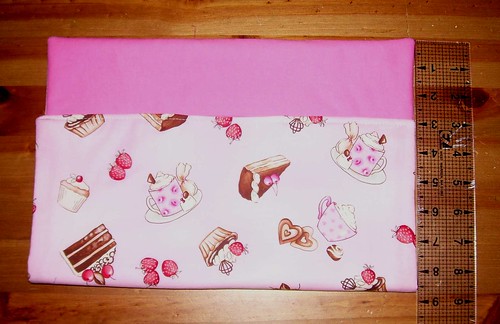
Start with the cotton woven fabrics of your choice. You can do the front and back in the same fabric, in a print and a solid, or two coordinating prints. For the hidden inner fabric I like to use a layer of fleece, but you can use quilt batting or, for a thinner version, a piece of cotton flannel. Be sure to prewash your fabrics so that your art kit will be washable when you’re all finished.

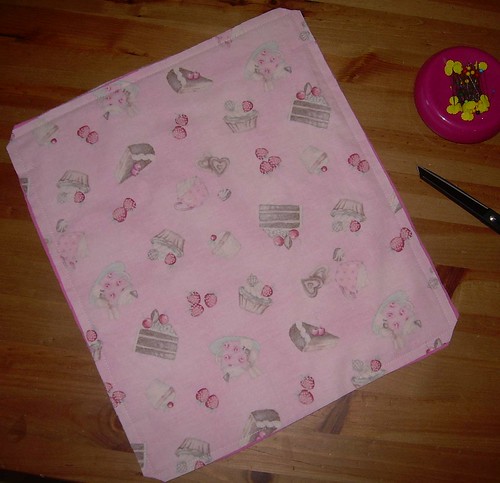
Cut your fabrics into three rectangles, measuring 15 1/2″ X 13 1/2″. If you’re using a directional print, you’ll want the design to go across the shorter measurement.
STEP 2
Ready your fabrics for sewing by placing your cotton wovens with the right sides facing and the hidden inner fabric on top.
STEP 3
Stitch around the edges using a 3/8″ seam allowance and leaving a 3″ opening in one of the short edges for turning. Clip your corners, then turn right side out, pushing your corners out until they’re as square as possible. (A clean chopstick works great for this. In my house, we call them “corner-poker-outers”.)
STEP 3

Topstitch at about 1/8″ across the short edge that you left open for turning, closing the hole.
STEP 4
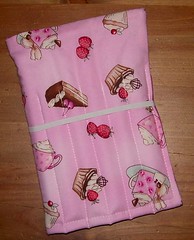
Fold the topstitched edge up as shown to 3″ below the opposite edge and pin.
STEP 5
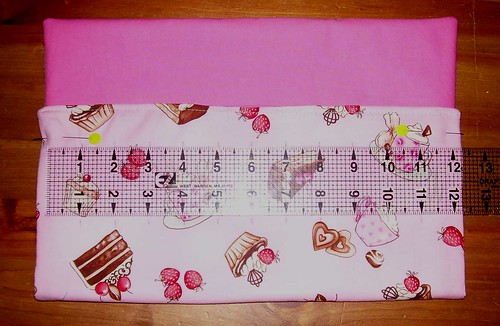
Mark the middle of your art kit, then mark at 1″ intervals across. You should have a total of 11 markings. I use disappearing ink so that I don’t have to worry about cleaning it off later, but you do have to work quickly so that it doesn’t disappear before the next two steps are completed.
STEP 6

Draw in the lines for your pencil pockets at the 11-1″ intervals you just marked.
STEP 7
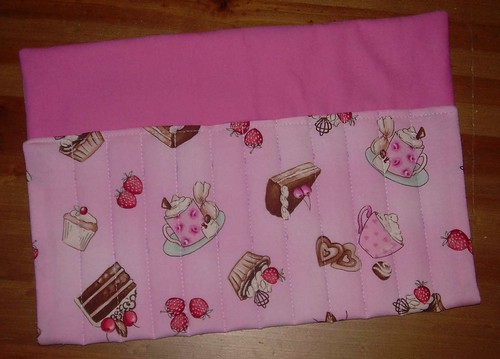
Stitch down each line, backstitching at the top and bottom to lock in your stitches.
STEP 8

Cut two pieces of 1/4″ elastic, one 5 1/4″, one 11 1/2″. Pin the shorter piece across the pencil pockets beginning at the first stitching line on the right and ending at the fifth line from the right as shown. Fold the longer piece to form a loop and pin between the two layers of fabric on the left-hand side of the art kit leaving about 1/2″ inside the the two layers.
STEP 9
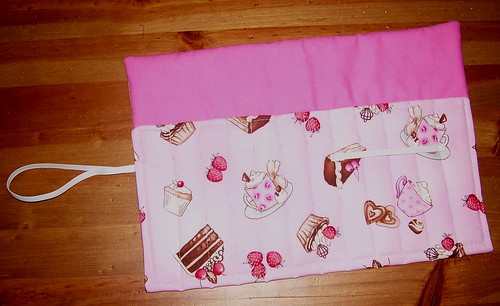
Stitch across the ends of the shorter piece of elastic following your previous stitching lines, backstitching and forward-stitching several times to keep it secure. Then topstitch at 1/4″ beginning on the right at the top of the pocket section, continuing around the bottom and up to the top of the pocket section on the left, securing the elastic loop inside, being sure to backstitch at the beginning and end and over the elastic loop to keep it secure with heavy use.
STEP 10
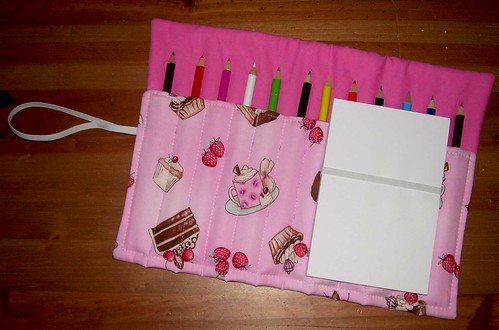
Add your pencils and doodle pad and ENJOY!
Did I mention that we live in Texas?
Morgan and I got up early, but not crazy early, to do some Black Friday shopping. We met up with our friends, Crystal and Chris, and had a wonderful time. We had to laugh, though, as we exited the parking lot of the shopping center and looked off to the left to see these two guys riding away on horseback. Only in Texas . . .

Thanksgiving 2008
We had a lovely Thanksgiving this year! Our dear friends and fellow GFA staff members, Janet and Garry, came all the way over from next door to spend the afternoon and evening with us.

We had tons of yummy food! Janet made the beautiful “living candle” centerpieces for us.

After dinner, Garry, Ray, Morgan and Sean watched the Cowboys play football while Allen and Samantha taught Auntie Janet how to play “I Spy” on the computer.


Sometimes It’s the Simpliest Things
Ray’s mom picked up this swing for a few cents at a yard sale and sent it home with us. It’s really just a round piece of wood on a rope, but the kids played on it until it was too dark to play anymore.
Jamie “helped” hang the swing from the walnut tree.


Morgan dropped by and went for swing, too!

Support Trip – HOME!
We’re home!
We left Ray’s Mom’s house on Thursday morning–a day early because more snow was coming!

We did have a chance to drop in and visit with Ray’s 91-year-old Great Aunt on Wednesday, though. It was such a blessing to spend time with her!

Jamie thought her walker was the coolest “cycle” he’d ever seen.

Thank you so much for your prayers and encouragement on our trip. God was with us every step of the way. We really enjoyed being able to share with you, too!
Support Trip – Wrapping Things Up
We had a bit more snow today,

and, sadly, had to cancel our lunch meeting with our supporters in eastern Tennessee. We’re wrapping things up here now and planning to head toward home on Thursday morning. Please pray for safe travel!
I’ll leave you with some more pictures of fun in the snow.


