Sewing/Crafts
If You Give a Cat a Cupcake for United through Reading

This Size 3T Set is for the United Through Reading Charity Auction that starts today at Kukae & Mimi. This is my second year participating, and I enjoy it so much! Each participant chooses a children’s book and then she works her donation around the book. My selection this year is If You Give a Cat a Cupcake. Proceeds and books go to the United through Reading program which gives deployed military members a great way stay connected with their children at home.
The top in this set is a slightly modified version of my Emmy pattern. I curved the bodice and pushed the gathers to the middle, and I made the sleeves a little wider and the armband a little narrower. The skort is the size 3T bloomers from the AJ Bottoms pattern with a skirt attached. (I love the bloomers under the skirt!) The purse is a Mini Sammi Grace bag, modified to make it toddler-size. (I took about 2 inches off of the pattern each way and made the strap 3 inches shorter.)
More pictures:


There are tons more handmade items up for auction, so go check it out! Auctions run through June 1st.
Handmade Dolls for the Casa Bernabe Orphanage

Craft Hope is running it’s second project, and I’m so excited that I was able to get involved and help a little! These sweet dolls that I just finished will be heading to an orphanage in Nicaragua where I pray they’ll receive lots of love. To read more about the project, click the button at the top of this post.

I used the free Little Miss Missy pattern for these. I embroidered the faces with my embroidery machine and sewed up the outfits from a simple pattern that I drew out myself.
These are the first dolls that I’ve ever sewn, and I was surprised by how quickly and easily they went together! I even got Samantha involved in picking fabrics for the clothes and stuffing arms and legs.
If you’re a sewer, and you have some time to sew up a doll or two, I hope that you’ll consider donating, too!
Made by Rae Backpacks
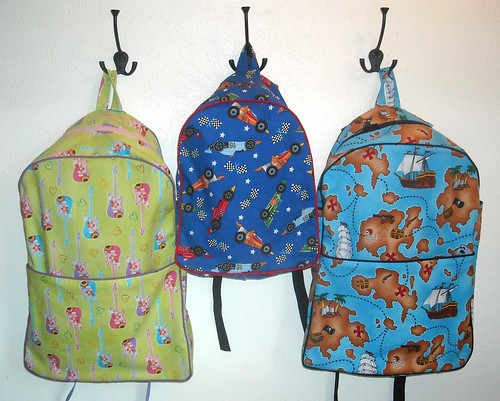
I really wanted to make new backpacks for my three youngest (since I’m not afraid of zippers anymore). I thought I’d try out the really cute pattern that Rae of Made By Rae has available on her Etsy store: Toddler Backpack. I love the way that she uses piping in her patterns. It always makes the finished item look professional. She includes suggestions for increasing the size for bigger kids, too.
The kids picked out their own fabrics at Joanns. Jamie saw the racecar fabric and would not be swayed to anything else! I had them choose from cotton woven fabrics and then I just backed each pattern piece with cotton twill to give the finished bag some structure. (Rae suggests using bottom weight fabrics.)
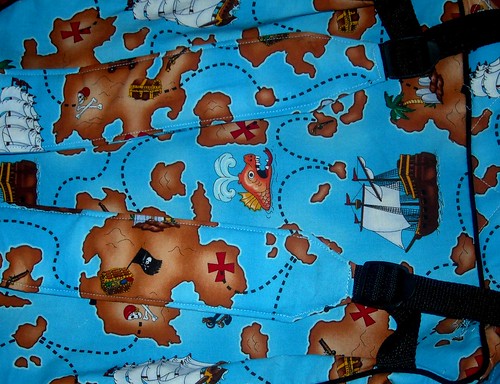
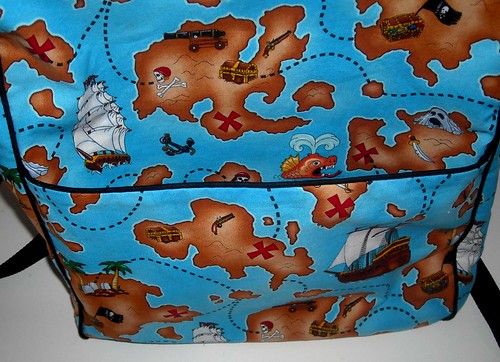
I sewed Jamie’s backpack according to the directions, and it’s perfect for him! For Samantha and Allen, though, I increased the size, modified the straps a little and added front and side pockets:
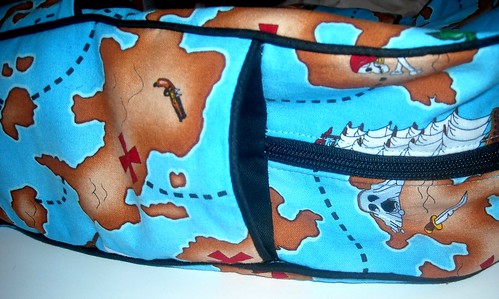
Ready for Adventure!

Spring Top Week – Day 5 (and the last day of the challenge)
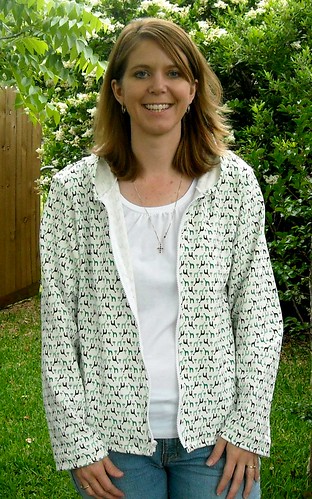
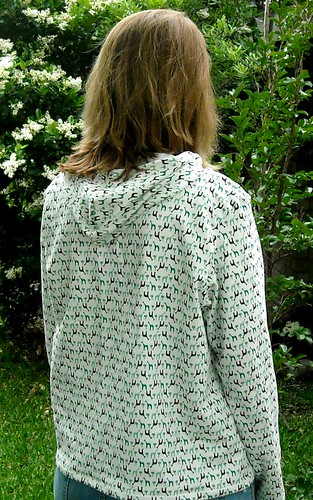
The last of my Spring Top Week projects–I finished this one a little late to enter it into the actual challenge, and now I wish I’d done it earlier . I was so afraid of that silly zipper (this was my first zipper), and it ended up being so easy! I feel a little ridiculous now that I was so afraid of sewing in a zipper! Yes, Shelly, you told me so . . . The fabric is organic cotton/lycra french terry that I bought from The Fabric Fairy with this hoodie in mind. I used the Favorite Things Hoodie pattern, but I made a few adjustments to get it to fit well. The major adjustments were narrowing it across the shoulders and tapering and extending the sleeves.
Unzipped
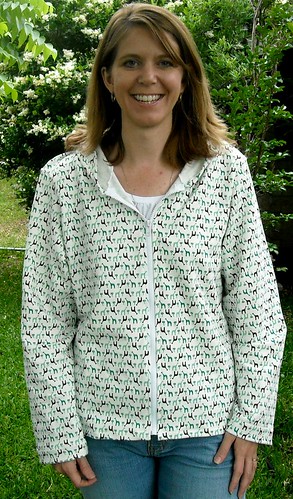
Zipped (The zipper works!)
Back
Whew! That was a busy week of sewing, but it was a lot of fun!
Spring Top Week Day 4
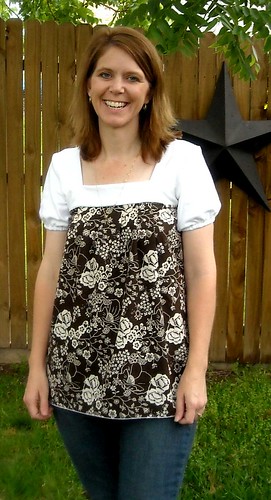
Thursday’s top is a tunic style made from New Look #6179. It’s sewn from a cotton woven fabric making it different from the knit tops that I normally wear, but I like it! I went by the measurements on the back of the pattern rather than the RTW size that I normally wear. I would normally purchase a size 10, but measurements had me make a size 12 in this pattern, and it fits really nicely. I did add some length to it because I like longer shirts, but I failed to flare the bottom enough and had to cut off some of my added length so that it would fit at the hips. Overall, I’m happy with it–I think I’d like to try making another one from cotton jersey!
Closeup of the pretty design on the fabric:
Spring Top Week Day 3
Today’s top is another Emmy modification. This time I curved the bodice and pushed all the gathers to the middle. I really like the look that it has this way! I also narrowed the width across the chest and shoulders, so it fits me better than yesterday’s top. This one if my favorite so far.

Spring Top Week Day 2
I made today’s top by enlarging my own Emmy Shirt Pattern. I’ve been thinking about trying the pattern out for myself for awhile. I’ve had a few mamas mention that it would be a cute grown-up top, too. There are a few things that I’ll change the next time I sew it, but overall I really like it. The cotton interlock makes it super comfy, and I love the color.
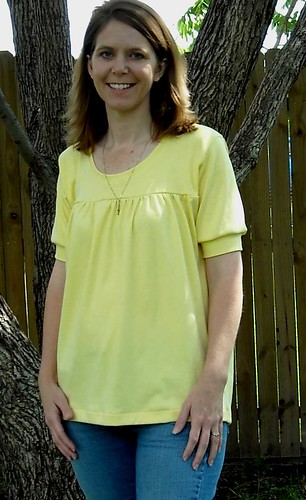
Edited on 5/29 to add: I decided overnight that I really didn’t like the way the sleeves fit on this shirt, so I made some modifications, and I’m much happier with it now!
Spring Top Week Day 1
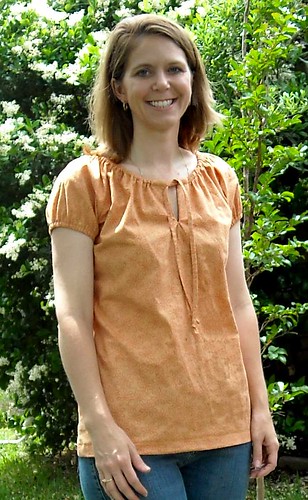
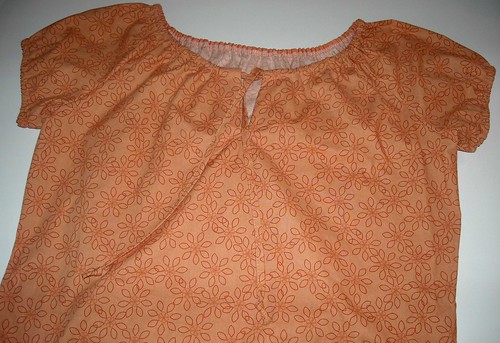
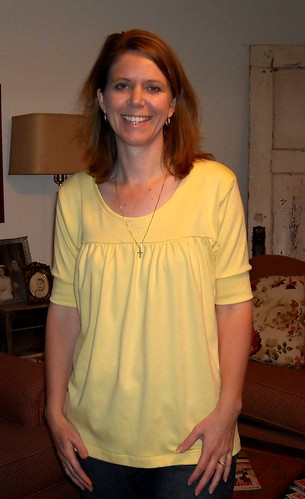
I’ve really been wanting to sew some things for me lately, so I thought I’d jump into Made by Rae’s Spring Top Week Sewalong. For this first top, I followed Rae’s Spring Ruffle Top Tutorial at the Sew Mama Sew Blog, although I did modify it a little by adding cute elasticized sleeves. I really like the result. I think I’ll be making more of these!

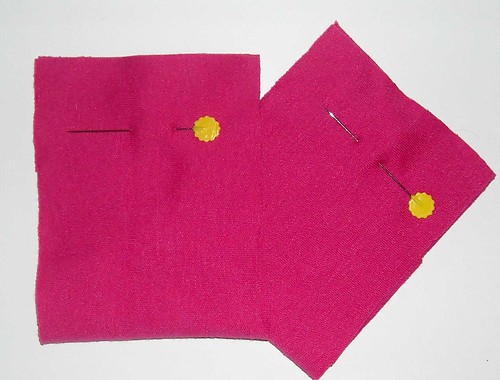
Newborn Bloomers Tutorial
I recently fell in love with the Itty Bitty Baby Dress Tutorial by Rae of madebyrae.blogspot.com. It makes such a sweet little newborn dress! I’ve made a few over the last month. This first one was a gift for a friend who’s a huge Florida Gators fan.
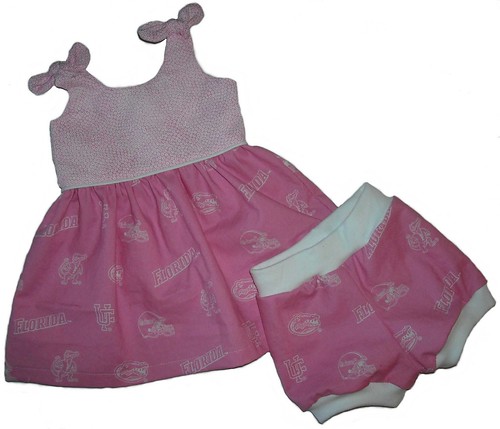
I really like having bloomers to cover baby’s diaper when wearing dresses, though, so I pulled out my AJ Bottoms pattern and got to work on shrinking the smallest size bloomers down to newborn size. I thought I’d share the pattern here with you so you can sew up some sweet baby dress and bloomer sets, too!
I made this set just last week for my friend, Lisa, who is expecting a baby girl very soon:
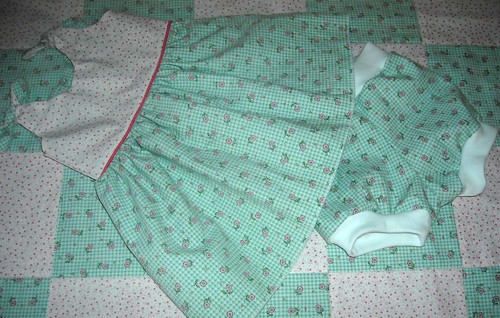
These bloomers should fit from newborn to around 12 pounds, and they’re roomy enough to fit over cloth diapers, too!
Before you get started, you’ll need 1/3 yard of woven fabric to match your dress for the body of the bloomers and 1/4 yard of coordinating cotton or cotton/lycra blend interlock for the waist and legbands. I like to use cotton interlock with enclosed elastic for the waistband. My favorite elastic for this use is 1″ plush diapering fold-over-elastic unfolded. It makes a really nice soft stretchy waistband. You could also use a cotton/lycra blend with no elastic or cotton interlock with 1″ pajama elastic. Really, because these bloomers are for a newborn, you might be able to use the cotton interlock without the elastic, but cotton has a tendency to stretch out and lose it’s shape while being worn, so keep that in mind.
Seam allowance is 1/2″ for sewing. Cutting allowance is 1/4″ for serging.
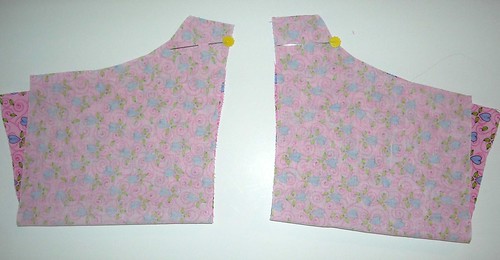
Okay, let’s get started! First, you’ll find the bloomers pattern here: Newborn Bloomer Pattern. Start by cutting out your pieces. Be sure to cut your body pieces in opposite directions. The easiest way to do this is to fold your fabric and cut both pieces at the same time.

Fold each body section over matching up inseam edges and pin.
Sew or serge the inseam. Turn one body section right side out and insert it inside the other section so that the right sides are facing. Match up the inseam and the front and back as shown and pin.
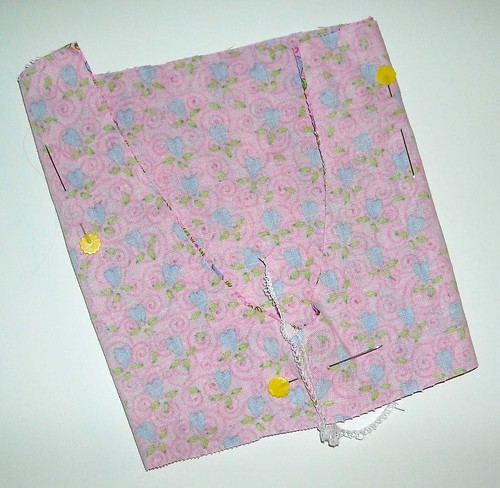
Sew or serge around this “U” shape and open up the body being sure that it’s turned inside out.

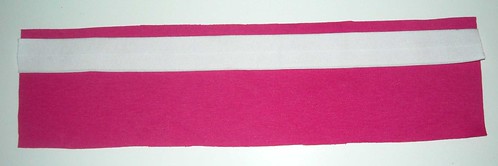
To make your waistband with hidden elastic, begin by laying out your waistband and cutting the elastic to the same length. (Remember if you’re using diapering FOE, it’ll stay unfolded.) Position the elastic about 1/4″ from one long edge of your waistband.
Fold the waistband over with the elastic on the outside, match up the short ends and pin.
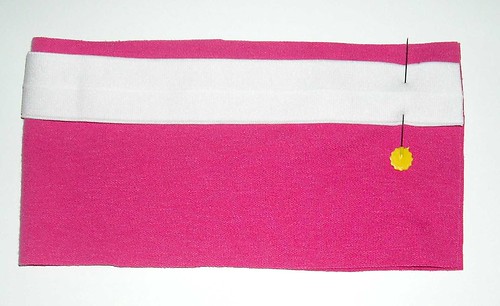
Sew or serge across the pinned edge.
Now fold the waistband over the elastic, as shown, so that the waistband is right side out and your elastic is hidden inside.
Next, pin your folded over waistband inside the body of your bloomers. Begin by matching up the seam on the waistband with the back seam of the bloomers. (The back of the bloomers is slightly higher than the front.) Then divide the waistband into quarters and pin evenly at the sides and front.
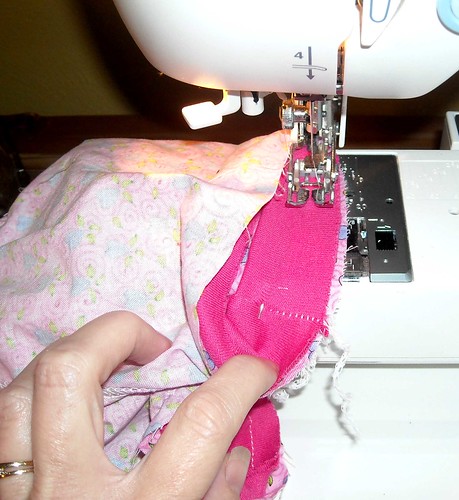
Sew or serge in the waistband. You’ll need to stretch the waistband to fit the body as you go.
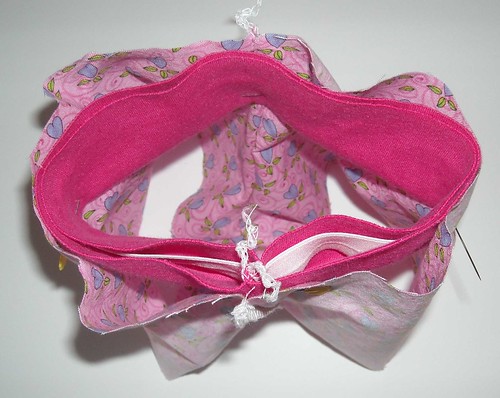
Fold your legbands in half, matching up the short edges.
Sew or serge across the pinned edges, then fold over as you did the waistband. With the bloomers still inside out, pin the legbands inside the leg holes, lining up the seams. Divide the legbands into quarters and pin, then sew while stretching to fit, using the same method you used to attach the waistband.
Turn right side out:

Now go sew an Itty Bitty Baby Dress to match!
I love to get your feedback and see pictures of the things you make with my tutorials and patterns. I hope you enjoy this one!
Spring is Here!
I know, I’ve been missing for awhile. I always seem to have blog posts running around in my head but finding time to actually upload pictures and type them out is another story.
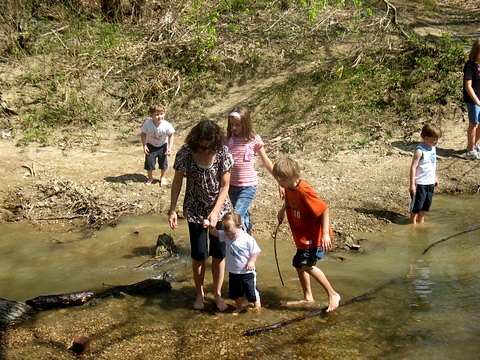
It’s spring here, and we’ve been enjoying the weather when it’s nice. We meet with a wonderful group of homeschoolers for park day every Friday afternoon. A few Fridays ago, the beautiful weather and a nearby creek led to some wet and muddy fun. There’s nothing like rolling up your pants and putting your feet in the water to make you feel like kid.
I didn’t have my camera on hand, but another mom snapped a few photos. Here are Samantha and Allen exploring the water with my friend, Shelly, and her boys.
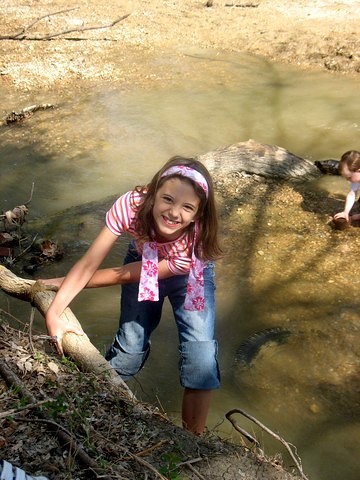
Samantha climbing up the hill.
And, Allen.
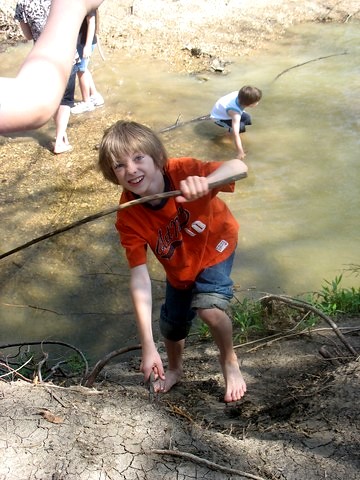
Jamie really wanted to play, too, of course, so we were headed down the hill to join in the fun in this picture. Let me tell you, the weather was warm, but that water was COLD!
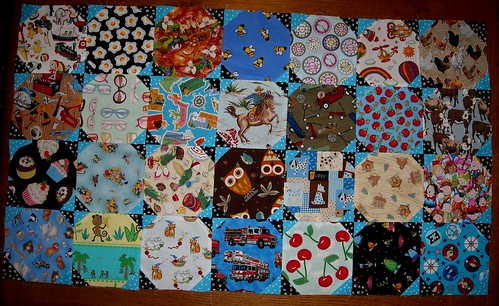
I’ve been sewing alot when I have free time. I was excited to get to organize an I-Spy Quilt Swap on an on-line sewing moms board last month. Moms signed up to send in 30 or 60 squares each of novelty fabric with pictures of things that kids can “spy”. I’ve been saving squares for awhile for this project, too. Here’s what I have done on Jamie’s I-Spy Quilt so far:
I also finished up two new patterns for moms to sew for themselves and their little ones! I am really enjoying designing patterns. It’s so exciting to see what other moms create with them!
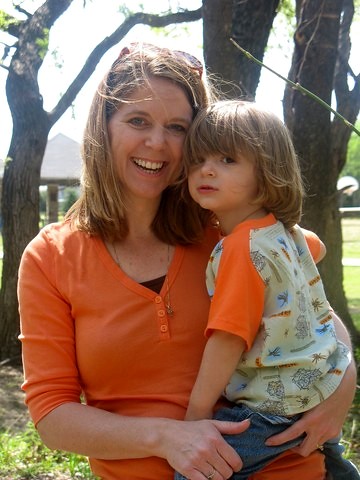
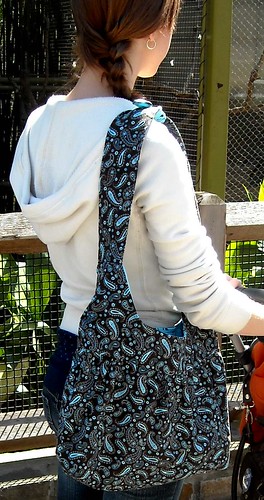
The Sammi Grace Bag is a great pattern for moms to make bags for themselves, their daughters and their friends. It’s got multiple options and versions. This is the full-size shirred version:
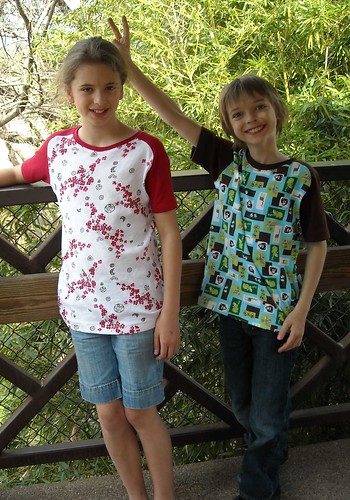
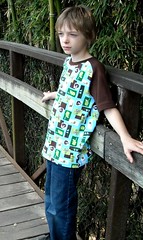
The Patrick Curved Raglan has been a popular pattern for months now, but lots of mamas were asking for it in bigger sizes. Of course, I love sewing for my bigger kids, too and couldn’t resist enlarging the size range. The Big Kid version has a standard and a more feminine option:

For the record, I did attempt to get pictures of those two tops side by side, but . . . um . . . it didn’t work out well!