A Beautiful Day for a Visit to the Zoo
Jamie wanted to touch the water.

Allen flew through the air.

Beautiful Scarlet, Morgan’s youngest charge, went for slide.

Samantha paused for a rest.

Morgan and Allen played “monkey”.

We shared lots of smiles.

We took a turtle picture just for Nana and maybe to show off everyone’s mama-made clothes a little.

We even had a few snacks.

It was truly a beautiful day!

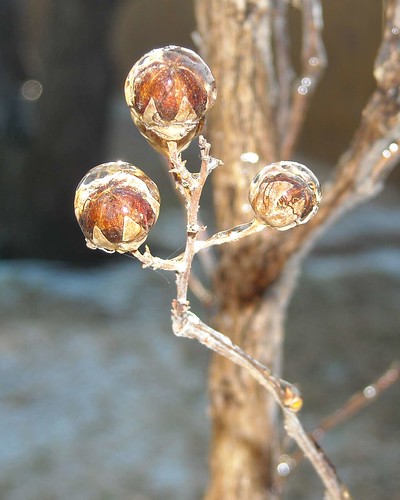
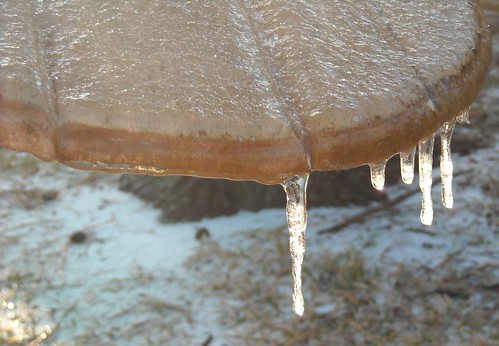
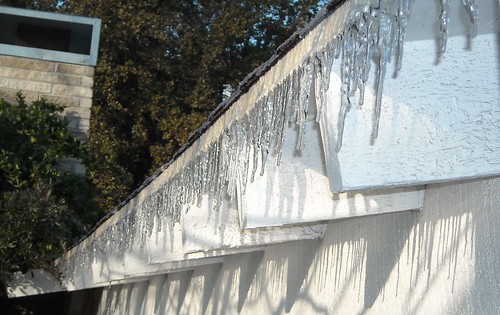
Ice!
Jamie is Two!
Jamie had a lovely time at his second birthday party yesterday! Lots of friends came to celebrate with him: the Hills, the Browns, the Mortons, Auntie Janet, Fulton and, of course, Morgan, Sean, Samantha, Allen and Mom and Dad.
He was a bit impatient for everyone to arrive. He just couldn’t understand why he had to wait to open his presents.

He loved his Mickey Mouse cake and blowing out the candle!


He had plenty of help opening his presents.

He got a big dump truck from the Bishops . . .

. . . puzzles and a Thomas book from the Browns . . .

. . . an animal alphabet puzzle from the Hills . . .

. . . more puzzles from Mama . . .

. . . and some handmade by Daddy wooden tools.

The cake was yummy!


And, the presents were so much fun!


Saturday Morning Breakfast

I really just wanted to share this picture of Morgan and Sean. I think it’s my new favorite!
The three of us went out to breakfast at Cracker Barrel last Saturday morning and just enjoyed each other’s company. Our main topic of conversation was Tim Tebow (the Florida Gators quarterback). Morgan and Sean both thought it was awesome that he changed the Bible verse that he wears in patches under his eyes from his normal Philippians 4:13 to John 3:16 for the national championship game that the Gators won two nights before. Sean discovered that John 3:16 was one of the top things searched on internet the following day. As a mom, it’s always encouraging to see my children admiring young adults who publicly and enthusiastically share their Christian faith.
Clearance Sale at In the Hands of a Child
I posted a few days ago about the new CPSIA law that take effect on February 10th. This morning, I received an email from In the Hands of a Child and thought I’d pass it on. Because of the new law, they are selling all their lap book kit packs at a 35% discount. If you’ve never done a lapbook with your children, I promise you and they will love doing them! Here are a couple pictures of the lapbooks that Samantha and Allen made when we were studying the systems of the human body last year.


Dear Valued Customers,
Due to the new CPSIA law In the Hands of a Child, for the time being, is discounting our Kit Pack inventory in order to lessen our possible loss in the event that an exemption is not granted.
While we are still praying for this situation to work out for all small businesses we feel that it is in our best interest to lessen our possible loss. And what better way than to pass the savings on to you, our wonderful customers, who are praying with us through this difficult situation!!
Please help us clear our shelves and enjoy a 35% savings on all Kit Packs!! Savings will be automatic! Spread the word and help us empty the shelves!!
This sale will continue until our Kit Pack inventory has been exhausted, so purchases will be on a first-come-first-served basis.
Once they are gone, they are gone!
In the event the law is modified, In the Hands of a Child reserves the right to bring back Kit Packs in the future at full price without any discount, implied or expressed, during this sale.
Cannot be combined with any other offer, special, discount, coupon or sale.
Super Member discount DOES NOT apply to this sale.
Tax and Shipping not included in calculating discount price.
Not valid toward prior purchases.
No rainchecks.
A Little Love from Samantha
It’s normal around here for me to be the only one up for a few hours early in the morning. This morning, I thought I’d enjoy my coffee and work on loading some pictures into my flickr account while things were quiet. Very soon, everyone will be up and getting ready for church.
I poured my coffee and walked into my sewing room to grab the camera and found a surprise:

Inside:


Isn’t it a blessing to be reminded that you’re loved, especially when it’s just a regular day?
Christmas Morning
What a wonderful Christmas we had this year!

There were kisses . . .


. . . a few surprises . . .


. . . yummy food . . .


. . . new toys to play with . . .


. . . some mama-made presents . . .


. . . and lots of smiles!

Christmas Season Snapshots
Fun and Games at our Homegroup Christmas Party


A Present from Auntie Gisela at the GFA Kids Christmas Party

Horizon’s Church Children’s Christmas Program


Visiting with Santa


Hanukkah Night Two with the Maxams and a Few of the Browns


Handmade Christmas Projects – Coasters
I really like giving Christmas gifts that are handmade. I also enjoy giving practical gifts. There are two very sweet moms who have watched my three youngest children this year so that I could volunteer in the GFA office two days a week, and we wanted to do something special for them. This project was the perfect practical, handmade gift that the kids could have a hand in making, and I think they turned out really nice!
For this project, we followed the Coaster Tutorial at Two Hippos Blog. We bought 12 four-inch ceramic tiles, glue, varnish and scrapbook paper. I precut the paper into four inch squares, and we layed them all out.

Samantha and Allen glued the paper squares on to the tiles. Then they added a second coat of glue to the top of the paper.

Once the papers were dry, I painted them with another coat of glue.

When that was dry, we added three coats of varnish to seal the coasters. We allowed them to dry and added some felt “feet” to the bottoms, and they’re all ready for giving!


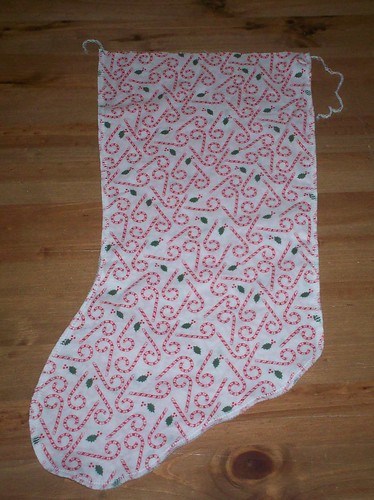
Christmas Stocking Tutorial
The stockings are hung by the . . . well, we don’t actually have a chimney, so they’re hung in the dining room from the quilt rack.

I sewed these stockings up last year so that we’d all have nice coordinating ones, and I thought I’d share my pattern and instructions with you. I love the simple design, and the size, in my opinion, is perfect. They’re big enough to hold a DVD or video game but not so huge that you have to spend your whole Christmas budget on stocking stuffers.
For each stocking, you’ll need 1/2 yard of print woven fabric for the body, 1/4 yard of fabric for the top (velvet works beautifully) and ribbon for hanging. The body pattern can be found here. When you print, be sure that the “Fit to page” option is not selected. The pattern will print in two pages which you should butt up against each other to make a complete pattern. 1/2″ seam allowance is included.
STEP 1
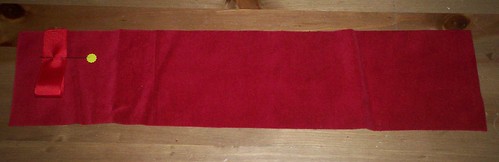
Cut out your pieces. You’ll need to cut two body pieces from the pattern linked above in opposite directions. For the top of the stocking, you’ll need to cut two 17″ X 3 3/4″ strips.

STEP 2
Line body pieces up with right sides facing and sew or serge using 1/2″ seam allowance around all sides except the top.
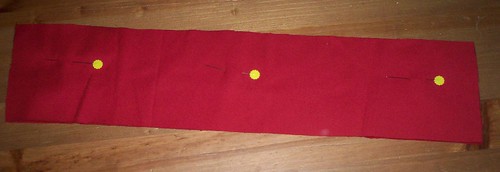
STEP 3
Cut a piece of ribbon to 5 1/2 inches. I used 1″ grossgrain ribbon for ours. Pin the ribbon on the right side 1″ from the end of one of your top strips as shown.
STEP 4
Line your second strip up on top of the first strip with right sides facing and sew or serge along the edge where the ribbon is pinned, securing the ribbon inside.
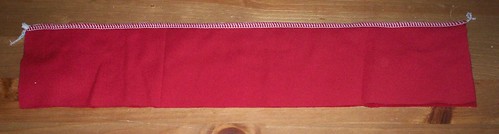
STEP 5
Flip your two strips apart exposing the ribbon inside.

Fold over, matching up the short ends and sew or serge across the short edge.

STEP 6
Fold the finished top piece right-side out as shown, being sure that the ribbon is now at the back and on your left hand side.

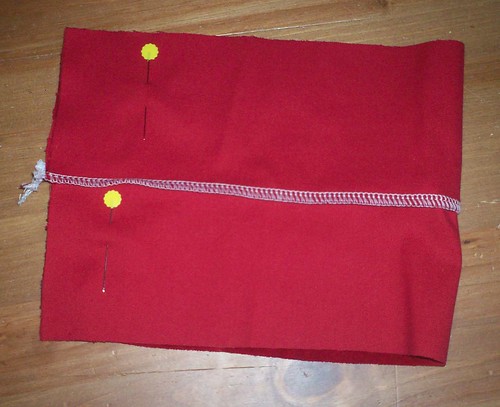
STEP 7
Now pin the top of your stocking upside down inside the two body pieces which are still right-sides facing, as shown. Match up the seam on your top piece with the seam on the heal side of your stocking.
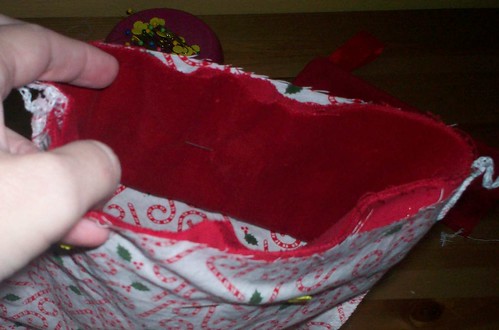
STEP 8
Sew or serge around the raw edges, attaching the top to the body of the stocking.
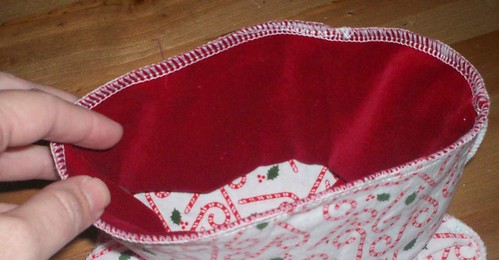
STEP 9
Flip the top out of the stocking . . .
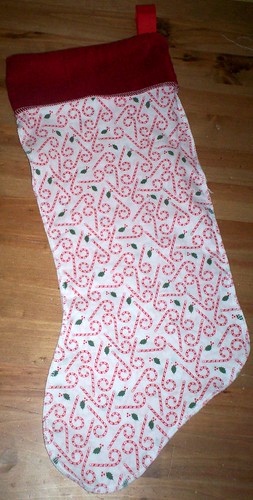
. . . and turn right-side out.
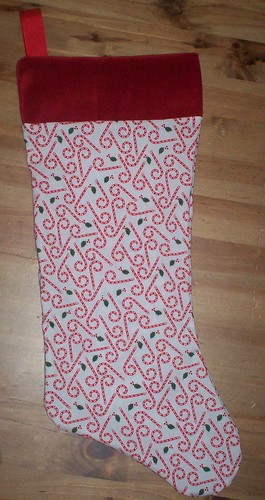
READY FOR SANTA!
Please let me know if you have any questions, and I’d love to hear if you use this tutorial to make your own stockings!


