Charity
Hopeful Threads: Fluff for Foster Care
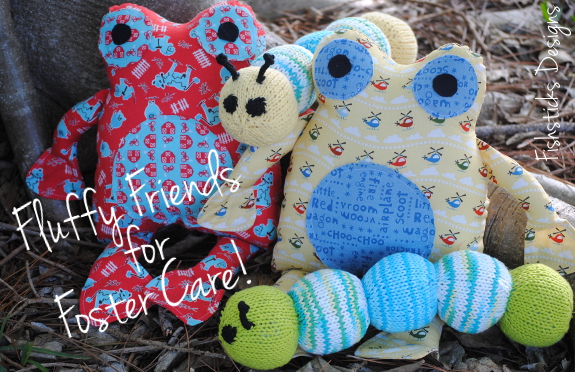 Farmer Frog and Pilot Frog went for a walk one sunny spring day. They brought along their pet caterpillars to enjoy the fresh air. Their conversation bubbled over with excitement about the mission they’d been assigned, knowing that their new jobs as friends to little ones in foster care would bring smiles to faces and joy to hearts!
Pilot Frog hoped that his trip to Hopeful Threads would lead him to the perfect little boy for him, maybe one who loves helicopters and pretending to fly!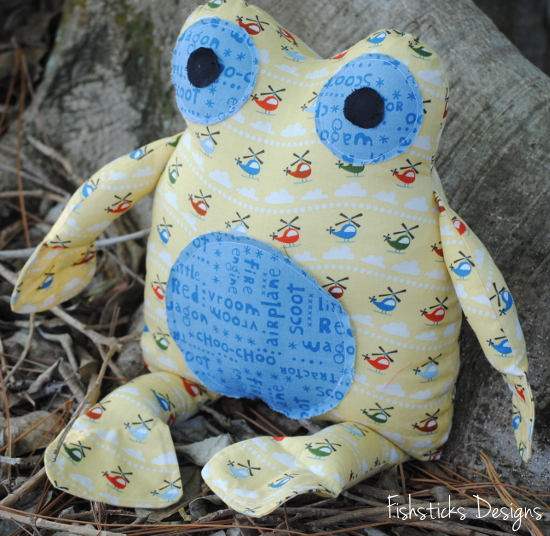 Pilot Frog’s green caterpillar would be making the trip with him. This little caterpillar dreamed of finding a new home with a little one who would love to cuddle with him day and night.
 Farmer Frog was looking forward to a much longer trip all the way to Canada! There, he would settle down in a brand new foster home and wait expectantly with the family for a child in need of their love and his companionship.
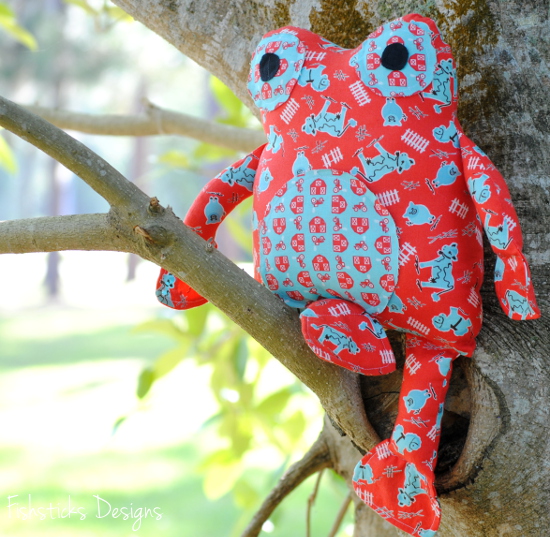 Traveling with Farmer Frog, of course, was his yellow caterpillar. The yellow caterpillar was filled with anticipation of becoming a special lovey to a wee one who would share playtime laughs and bedtime snuggles.
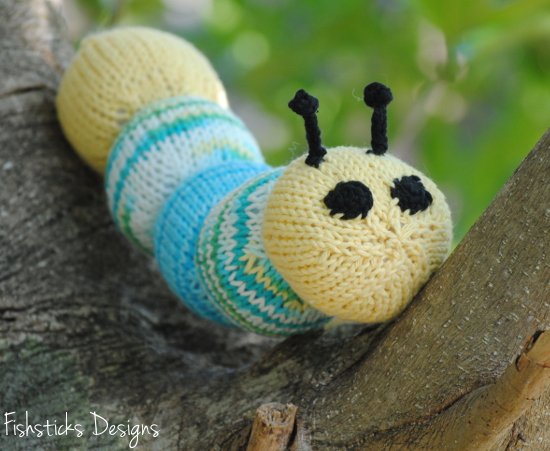 Heehee! I couldn’t resist writing a silly little story to go along with these guys. Aren’t they cute little stuffies? I sewed up the frogs using Bit of Whimsy’s Fritter Frog pattern (the Daddy Frog version). The sweet caterpillars were knit by my 15-year-old, Samantha. (I keep telling her that she needs her own creative teen blog!) She used this pattern Lion Brand Cuddly Caterpillar. Pilot Frog and his green caterpillar are shipping out to Kristy at Hopeful Threads for this month’s Fluff for Foster Care project. In the same spirit, Farmer Frog and his yellow caterpillar will be packed off to my friend, Jamie, in Canada where she and her husband are just beginning the foster family journey.
Bibs, Bibs, Bibs!
 I cannot possibly thank you enough for sharing your time, your talents and your fabric by sewing so many bibs for last month’s Hopeful Threads Dinner for 2 project!
  Opening your packages has been so much fun! It’s so cool to see the love and care that was put into each bib.
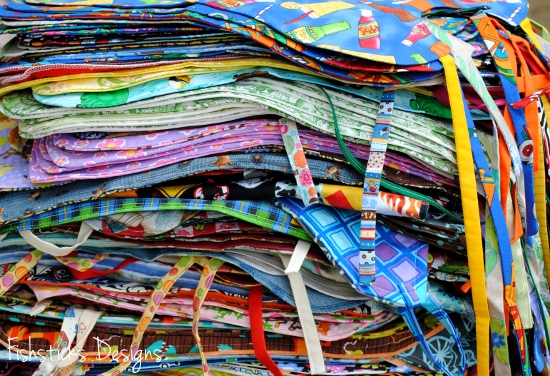 Over 160 bibs are packed in a suitcase, ready to fly off to China where they are going to be a huge blessing to the children at Hidden Treasures Foster Home. (No worries, though, if you haven’t shipped your bibs yet. You can still send them, and we’ll make sure that they make it over on the next trip!)
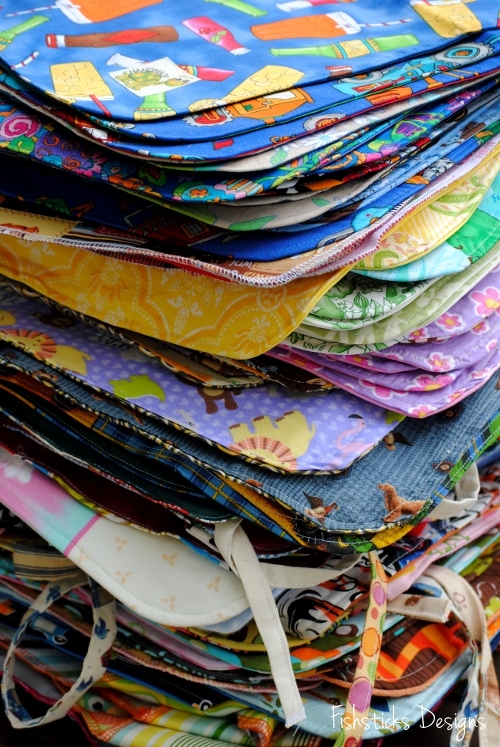 I’m working on a little “Thank-You” gift that I hope to have for you tomorrow!
Upcycled Grown-Up Bibs!
 This month’s Dinner for 2 project at Hopeful Threads is all about bibs. If you’ve been reading along, you already know that here in Florida, we’re collecting handmade bibs for the Hidden Treasures Foster Home in China. (You can read more here: Big Kid Bibs for Hidden Treasures.) The project is actually called Dinner for 2, though, because over in Louisiana, Anita is collecting bibs for the residents at Grace Nursing Home! I couldn’t let the month pass by without sewing a few adult bibs to send her way.
Remember how I said that I had collected a pile of thrifted men’s button-down shirts in anticipation of the Upcycled Men’s Shirt Challenge at Project Run & Play? Well, guess what I did with the extra shirts? I turned them into bibs for a few of the men at Grace Nursing Home! First up, the plaid dress shirt version: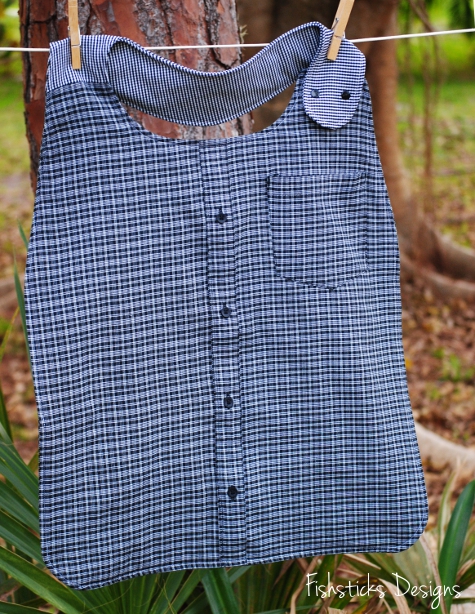 Here’s the fun-loving, novelty version:
 Finally, the casual flannel shirt version.
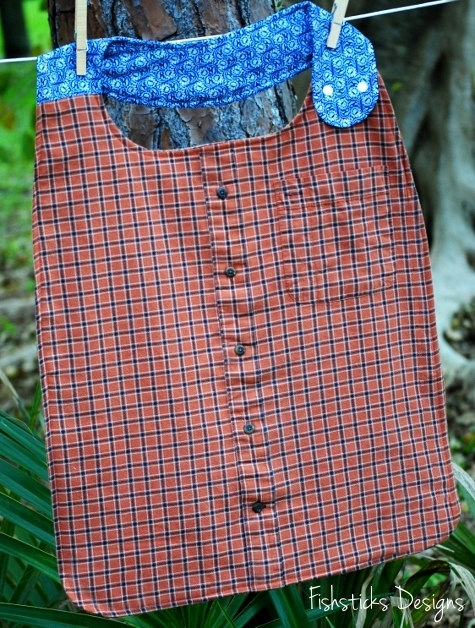 Aren’t they fun? Using thrifted shirts in good condition saved on fabric costs and gave them a more grown-up look! Sewing them was really easy, too. I scaled my Big Kid Snap Bib pattern up to adult size, using my husband as my model. For each bib, I cut the front and back body from the front and back of a men’s large button-down shirt. To add some absorbency, I also cut a hidden body layer of flannel. Before I started sewing things together, I stitched the button placket on the front shut. For the wraparound neck piece, I used coordinating fabric, cutting the same three layers. Once I stitched each neck piece to each body piece, I just followed the instructions from the Big Kid Snap Bib pattern, making the diameter of the neck about 7 1/2″. Easy peasy, right?
I had planned to just blog about these adult bibs, but I couldn’t resist drawing up a pattern for you to use. There’s still time to add to the collection heading to Louisiana! You might even want to sew them for other things, too! Wouldn’t they be perfect for the tasters at a chili cook-off or maybe the contestants at a pie-eating contest or even just for the grown-up messy eaters at home? Okay, here’s the link to the pattern: The Grown-Up Bib. This is only the pattern. For the instructions, you’ll need to go download this pattern and follow the steps I mentioned above: The Big Kid Snap Bib.
If you sew for Dinner for 2, be sure to add your pictures to the Flickr album, and if you haven’t already entered the It’s a Snap Source Giveaway from Monday, be sure to do that, too!
It’s a Snap Source Giveaway!
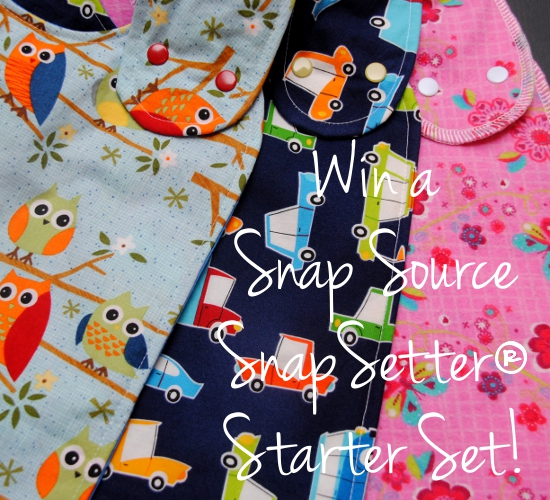 Guess what?! When the folks over at The Snap Source heard that we were joining with Hopeful Threads to sew bibs for two different charities this month, they offered to send me THREE SnapSetter® Starter Sets to give away! How cool is that?
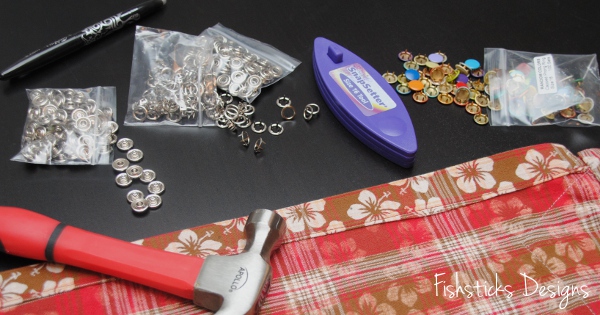 I love using the SnapSetter® for clothing. The snaps are high quality, affordable and long-lasting, and applying them is fast and easy! Simply position the snap components and fabric in between the layers of The SnapSetter® and hammer into place.
 How many things can you think of that could use snaps? (Snaps, by the way, are far easier for little hands to manage when dressing themselves than buttons. My six-year-old, Jamie, requests them on all of his camp shirts!)
 Each starter set comes with the standard size 16 SnapSetter®, six open-ring snap sets and 40 capped snap sets! And, did I mention, that THREE people will win?
 To enter, just follow the instructions on the Rafflecopter below! I’ll announce the winners on Monday, 2/25, and the winners will have 48 hours to respond. Both domestic and international entries are welcome!
a Rafflecopter giveaway
The Big Kid Bib: Serged & Snapped in Seconds

Have you peeked over at the Dinner for 2 Flickr Group lately? There are some seriously great-looking bibs showing up already, bibs for kids and adults alike. Have you sewn a bib or two yet? What are you waiting for? A quicker method of sewing perhaps? Do you have a serger? Well, then the Serged & Snapped in Seconds Bib tutorial is just for you! (Okay, so it really takes minutes, but seconds make up minutes and without seconds you don’t get the alliteration.)
Let’s get started! First, hop over to this post: Hopeful Threads & Dinner for Two. Read all about why we’re sewing bibs this month, print the Big Kid Snap Bib Pattern and get your three fabric pieces cut out: I have a front piece of cotton quilting fabric, a hidden inner layer of cotton flannel and a backing piece of PUL. (This method works well with PUL because the slippery side is hidden when you serge. Ripstop may be too slippery, but you can certainly try it!)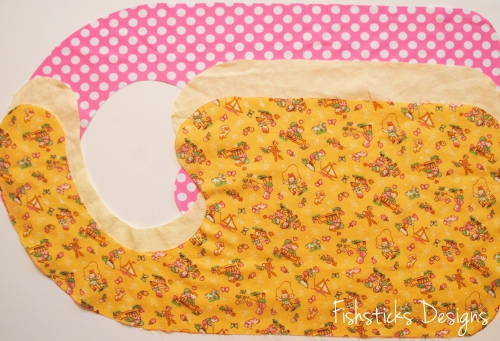
Grab a glue stick from your school supply closet or your junk drawer. A fabric glue stick will certainly work, but regular glue stick is cheaper and easier to find, and as long as it’s washable, it works just as well. You do want a glue stick that is new and not gummy at all. It needs to spread quickly and in a thin layer. Rub that glue stick all over the shiny side of your PUL. You want plenty of glue so there won’t be any slipping and sliding. Carefully place your hidden layer on top, line up all the edges and smooth it out.
 Now glue the wrong side of your front fabric piece to the top of the flannel using the same method. It is much easier to spread the glue stick glue on cotton quilting fabric than on flannel. Flannel leaves icky fuzzy stuff on your glue stick.
 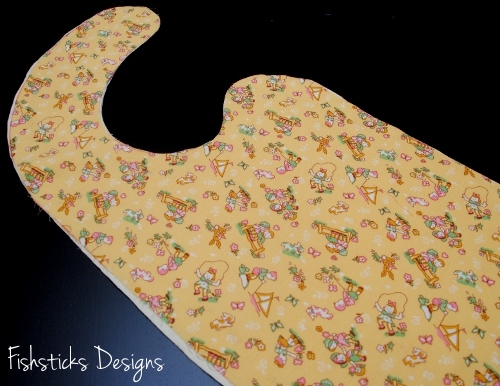 Check to see if you have any areas where the fabrics are overlapping and square them all up.
  Now you’re ready to serge.
  Just one second before you head to the serger, though. Do you have one of these baskets? These beautiful colored spools of Woolly Nylon have been sitting in this basket since Joanns clearanced them quite some time ago. If you have a basket like this, you might consider pulling one of those pretty colors through your upper looper. If you don’t, white will work just as well!
  Now, off to the serger! The seam allowance is 1/2″ so you want to cut off 1/2″ or close to that with your serger blade. It’s hard to keep that exact when you’re going around curves, but get it as close as you can.
  I started and stopped my serging at the back of the neckline since that’s the spot that will be least likely to be seen when the bib is worn.
 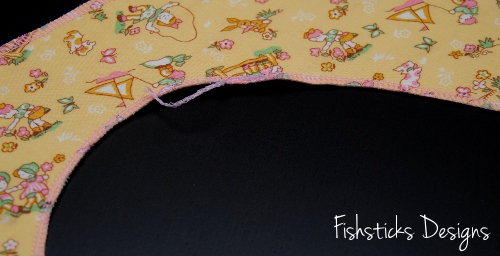 Zip, zip, round the corners, and all you have left to do is add the snaps.
 Refer back to the pattern for snap placement. Press the snaps in place.
 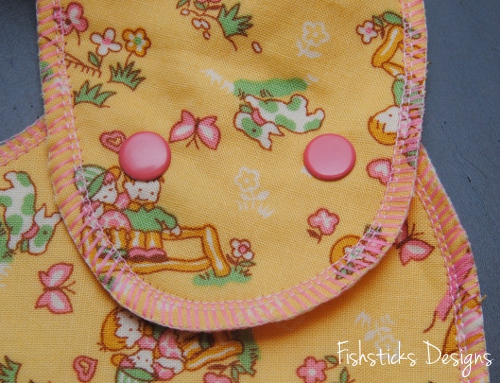 And you have a bib ready to send off with love to a sweet little one who will be so excited to receive it! Now wasn’t that fast?! Fast enough that you have time to make another one? Super! Go serge some more!
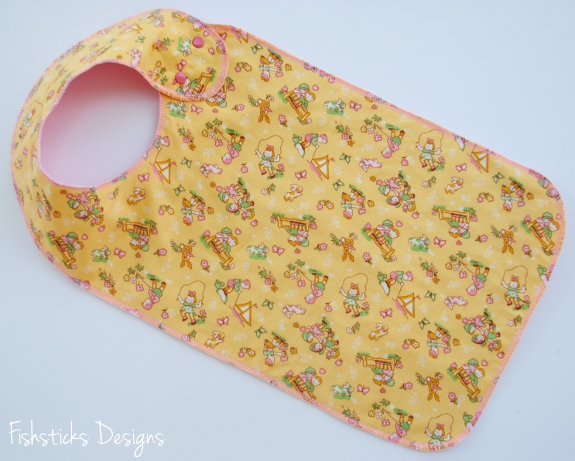
Hopeful Threads, Dinner for Two & Big Kid Bibs for Hidden Treasures
 Woohoo! It’s February! I have been bubbling over with excitement about today for weeks now! Not only do I have the magnificent privilege of getting to work with Kristy and all of the incredibly giving Hopeful Threads followers this month, but I get to be involved in a project that I know is going to be a huge blessing to everyone involved, from those who contribute their sewing talents to the beautiful children and caregivers who receive these handmade gifts.
 I was visiting with my friend, Heather, several weeks ago, and she mentioned that she was getting ready to sew some waterproof bibs to send to China with her daughter, Ransley. Actually, I think she simply asked me if I thought diaper-making PUL would work as a waterproof backing for the bibs that she was making. I thought it would be perfect and offered her some scraps that I had in a box in my garage. A few days later, she texted me about the PUL, and I called her to ask some more questions. The more I heard, the more I was sure that this was a great project for all you sewists who are so kind and generous about offering your time and talents each month to give to those in need! A quick email to Kristy and an even quicker response from her, and I was busy at work putting together everything that you would need to start sewing!
 First, though, a little bit about the children who will be receiving your gifts. This is Ransley, above, on her last visit to the Hidden Treasures Home just outside of Fuzhou, China. Ransley is leaving in the next few months to go serve on staff at Hidden Treasures for the next few years. She shared with me that God showed her such peace, love and joy on her last journey there. The home is filled with children, many of whom have special needs, but it’s also filled with love and fun and hope. You can read many of the children’s stories and browse through photos on the homes’ official website right here: Loaves and Fishes International and the Hidden Treasures Foster Home. I urge you to take a few minutes to read about these sweet little ones.
 When I asked Heather to tell me about the bibs she was sewing, she shared that she’d been asked to sew some when Ransley last journeyed to China. The older special needs children often need bibs to keep their clothing clean and dry, but larger bibs are harder to come by, especially in China. The staff at Hidden Treasures actually sent her a pattern drawn up on a paper bag and suggested that she sew them with cotton fronts and vinyl shower curtain backing.
 Heather sent over about a dozen sewn that way, but she heard they didn’t hold up as well as she’d hoped. I was so excited to jump in and offer suggestions that I hope will produce bibs they will be able to use for years to come! And, after reading this inscription on the original paper bag pattern, I feel so incredibly blessed to have the opportunity to offer my experience!
 Are you ready to get sewing?
 I have two different bib options for you, but let’s start with a little about fabrics and notions. For the waterproof backing, I highly recommend diaper-making polyurethane laminate. You’ll find it labeled PUL in most fabric shops. (Natures Fabrics is offering a 10% discount on PUL for participants. Just type in the code loavesfishes1 when you checkout. You must only have PUL in your cart to check out with the code.) Rip-stop nylon is an alternative waterproof backing.
These bibs will be packed into spare suitcases for the trip to China, so they need to be absorbent, but not too thick. I’m suggesting sewing them with cotton woven quilting fabric or flannel on the front and a hidden flannel layer for a little extra absorbency without too much thickness. Please pre-wash all cotton fabrics.
One last thing, the staff at Hidden Treasures has specifically asked for bibs with no Velcro (or other hook and loop) because the children tend to rub their heads against it, and it can be irritating. The first bib pattern is a traditional tie bib. These work really well for the needs of the children at Hidden Treasures. (Now that this project has ended, this tie bib tutorial is no longer available, but be sure to grab my tutorial for the snap bib in four sizes here: The Bibs in All Sizes Tutorial.)
 The second bib pattern is a snapped bib with a wrap-around back. These are very quick to make and great for both the needs of the children at Hidden Treasures and perfect for your little ones at home, too. (My favorite tool for attaching metal snaps is The Snap Source Snapsetter. It’s what I use for campshirts, pajamas, overalls, anything that needs metal snaps, and at only $9, it’s quite economical, too!) Just click this picture for the Snap Bib PDF pattern download.
 Be sure to add pictures of your bibs to the Flickr album: Dinner for 2 Album. Thank you so much for giving your talents, your time, your stash, yourselves for these little ones!
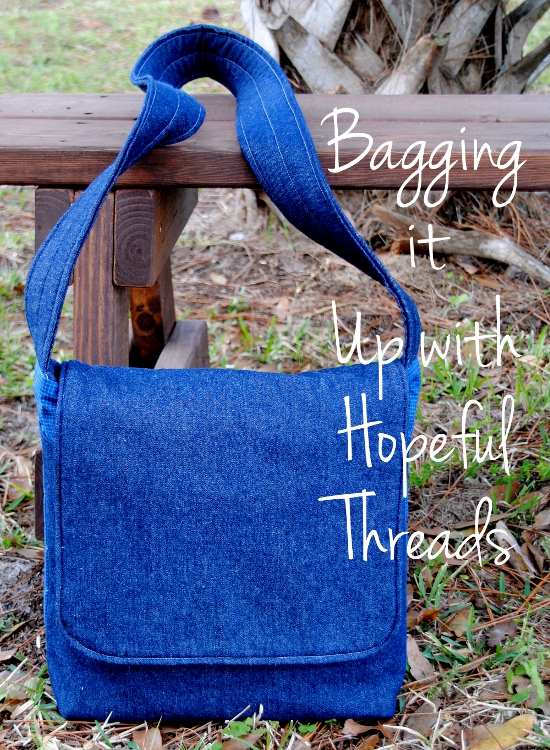
Bagging it Up in January with Hopeful Threads
Have you sewn a bag for the January Hopeful Threads project yet? I’ve set a little goal for myself to sew something for every project that Kristy posts this year. (I’m trying to be careful not to set huge sewing goals this year because, in case you didn’t notice, I didn’t hit any of the ones that I set for myself on my blog last year! I’m not terribly upset about it, though. I was a temporary single mother while trying to sell our house in Texas for over six months before moving halfway across the country to join my husband in Florida, and then we were in temporary quarters for two months before finally settling in our new home. I think that’s plenty of reason to change my priorities!)
I used my own Messenger Bag Tutorial to sew up this denim bag. (I cut it out on Thursday night and took it with me to a “sewing/playdate” at a friend’s house on Friday.) I was hoping that sticking to denim and dark blue plaid would give it a masculine feel. What do you think?
I modified the pattern slightly by adding a front pocket under the flap, along with a magnetic snap closure.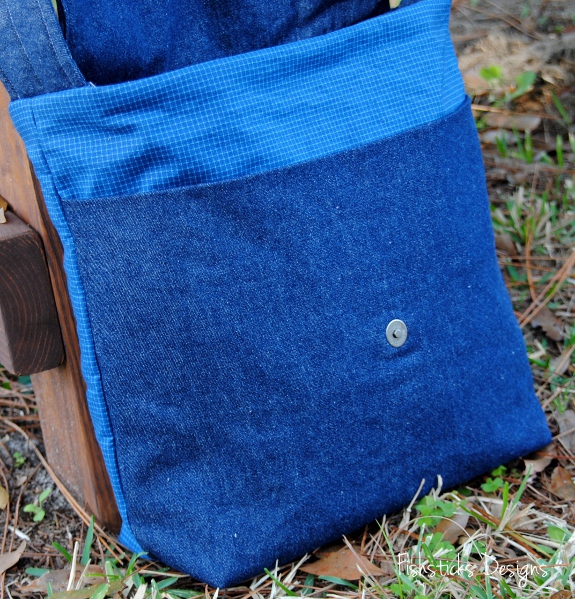 Inside, there are a couple of extra smaller pockets for those things that you don’t want to lose down in the bottom of the bag. I just skipped the pen/pencil pockets from the tutorial and divided the inside pocket in half instead.
Kristy has been posting some great tutorial links on the Hopeful Threads Facebook page. Be sure to go check them out! If you don’t have time to do a more complicated bag like this one, maybe you can squeeze in a simple tote bag during naptime one day this week?
200 Pairs of Shorts!

Have you heard the news?! We passed 200 pairs of shorts for July’s Hopeful Threads project! That means that not only do we have a huge pile of shorts to bless little boys through Children in Families in Cambodia, but we can send shorts to Ghana, too!
And, there is still time for you to sew! The free Mud Puddle Splashers pattern will be available through midnight tomorrow night. Grab it and sew a few pairs of shorts at naptime or even after the kids are in bed tonight. (Be sure to scroll through my other blog posts from this month for the back pocket addition and tips for sewing knit shorts in a flash!)

Look What I Found!

I was on the hunt for fabric for a couple of projects yesterday, so I ran up to this quilt shop, just north and east of Dallas, in McKinney. It’s called The Quilt Asylum. Is that not the greatest name for a quilt shop?! I love that they always have a nice selection of the latest fabric releases, and the ladies who work there are so friendly and helpful!
I browsed around the store for a bit looking for exactly the right fabric, then I turned and walked back towards the front of the store to see what I missed the first time around. (Do you do that when you shop for fabric? Sometimes I have to look over the rows multiple times to actually see everything!) When I turned, I saw this lovely rack of sewing patterns, and something on that rack of sewing patterns caught my eye! (Do you see what I saw?)

I don’t think I actually sprinted across the store, and I’m sure that I didn’t squeal as if I had just seen my favorite movie star, but I really wanted to do both of those things! Right there, hanging on the rack among stars like Serendipity Studios, Sew Liberated and Indygo Junction, were two Fishsticks Designs patterns!

It was the first time that I walked into a shop and found my patterns for sale! How cool is that? (I do wholesale my patterns directly to a few quilt shops around the country, but the majority of my wholesale distribution is through United Notions. Because of that, I don’t actually know what shops carry my patterns.)
It was so much fun having a few minutes of feeling a little like a celebrity, introducing myself and showing off my designs! Today, though, it’s back to reality, and my every-growing to-do list. My whole family is coming in this weekend, and we have a family photo session scheduled for Monday evening. Today’s goals include getting shirts done for Charlie and Jamie and working on a dress for Katie (one that I hope will end up as a new pattern for the fall).
There are just six days left to download and sew the free Mud Puddle Splashers pattern for Hopeful Threads and Children in Families! The latest count is 130 pairs of shorts! Think we can add 70 more for 200 total by next Tuesday?
In addition to the free pattern and the joy of sewing for someone in need, there are some great giveaways this month, including this Playdate Backpack filled with goodies from me! Each pair of shorts that you sew and donate enters you to win. You can check out all the other prizes including patterns from Figgy’s and Muddy Max Designs over on the Hopeful Threads blog.


Naptime Knit Mud Puddle Splashers

There are still 12 days left to grab the free Mud Puddle Splashers pattern and sew a pair of shorts for the Hopeful Threads’ Little Boys’ Shorts Sewing Project! I thought I’d take advantage of naptime at my house yesterday to show you the quickest way to sew the MPS using knit fabrics.
First, knit fabrics are wider than woven fabrics, so you can save a little time by combining the pocket and the body/leg piece. (You can do this on woven fabrics, too, but keep in mind that it will increase the amount of fabric that you’ll need, especially if you need to match up a stripe or print.) Tape your pattern together and cut out the correct size. Print and cut a second pocket pattern. (It’s page 26 of the pdf.)
 On the back on each pocket piece, measure in and draw a straight line 1″ in from the straight edge.
 On both the front body/leg piece and the back body/leg piece, measure and make a mark 3″ below the waist on the straight side.
 Place each pocket piece on the straight edge of a body/leg piece, overlapping so that the line you drew on the pocket is even with the straight side of the body/leg and the top of the overlap is at the 3″ marking. Tape the pockets in place.

Now you have two pattern pieces where before you had four.

Alright, we’re ready to get started on these shorts. It’s 1:00 here, and all is quiet as naptime has commenced.

Check to make sure the little ones are sleeping peacefully.


Cut out your shorts pieces. You’ll have two fronts cut in opposite directions and two backs cut in opposite directions.

We’re moving right along.

Except for the hem and the elastic channel, I’m using just my serger since these are knit shorts. You can use your sewing machine with a walking foot just as easily, though. The front and back rise are serged up now, and I’ve created my memory crease along the waist. A little spray starch will help when pressing cotton or cotton blend jerseys that like to roll. Sides are pinned together and ready to be serged.

Less than 30 minutes since we started!

That 90 degree angle where the bottom of the pocket connects to the side of the pants can be a little tricky if you’re using your serger. I serge both sides from the bottom up.

When I get to that angle, I simply pull the fabric slightly so that the angle sort of disappears. If you go slowly, you should be able to make that turn without a problem.

If a few of the loops end up off of the fabric, don’t worry, as long as both of the needle stitches are on the fabric. It’ll hold just fine and won’t be noticeable unless someone turns the shorts inside out and looks really closely. With a little practice, you’ll soon be turning that corner beautifully without even thinking about it.

1:42, even with taking a little time to snap a few pictures while I was working.

I’ve hemmed the legs and pinned the inseam. I hemmed these shorts by serging off 1/4″, then folding up 1″ and hemming using the triple-stretch stitch on my sewing machine. You can find a tutorial on how I do that right here: Hemming Knits.

Two minutes to two . . . not going to finish in under an hour, but I’m almost done.

Ready for the elastic.

Before I put the elastic in, though, I’m going to rotate the side around a bit and press those pockets in nicely.

Elastic and tag are in and the shorts are done!

And, I still have time to get a few other chores done, or, better yet, to enjoy an afternoon cup of coffee and a little mama-time on Pinterest!

Hey, there are still a dozen naptimes left in the month! Plenty of time to add to the ever-increasing pile of shorts for Children in Families in Cambodia! I heard that the number has already reached 100! Do you think we can double that number in 12 days?


