Hopeful Threads
Coming in 2014 . . .
 It’s been almost two weeks since I’ve blogged! Eeek! I’ve actually been struggling to keep up with everything lately. My days are currently ruled by all-day nausea and the overwhelming need to just take a nap! There’s a really exciting reason for that, though!
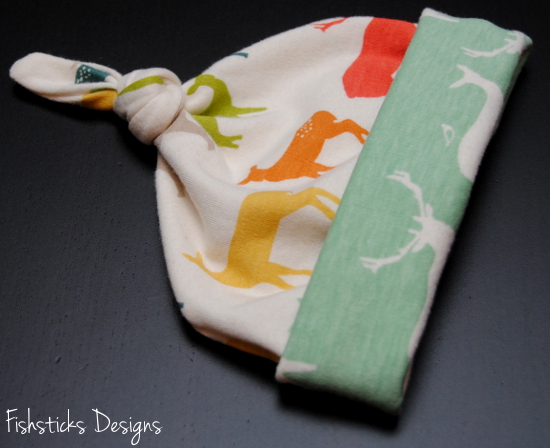 Someone with tiny fingers . . .
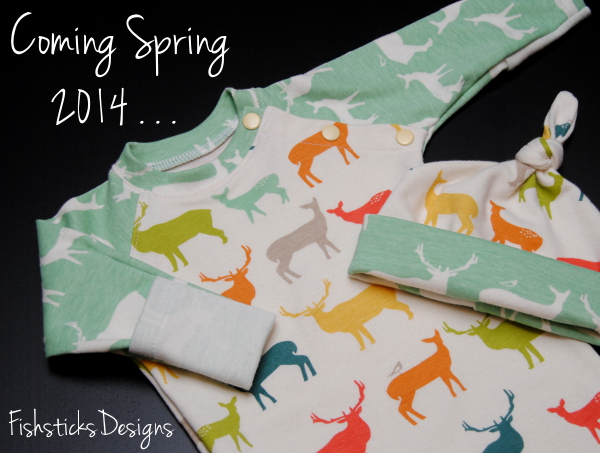
 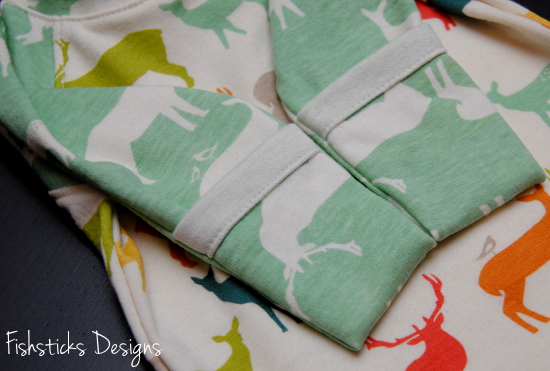 . . . and tiny toes will be joining our family in the spring of 2014!
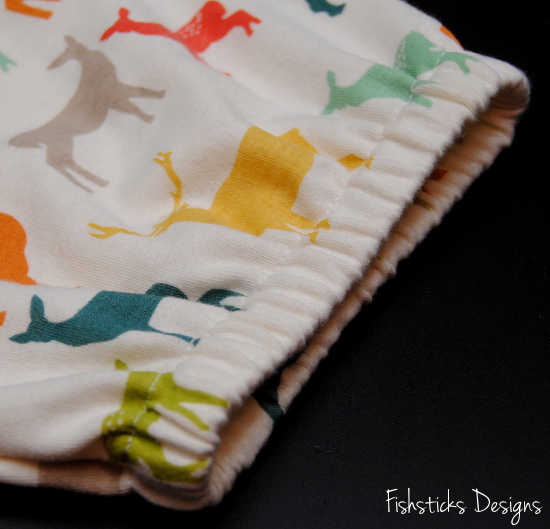 Since Hopeful Threads is hosting a Create Hope Designs sew-along this month, I couldn’t resist sewing up a Watered With Love Layette Set for Baby #7 in this sweet organic cotton interlock from Birch Fabrics.
 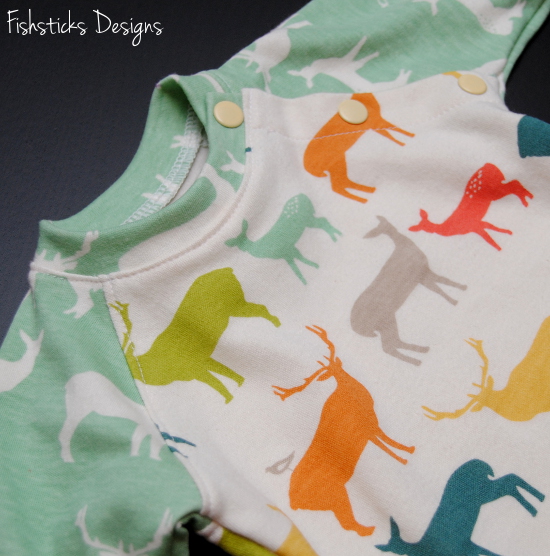 I’m hoping that this will be the first of many outfits that I get to sew (and knit) for this little one! Right now, though, I have five weeks until Quilt Market, and I’m so far behind! If you don’t see me around here as much as usual, at least you’ll know why. (I’m probably sneaking off to eat something strange that I’ve been craving . . . like mashed potatoes . . . for breakfast.)
Aprons with a Dash of Love
A New Create Hope Designs Pattern!
 Have you seen that Hopeful Threads is doing a Create Hope Designs Sew-Along this month? If you’re not familiar with CHD, I encourage you to go read the project announcement for this month — it’ll give you a great overview: September CHD Sewalong. Oh, and don’t miss yesterday’s post all about China Little Flower, the amazing organization that is supported by Create Hope Designs: Get to Know China Little Flower.
In honor of the sew-along this month, I thought I’d finish up a pattern that I’ve had in mind for a bit and donate it to Create Hope. Meet With a Dash of Love ~ Reversible Aprons for Mom & Her Little Helpers!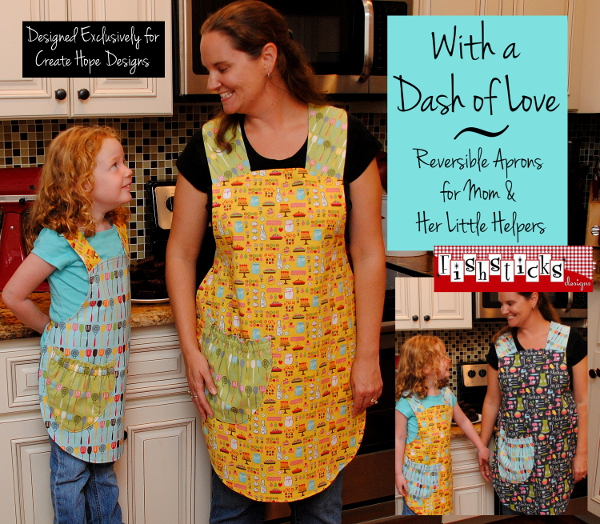 This apron pattern includes three sizes — The Mom size which will fit moms from about size 4 to about size 16, the Big Kid size which fits little ones from about 7 to 10 and the Little Kid size for ages 3 to 6.
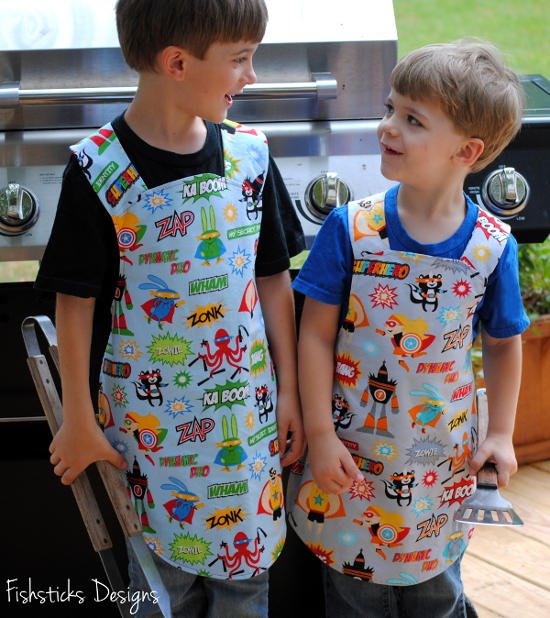 The neckband is a simple no-fuss pull-over, and the apron can be sewn with cotton woven quilting fabrics or with waterproof fabrics.
 And, for those of us who love having two looks in one (or just want to be able to hide a spill when necessary), this apron is reversible!
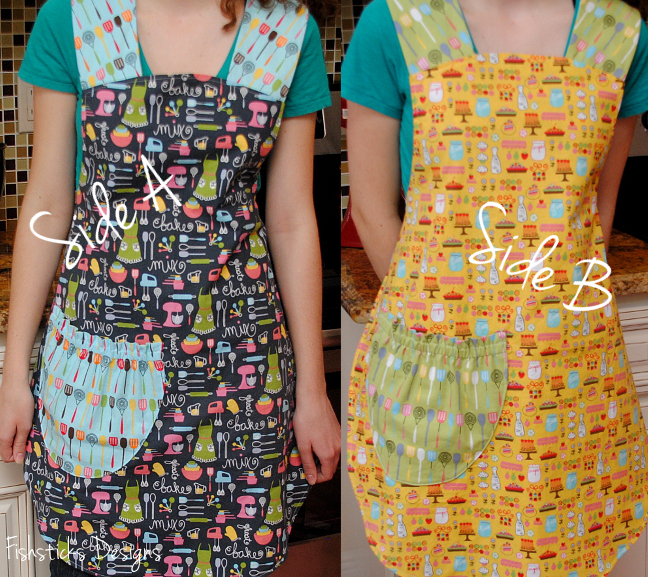 My testers did such a great job with this apron! Kelly sewed the cutest craft apron for her little guy with cotton laminate.
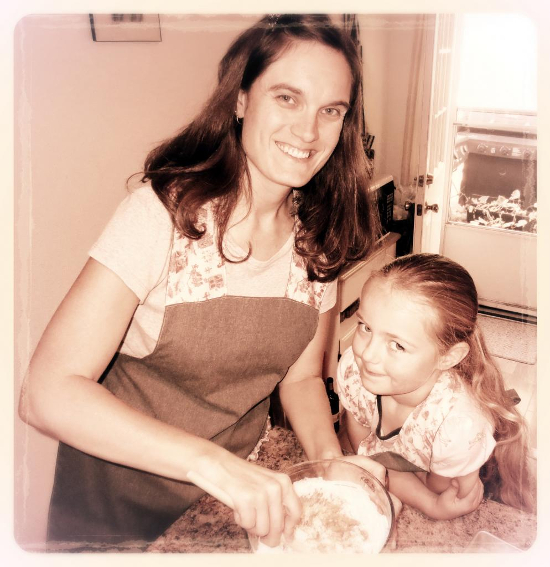
 Tania and Denise sewed the sweetest mother & daughter aprons.
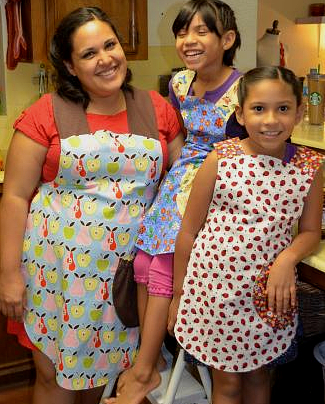
 And, Ann made coordinating aprons for herself and her grandchildren. The little guy’s apron is a bit big, but is this not the sweetest picture?
  Ready to go grab the pattern and get sewing? It’s only $5 and all the proceeds go to support the children at China Little Flower! Just click right here: A Dash of Love.
The Fisherman’s Fidget Apron
 Whew! I finished my second Busy Hands Fidget Apron just before the end of the month. This Hopeful Threads project is all wrapped up now, but I know that the folks at Communities of Faith Liaison of Hospice in Charlotte would be thrilled if you sew and send them a fidget apron or two anytime! You can find the details about this project and where to send aprons right here: Fidget Apron Project. The free pattern will stay available right here on my blog for you to use for family, friends or charity whenever you’d like: The Busy Hands Fidget Apron.
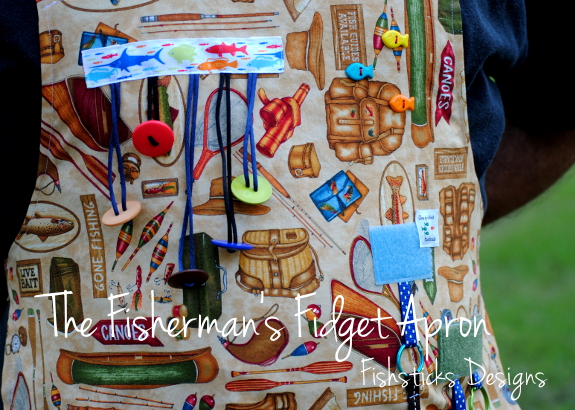
 I really enjoyed making this fishing themed apron. I’m hoping that a gentleman who loves fishing will be excited to receive it!
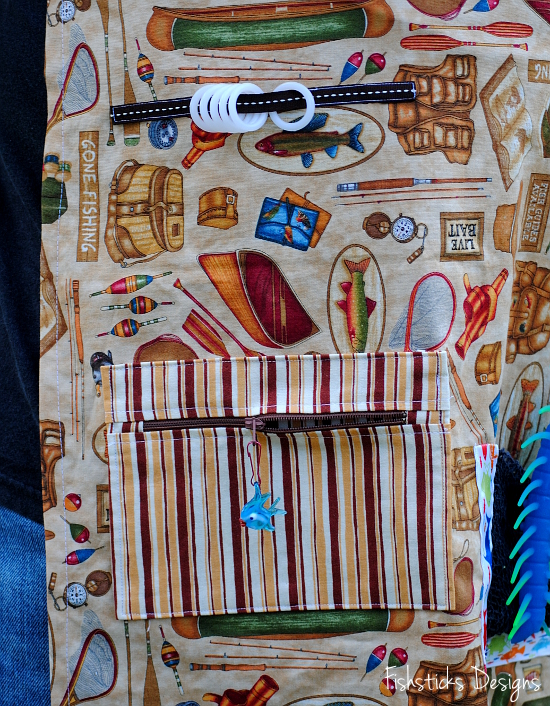 I kept my eye out whenever I was out shopping this month for anything that I thought would work and fit the theme. That squishy worm-like creature has disappeared from my sewing room enough times since I purchased him — I’m fairly certain that he’s great for keeping fidgety hands busy.
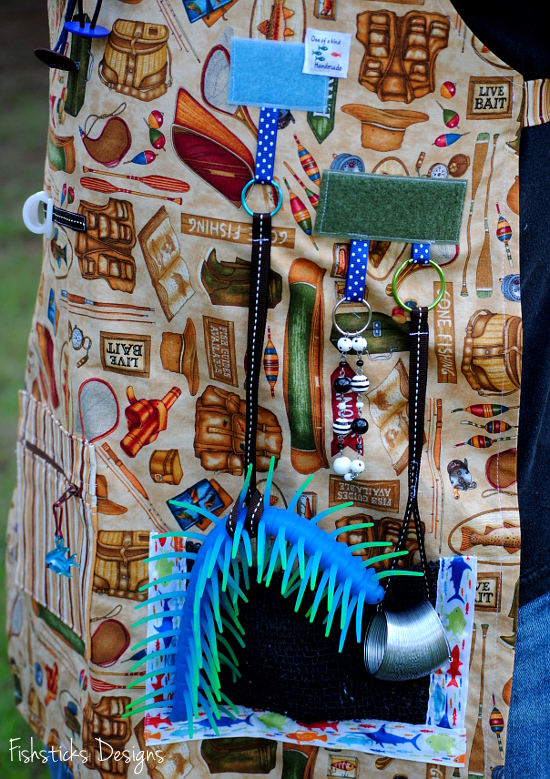 I think my favorite part of this apron might be the “fishing net” pocket, though. It has a great texture to it, and it makes the perfect home for any little loose additions.
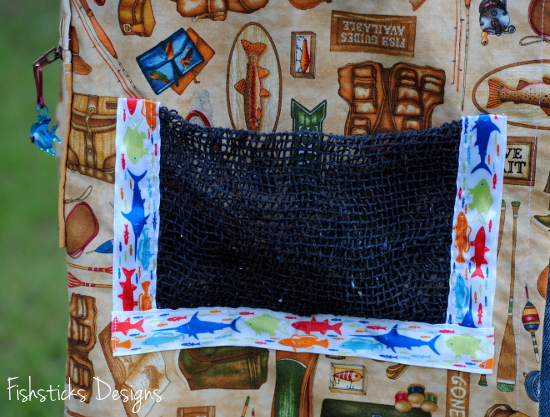 Thank you so much to those of you who sewed and gave this past month! Be sure to stop in at Hopeful Threads this morning and read all about this month’s project for the kids at Pine Ridge Reservation!
Bundle Discounts, Upcoming Sew-alongs and Busy Hands
 Are you ready for the Charlie Tee & Hoodie Sew-alongs?! The Charlie Tee sew-along starts Monday at Pattern Revolution, and the Charlie Hoodie sew-along will follow a week later right here on the Fishsticks blog. Oh, and in case you didn’t already know, you only need one pattern for both the tee and the hoodie! AND, it’s on sale for one more week for only $5!
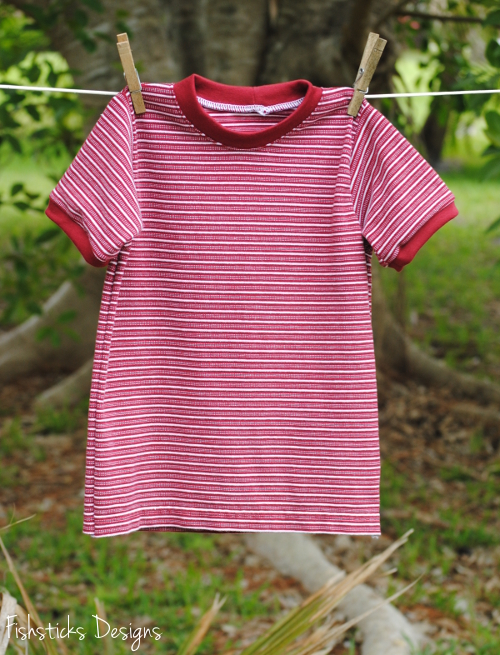 The Charlie Tee & Hoodie pattern is available in three size sets. You can find each one right here: Infant & Toddler, Big Kid Sizes, Teen & Adult.
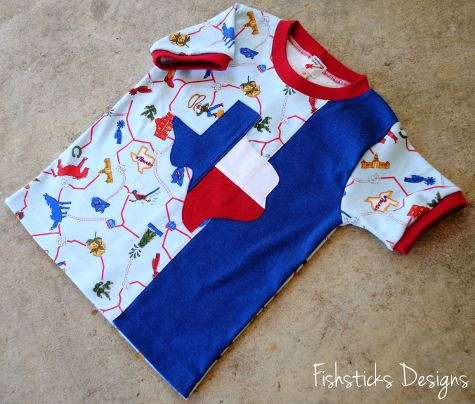 In addition to the Charlie Tee sale, I’m introducing a Buy 4, Get One PDF Pattern Free Bundle Option! For every 4 PDF patterns you purchase in a single transaction, you will receive a fifth PDF pattern free of charge. If you buy 8 patterns in a single transaction, you can select 2 additional patterns to be emailed to you FREE! Each multiple of four PDF patterns in a single order, earns you a free PDF pattern. If you purchase in the Etsy store, simply note the free pattern(s) that you’d like in the comments section of your order. If you purchase through the main store, just add a note in the comments on Paypal or send an email to leigh@fishsticksdesigns.com once your order is complete.
Finally, have you sewn a Busy Hands Fidget Apron for this month’s Hopeful Threads project? Time is winding down and the Flickr album needs filling! I’m working on the man’s fishing apron that you see above right now. Sewing these is so much fun because you really get to be creative with them! If you can spare a few hours this weekend, I encourage you to sew one to donate. Just click on the picture below for the free pattern!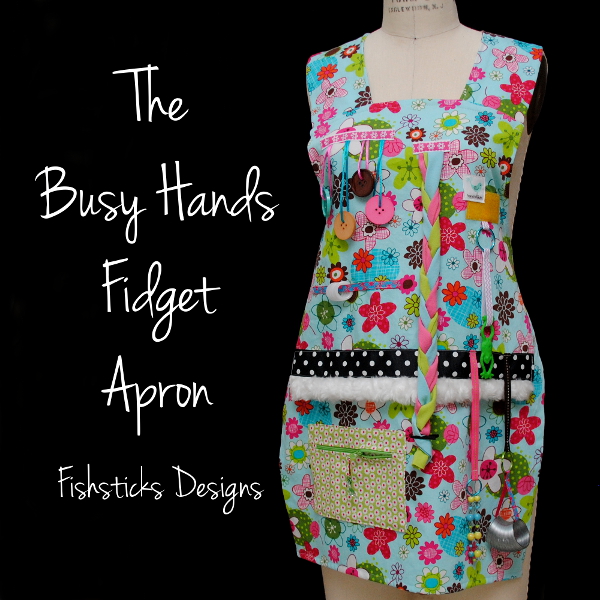
The Busy Hands Fidget Apron Pattern & Tutorial
Hopeful Threads’ July 2013 Project
 I absolutely love working with Kristy at Hopeful Threads on a project, and this month is another great opportunity for me (and you!) to do that! This month’s Busy Hands, Ours to Theirs project is a unique way for you to sew and give to many older men and women who have spent much of their lives giving to others. You can read all the details right here: The Busy Hands, Ours to Theirs Project. The Fidget Aprons that we’ll be sewing are designed to be used by those who suffer from Alzheimer’s Disease and other forms of dementia. The trinkets, trims and activities attached to the apron provide a way for patients to keep their often restless fingers busy. This can provide much-needed relief for both loved ones and their caregivers.
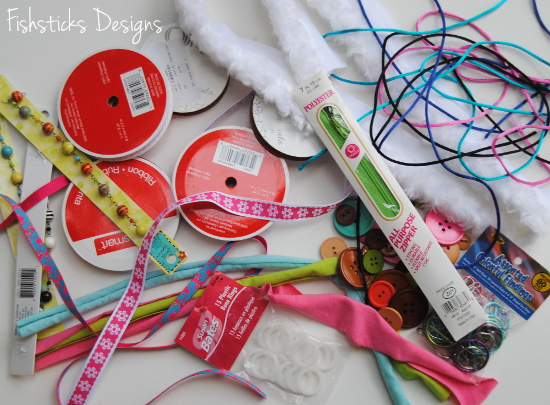 The Busy Hands Fidget Apron is a free pattern and tutorial that I put together just for this month’s project. The tutorial includes instructions for how to safely attach the trinkets while keeping the apron washable and not overly cumbersome. The apron is easy to sew and includes a comfortable easy-on, easy-off pull-over neckband.
 Before you get started sewing, you’ll need to gather your fidget items. Here are a few details on the things that I used to get you ready to start digging through your stash or to grab your coupons and head out to the craft store! (In addition to the these items, the apron itself requires 1 1/2 yards of cotton woven fabric. Quilting fabrics and lightweight twill work perfectly.)
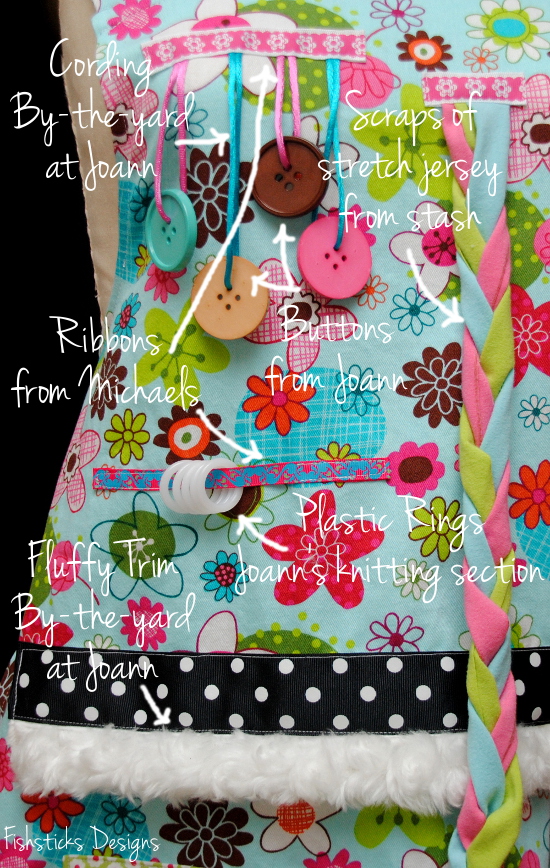 Choose trims that feel nice to the touch. (I found this fluffy trim above on clearance at Joann Fabrics for $.99 a yard. Pom-pom trims or even a long rectangle of minky or cuddle fabric folded in half would work well, too!) Things that make a slight clicking noise like the round plastic rings (knitting stitch markers) are great. Try to avoid things that are really loud, though. Buttons and beads are great, especially large ones or uniquely-shaped ones. Knit fabric scraps, cording or shoelaces can be used for braiding or lacing.
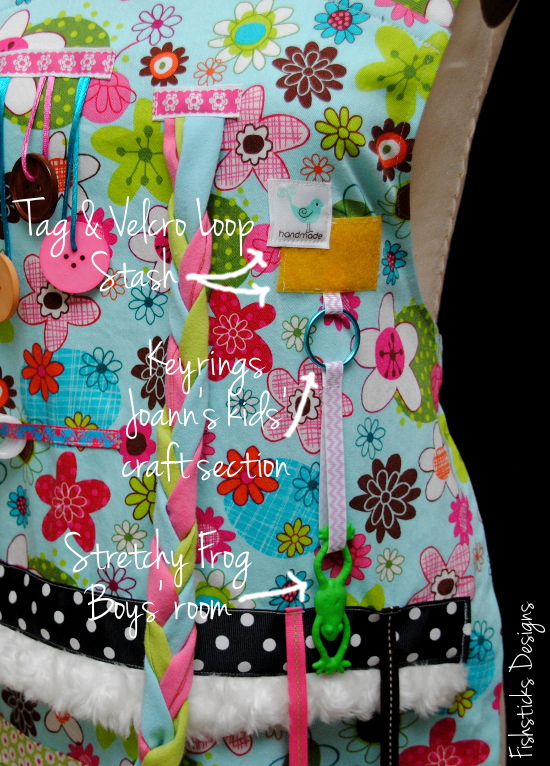 Be sure to grab some keyrings! You’ll need them to make it easy to remove items that can’t be washed and dried. For a little fun, find small toys that can be attached easily with ribbons. I found the stretchy frog above in my boys’ toy stash, and the tiny Slinky below came from the dollar section at Target.
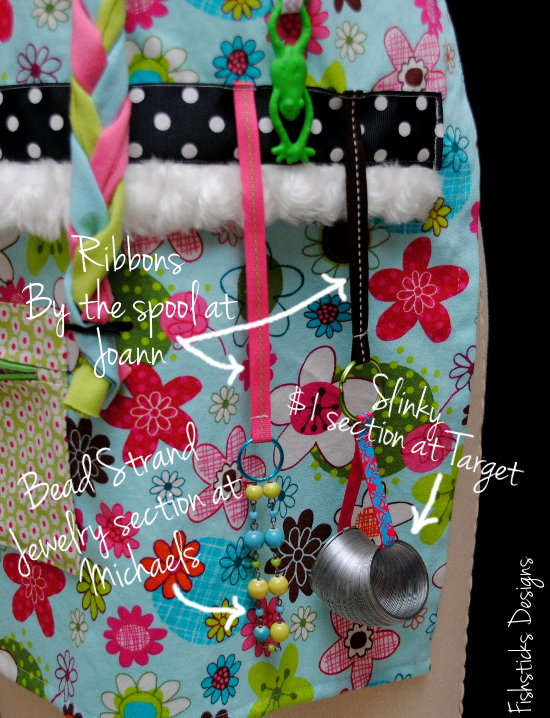 You’ll need plenty of ribbon to attach your fidget items. (Small pieces from your stash are a great choice, or check out Michaels, Joann or Hobby Lobby for a huge selection!) The pattern includes instructions for the little zippered pouch. You’ll need a zipper that is at least 7″ long. A longer zipper is fine, though. We’ll just cut off the extra. (Don’t panic if you never sewn a zipper before. The method that I use is really, really easy. Just make sure you know where your zipper foot is!)
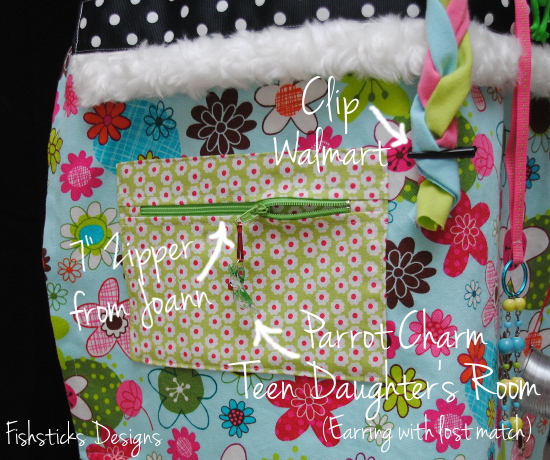 Use your imagination. You most definitely do not have to sew your aprons exactly the way that I did mine! This is a project that you should interpret in your own way!
One more thing, this project needs aprons for men and women, so keep an eye out for items that can be used for either. I have this fishing fabric washed and dried and ready to be sewn into a man’s apron next week!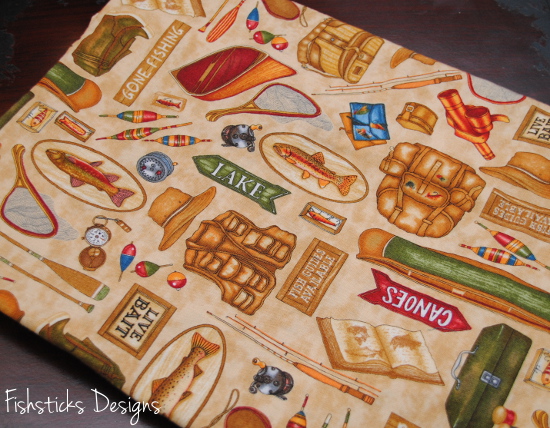 Once you have your fidget items ready to go, just download the pattern right here: The Busy Hands Fidget Apron. Be sure to share your finished aprons in the Hopeful Threads Flickr album! It’s going to be so much fun to see what you put together!
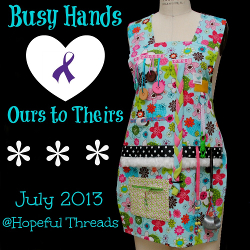
Boxer Briefs for My Little Guy
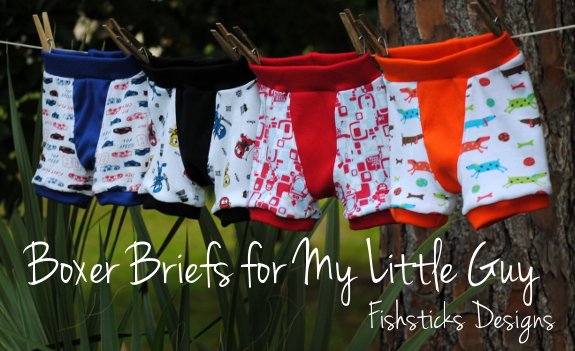 We’re pretty relaxed about learning to use the potty around here. I think having a big family and a busy schedule sort of leads to that. They all learn when they’re ready to learn. Charlie’s getting pretty close to making the transition to undies full-time so I thought some fun momma-made undies were in order!
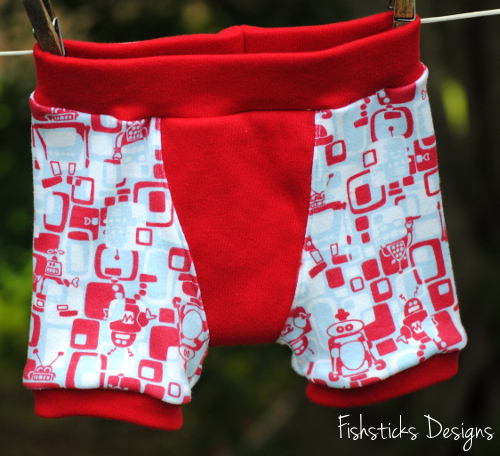 My Undercover Bottoms Boxer Briefs pattern is my boys’ favorite for comfortable underwear. (It also works great as PJ bottoms, and one of my customers just made it with swimsuit fabric for her daughter to wear with a rash guard at the pool!)
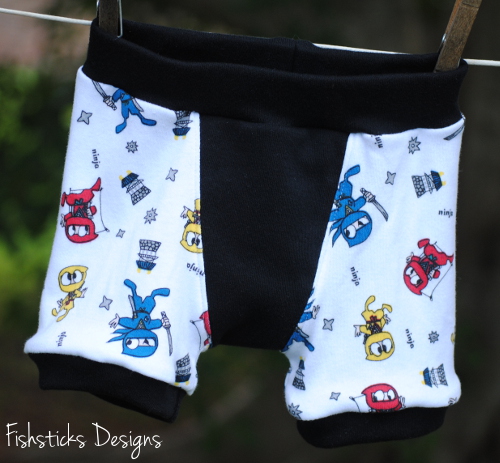 I made these without the optional fly opening, simply because they’re faster to sew that way, and Charlie doesn’t use it anyway. That built-in double-front layer is great, though, for little boys who still have occasional accidents. It also hides the seam between the front and back cod pieces which makes for more comfortable wear.
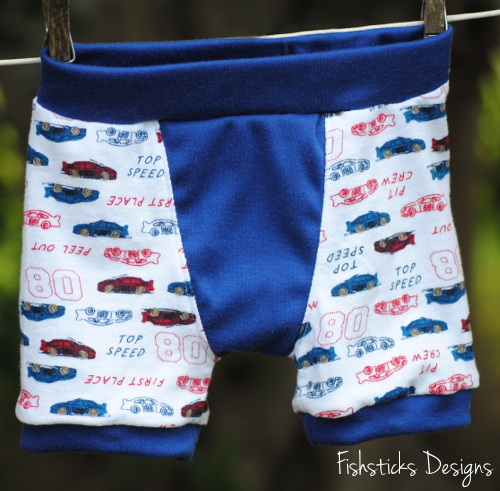 Charlie is really excited about these, and even for relaxed potty-learning, that is always a good thing! (Every mom knows that the more they like something the more likely they are to want to use it, right?)
 I’m adding these to the Summer Sewing for Family Project at Hopeful Threads. Kristy shared some fun pictures over there of the Buttons & Buckles Shortalls that she made for her little man last week, AND there’s a Fishsticks Designs Giveaway going on that you might want to check out, too! You still have some time to enter.
It is such a blessing to give!
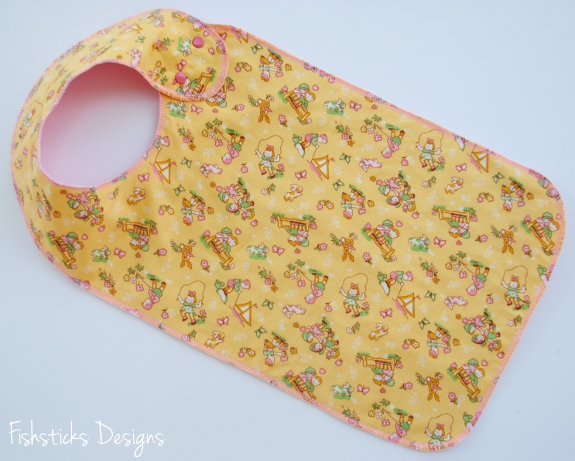
Remember this huge stack of bibs from the February “Dinner for Two” Hopeful Threads project? Many of the bibs that you sewed and gave are already being put to use at The Hidden Treasures Foster Home, and the others are making their way over in suitcases a little at time as volunteers travel from the states to serve. I’m so excited to get to share with you some beautiful pictures that were emailed to Kristy and me . . . pictures of the children who received your handiwork! These pictures should warm your heart and encourage your spirit.
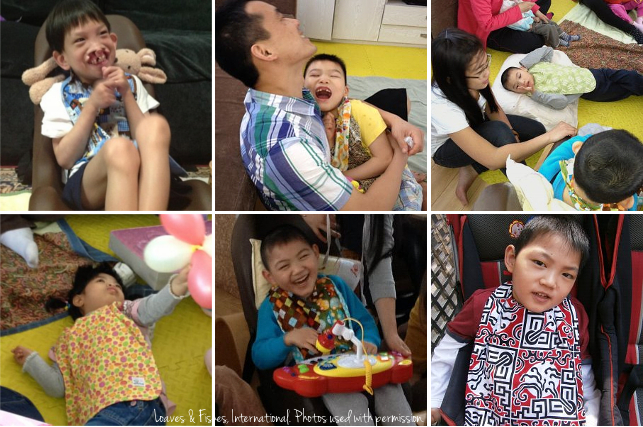 A portion of the thank-you letter that was included with the photos said, “We are so touched because we can feel the outpouring of tender love, quality of workmanship and genuine giving that went into the making of each bib. These bibs brighten the daily life of not only the children but everyone who cares for them and visits the home. The variety of patterns and colors makes a person smile, and I believe makes the child feel very special.”
Thank you so much for giving of your time and your talents!
The above photos are property of Hidden Treasures Foster Home/Loaves and Fishes International, and are used here with permission. Please do not copy or reuse without permission.

Hopeful Threads: Fluff for Foster Care
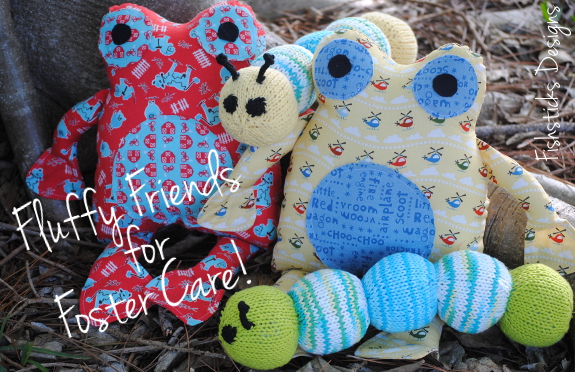 Farmer Frog and Pilot Frog went for a walk one sunny spring day. They brought along their pet caterpillars to enjoy the fresh air. Their conversation bubbled over with excitement about the mission they’d been assigned, knowing that their new jobs as friends to little ones in foster care would bring smiles to faces and joy to hearts!
Pilot Frog hoped that his trip to Hopeful Threads would lead him to the perfect little boy for him, maybe one who loves helicopters and pretending to fly!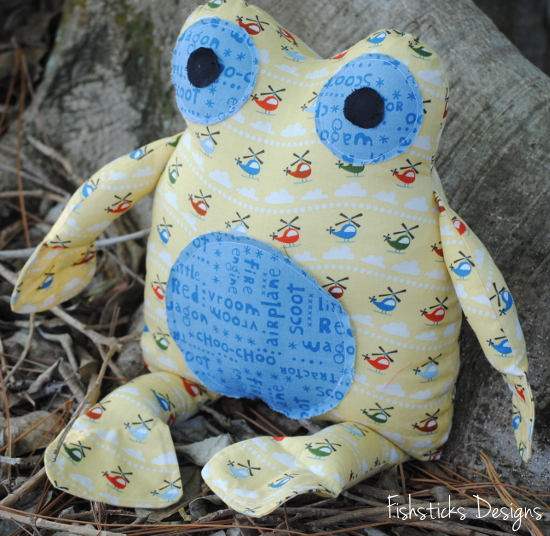 Pilot Frog’s green caterpillar would be making the trip with him. This little caterpillar dreamed of finding a new home with a little one who would love to cuddle with him day and night.
 Farmer Frog was looking forward to a much longer trip all the way to Canada! There, he would settle down in a brand new foster home and wait expectantly with the family for a child in need of their love and his companionship.
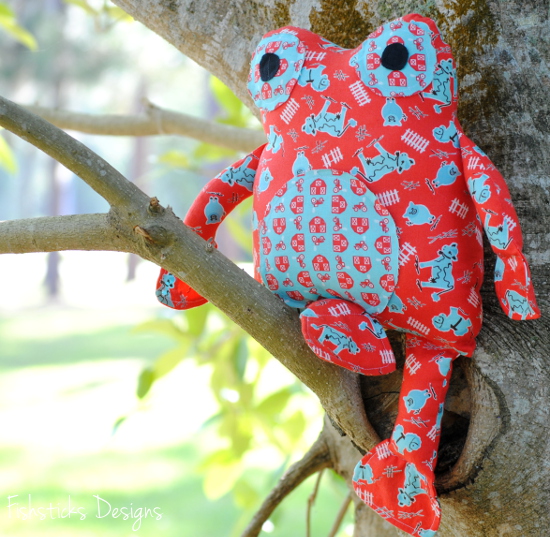 Traveling with Farmer Frog, of course, was his yellow caterpillar. The yellow caterpillar was filled with anticipation of becoming a special lovey to a wee one who would share playtime laughs and bedtime snuggles.
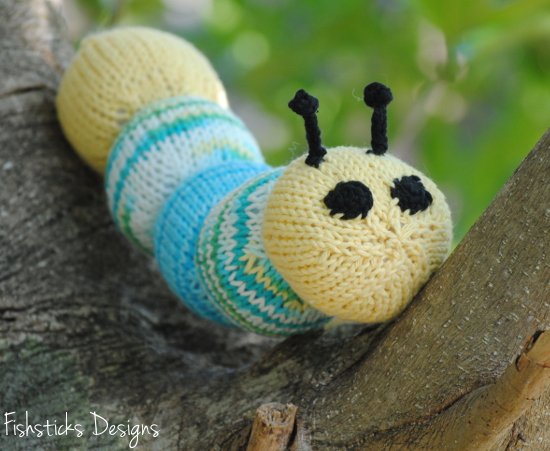 Heehee! I couldn’t resist writing a silly little story to go along with these guys. Aren’t they cute little stuffies? I sewed up the frogs using Bit of Whimsy’s Fritter Frog pattern (the Daddy Frog version). The sweet caterpillars were knit by my 15-year-old, Samantha. (I keep telling her that she needs her own creative teen blog!) She used this pattern Lion Brand Cuddly Caterpillar. Pilot Frog and his green caterpillar are shipping out to Kristy at Hopeful Threads for this month’s Fluff for Foster Care project. In the same spirit, Farmer Frog and his yellow caterpillar will be packed off to my friend, Jamie, in Canada where she and her husband are just beginning the foster family journey.
It’s a Snap Source Giveaway!
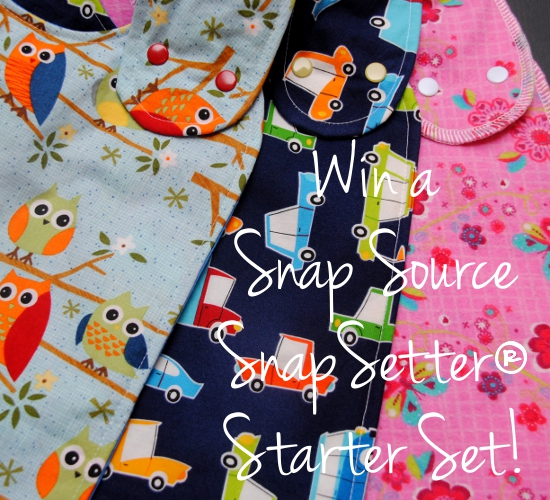 Guess what?! When the folks over at The Snap Source heard that we were joining with Hopeful Threads to sew bibs for two different charities this month, they offered to send me THREE SnapSetter® Starter Sets to give away! How cool is that?
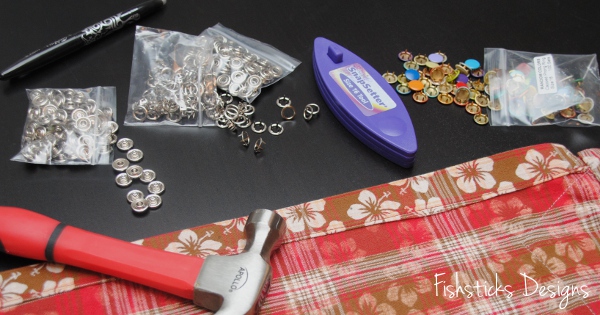 I love using the SnapSetter® for clothing. The snaps are high quality, affordable and long-lasting, and applying them is fast and easy! Simply position the snap components and fabric in between the layers of The SnapSetter® and hammer into place.
 How many things can you think of that could use snaps? (Snaps, by the way, are far easier for little hands to manage when dressing themselves than buttons. My six-year-old, Jamie, requests them on all of his camp shirts!)
 Each starter set comes with the standard size 16 SnapSetter®, six open-ring snap sets and 40 capped snap sets! And, did I mention, that THREE people will win?
 To enter, just follow the instructions on the Rafflecopter below! I’ll announce the winners on Monday, 2/25, and the winners will have 48 hours to respond. Both domestic and international entries are welcome!
a Rafflecopter giveaway
The Big Kid Bib: Serged & Snapped in Seconds

Have you peeked over at the Dinner for 2 Flickr Group lately? There are some seriously great-looking bibs showing up already, bibs for kids and adults alike. Have you sewn a bib or two yet? What are you waiting for? A quicker method of sewing perhaps? Do you have a serger? Well, then the Serged & Snapped in Seconds Bib tutorial is just for you! (Okay, so it really takes minutes, but seconds make up minutes and without seconds you don’t get the alliteration.)
Let’s get started! First, hop over to this post: Hopeful Threads & Dinner for Two. Read all about why we’re sewing bibs this month, print the Big Kid Snap Bib Pattern and get your three fabric pieces cut out: I have a front piece of cotton quilting fabric, a hidden inner layer of cotton flannel and a backing piece of PUL. (This method works well with PUL because the slippery side is hidden when you serge. Ripstop may be too slippery, but you can certainly try it!)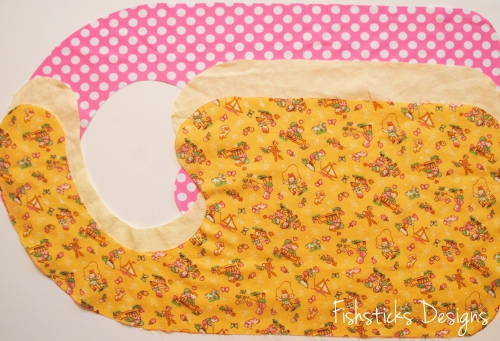
Grab a glue stick from your school supply closet or your junk drawer. A fabric glue stick will certainly work, but regular glue stick is cheaper and easier to find, and as long as it’s washable, it works just as well. You do want a glue stick that is new and not gummy at all. It needs to spread quickly and in a thin layer. Rub that glue stick all over the shiny side of your PUL. You want plenty of glue so there won’t be any slipping and sliding. Carefully place your hidden layer on top, line up all the edges and smooth it out.
 Now glue the wrong side of your front fabric piece to the top of the flannel using the same method. It is much easier to spread the glue stick glue on cotton quilting fabric than on flannel. Flannel leaves icky fuzzy stuff on your glue stick.
 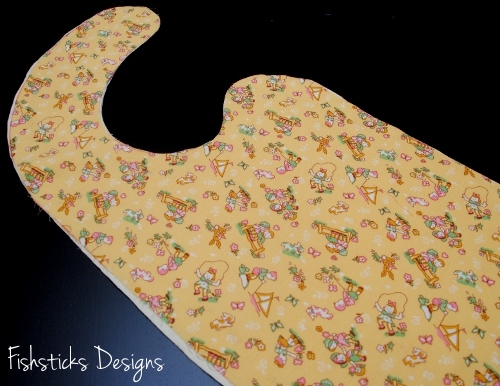 Check to see if you have any areas where the fabrics are overlapping and square them all up.
  Now you’re ready to serge.
  Just one second before you head to the serger, though. Do you have one of these baskets? These beautiful colored spools of Woolly Nylon have been sitting in this basket since Joanns clearanced them quite some time ago. If you have a basket like this, you might consider pulling one of those pretty colors through your upper looper. If you don’t, white will work just as well!
  Now, off to the serger! The seam allowance is 1/2″ so you want to cut off 1/2″ or close to that with your serger blade. It’s hard to keep that exact when you’re going around curves, but get it as close as you can.
  I started and stopped my serging at the back of the neckline since that’s the spot that will be least likely to be seen when the bib is worn.
 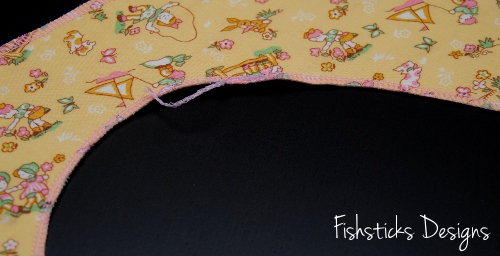 Zip, zip, round the corners, and all you have left to do is add the snaps.
 Refer back to the pattern for snap placement. Press the snaps in place.
 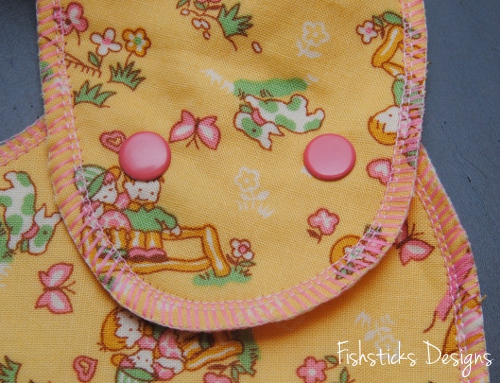 And you have a bib ready to send off with love to a sweet little one who will be so excited to receive it! Now wasn’t that fast?! Fast enough that you have time to make another one? Super! Go serge some more!