My Patterns
It’s Time: A Going Out of Business Sale
 Let’s start with the sale details!
Click right HERE to shop!
My 41 traditional PDF patterns will all be on sale for $2.50 each through Friday, 12/2 at 11:59 p.m. eastern. You’ll also be able to purchase my whole collection of 41 PDF patterns, plus the out-of-print Emmy Dress & Top patterns, for a special price of $75. That’s a total of 43 patterns, making them less than $1.75 each!

My 16-pattern Go Fish PDF Collection will also be on sale for $16 through Friday, 12/2 at 11:59 p.m. eastern. (These patterns will no longer be available as individual PDF patterns.)

No other discounts apply! If you have difficulty using my main site on a mobile device, try my Etsy shop instead.
If you’re not familiar with my PDF patterns, you can read more about them here: Fishsticks Designs PDF Patterns
For a limited time, you’ll still be able to purchase my traditional patterns in paper form through your local quilt shop, and I plan to continue distributing my Go Fish paper patterns through local quilt shops for the foreseeable future.
Now a little about the why …
This little business that I started almost ten years ago grew so fast, and it felt like a perfect fit for me. So many things have changed over the years, though. The PDF pattern business has grown up in the last decade, and so many talented new designers have come on board. You sewists have so many choices now! Because of the life changes that we’ve experienced over the last two years, I have so little time to devote to my business … I just can’t keep up. (Honestly. I had planned to start this sale on Black Friday, then Cyber Monday, and now it’s nearly Tuesday.)
My sewing friends who have kept up with me know that we accepted a fostercare placement of two siblings nearly two years ago, and the youngest was diagnosed a few months later with a complex medical condition. They’re a part of our family now, and we anticipate adopting them in the coming months. (I’m excited that I’ll get to share them with you for real!) I’ll admit that I’m a little bit sad about walking away, and I hope that I’ll be able to start fresh again someday when life settles down a bit. Right now, I need to make family my priority.
Don’t think I’m disappearing, though! I’m still sewing, and I’m hoping that without the stress of my pattern business, I’ll be able to share more on my blog. Some changes will be coming here soon, too!
Riley Blake Back-to-School Blog Tour!
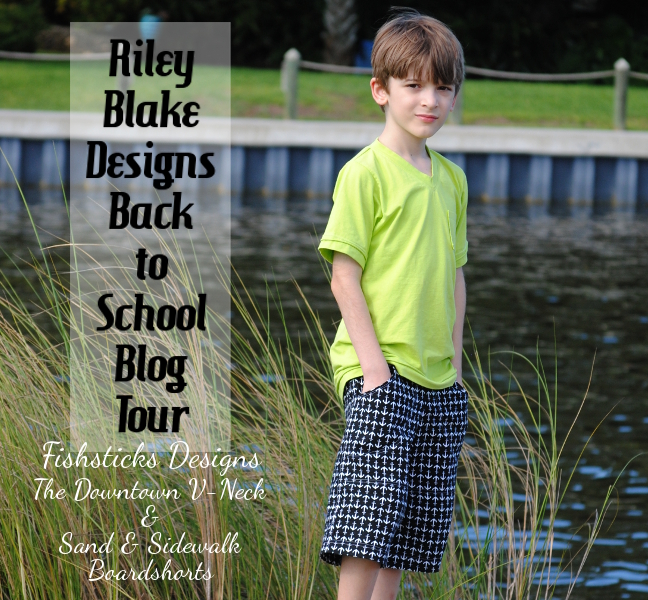 Jamie and I are participating in the Riley Blake Back-to-School Blog Tour today! He’s going into second grade this year, and, like most second-graders, he definitely has his own opinions. He’s been a little bit tough lately when it comes to letting me sew for and then photograph him. This time, I involved him in the whole process. He was really excited that I let him help me choose the fabrics for his outfit, and then he loved having a say in where and how to take the pictures. He did a terrific job, too! Continue reading
The Cultivate Blog Tour
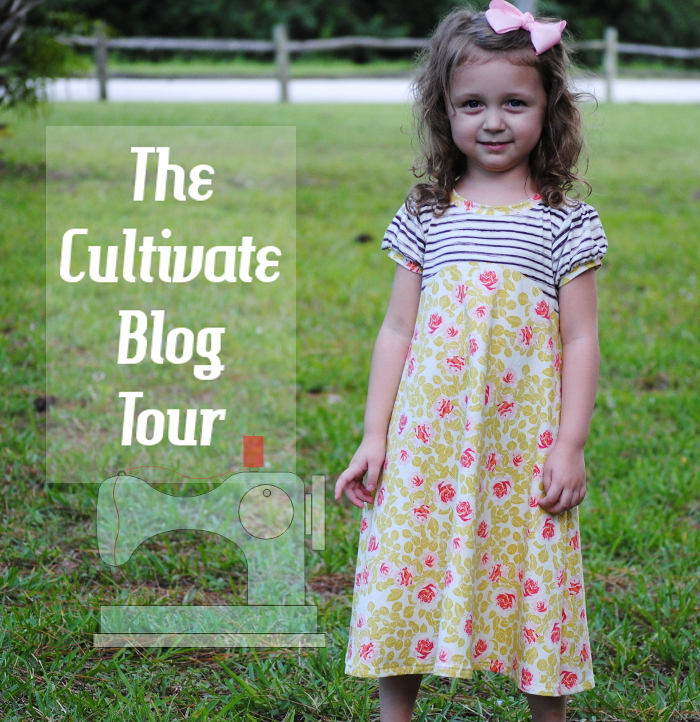 Wheeee! I am so excited to be today’s stop on Bonnie Christine‘s Cultivate Blog Tour! Have you seen the beautiful fabrics that she’s designed for this collection? (And, do you know what a great name she has?) Continue reading
Ponies on a Katie J. Jumper
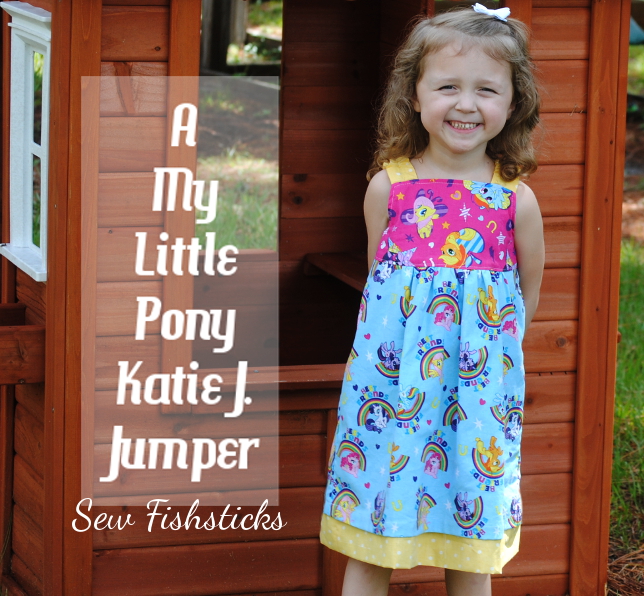 Miss Katie J. celebrated her 4th birthday early this month, and since she adores everything My Little Pony, she needed a pony-covered party dress! As seems usual lately, my schedule kept me hopping until the last minute, so I opted for a party dress pattern that I know well and can sew quickly – one that happens to be named for the birthday girl – the Katie J. Jumper! Continue reading
Hooded Ninja Tees ~ RB Knit LOVE
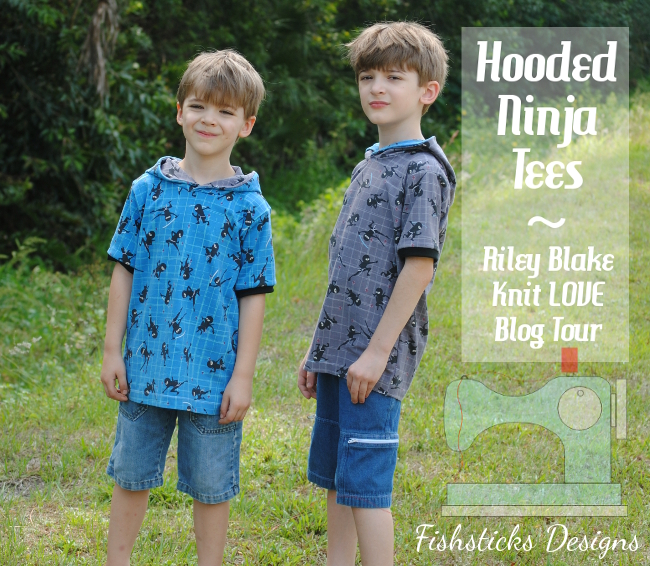 It’s my turn on the Riley Blake Knit LOVE Blog Tour! If you’ve been here for any time at all, you probably already know how much I love working with RB’s stretch jersey knits. They wash and wear beautifully. The weight is perfect. They’re easy to sew, and the selection of prints and basics has grown so large, you’re sure to find something that you love! (Check them all out right here: Riley Blake Knits, and purchase them at your favorite local quilt shop!) Continue reading
Crossroads Denim & Topstitching for a Beautiful Finish!
 I’m the first stop on the Indygo Junction Crossroads Blog Tour! Since my tour date happens to fall on St. Patrick’s Day, I couldn’t resist choosing Midtown Moss for shorts for my two youngest boys. I used my Sand & Sidewalk Boardshorts pattern and paired the shorts up with store-bought tops. Now my boys are ready to celebrate their Irish heritage in handmade style!
Continue reading
Quick Handmade Gift Ideas Using Go Fish Patterns
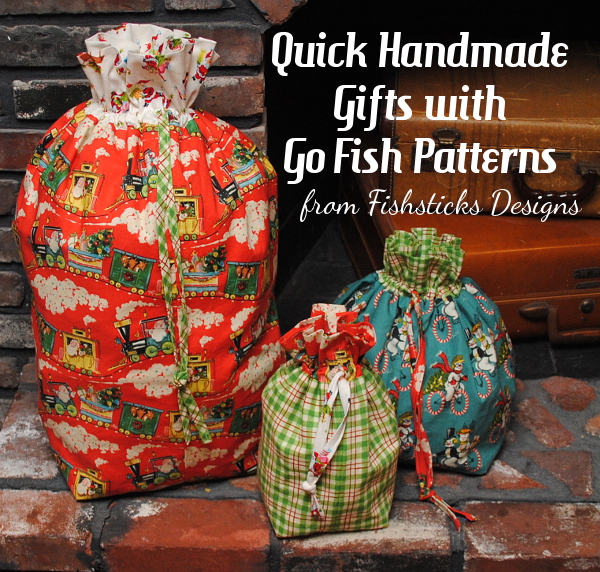 Do you love giving handmade gifts for Christmas? I do, too! But, who wants to spend the whole holiday season in their craft room sewing? Quick-sew projects that result in gifts the recipient will use and enjoy are the best! My Go Fish Patterns are some of the quickest around, and at a cost of only $4.25 each, they’re inexpensive, too! I thought I would take a bit of time to sew up a few Go Fish projects and share some gift ideas with you! Most of these combine a little something store-bought with something handmade. You don’t have to add extras, of course, but sometimes those little things round out a gift quite nicely.
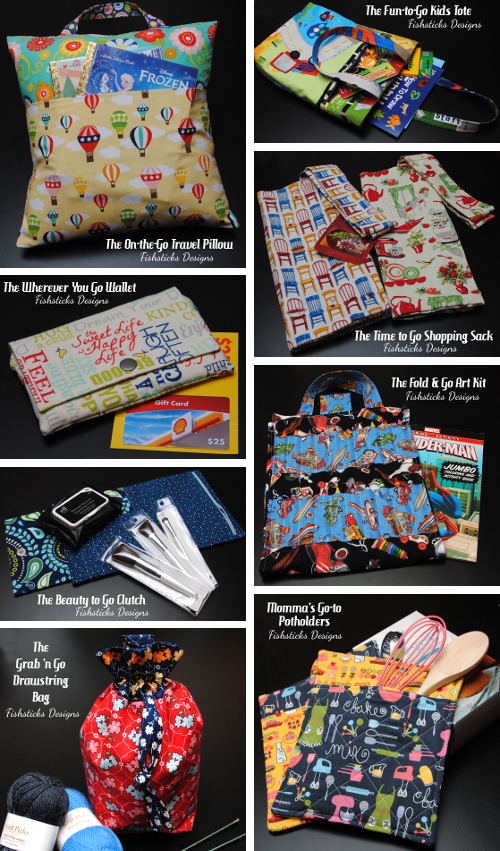 First up, check out those Grab ‘n Go Drawstring Bags in the title image above! Santa Sacks seem to be the “in thing” this year, and you can sew your own in no time at all! Use one to carry gifts to a party, or sew up one for each of your children to leave for Santa to fill on Christmas Eve. Drawstring bags make great reusable gift bags, too, and it’s really simple to change the dimensions to make whatever size you need!
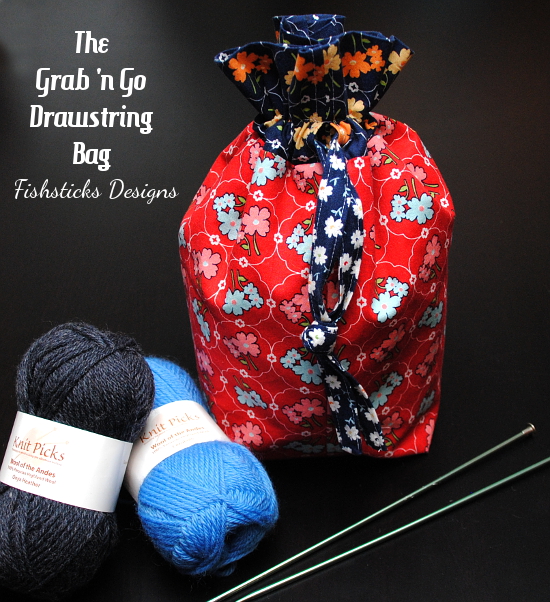 Since we’re already chatting about drawstring bags, they’re a gift that can work for many people on your list! Fill a pretty flowered drawstring bag with yarn and knitting needles for your daughter, or sew one using a transportation print to fill with Hot Wheels cars for your grandson. We have this silly annual Nerf gun battle on Christmas morning at our house, and I’ve learned that little drawstring bags are perfect for keeping track of those little foam darts! Once you start making these bags, you’ll start finding tons of uses for them.
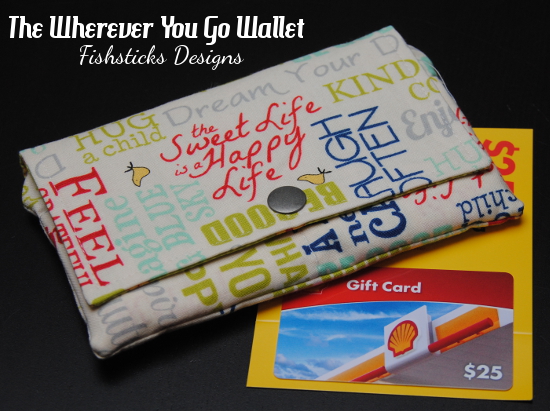 A teen or college-age niece would be thrilled to receive a handmade Wherever You Go Wallet with a gas card or even cash tucked inside! Choose a fabric that fits her personality, and maybe add a matching key fob using my free tutorial, too.
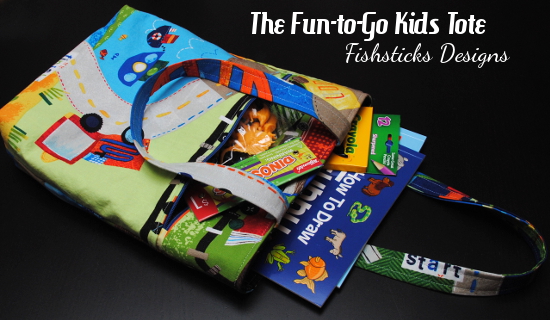 Pack a Fun-to-Go Kids Tote with activity books, little toys and snacks instead of filling a stocking, and you’ll have a gift that can be used all year long.
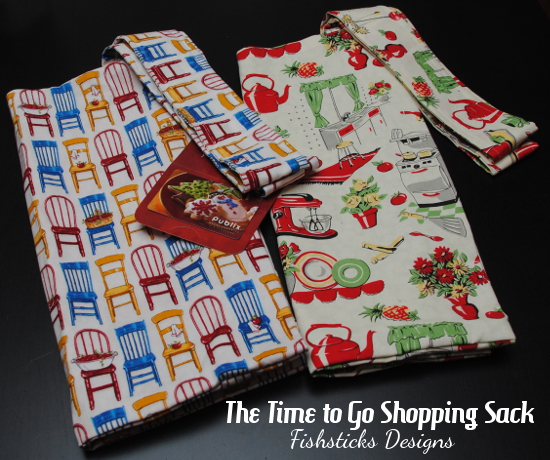 Give a set of Time to Go Shopping Sacks with a grocery store gift card for a practical and environmentally friendly gift. Don’t feel like you have to use traditional fabric on these like I did! One of my customers sewed Spiderman grocery sacks for her mom who loves comic book superheroes. It’s way more fun to shop when your bags make you smile!
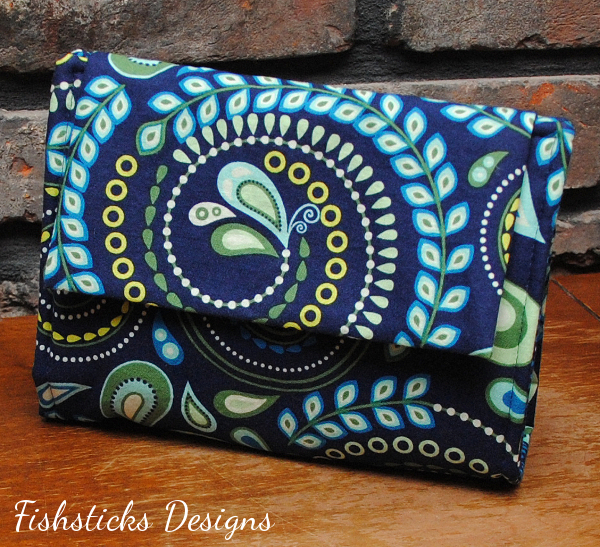
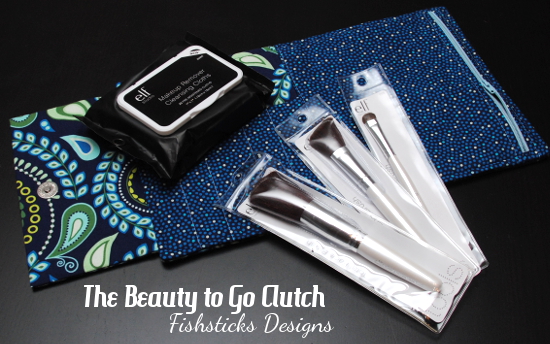 Sew a Beauty to Go Clutch and fill it with new makeup brushes, add your favorite facial wash and perhaps a gift card from your favorite independent beauty consultant or your local cosmetic store. (Support small business owners whenever you can!)
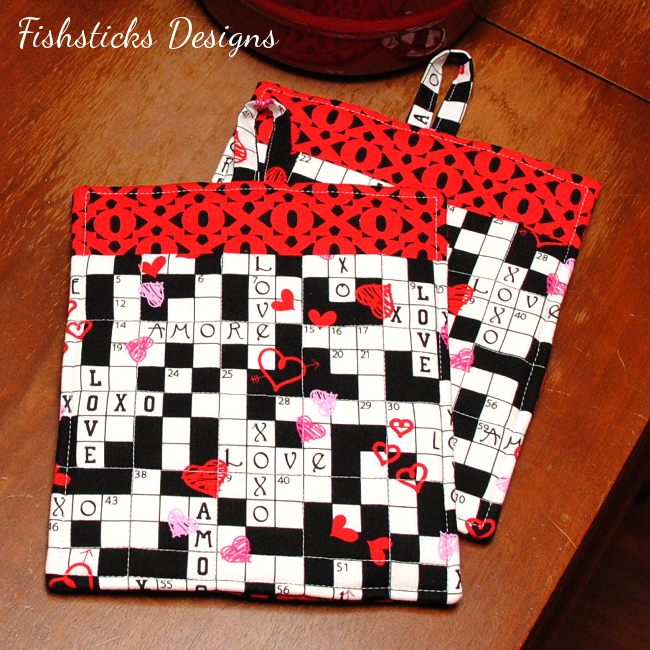
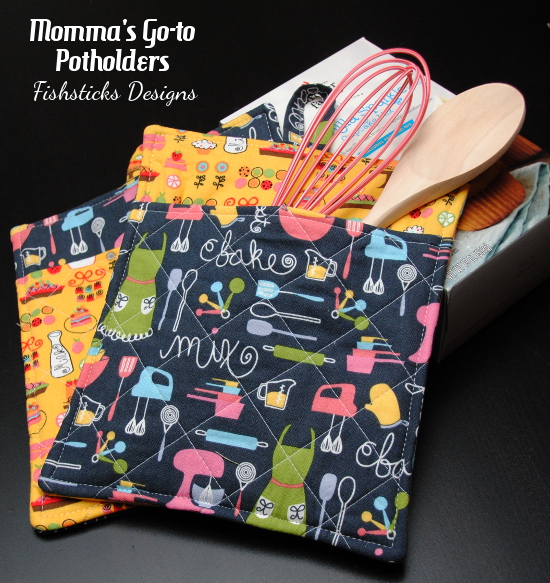 Potholders are a fairly traditional handmade gift, and you can really never have too many. What couple wouldn’t enjoy a gift basket that includes a set of Momma’s Go To Potholders, along with utensils and mixes for their favorite foods? You could even add a Go Bake Something Apron … or a matching set of aprons for husband and wife?
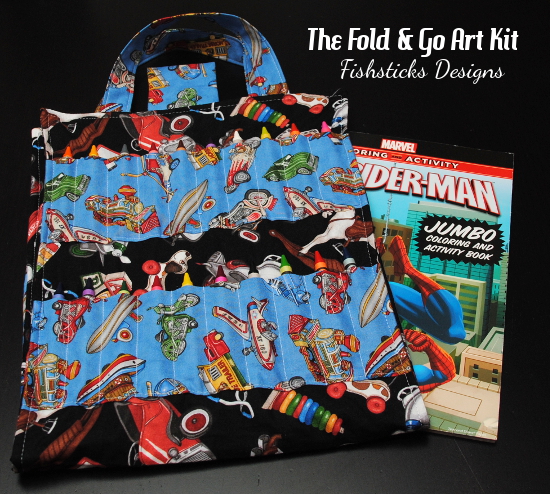 The Fold & Go Art Kit with crayons and new coloring books is a quick and useful gift for preschool through elementary. You could even substitute mini colored pencils or mini washable markers.
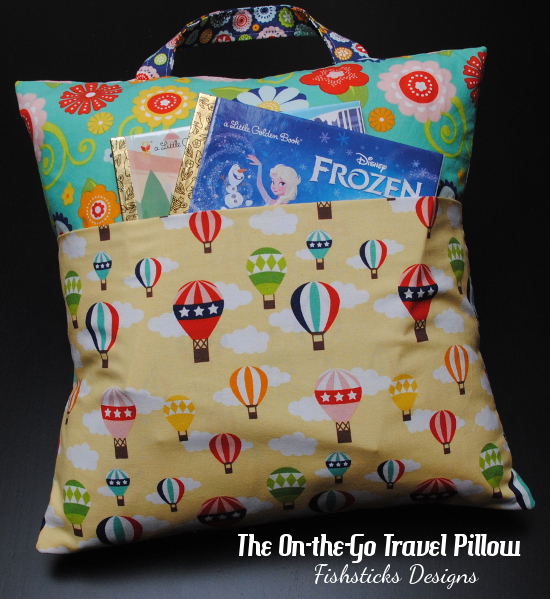 Finally, the quickest sew in my Go Fish series – the On-the-Go Travel Pillow! This one could easily become your go-to night-before-the-party project. Add a couple of age-appropriate books and this makes a great gift! These are new books, but be sure to check your local used bookstore to build up a stash. Ours carries Little Golden Books for $.50 each! Oh, and these pillows don’t just work for little ones, even teens need a place to rest their heads on trips and at sleepovers. Just choose a fabric that personalizes it for the receiver!
Now all you need to do is go buy your Go Fish patterns, find the perfect fabrics and set aside a little bit of time for sewing! I would love to see what you sew! Add a link in the comments, or come join us in the Fishsticks Designs Sewing Group to share!
Four New Go Fish Patterns … and a Go Fish Sale!
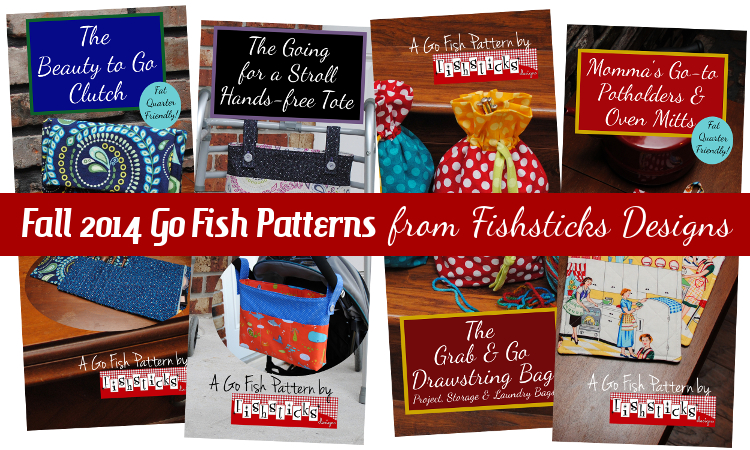 Ready to do a little Christmas-is-almost-here sewing? I’ve got four new quick-as-a-flash Go Fish patterns ready for you to sew! And, because now is the time to get those holiday sewing lists moving along, I’m running a choose-your-own-six-pack sale on all of my Go Fish patterns for one week!
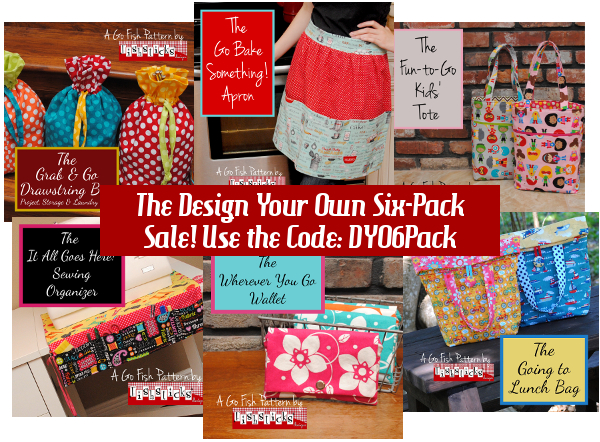 To take advantage of the sale, just choose any six Go Fish Patterns, add them to your cart in the Fishsticks Designs Pattern Shop or Fishsticks Designs at Etsy, then use the code DYO6Pack to receive the discount. (Etsy is the best choice if you’re mobile.)
On to the new pattern introductions!
 First up is the Beauty to Go Clutch. This little organizer is perfect for keeping your cosmetics and cosmetic brushes organized and ready to take along with you!
 The Beauty to Go Clutch opens to reveal a zippered compartment, as well as a divided pocket for brushes.
 Once everything is packed away, it rolls up and fastens with a magnetic snap to keep everything neatly in place.
 The Grab & Go Drawstring Bag pattern includes instructions to sew three different size bags – a project size, a storage size and a laundry size bag.
 These bags go together really fast, and they’re useful for so many things. From gift giving to taking along sporting equipment and yarn crafting to Lego storage, you’ll find this bag incredibly handy to have around!
 Potholders are practical and thoughtful gifts for all sorts of occasions, and having a quick and simple one in your pattern arsenal is must! Momma’s Go-to Potholders and Oven Mitts pattern is just the one to keep handy.
 This generously-sized potholder features a large front pocket that allows it to double as an oven mitt.
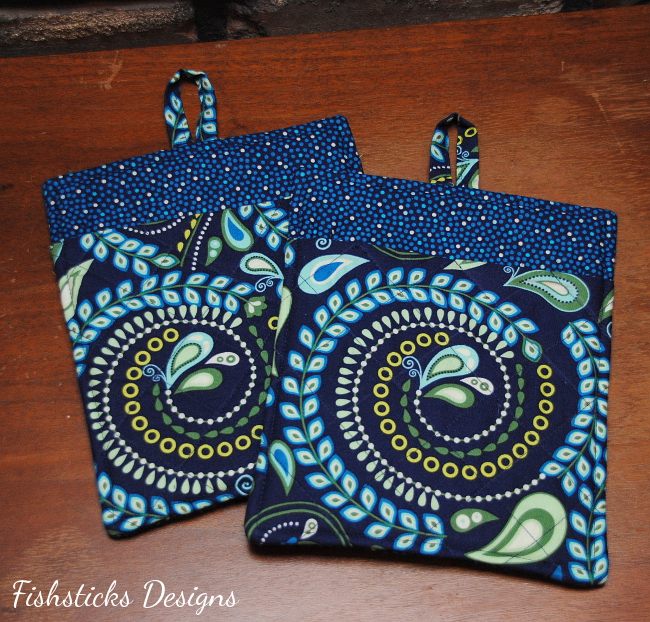 Sew it up with a pretty fabric, and it’ll add some beauty to your kitchen, too.
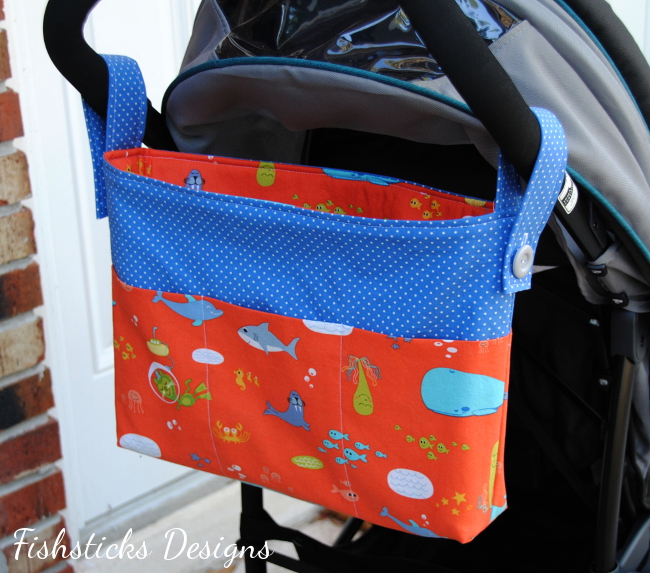
 Finally, the Going for a Stroll Hands-free Tote! This pattern is one that was requested by several shop owners when I was at the Checker Distributors’ Open House in August, and I’m so happy with how it turned out!
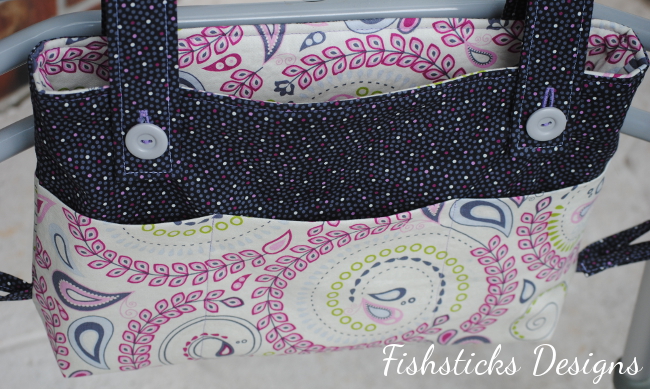 The Hands-free Tote is filled with pockets for storing your essentials, and it’s designed to work with a walker, a stroller or a wheelchair.
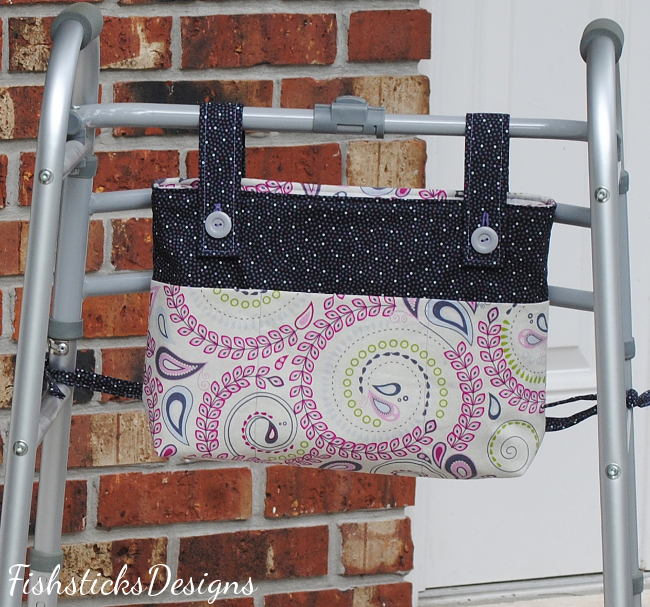 The tote features straps that can be sewn on in the center of the bag to button over a full handle, or they can be attached to the sides so that they can fasten over double handles.
 You can find all four new patterns available now in my main pattern store, my Etsy shop and on Craftsy! I’ll be back on early next week with some ideas for using my Go Fish patterns for Christmas gifts that will be loved by everyone on your list.
Tips for Sewing Children’s Outerwear
This post originally appeared at Get Your Crap Together in September 2013. With fall and winter sewing well underway, this is a great time to revisit some of these tips for sewing outerwear!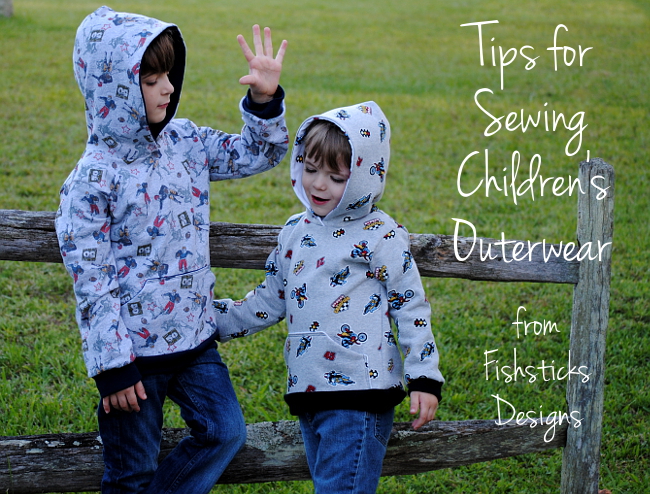 I’m so excited that Chelsea invited me to share some tips and ideas for sewing children’s outerwear. Honestly, outerwear just might be my favorite thing to sew for little ones. As moms of little ones, our days are full! When I’m able to carve out a few spare minutes to sew for my children, I want to spend that time sewing something that will get a lot of use! I want to see the finished work of my hands be enjoyed over and over again. Outerwear accomplishes that goal so well!
Think about it. If you sew a shirt or a pair of pants, they get worn once and tossed in the wash. We don’t treat jackets or hoodies that way at all. We throw a jacket on our child as we head out the door, then hang it up to be worn the next day when we get home. Isn’t that cool?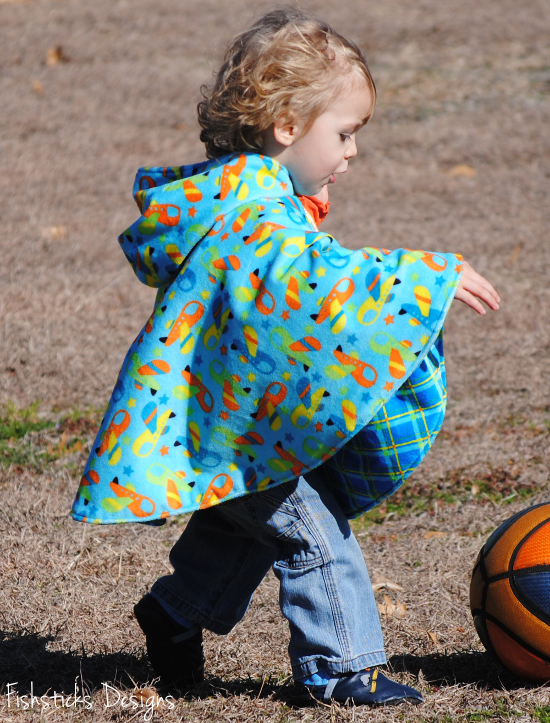 My family and I live in Florida, so I tend to make mostly lighter-weight outerwear that for those of you up north would work best for fall or spring or for layering in the winter. Since Chelsea is working on fall wardrobes for her littles, that’s what I’m going to share today. (You can definitely sew coats for colder climates, just do your research and make sure that you’re using the best materials. Also, as I’m a bit of a stickler for car-seat safety, please don’t ever put your child in a car-seat wearing a heavy coat! A poncho that you can pull on after your child is buckled securely is a great choice, though.)
There are some wonderful independent designer patterns available for boys and girls. I really recommend working with independent designers — I’m all about supporting small businesses, and it’s an amazing thing to be able to contact the designer if you get hung up somewhere! Since I design patterns myself, those are the ones that I’m featuring here. The hoodie pattern is my Charlie Tee and Hoodie and the Which Way Out Jacket is the zip-up jacket. The poncho is one that has yet to be released.
 When choosing a pattern, keep your personal needs and tastes in mind, of course, but be sure to look for those things that make a jacket practical! Pockets are really a necessity, and a hood is great for keeping little ears warm without having to keep track of a hat.
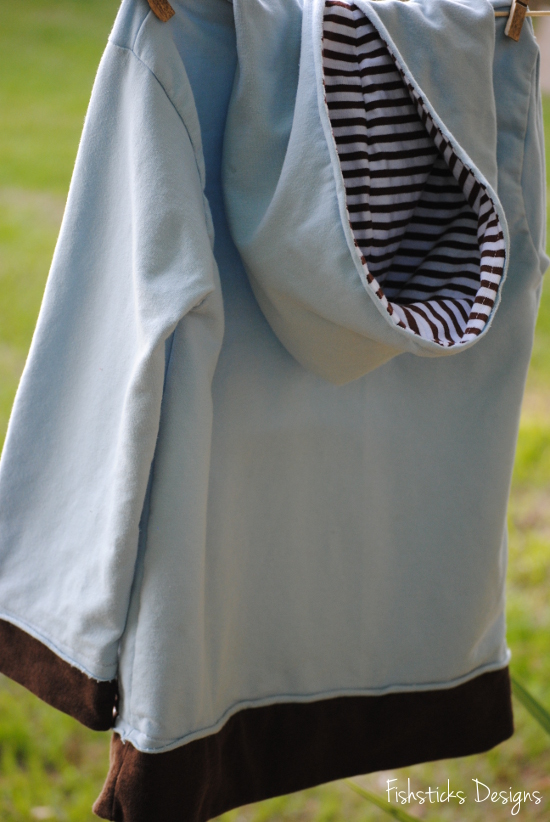
I mentioned already that I love the amount of use that you get from outerwear, but you get even more bang for your buck if you choose a pattern that is reversible like my Which Way Out Jacket! It’s so cool to have a piece of clothing that is fun and playful on one side while it’s dressy and a bit more reserved on the other. It can be a huge blessing, too, when chocolate ice cream happens to drip down one side, and you can just wipe it off and flip it over!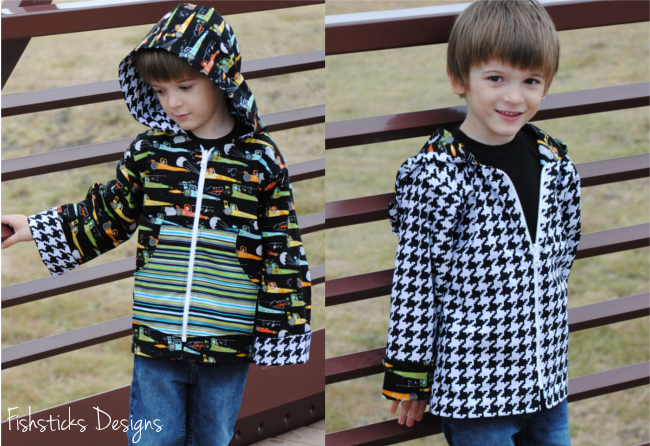 Once you have your pattern chosen, you need to decide on the fabric that you’ll use, and there are so many choices!
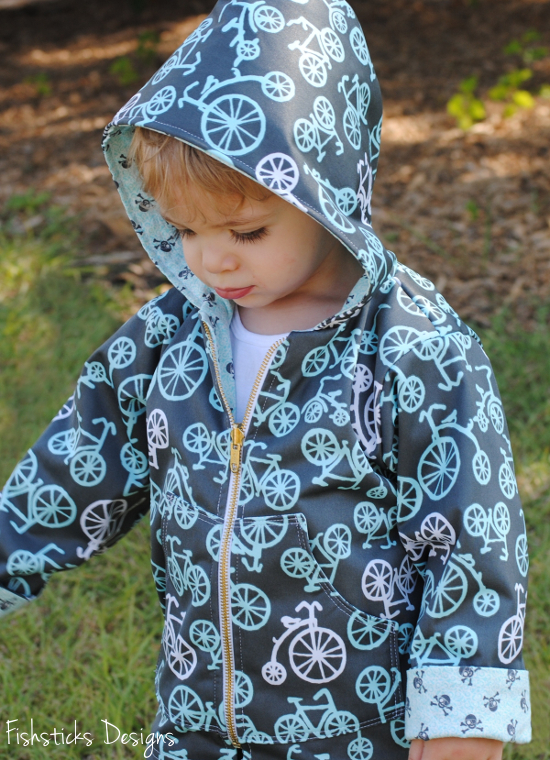 The poncho at the top of this post is sewn with Cuddle Fabric, commonly referred to as Minky. Minky is a polyester fabric that is very warm and fairly heavy, and it has a teeny, tiny bit of stretch. The WWO Jacket just above this paragraph is sewn with cotton flannel on the inside and PUL (polyurethane laminate) on the outside. PUL is a polyester fabric that has a laminate fused to the wrong side. It’s commonly used by cloth diaper makers, and is completely waterproof. It makes a perfect rain coat or windbreaker!
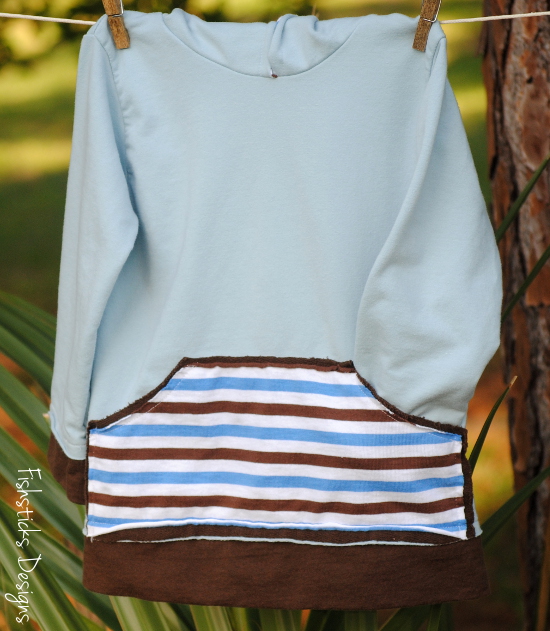
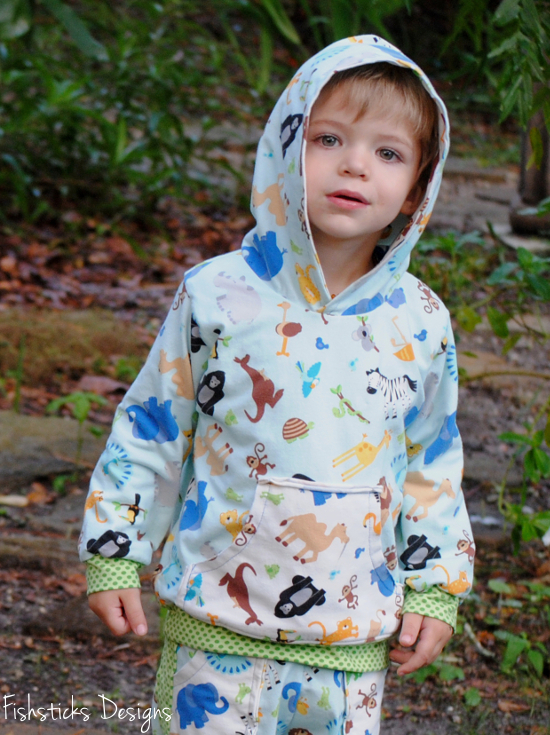 The hoodie above is a great lightweight choice sewn with cotton stretch jersey. Other t-shirt knits are good choices for that little extra layer when the air is just a bit crisp, too. Cotton interlock tends to be my personal go-to since it’s a bit thicker than jersey but not sweatshirt-heavy.
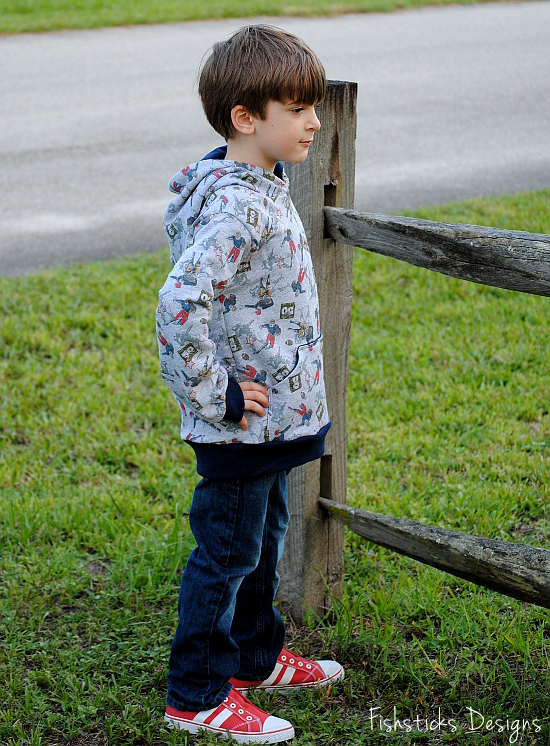 The hoodie above is sewn with cotton french terry. French terry has a right side that is smooth and a wrong side with little loops on it. You can find it in 100% cotton and in a cotton/spandex blend, usually referred to as stretch french terry. The first has a little bit of stretch, while the second has a good amount of stretch and recovery. French terry is heavier than the other knits mentioned above, but not quite as heavy as sweatshirt fleece. It’s a perfect choice for a hoodie for fall or spring . . . or winter if you live in my neighborhood!
The hoodie below is made with cotton sweatshirt fleece. This is the traditional hooded sweatshirt fabric, smooth on the outside, fluffy on the inside. Sweatshirt fleece is generally 100% cotton, and does not have much stretch to it. That makes it easier to sew, but sometimes harder to pull over the head! (A little tip if you’re sewing a traditional hoodie for a child with a larger than average head, cut your hood slightly taller — about 1/4″ — than the pattern calls for, and then increase your seam allowance by about 1/8″ of an inch when sewing in the hood. You’ll be amazed at the difference that little bit makes!)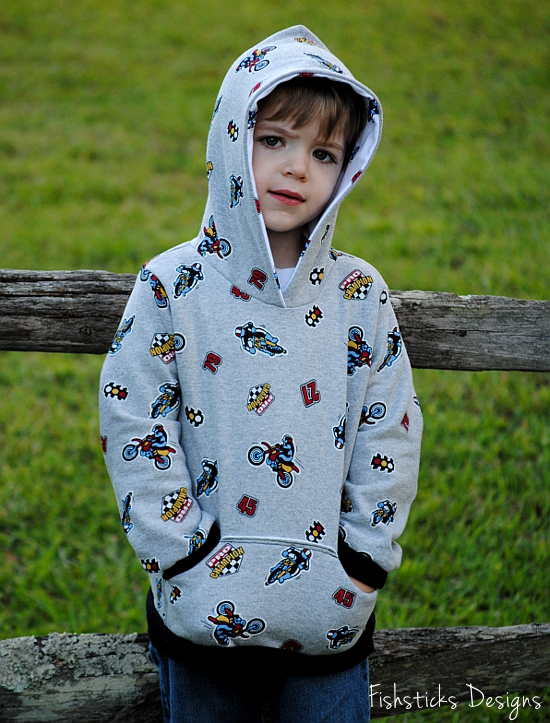 Other good fabric choices for outerwear include cotton quilting fabrics — the reversible cars/houndstooth jacket above is sewn with two layers of quilters cotton, flannel — flannel is a great choice for lining a double-layer jacket, and polyester fleece is another good choice — it comes in tons of colors and prints!
I think many of us look at outerwear as being more difficult or more complicated to sew than other clothing, but it’s really not! There are sometimes a few more steps involved, but I think the extra time is worth the end result. Choose fabrics and a pattern that you love, and go for it. Chances are, you’ll be smiling all season, every time you see your hard work put to use!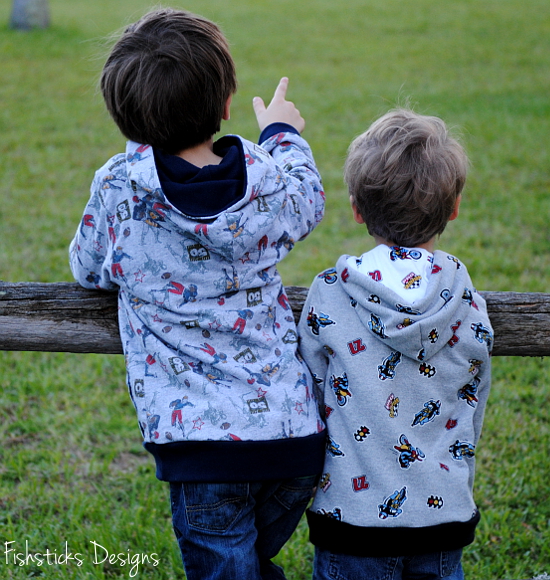
Pattern Extra: Add a Zippered Pocket to the Sand & Sidewalk Boardshorts
 Because you asked, and it makes me happy to make you happy … here are the instructions for incorporating a zippered pocket into the side of the Sand & Sidewalk Boardshorts. Those of us who live in the deep south or in the southern hemisphere will be using this tutorial right away — I promise that I’ll remind those of you up north about it in the spring! In case you’re not familiar with the Sand & Sidewalk Boardshorts and Skate Pants pattern, a front knee panel is incorporated into both the shorts and the pants. This tutorial is only for the shorts. (The curve at the bottom of the knee panel on the pants would make this more difficult.) This tutorial is a little long but the most complicated step is drawing in the back portion of the wrap-around knee panel, and that’s not really hard at all! I’ll walk you through each step, and if you have a question, just ask!
Start by printing and assembling your pattern.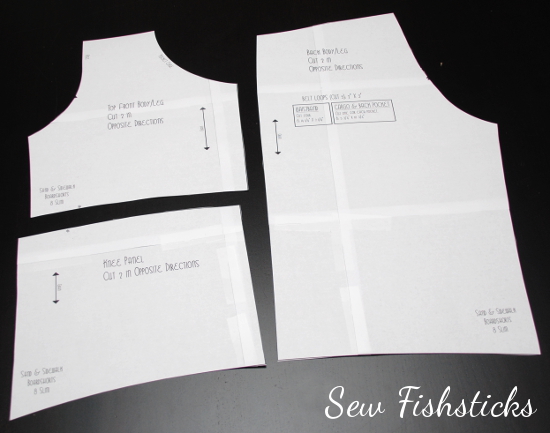 Flip the knee panel pattern piece over onto the bottom edge of the back pattern piece so that their right sides are facing. Line the bottom edges up on the right hand side as you’re facing the pattern pieces. Mark where the top edge of the knee panel hits on the right hand side. (Doing this will assure that the sides of your knee panel will line up properly.)
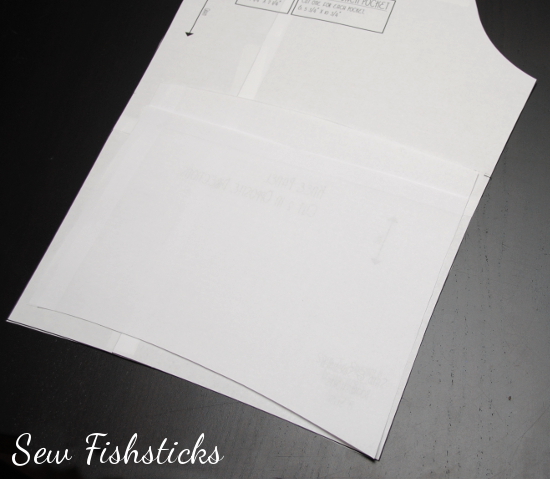 Flip the knee panel back over and place the right hand edge of it so that it’s overlapping the left side of the back pattern piece by 1″ with the bottom edges aligned, as shown. Tape this in place.
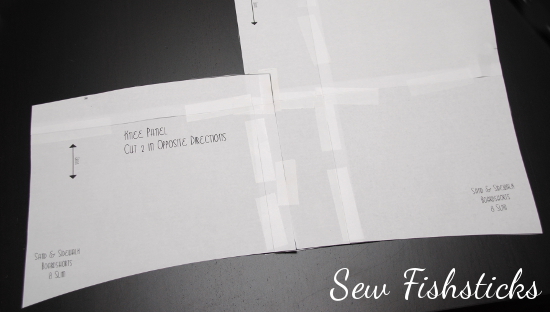 Now comes the slightly tricky part. You’re going to have to draw in a slight, gentle curve from the overlapped edge to the far side of your back pattern piece where you made that mark before. (I’ve found that it’s easier to get a nice curve when I cut than when I’m drawing, so if your curve isn’t perfect now, you may be able to “fix it” when you cut in a minute.) You can see here that I drew the curve starting at the very edge of the back piece, rather than starting at the edge of the overlapped knee panel. This will give you a smooth finish on the top of your pocket.
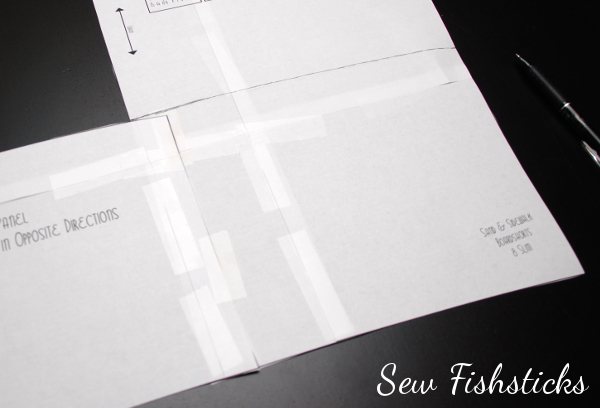 Still with me? Now cut along that curve that you just drew.
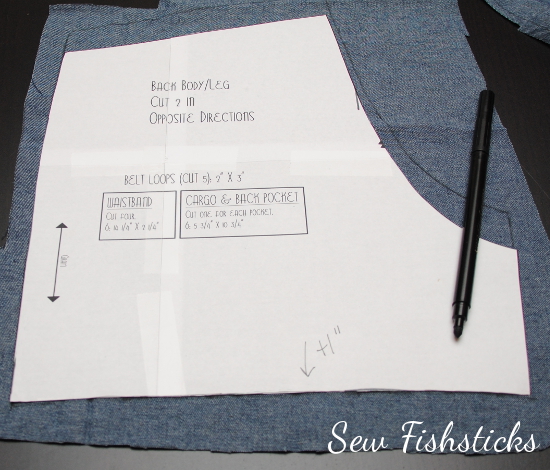
 Before you move on, make a notation on the top back pattern piece that you just cut away that says, “Add 1 inch,” with an arrow pointing to the bottom edge. (You’ll need to add an inch when you trace this later to accommodate the seam allowance.)
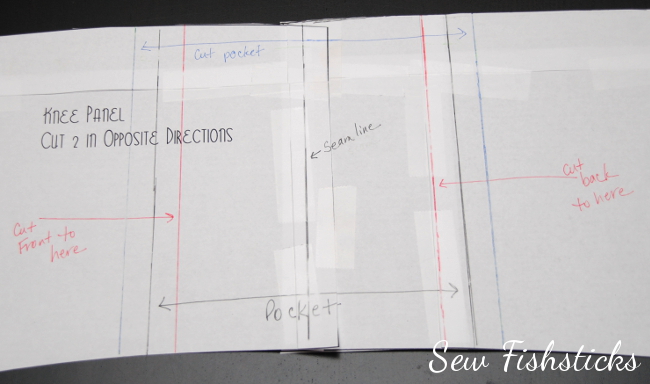
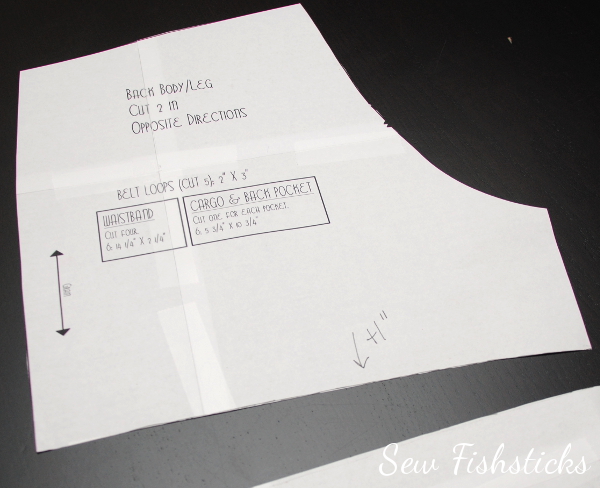 Deep breath. When you finish this, you’ll be ready to modify all sorts of patterns to do fun things like this! Okay, now we need to draw in the pocket. On the size 5 that I did for Charlie, I made the pocket 5″ wide. On the size 7/8 that I sewed for Jamie, I made the pocket 6″ wide. You sort of have to decide what size works best for the size shorts that you’re sewing. (And, you’ll need a zipper slightly longer than the length you decide. Any length will work, as long as it’s at least a bit longer than the width of the pocket.) The center of your wrap-around panel is going to be at the center of that overlap. Draw a line there, then draw straight lines 1/2 the distance of the width of your pocket on each side. In this case, since my pocket is going to be 6″ wide, my lines are both 3″ out from the center. (The center line says, “Seam line”, on my copy because that is where the seam on the upper part of the shorts will line up.)
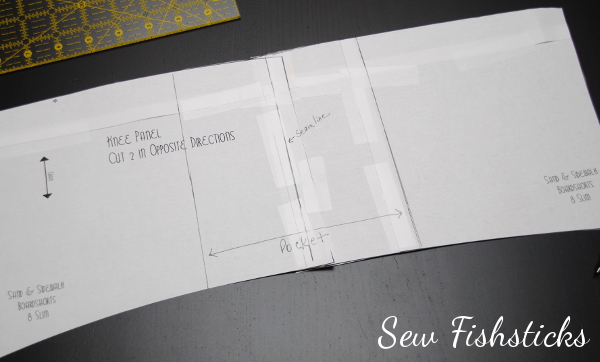 The lines that you just drew in will end up being the finished seam lines, but you need seam allowances drawn in before you can cut out your fabric. If you have different color pens on hand, some color-coding may help keep things clear in this step. I generally use a 1/2″ seam allowance on all of my patterns, so that’s what I’m going with here. To get the width that I’ll cut the pocket, I drew new lines 1/2″ on the outside of the original lines. Those are the blue lines in the following two pictures. For the front and back pieces of my wrap-around panel, I added lines 1/2″ to the inside of the pocket seam lines. Those are the red lines that you see here. I like to draw in arrows and note which part is cut to which line when I draw in these seam allowances. Otherwise, it’s really easy to get mixed up!
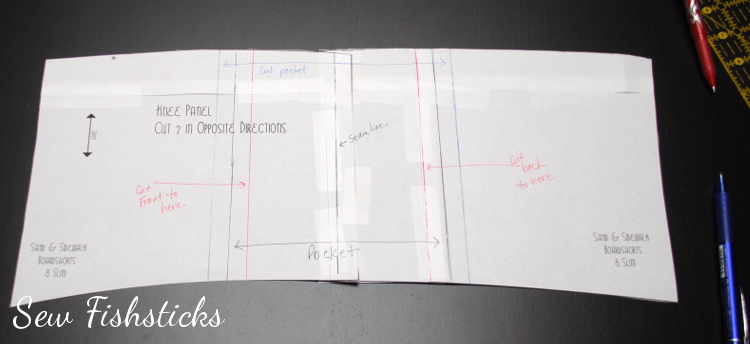
 You’re ready to cut out your fabric pieces! What I usually do is place the pattern on the fabric, trace the outside of the pattern up to the lines that I’ve drawn in …
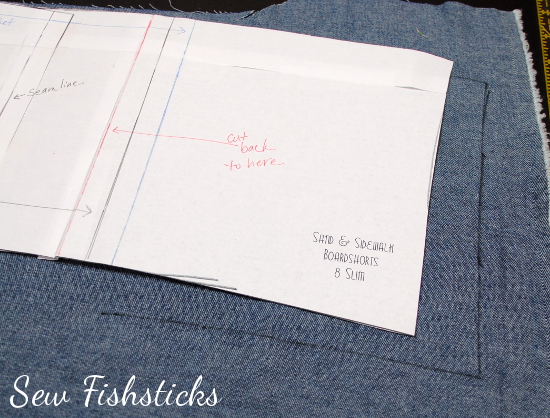 Then, I either fold the pattern back on the line, or I use a straight-edge to draw in the straight line.
 Be sure that you’re tracing your pattern pieces to the correct seam allowance line. You’ll need four pocket pieces (two, then two reversed), and you’ll need two each of the front and back pieces (one, then one reversed). Label your pieces when you trace them!!! I put a letter “B” for the back, a letter “F” for the front and a letter “P” for the pocket using a washable marker at the inside edge. (If you don’t label these, you may end up with a mess.)
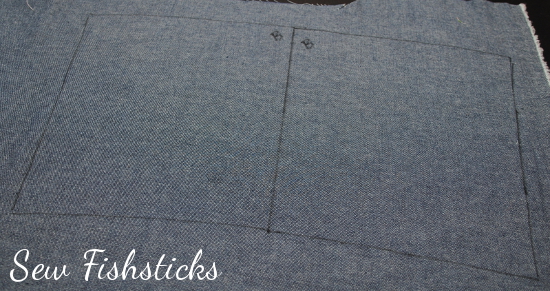 Now that your wrap-around/pocket pieces are all cut out, you’ll need to cut out the rest of your pieces. When you cut out the upper back, you’ll need to add 1″ for the seam allowance. (Since you didn’t add 1/2″ to the back knee panel that you created, you’re adding the seam allowance for it and the seam allowance for the back at the same time. Just trust me, that you need an inch. You do not need to add seam allowance to the front piece, since it has the seam allowance already added in.)
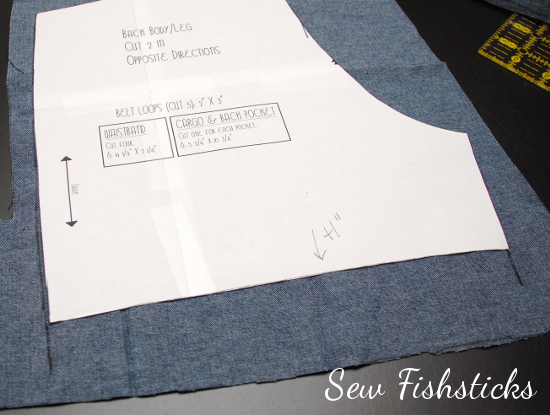
 Time to sew in the zipper! Are you ready? Lay out the pattern pieces for the wrap-around on one leg, and arrange them in order. This photo shows the pieces for the left leg. The front piece is all the way to your left, the two pocket pieces are in the middle (both with right sides facing up) and the back piece all the way to your right. You want your zipper to close with the pull towards the front of the pants.
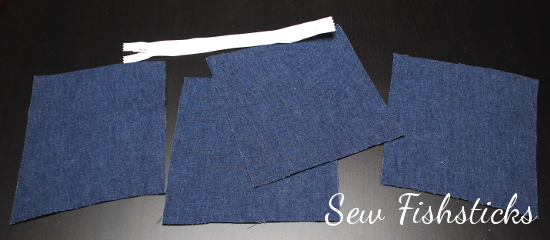 Set everything to the side except for the front pocket piece. Turn your zipper face down, as shown, on the top edge of this piece and line up the edges. Pin the zipper so that the pin heads will be facing you as you guide the zipper through your machine. That will allow you to remove them as you get to them.
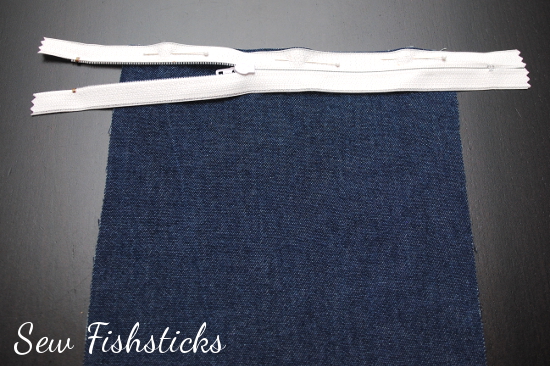 Put the zipper foot on your machine and adjust the needle so that it falls 1/4″ from the zipper’s outside edge. (Remember this setting because when you sew the other side of the zipper, it will be hidden between two layers of fabric, and you want both sides to be even.) Stitch the zipper in. When you get to zipper pull, backstitch, remove the fabric from the machine, pull the zipper pull past and start stitching again where you left off.
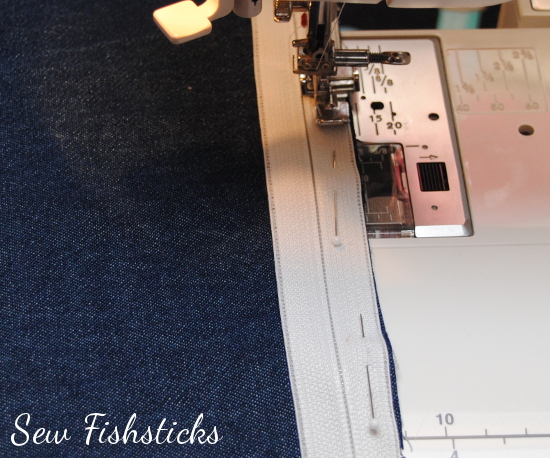 Once you have this side of the zipper stitched in, I like to flip over to the back and trim away some of the fabric so that those raw edges will end up sewn neatly under the zipper when it’s topstitched. (If you don’t do this, those edges may fray with washing and end up getting caught in the zipper teeth. You won’t have to do this on the other side of the zipper since it will be sewn between two layers of fabric.)
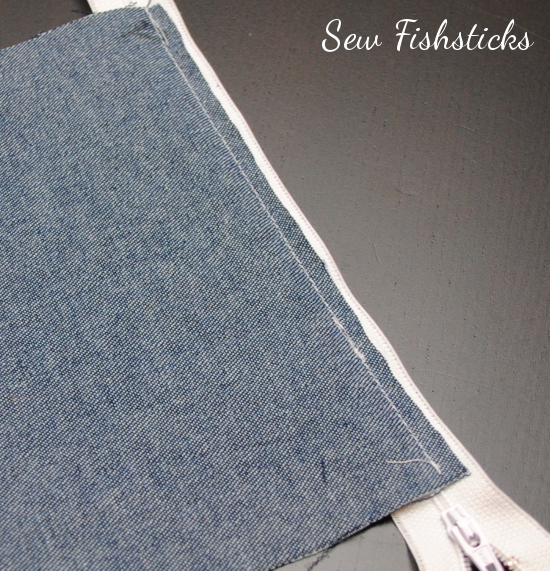
Flip the pocket down away from the zipper and press it lightly. (Be careful because plastic zippers can melt!) Topstitch 1/4″ from the seam.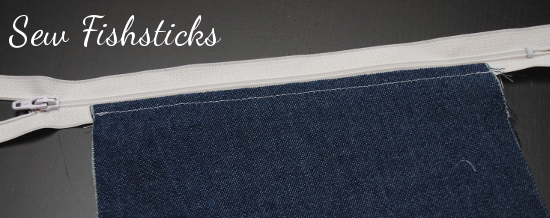 Pull the zipper pull over so that it’s above the pocket and cut away the extra zipper.
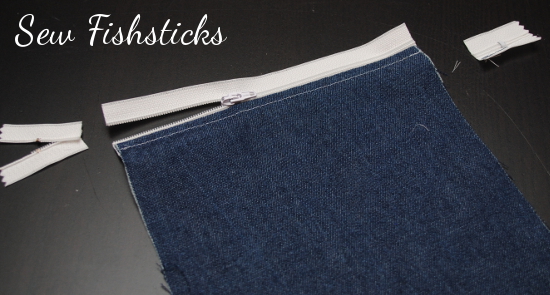 Place the second pocket piece behind the front. Line up the top edge of this piece with the top edge of the zipper and pin. Flip the front piece up at the bottom edge and trim away enough of the bottom pocket piece so that it falls 1/2″ shorter than the front piece. (This will reduce the bulk when you hem the shorts.)
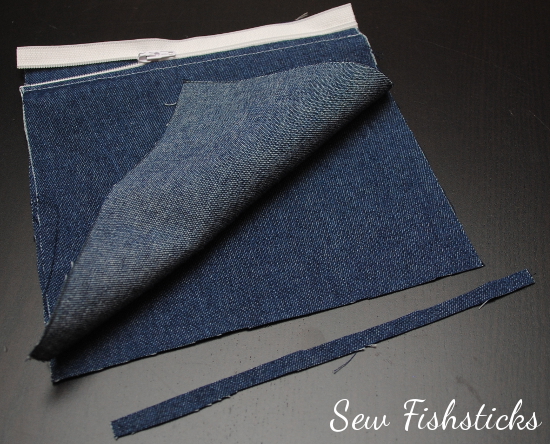 Sew the back wrap-around panel piece to the back side of the pocket. Serge or overcast your seam allowance to prevent fraying. Before sewing the front of the wrap-around to the pocket, pull the zipper pull back and pin the zipper teeth close together.
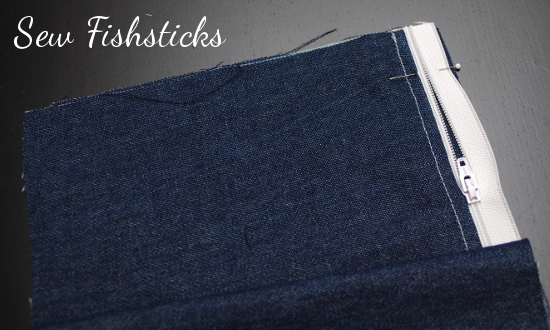 Sew the front of the wrap-around piece to the pocket. Serge or overcast the seam allowances.
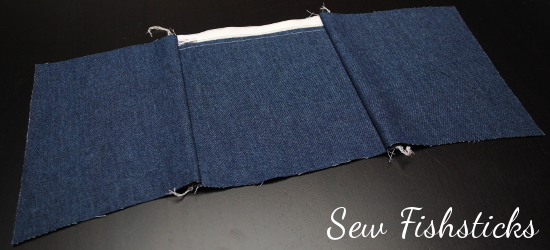 Pull out that twin needle and topstitch down both sides of the zipper. (Or just sew two rows of side-by-side topstitching.)
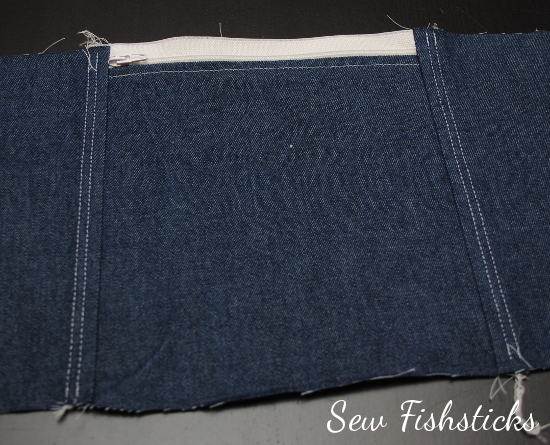 If you haven’t already assembling the top portion of this leg, do so now. (This top portion looks slightly different than the pattern because it’s the modified version that I did for Project Run & Play.)
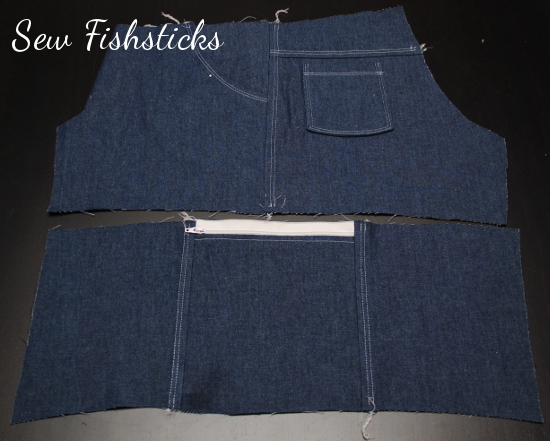 When you pin the wrap-around panel to the bottom edge of the top portion of the leg, pin the top edge of the zipper in the same way that you pinned the bottom edge of the zipper earlier. This time the zipper will be sandwiched between two layers of fabric, so be careful to line up the three edges evenly. Sew the pieces together using your zipper foot with the same settings you used for the bottom of the zipper.
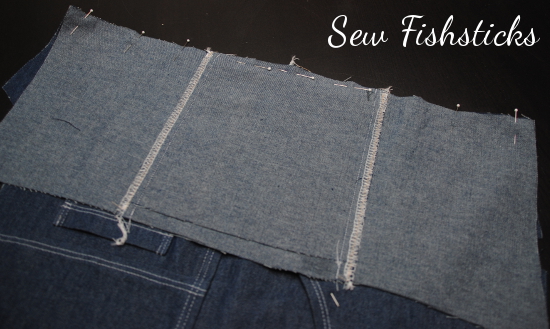 When you overcast or serge this seam allowance, you’ll need to open the zipper, go part-way, stop, pull the zipper past and start again where you left off.
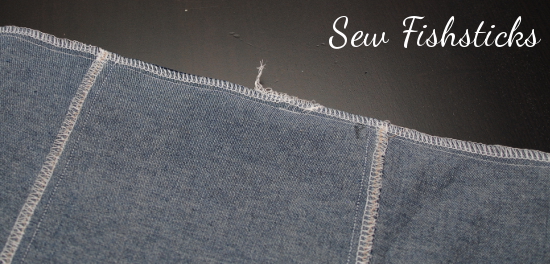 Topstitch above the seam using a twin needle or stitching two rows of side-by-side stitching.
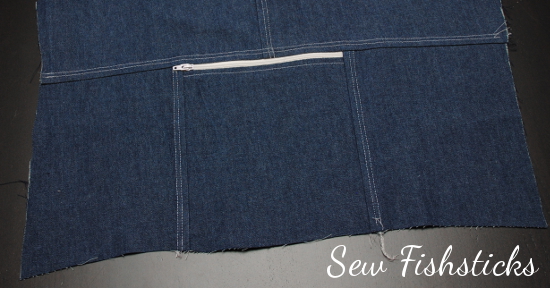 From here, you’ll do the other leg, then follow the instructions in the pattern to complete the shorts. Be careful, though, when you line up the inseams the make sure that the wrap-around seams are lined up as closely as possible.
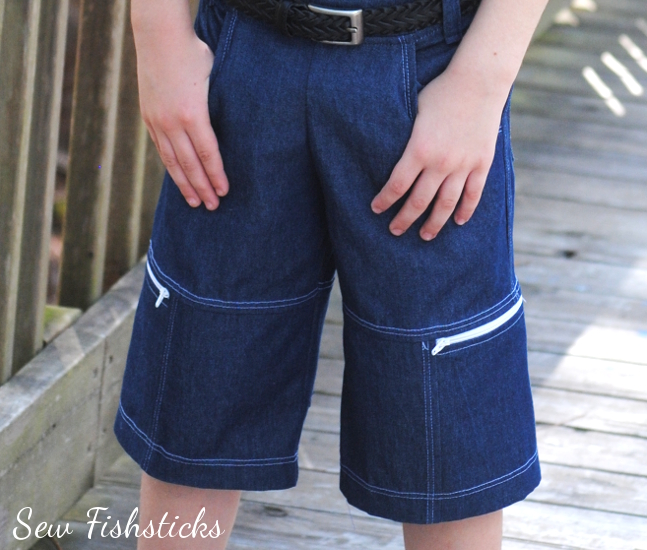 That wasn’t too hard, was it? A few little tips/notes: first, I didn’t put this together in a PDF, but my blog has Print-friendly button at the bottom of each post, that will make it easier for you to print if you prefer. Second, because you’re basically drawing in your pattern and you’re not a computer, you may get edges that don’t quite line up. As long as they’re small pieces, just trim them so that they do line up and move on. Those little tiny misalignments aren’t going to affect the fit of the final piece.
Go sew some cool shorts! And, then share them with us! We would love to see them in the Fishsticks Sewing Group or on the Fishsticks Fan Page or tag me on Instagram!


