Sewing/Crafts
Project Run & Play, RBD Chevrons & Exciting Knit News!
![]() Are you following along at Project Run & Play? Did you see that there’s a Fishsticks Designs giveaway that starts today? I’m so excited to be sponsoring this All-Star Season! It’s been so much fun already! This is Riley Blake Chevron Week at PR&P, and there are some seriously amazing designs already popping up in the sew-along. You can check them out right here: Chevron Week. The All-Star chevron projects will be posted tomorrow!
Are you following along at Project Run & Play? Did you see that there’s a Fishsticks Designs giveaway that starts today? I’m so excited to be sponsoring this All-Star Season! It’s been so much fun already! This is Riley Blake Chevron Week at PR&P, and there are some seriously amazing designs already popping up in the sew-along. You can check them out right here: Chevron Week. The All-Star chevron projects will be posted tomorrow!
Katie’s not here this week to model this sweet little number for you, and she was sick most of the week last week, so my dress form will have to do. These fabrics are all stretch jersey knits from the Riley Blake Sweetest Thing collection that was released last fall. (A little secret? The knit chevrons are coming back . . . and they’re bringing along some new friends!)![]() I’ve been working on a new collection of patterns, four patterns to start, designed specifically for stretch jersey knits. They’ll be featuring the HUGE collection of stretch jerseys that Riley Blake Designs is releasing next month! This little dress is one of the set. All of the patterns will be quick and simple to sew, and they all use various raw edge finishes to showcase that great jersey curl. They’re still about a month off, but I couldn’t resist showing you a little preview since I’ll be incorporating those great chevrons!
I’ve been working on a new collection of patterns, four patterns to start, designed specifically for stretch jersey knits. They’ll be featuring the HUGE collection of stretch jerseys that Riley Blake Designs is releasing next month! This little dress is one of the set. All of the patterns will be quick and simple to sew, and they all use various raw edge finishes to showcase that great jersey curl. They’re still about a month off, but I couldn’t resist showing you a little preview since I’ll be incorporating those great chevrons!![]()
Since we’re already chatting about the new RBD knits, have you seen them yet? You can peek at all of them right here: Riley Blake Knits – Coming Soon! There are solids, dots, and CHEVRONS in over a dozen colors!
![]()
My favorite, though, is the stripes! Stripes in not just one, but two sizes! 18 in all! I love knit stripes!
Did I say this was a HUGE collection? I feel like I’m in knit heaven!
Bit of Whimsy Fritter Frogs for Easter
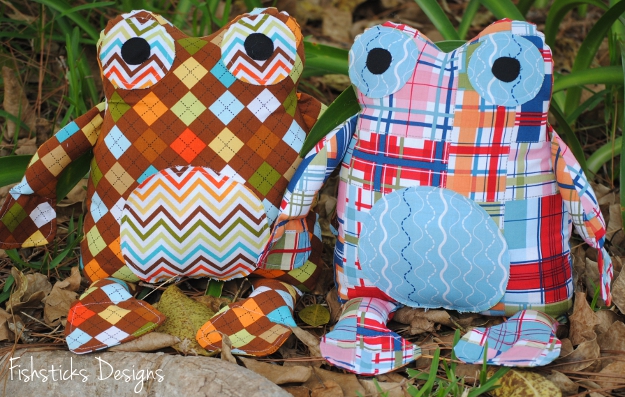 Meet Freddie and Mike (the Knight), our latest handmade cuddly family members! I stitched these guys up for Charlie and Jamie using the Bit of Whimsy Fritter Frog pattern. I chose the larger “daddy” version, and they’re the perfect size for cuddling or using as a pillow. (I’m thinking they’ll be great to have in the car for our trip next month!)
Isn’t it odd that I don’t really care for store-bought stuffed toys at all, but I LOVE creating handmade stuffed critters for my littles?  Charlie and Jamie named them. Freddie is Jamie’s frog. He likes alliteration almost as much as his mom. Mike (the Knight) is Charlie’s. He just likes Mike the Knight. (Poor Charlie is actually curled up on the couch recovering from a nasty stomach bug and watching Mike the Knight right now.)
 These two were the fastest and easiest stuffies that I’ve ever sewn. I just pinned the eyes and tummy on and stitched them down about 1/4″ from the edges using a short stitch length and leaving the edges raw. Because I used the larger “daddy” frog pattern, they’re big, and I was able to stitch the legs to the inside like the arms, leaving an opening between the legs for stuffing. Then, instead of stitching across the bottom, I closed the opening between the legs with a ladder stitch.
I actually have this pattern out on my work table so that I can cut out a few more for this month’s Hopeful Threads Fluff for Foster Care project! I just need more stuffing!

Easter Pictures!
 I hope you were all blessed with a wonderful Easter Sunday! We enjoyed an amazing worship service, yummy food, great company and beautiful weather! I was up late two nights in a row last week sewing for our two little guys and our granddaughter. The boys ended up with khaki shorts that I ran out and grabbed at Target on Saturday night, and I was still sewing buttons on Charlie’s shirt about fifteen minutes before church started on Sunday morning! (We’re used-car shopping right now, and it takes so much time! We were out nearly all day on Saturday after spending hours of time researching for days ahead of time, and we still haven’t purchased anything. I’d really like the perfect van to just appear in our driveway so we can be done.)
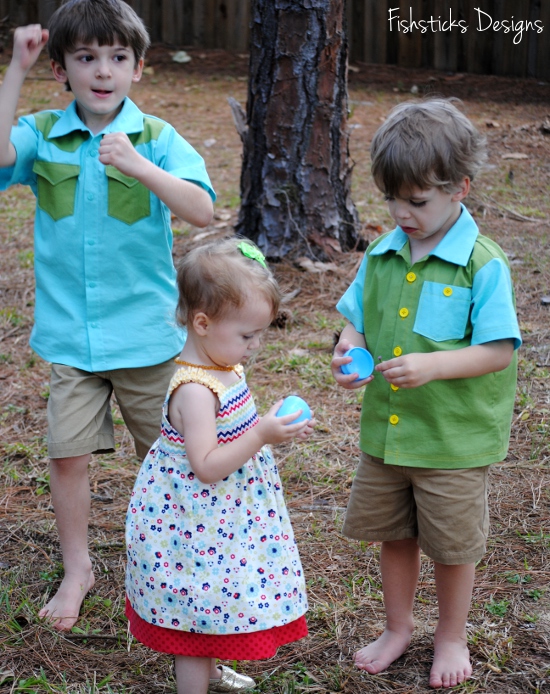
We went to the early service on Sunday morning, so we were all a little wrinkled by the time we got out to hunt eggs in the afternoon. You’ll just have to overlook the wrinkles. We also had no baskets, so the kids hunted with my reusable grocery bags! Katie’s dress is the Reversible Double-Layer Katie J. Jumper in Riley Blake Tone-on-Tone Dots and coordinates from Dress-up Days.
 Charlie got an Everyday Camp Shirt made with Timeless Treasures’ Soho Solids and yellow buttons! (Hmmm . . . how did I miss that dirty face? Just pretend that I washed it, and you can’t see that chocolate.)
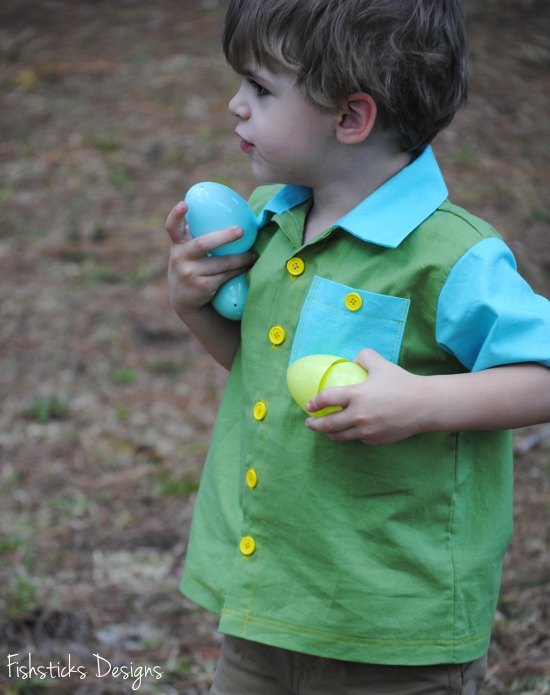 I’ll be back to share a little more about Charlie’s shirt later this week. It’s Button Week at Sew-vivor!
 Jamie’s shirt is a prototype of a new design that I’m working on. It’s a fun retro Western-style shirt.
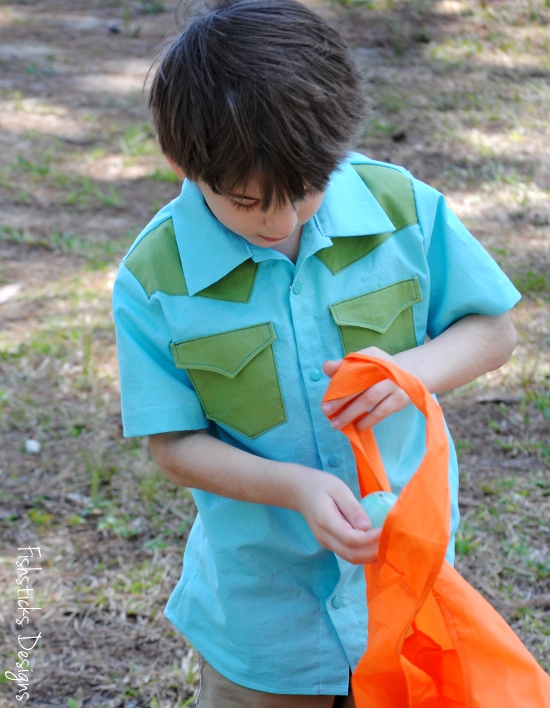 Those pocket flaps were supposed to get snaps, too, but church was starting without us! I love the shirt-tail hem on this one.
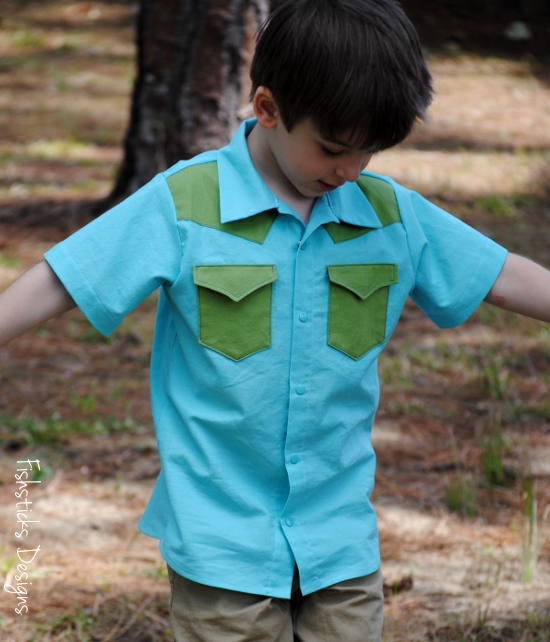 Ray and Samantha hid the eggs for us, including a few that they thought would be too high for the little ones to get to on their own.
 Bet you never knew that palm trees were made for climbing! (I certainly didn’t!)
 I attempted to get some pictures of the three little ones together.
 I also tried to get some pictures of Charlie and Jamie together.
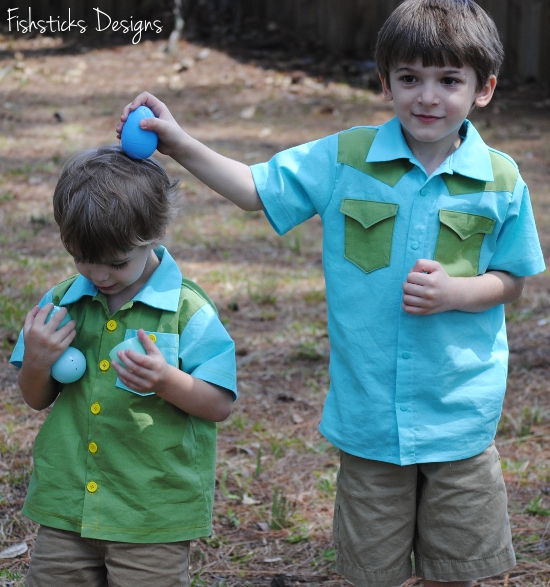 Maybe next year? I did get one really cute one of Jamie and Katie!
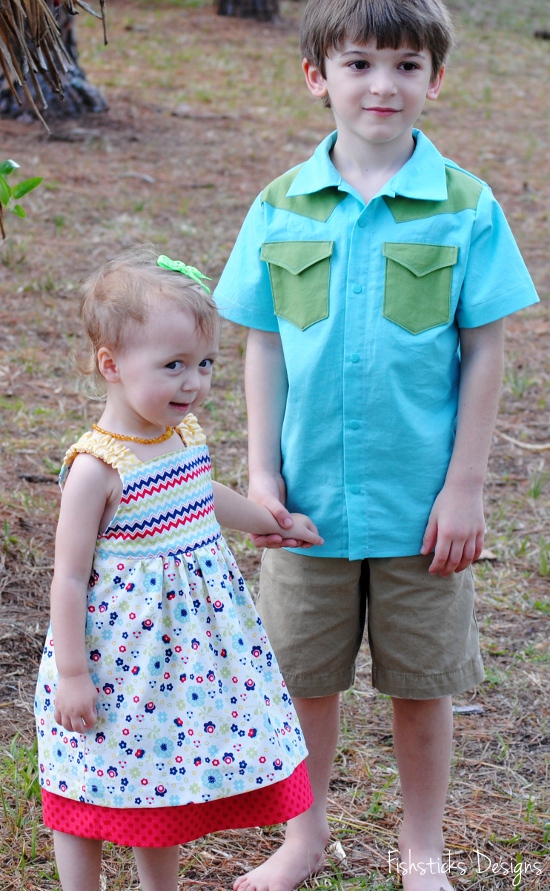 I’ll leave you with that! Happy Easter . . . a couple days late!
Project Run & Play: Inspired by a Little Boy’s Art & Imagination
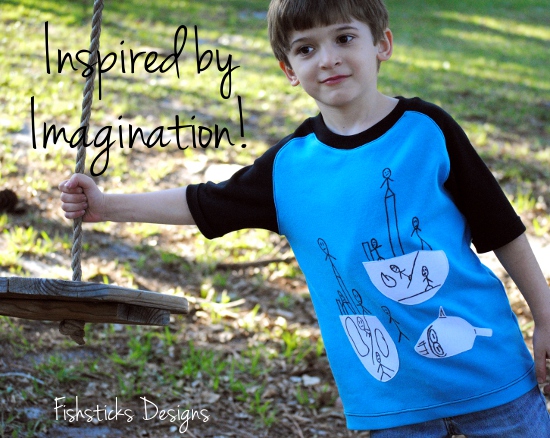 The Project Run & Play All-Star Season has begun! Are you sewing along? The first theme is Inspired by Art. In keeping with my goal to sew everyday wearables for my little ones, Jamie got a new Patrick Curved Raglan inspired by his own artwork!
 This pirate ship drawing is one that Jamie did a few months ago. I saw it hanging up when I was looking for ideas for this week, and asked him what he thought about putting it on a shirt. He couldn’t have been more excited! (Jamie doesn’t tend to get overly excited about the clothing that I sew for him anymore, so I was really excited to see what he would think when I was done!)
 I started by scanning and enlarging the picture. I printed the ships and the shark on separate pages and cut them out to make patterns for the appliques. To reproduce the rest of the drawings, I drew them freehand on to the fabric using a Frixion pen. Because Frixion ink disappears when you iron it, I was able to correct any mistakes before tracing the final drawings with a Crayola fabric marker. I did all the applique and the drawings on the front of the shirt before sewing the pieces together.
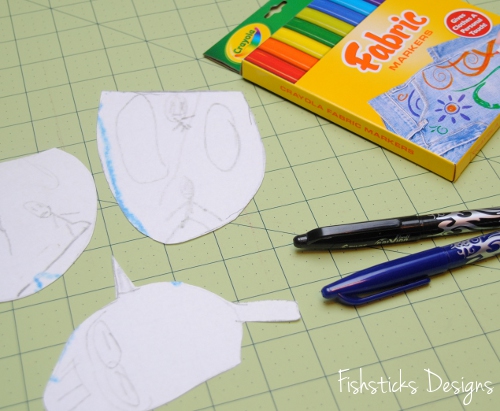 The end result?
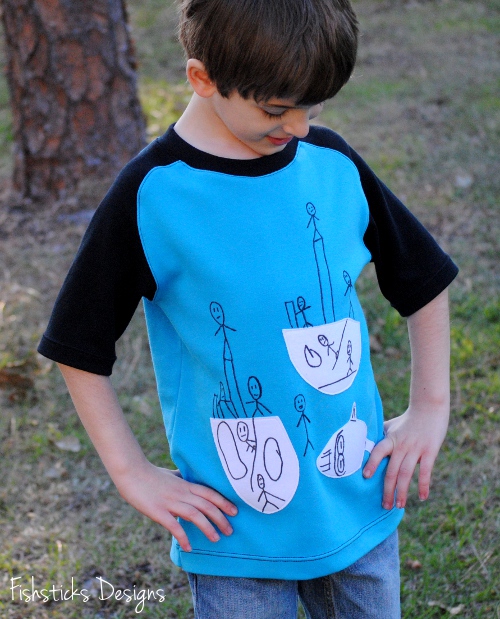 I think he likes it!
 It is his artwork! How could he not like it, right?
 Here’s Jamie’s rundown of all the parts of his artwork:
 This was so much fun to create! And, Jamie says that it’s “the coolest shirt ever”! Woo-hoo! A win for mom and for Jamie!
March Riley Blake Mystery Quilt Block – Simplicity
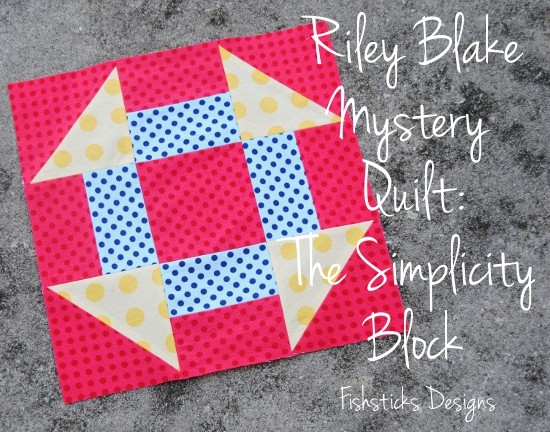 I’m moving right along with the blocks in the Riley Blake Mystery Quilt! I don’t have a whole lot to share about this month’s “Simplicity” block because it really was simple. It looks far more complicated than it is!
You start with four half-square triangles. (If you don’t want to sew these one at a time, take a look around for short-cut tutorials. Here are two from the Sew Mama Sew blog: 8-at-a-Time HSTs and 4-at-a-Time HSTs.) Add four squares made from two equal-sized rectangles. (I sewed these all at once in a strip. Since I wanted 4 – 4 1/2″ squares, I cut a strip from each fabric 2 1/2″ x 18″. I stitched the two strips together, pressed the seam allowances and cut the strip into 4 1/2″ squares. If you use this method, be sure that you’re using a short stitch length so that your seams don’t pull apart when you start piecing the blocks together.)
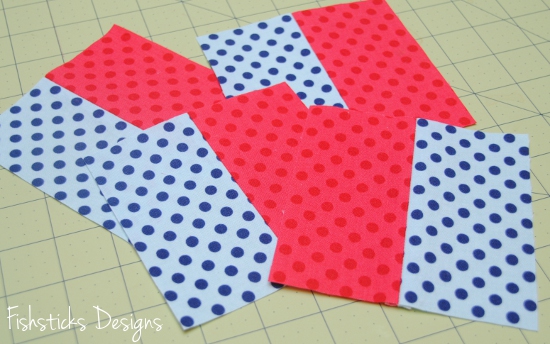 Cut a center block.
 Follow the instructions for piecing your blocks together, and you’re done!
  Here are January, February and March all together! Once I finished the first two blocks, I decided that I needed some more color so I added in some blue, still sticking with the RB Tone-on-Tone dots. I think I like it. What do you think? It seems a little off now, but once I add the other blocks with the blue mixed in, I think it will all balance out.
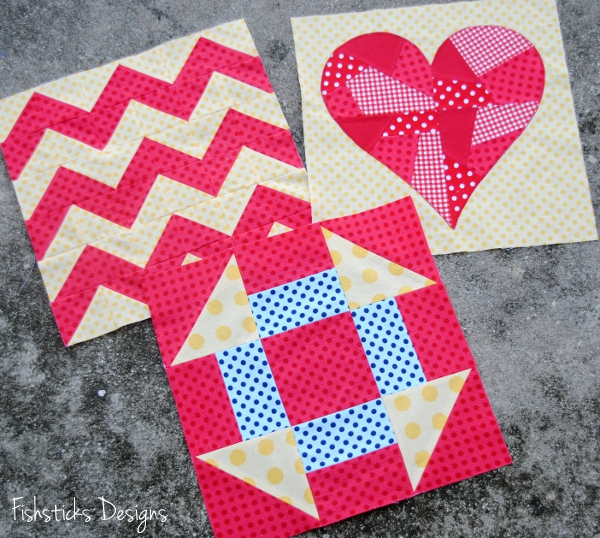
Samantha’s Apron!
 Samantha loves to help in the kitchen. Actually, she and Ray do a lot of the cooking around here together! She asked for an apron for her birthday this year. Her birthday was not quite two months ago. In my defense, though, I did take her fabric shopping on her birthday, and I took her out for lunch, coffee and book-shopping.
 She found an apron that she liked in the book, A is for Apron, by Nathalie Mornu.
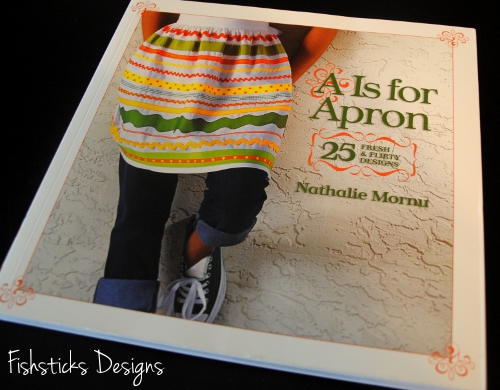 This is one of those books, though, that requires you to enlarge the patterns by 400%. I’m not totally sure how to do that. (I would love suggestions if anyone has done it!) Rather than try to enlarge the pattern, I just redrafted it, making a few little changes to make it exactly what Samantha wanted.
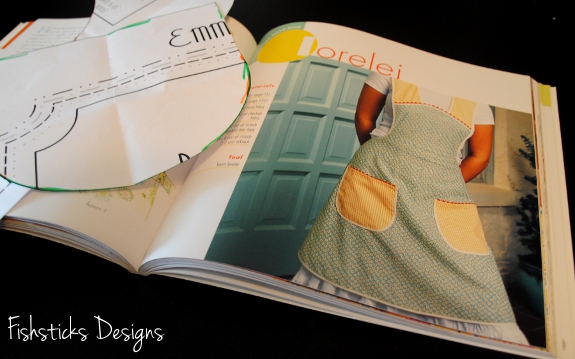 Samantha agreed to model the apron for me this morning. Can I just say how nice it is to photograph a cooperative model? She did roll her eyes a little when I handed her one of my vintage Pyrex bowls and a wooden spoon and suggested she pretend to bake cookies, but she went along with me.
 These fabrics are the ones that Samantha chose on our birthday fabric shopping trip. She loves aqua and red, and the vintage-style of the apron works beautifully with the fabrics.
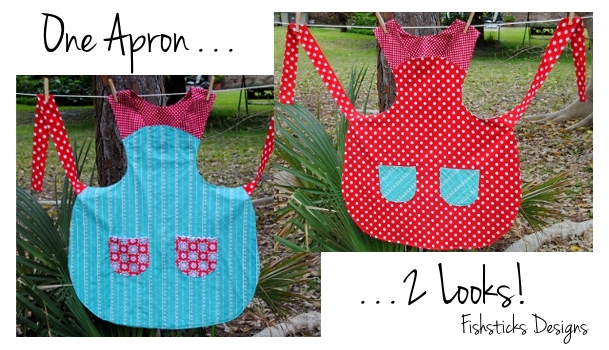
 The original apron from the book uses bias tape. I do not do bias tape. (It’s just evil . . . mean and evil.) So, I made the apron reversible! So much easier than sewing bias tape all the way around, and you get two looks in one!
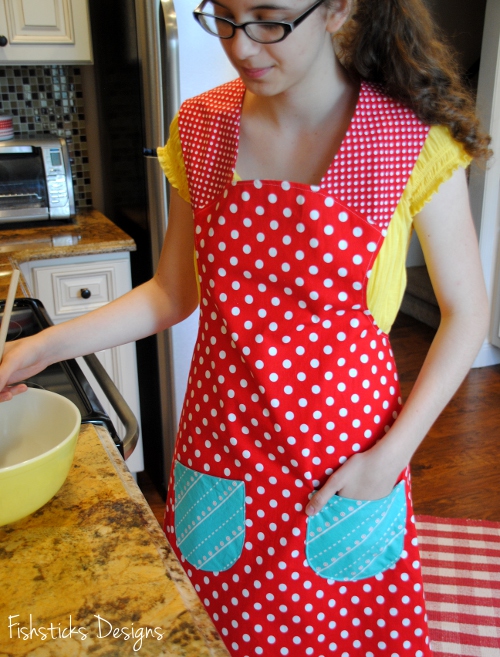 I love this pull-over collar. LOVE it! It’s so much less fussy than ties or D-rings.
 The rick-rack on these pockets was the first rick-rack that I ever sewed! I actually worked on these pockets at the Sewing Soiree a few weeks ago, and I secretly threw one of the first pockets that I cut out into the trash can after ripping it apart and sewing it back together so many times that it was going to fall apart. I just couldn’t seem to visualize the way to baste the rick-rack so that when I sewed the pockets and turned them, it would look nice. As you can see, I did finally get it! Yay!
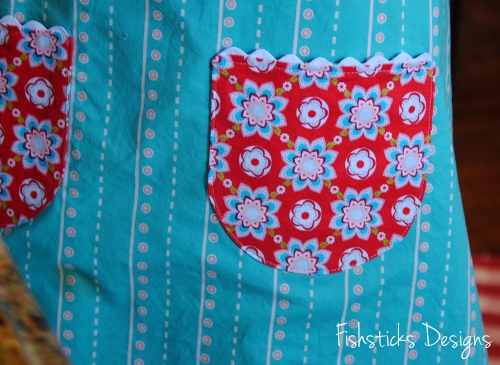 Samantha loves her apron! And she’s thrilled that I’ll actually allow her to use it now that I’ve photographed and blogged it. (Anyone else tell family members, “Here I sewed this for you, but you can’t have it until I get a chance to take pictures for my blog!”)
Hmmm . . . How long do you bake fake cookies? (I love this girl!)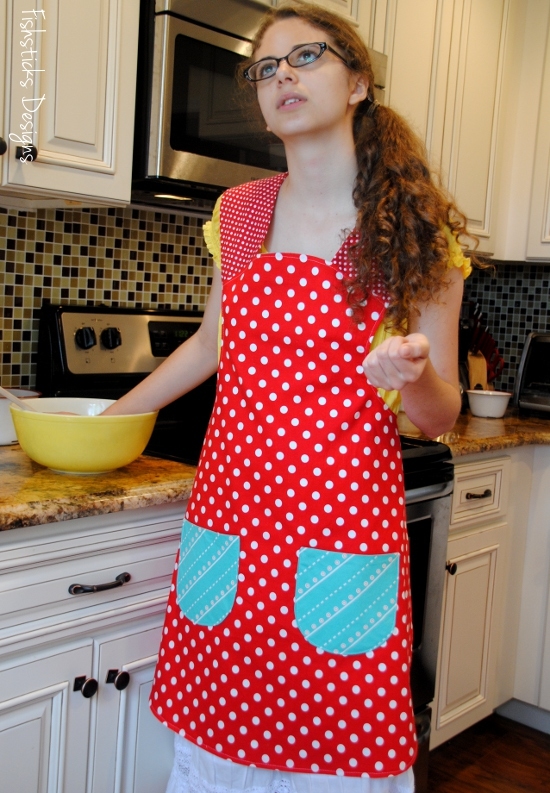
Sew-vivor Sew-along: Emerald
 Challenge #1 for Season 2 of Sew-vivor was to sew something using the 2013 color of the year: Emerald, and I’m sewing along with the finalists! (I love enjoying the motivation without the stress of the competition.) I’m currently planning summer wardrobes for my two little guys so I focused on making some everyday wearables for each of them. It was so nice that the Emerald theme fell on this week since the Celebration of Life for my friend, Sheri, was held this past weekend. Sheri loved sewing and the color green, and since I wasn’t able to attend the service in Dallas, I enjoyed honoring her memory by sewing green tops for my little guys (and sneaking in the turtles that she loved, too)!
  We headed out to the zoo yesterday after church to enjoy the beautiful weather. I had high hopes of getting good pictures of the boys in their shirts, but the sun was high in the sky, and neither one of them was in the mood for being cooperative. I did get a few pictures, though. (I loved that yesterday was St. Patrick’s Day, so the whole zoo was filled with green! It made me smile to think that people were celebrating Sheri’s memory along with us without even knowing!)
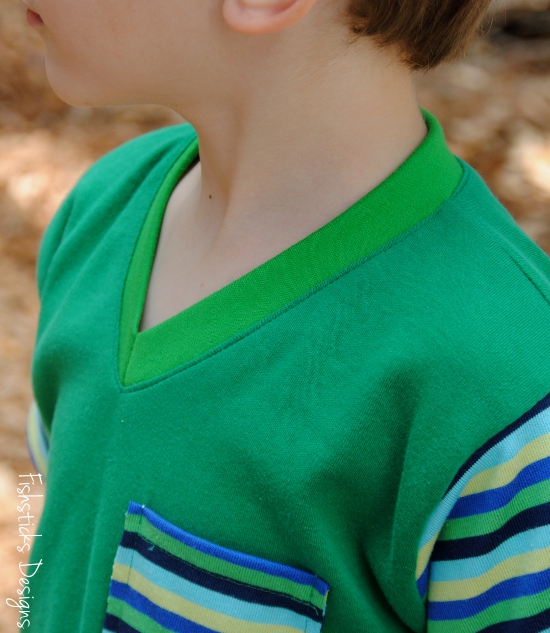 These v-neck pocket tees are my first drafts of a new pattern, so they need a little tweaking, but I’m so excited about having another option for quick and easy knit tops for my little guys.
 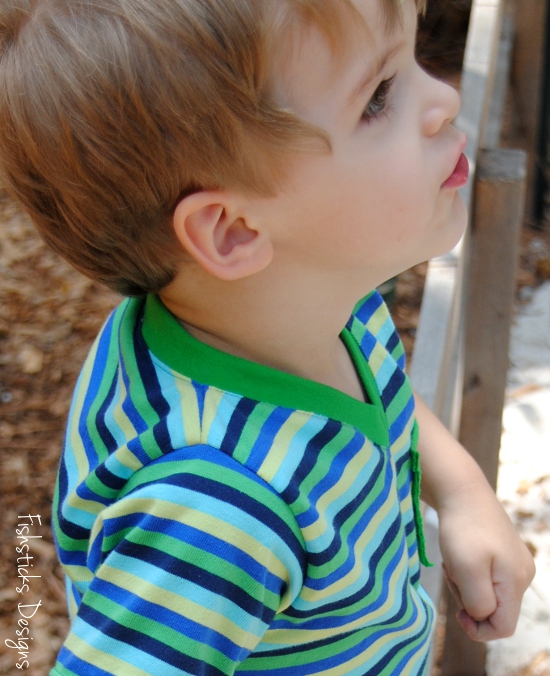 The raw edge pocket is so simple to sew, and that little bit of curl that you get on the edges adds some casual fun! (The curl gets better with washing, especially if you’re using jersey.)
 Those pockets are also great for storing any little treasures that you find along your path. (Charlie’s pocket was full of crushed, dried leaves when we came home last night.)
 I couldn’t resist finishing these tees off with one more little reminder of Sheri, these sweet “Mama Made” turtle tags! I need to get back in the habit of sewing tags onto my handmades. They really do finish them off nicely!
 Anyone else following along or sewing along with Sew-vivor? Did you sew anything green for St. Patrick’s Day?
This Time it Really Was Blood
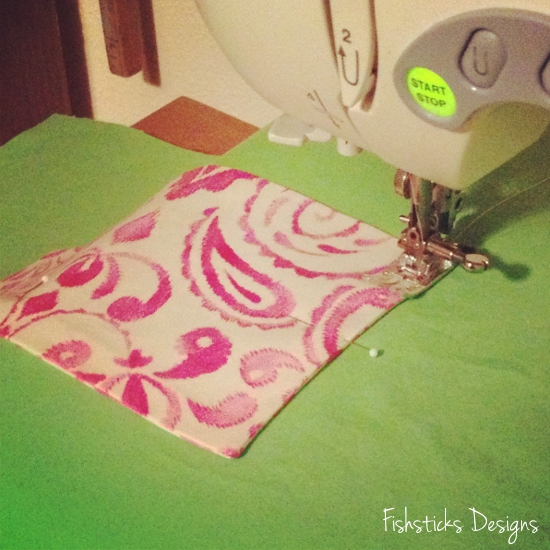
After last week’s nail polish scare, I couldn’t not post about last night’s adventure in parenting. This time there really was blood. (No gory pictures, I promise!) When I arrived home after several hours in the emergency room with my three-year-old daredevil, I found my sewing machine exactly as pictured above. Apparently, that’s exactly where I was in the process of sewing my Covert Robin project when I heard the scream. Oddly enough, the scream came from the six-year-old not from the little guy whose head was gashed open thanks to a pretty hard smack with the wooden tree-swing in our backyard.
He was so cute in his little hospital gown in the ER . . . at least until he got tired of sitting in a tiny room waiting. The staff was amazing, though, so I really can’t complain at all!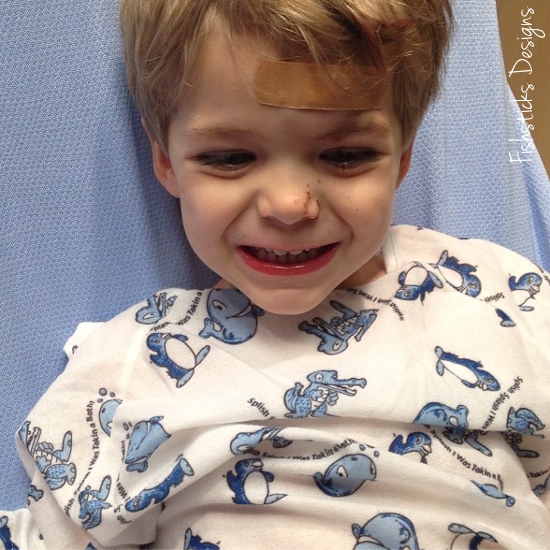 Charlie had a great nurse. He thought it was hilarious when he asked Charlie how old he was, and Charlie responded without skipping a beat, “14.” Really, he thought it was so funny, he brought other people to the room just to make them ask Charlie how old he was. Then he snickered and said, “He’s a little small for his age.”
The funniest part of the whole night for me was when the doctor looked down at Charlie’s big toe as he was finishing up the stitches and asked, “Did you get blood on your toe? Oh, no. That’s nail polish. Did your sister paint your toe?” “Nope. Me did it.” Three stitches and a good night’s sleep, and we’re all good to go. He’s actually hanging out with me right now in our church’s coffee shop while I blog and his older brother and sister attend their homeschool co-op writing class.
 Here’s another little peek at that Covert Robin project. I finished it up this morning! I have a few more little things to add, and it will be off to it’s secret recipient next week. Do you have any sewing plans for the weekend?
Bibs, Bibs, Bibs!
 I cannot possibly thank you enough for sharing your time, your talents and your fabric by sewing so many bibs for last month’s Hopeful Threads Dinner for 2 project!
  Opening your packages has been so much fun! It’s so cool to see the love and care that was put into each bib.
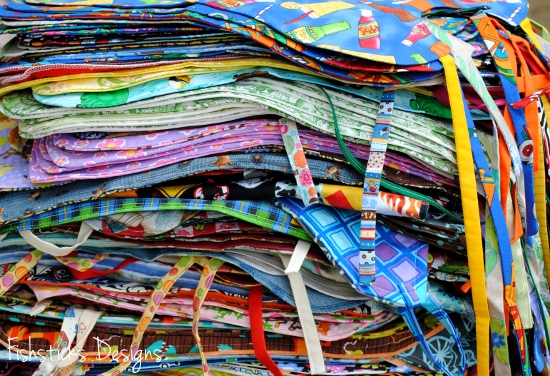 Over 160 bibs are packed in a suitcase, ready to fly off to China where they are going to be a huge blessing to the children at Hidden Treasures Foster Home. (No worries, though, if you haven’t shipped your bibs yet. You can still send them, and we’ll make sure that they make it over on the next trip!)
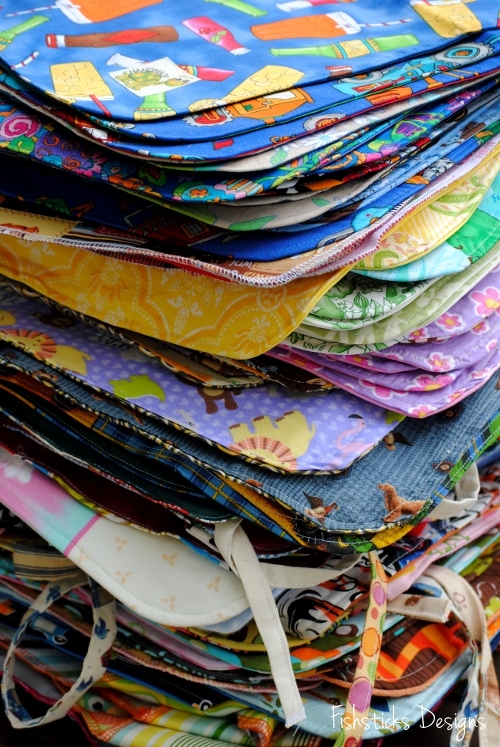 I’m working on a little “Thank-You” gift that I hope to have for you tomorrow!
The Totally Terrific Tie Tutorial
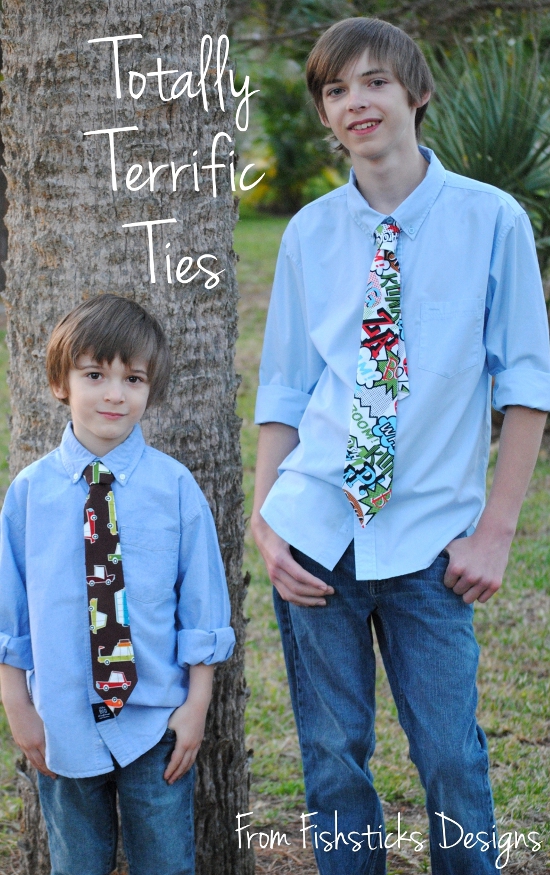 Easter is coming soon! And, Easter tends to bring beautiful handmade dresses for all the pretty little girls. Piles of flowery fabric and stacks of frilly patterns have made their way to sewing rooms everywhere. Boys, on the other hand, are so much harder to sew for when it comes to dress-up clothes! Most of us tend to go for simple and traditional button down shirts and dress pants for our little guys. How about dressing up those plain tops with a fun, personalized, handmade tie . . . or two . . . or a dozen!
 Ties are so fast and easy to sew, even ties that fasten with hook & loop tape (like Velcro) or pull on over the head with elastic!
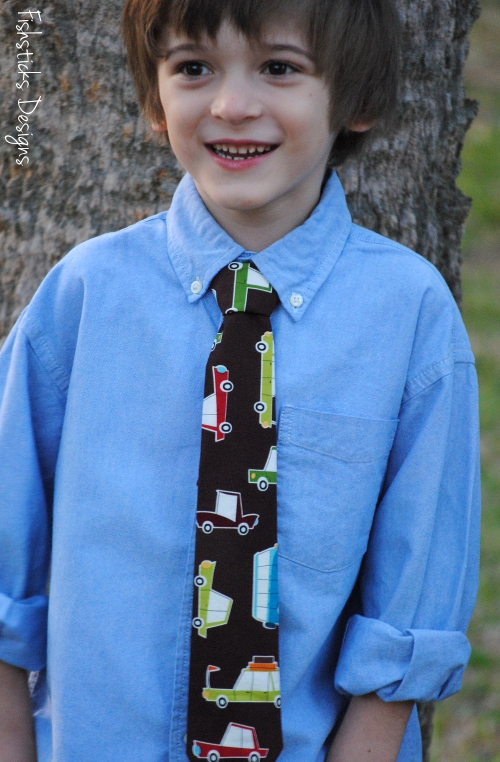 You might even find that your teenage boys will get excited about wearing something mama-made, if it’s a tie made with a great fabric! (I can’t believe how grown-up my Allen looks in this picture! And, for the record, he not only said, “That’s pretty cool,” when he saw the tie, but he also wore it to his writing class this morning.)
 Don’t they look handsome? (Even if they all really need haircuts!)
 I had to try these ties out with my Everyday Camp Shirts! I wasn’t sure at all how they would work since the Camp Shirt pattern is really meant to be worn as a more casual top. (It doesn’t even have a top button!) I think they look adorable, though! What do you think?
 I did find that they look much nicer with the Velcro-type fastener than with the elastic, though. I think that’s because the Camp Shirt has a wider neckline than a traditional button-down dress shirt. How can you resist a sweet little guy in a matching top and tie?!
 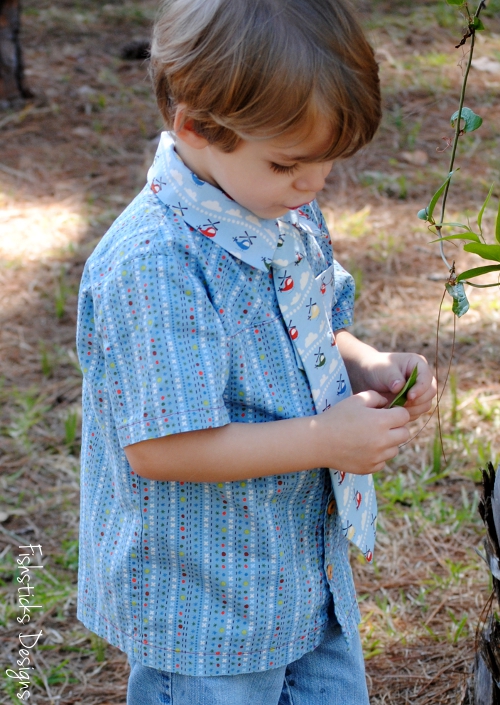 I’d say my little guys approve! (Or maybe big sister, Samantha, was making faces behind my back while I was photographing?)
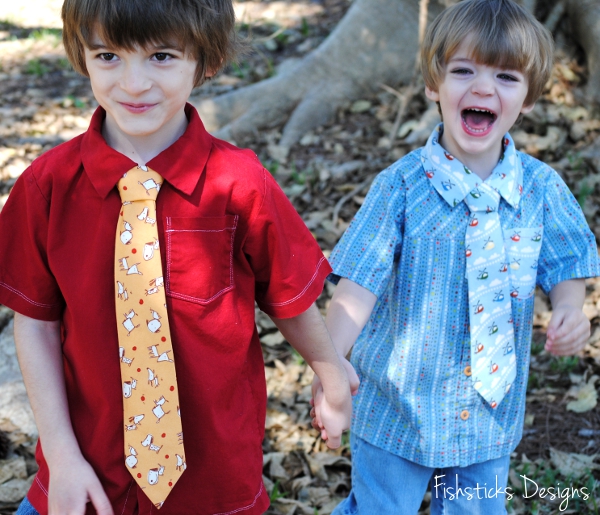 Ready to sew up a batch of ties for all the little boys and young men in your household? I’ve got a tutorial all ready for you! The tutorial includes patterns and instructions for Velcro and Elastic Ties in sizes to fit little ones from 2-4 and from 5-8, and it includes the pattern and instructions for a Traditional Tie for your bigger boys from ages 8 to about 14. You’ll find the tutorial right here: The Totally Terrific Tie Tutorial. If you sew one or two or more, I would love to see!
 Addition/Correction: It’s been brought to my attention that I did not specify the seam allowance on the original tutorial. 1/2″ seam allowance is included. So sorry about that!


