A Valentines Swap for the Kids!
I am so excited that so many of you have so many questions about cloth-diapering! I’m working on an information post for you–hopefully, I’ll have it up in a few days.
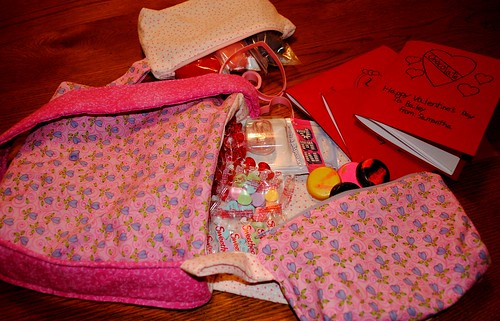
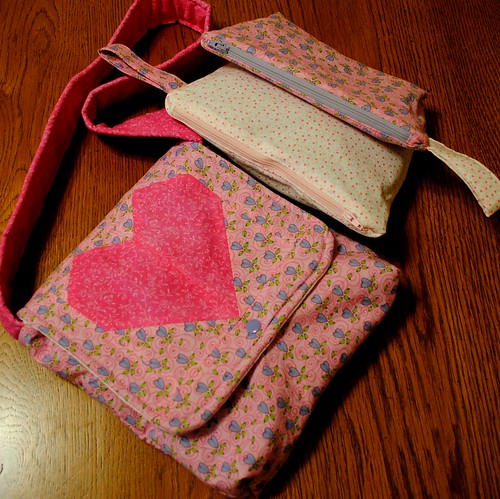
In the meantime, I wanted to share how much fun we had putting together this swap that was hosted on one of my favorite boards: Diaper Sewing Divas. (That’s a great place to go, by the way, to learn all about sewing your own cloth diapers.) In this particular swap, the kids (with moms help) were supposed to put together Valentine’s Day goodies for the children in the family we were partnered with. My three youngest participated by putting together this package for a little girl who is almost two. We started with a little messenger bag and matching zippered bags that I sewed up using tutorials from here on my blog.
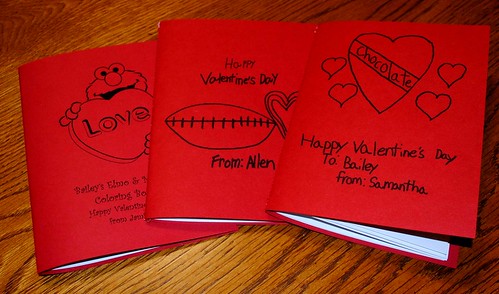
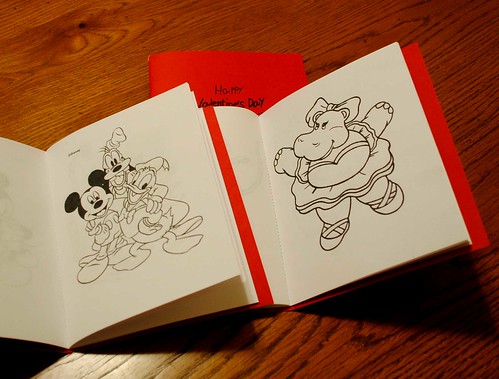
Then we added homemade coloring books. The kids each picked out coloring pages that we found online to make up a coloring book from each one of them. I used Chez Beeper Bebe’s Coloring Book Tutorial to put these together. (I did leave off the book-binding tape, though, because we didn’t have any on hand.)
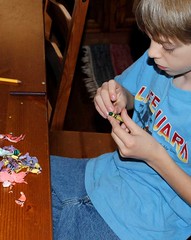
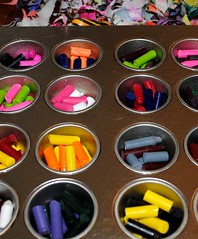
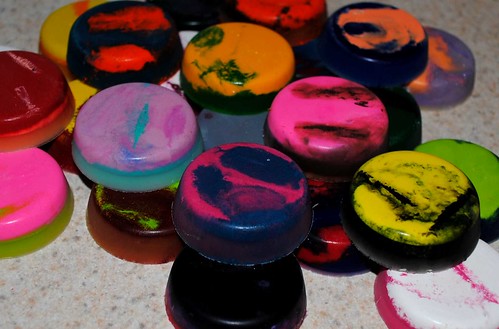
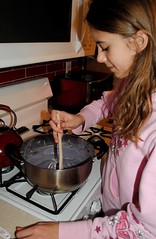
Coloring books need crayons, of course, so we followed the Cool Chunky Crayon Tutorial at Whimsy Love to recycle our old broken crayons into new chunky ones!
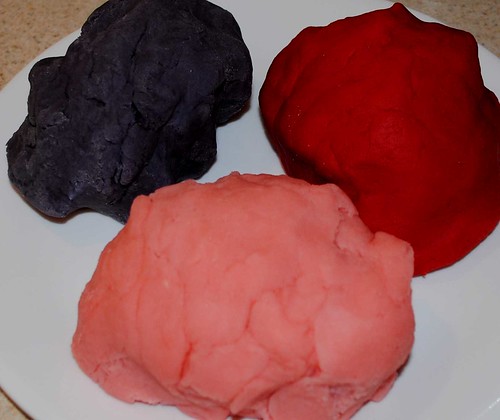
Finally, we mixed up some of our favorite Kool-Aid playdough to send along with some multi-sized heart cookie cutters.

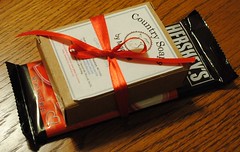
Of course, we couldn’t leave mom out, so we sent along some fun things for her, too!
All packaged up and ready to go!

Only a few days after we sent our package, our swap package arrived!
There was a little arguing over who got to open the package.
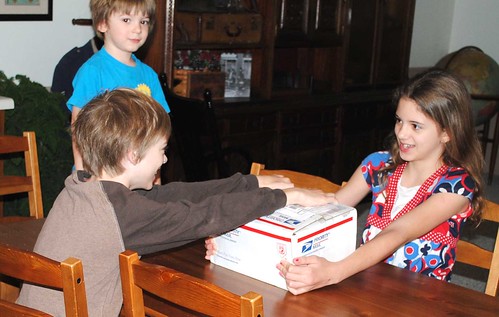
Somehow, Jamie won!

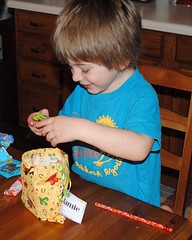
Each one of the kids got an awesome drawstring bag. (Allen’s has already been put to good use holding his Nerf darts!) Each bag was filled with all sorts of goodies–candy, bubbles, socks, pencils, pop-up balloons, ceramics to paint and lots more!
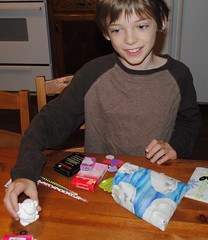

And, there were fuzzy socks for me and a pile of cloth diapers and a blanket for baby! Such a fun swap to give and to receive!
Diapers, Diapers and More Diapers . . . and they’re all cloth!
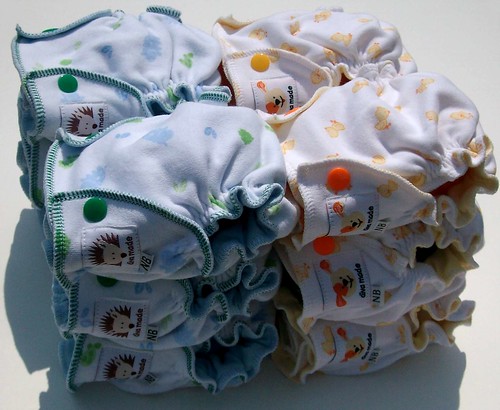
It’s getting close to time to welcome our new little one! We love using cloth diapers, and I especially enjoy sewing them myself. I’ve actually been working on diapers since not long after we found out that we were expecting. There are so many patterns available now, and they all have advantages. I thought I’d show off our newborn stash now, and then, as we try out each pattern on baby, I’ll report back with feedback.

I tried to make our newborn diapers from prints that are gender neutral so that they can be used again for another baby.
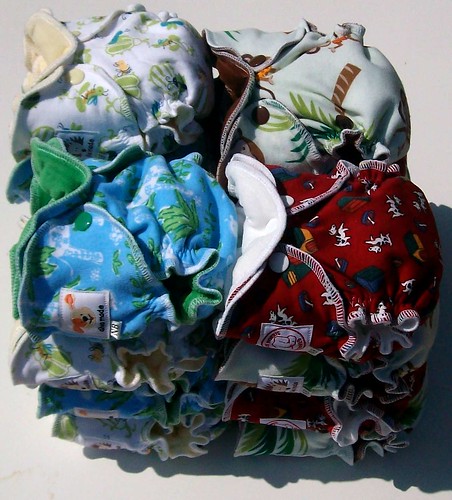
I also used knit fabrics to make all of these. The stretch in the fabric will help them to fit longer than if I used woven fabrics.
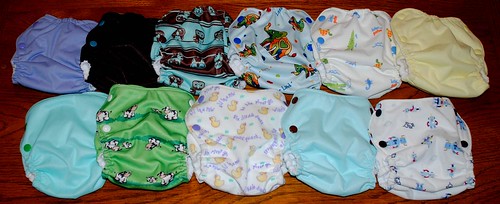
In case you’re counting, that makes a total of 40 newborn fitted diapers and 12 covers. I also have quite a few smalls finished, but I’ll save those for another post. Aren’t these adorable, though? If you’ve never tried cloth, you really should give a go. I promise they’re much easier to use and care for than you think they are!
Pizza-making Fun at CiCi’s Pizza!
Our homeschool group had a field trip to CiCi’s Pizza yesterday, and the kids had a great time. There’s just something about making your own pizza that makes it taste soooo good! I couldn’t resist showing off some pictures of the fun.


January Quilt Blocks for the Fresh Comfort Quilting Bee!

I recently finished up my first two blocks for the Fresh Comfort Virtual Quilting Bee. Katie asked for blocks designed around anything related to trees. The first block I designed myself using traditional flying geese blocks for the trees and piecing together the remaining parts of the block to resemble tree trunk, sky and grass.

For the second block, I used a the Maple Leaf tutorial at Quilter’s Cache.

As I was sewing these, it occurred to me that I’d love to have copies of each of the blocks that I sew for the bee to make a quilt to keep. So, using the same patterns, I sewed up these two quilt blocks with fabric from my stash:


A New Purse for the New Year

I’ve really needed to sew up a new bag for me for quite some time. My old one had seen it’s better days. I love being able to say, “I made it myself!” when people comment on my bags, but, um, I didn’t want to say that about my old one anymore. Before I started on my new bag, I did a little browsing and brainstorming for what exactly I wanted. Once I had my list ready, I went to work!
The Shade Garden fabric by Michelle Engel Bencsko just makes me smile, so I used the last of what I had in my stash to piece together this bag. I really liked the look of the “tied” handles that are popular right now, but it took some work for me to figure out how to actually make them look nice. I also added an elastic and fabric-covered button closure that is perfect for keeping things contained but still allows for quick access–it looks really cute, too!

The inside is much like my old bag with a middle divider and a divided side pocket where I can keep my cell phone, a pen or pencil and my favorite lipgloss.

Of course, I had to add a matching wallet and key fob, too.

I’m so happy with how the whole set turned out! When oldest daughter saw it, she asked me to sew one up for her right away. I think she might get one for her birthday in a few months instead. Shhhh . . .
Handmade Christmas – Christmas Pajamas
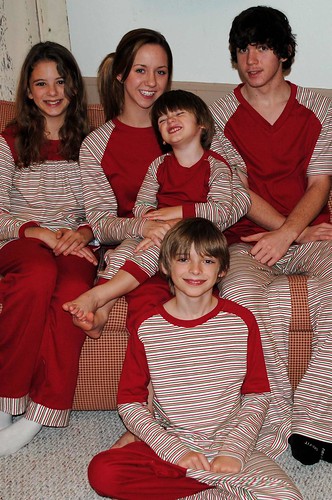
Just one more Christmas post before I move on to other things. It has become a tradition for me to make our kids new Christmas pajamas every year. I love having the kids in matching pjs on Christmas morning, and since my kids range in age from almost 20 to 2, I really have no choice, but to make them! I used several different patterns this year, some of my own and some purchased.
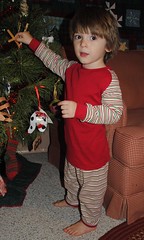
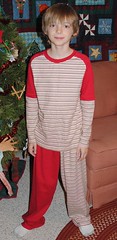
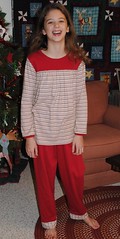
For my youngest two boys, I used my Patrick Curved Raglan top. I did modify Jamie’s to add cuffs to the arms. For Jamie’s pants, I used my AJ Bottoms pattern with cuffs added the same way I did the shirt. Allen’s and Samantha’s pants were both just traced from a ready-to-wear pair of PJ pants. (Knit pajama pants are very forgiving and tracing a pair that you know fits well works great!) Samantha’s top is my Emmy pattern which is her favorite.


For Morgan and Sean, I used Kwik Sew 3144. Morgan asked for a long nightshirt, and Sean wanted the v-neck style top. (I did modify the top a bit to make it more masculine for Sean. I just made the sleeves a little wider and longer and squared off the bottom and hemmed it.)
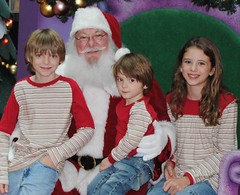
I always try to get the tops done as early as possible so the kids can get as much wear as possible out of them. They wear them with jeans to Christmas parties, get-togethers and, of course, to visit with Santa.
Handmade Christmas – Quilts for My Big Kids
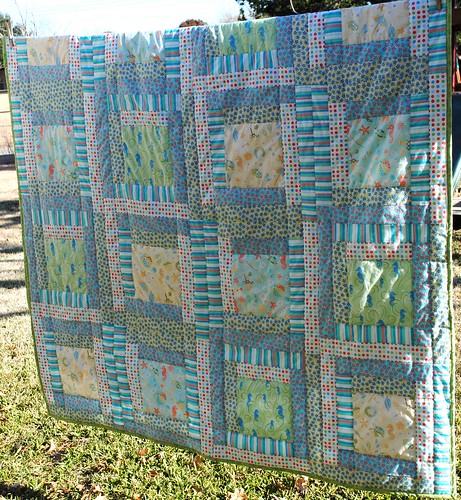
Morgan asked me to make a new twin-size quilt this year for her bed in her college dorm. The flip-flop quilt that I made her many years ago has seen it’s better days, and she needed something a little more grown up. She loves the beach and the ocean, and her favorite colors are blue and green. I set out hunting for the perfect fabric many months ago and had about given up when I ran across Hoffman’s Beach Babes fabric. I knew it was just right, but because it was a popular, discontinued fabric, it was hard to find. Fabrics by the Sea came to my rescue! I saw that they had a few sets of the various fabrics, so I contacted the owner, Barb, and she worked with me to put together exactly what I needed to get this quilt done! (She even included great goodies in the package–a quilted coaster kit and salt water taffy!)
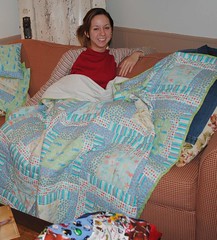
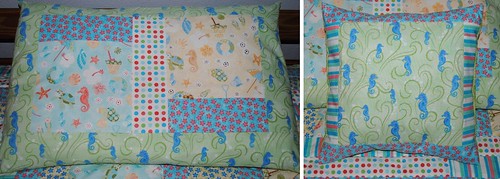
Morgan loves her new quilt, and I was even able to squeeze enough extra squares out of the leftovers to piece together a pillow sham and toss pillow for her.
I made a new twin-size quilt for Sean last year, but he needed a smaller, easy to drag around lapquilt. Like most teenage boys, he loves football, and I was able to find some really cool realistic cotton football prints to put this quilt together for him.
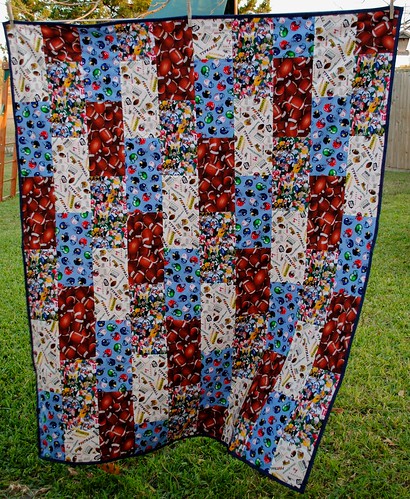
I like to make my lapquilts without batting and back them with minky. It makes for a nice warm, comfy quilt that folds up compactly, so it’s great for travel. I think Sean really likes his!
Now that Christmas is over, I’m looking forward to our new baby arriving in about a month, and doing lots of baby sewing. Pictures are coming!
Handmade Christmas – The Play Kitchen
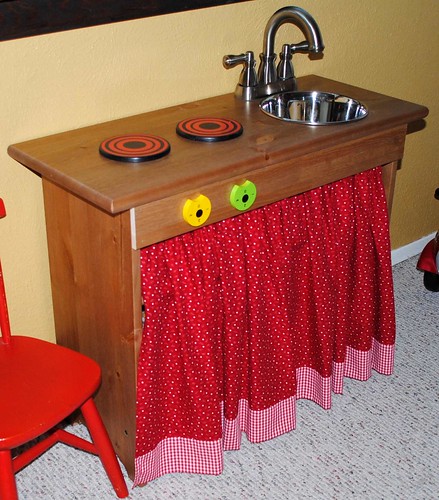
Our almost three-year-old, Jamie, has developed a love of helping in the kitchen lately, so we thought we’d put together a play kitchen for him for Christmas. A quick google search turned up hundreds of handmade kitchens with idea after idea for how to create one. We knew we wanted something simple, gender neutral and not too complicated to put together.
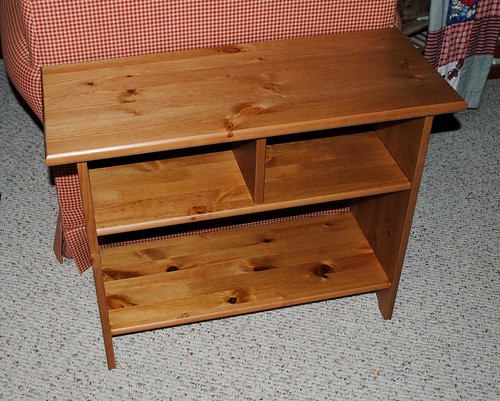
The kitchen’s home would be our family room which is decorated almost entirely in Ikea’s Leksvik line of furniture, so that was an obvious starting point. We picked up this Leksvik side table just before Thanksgiving and started brainstorming ideas for the kitchen “parts”.
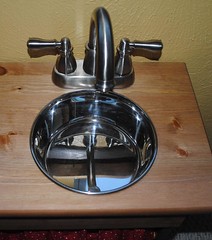
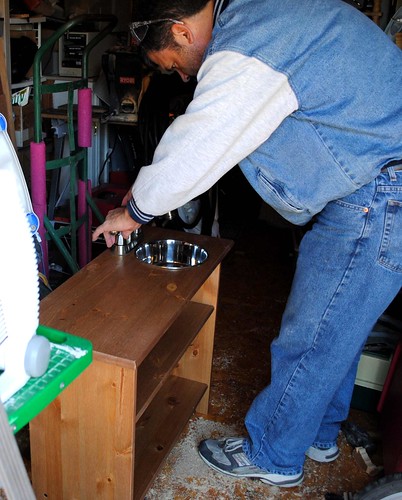
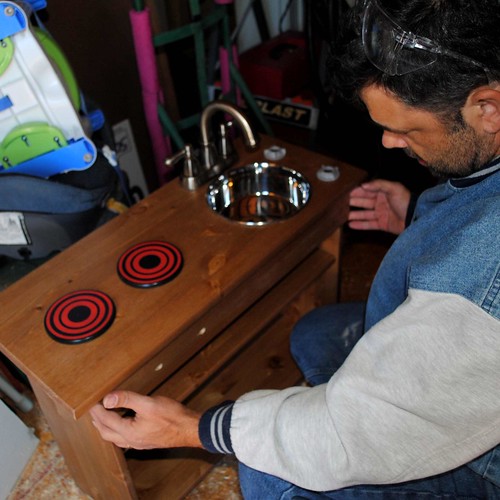
We drove out to our local Habitat for Humanity Restore one Saturday to hunt for a faucet and stove knobs. We were really excited to find this bathroom faucet, brand new in the package, for under $20. We didn’t find any knobs, though, and the ones that we found online cost more than we really wanted to pay. Samantha, our 11-year-old daughter, reminded us that we had an old wood tabletop play kitchen that we had originally purchased at a thrift shop put away in the storage closet because it had lost a knob. We pulled it out and quickly made use of the remaining knobs and the burners.
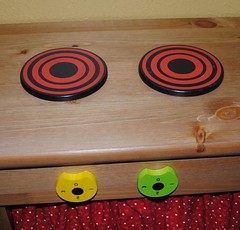
Ray was even able to install the knobs so that they turn. Finding a sink then became a problem because the space on the top of the side table is fairly narrow. All the stainless steel bowls in the kitchen section were either too wide to fit or too small to work properly. Walking around our local thrift store for inspiration, though, Ray ran across a stainless steel dog bowl that proved to be the perfect solution. We did, however, end up purchasing a new dog bowl from Walmart for the sink.
Ray put the kitchen together in the shed so that Jamie would be surprised on Christmas morning. Most of the construction was pretty straight-forward. He did add an additional piece of wood to the front of the kitchen for the knobs. (The wood came from a stack of extra pieces in the “As-Is” section at Ikea.)
Once Ray’s work putting the kitchen together was complete, I just needed to sew up a curtain for the front to hide the play kitchen accessories, and it was ready for Christmas morning.
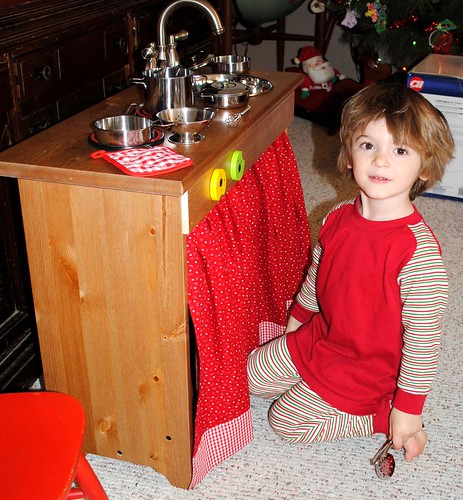
(Don’t you just love the bedhead?)

Cooking pancakes for Daddy.
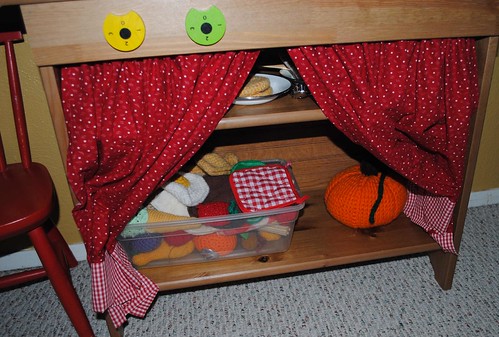
And, last a peek inside to see part our massive collection of felt and crocheted play food!
I’m sure that this kitchen will see a lot of attention in the coming years. I love that it fits in nicely with our decor and that it’s not overwhelming in size. I am so appreciative to all the other moms and dads who shared their play kitchen ideas that inspired this one!
Sampler Quilt Blocks and the Fresh Comfort Virtual Quilting Bee
Christmas sewing is officially finished! Yay! I’ll have more pictures to show of the things that I’ve made in the next week or two. (Some I can’t show yet because I have older children who read my blog!) Now that Christmas sewing is finished, I can move on to other things, and, although I do have a list of sewing to do for baby, I have another project that I want to get done, too.
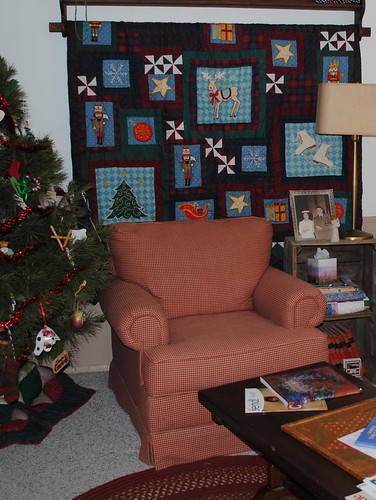
This past summer, I got that redecorating bug. Do you ever get that? Where you just feel like you need to change up some things. I love displaying quilts in my home, so I thought we’d go hunting for a nice quilt to hang on the wall in the living room. In the process of hunting, we found a really nice quilt rack in need of a little repair at a local thrift shop, but that perfect quilt never appeared, so the rack sat in a closet, lonely and unloved. When Christmas rolled around, we pulled out the Christmas quilt that Ray’s mom gave us years ago and decided to hang it next to the tree. It looks beautiful on the repaired quilt rack and really cozies up the living room. Now, though, I have a problem. You see, the quilt rack is hung on the wall, and I have no quilt to replace the Christmas one that currently hangs there. What’s a mom who loves to sew to do? Why sew a quilt, of course!

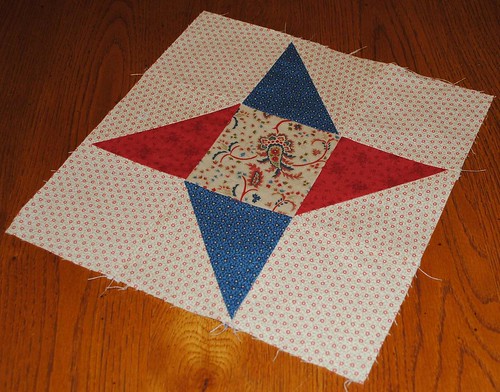
There are a couple of really fun, modern quilting blogs up and running right now, so I decided to do a sampler quilt using block tutorials from a few different blogs. I really like modern quilting fabrics, but in decorating, I tend to go with more traditional fabrics. I tend to choose fabrics that have a comfortable, warm, cottage feel. I discovered the Wiscasset line of quilting fabric designed by Minick & Simpson for Moda and knew right away that it was perfect for the quilt that I want to create.
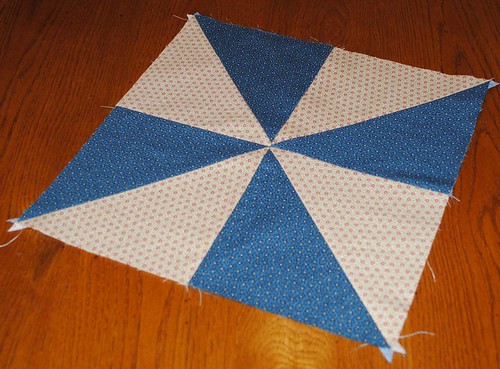
I’ve got three blocks ready to go into my quilt so far. That first one at the top is the Friendship Star from the Block Party blog. The second and third ones are from Modify Tradition: the Traditional Nine Patch and the Pinwheel.
I’ve also joined a virtual quilting bee based on the original Block Party bee. The one that I’ve joined is called Fresh Comfort, and you can find the blog here: http://freshcomfort.blogspot.com/. I really need to get over there and post my introduction. Things get started there in January, and I’ll be blogging about the blocks that I create as we go along.
Fabric-Covered Journals, Board Games & Dinner with Young Friends

We had three of Morgan’s friends and one of Sean’s friends over last night. It was such fun! We enjoyed an early dinner, then visited two different living nativities before coming back to our house for a devotional, gifts and homemade doughnuts.
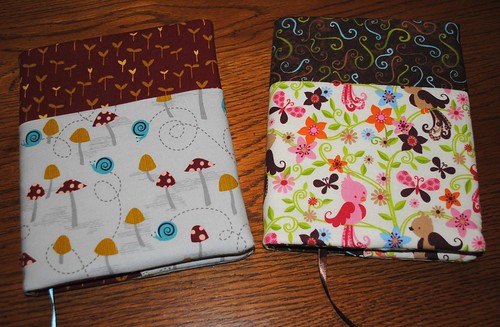
I made fabric-covered journals for the girls using the Journal Cover Tutorial at Moda Bake Shop for the basic construction.

These go together really quickly, and the girls loved them! I also included a nice pen and some hot cocoa, microwave popcorn and chocolate.
I had a much harder time coming up with a gift for the college-age guys. Some brainstorming for ideas and a few minutes spent roaming around the toy department, though, and here’s what I came up with:
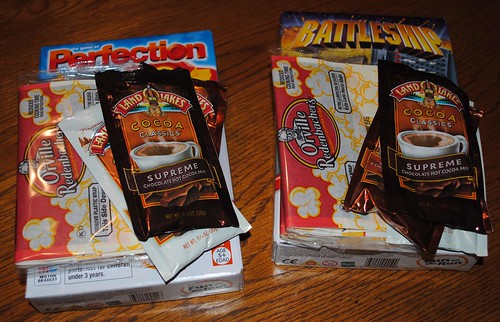
Each one got a travel-size version of a classic board game (perfect for storing in the dorm) along with popcorn, hot cocoa and chocolate.
I’m pretty sure that everyone enjoyed their gifts as much as I enjoyed putting them together for them!


