Guest Posts
Lord of the Rings Ranger Costume for CraftingCon
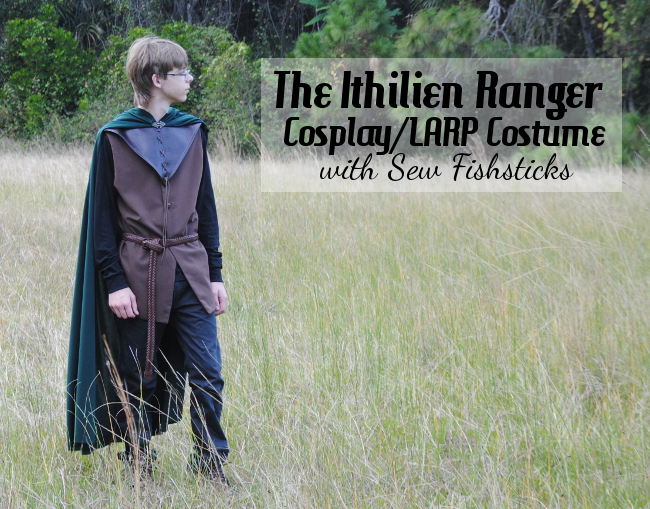
I’m guest posting today for CraftingCon at Friends Stitched Together! My Allen has been begging me to make him a Lord of the Rings Ithilien Ranger costume for what seems like ages, and since this month’s CraftingCon theme is LOTR/Hobbit-inspired, it was the perfect time to finally do it. Pop over and read all about it, and see my tips for making a great costume without spending too much time or money: Ithilien Ranger with Fishsticks Designs.
The Holiday Kitchen Gift Set Tutorial
 Thanksgiving and Christmas are right around the corner! I know, I know, I’m not sure that I’m ready to hear that either, but I love making handmade gifts, and every year I think if I just get started sooner, I won’t be sewing until 1 a.m. on December 25th! Maybe I’ll actually start early this year? At least I can help you start early! This tutorial is one that I shared at Skip to My Lou last year for the Holiday Bake, Craft and Sew-along, but I just finished putting the whole thing together for you in PDF form to make it easy to download, print and sew!
To download the tutorial, just click here: Holiday Kitchen Gift Set. Be sure to save the file to your computer before you print the pattern.
In case you prefer to read the tutorial here on my blog, here it is for you:
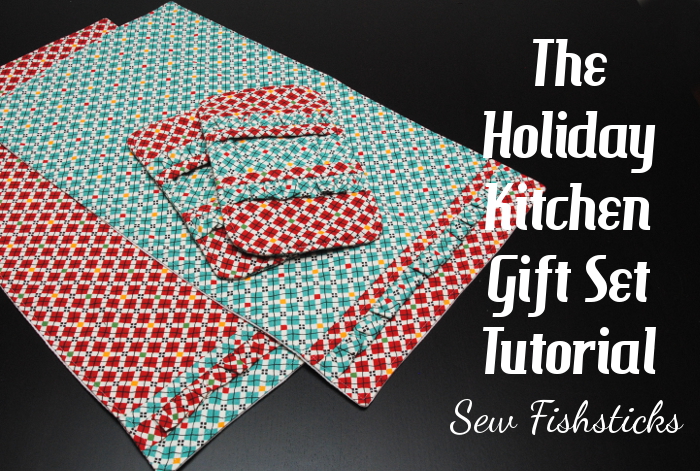
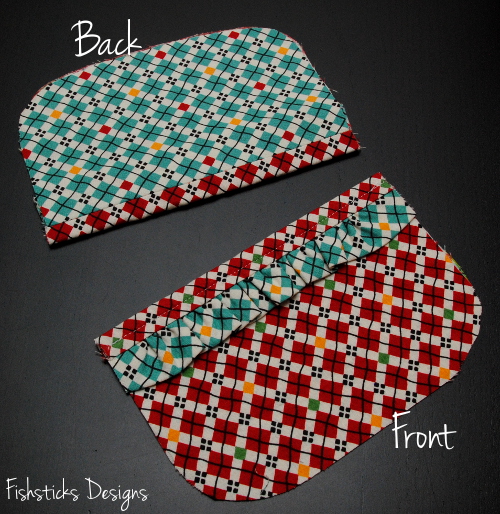
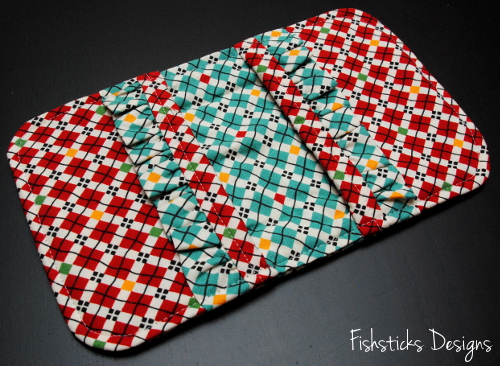
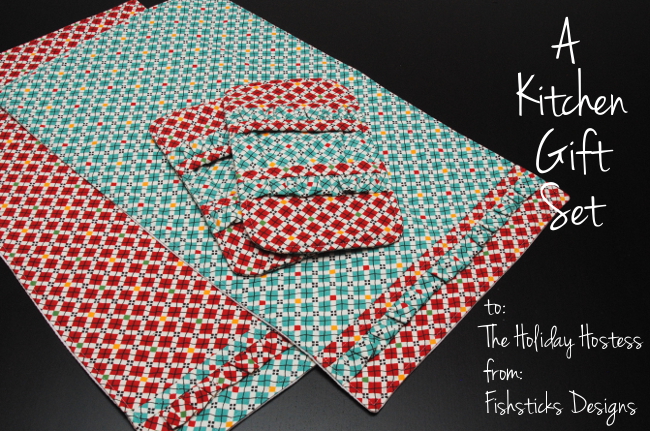
Are you looking for the perfect thank-you gift for all of those holiday party hostesses? The Kitchen Gift Set might be just what you need! The set includes fold-over, oven-mitt potholders (my favorite kind) and matching dishtowels.
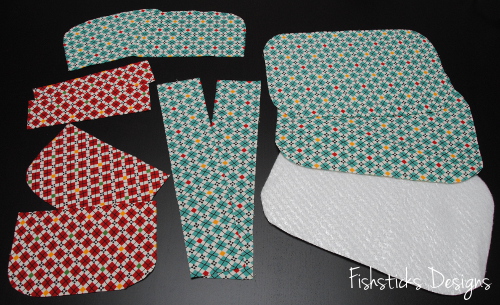
You’ll be able to get two matching potholders and two coordinating dish towels from one yard each of two coordinating cotton prints. You’ll also need 1/4 yard of Insul-Bright or another insulating fleece for the potholders and 1 yard of absorbent cotton fabric for the backing of the dishtowels (diaper fabric, waffle weave, pique, huck toweling, etc.) Let’s start with the potholders! You’ll need the pattern pieces found here: Potholder Pattern Pieces. (Be sure to print that “actual size” and check the measurement of the 2 1/2″ square.) Cut out all of your pieces. For each potholder, you’ll cut 2 pocket pieces of Fabric A, 2 pocket pieces of Fabric B, 2 base pieces of Fabric B, 2 base pieces of Insul-Bright, 2 trim pieces – 7″ x 2″, and 2 ruffle pieces – 12″ x 2 1/2″.
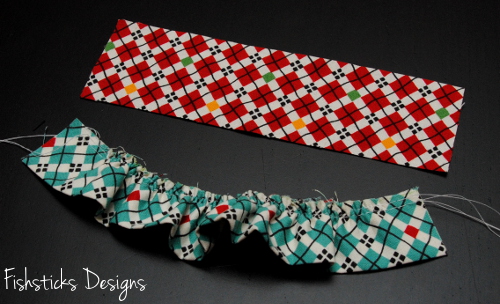
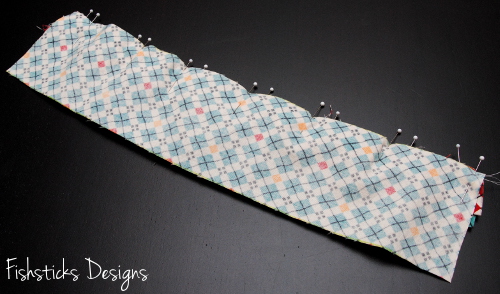
 Fold each of your ruffle pieces over with the wrong sides together and match up the long edges. Press well.
 Sew two rows of basting stitches (the longest stitching your machine allows) along the long raw edges — one at 1/8” and one at 1/4”—leaving the threads on each end 2 to 3 inches long.
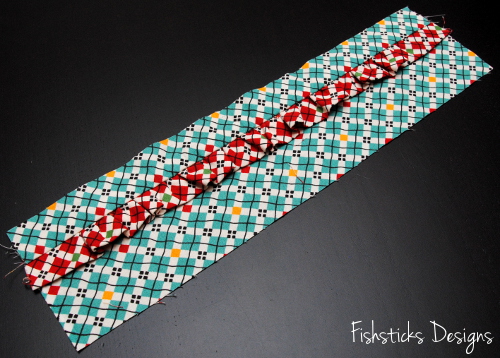
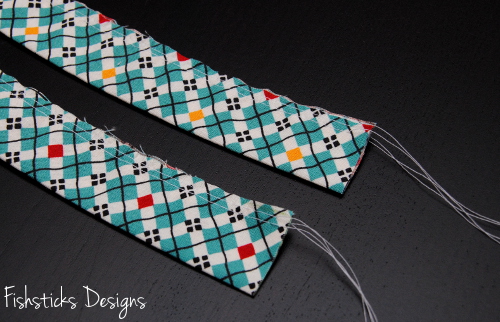 Pull the bobbin threads from each end to gather each ruffle until it is the same length as the trim piece.
 Set one ruffle aside. Pin the gathered edge of the remaining ruffle to the right side of one trim piece along one of the long edges. Check to make sure that your gathers are evenly divided. (You can baste here if you’d like.)
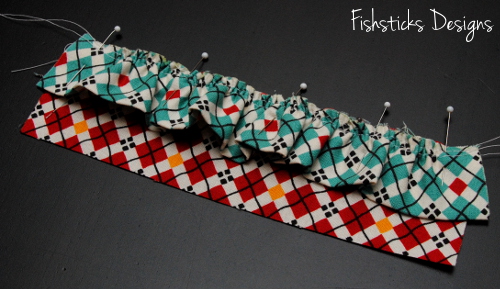 Place one of the Fabric A pocket pieces on top so that the right sides of the trim piece and the pocket piece are together and the ruffle is sandwiched between. Line up the edges as shown and pin in place.
 Sew the pinned edge.
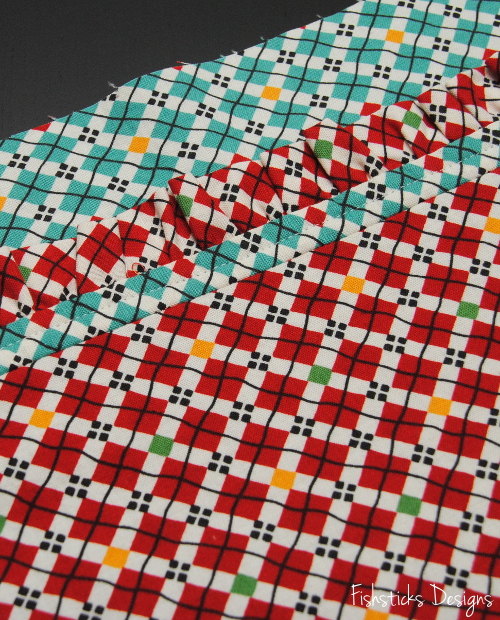
 Flip the pieces to the right side and press the ruffle towards the curved edge of the pocket piece while pressing the seam allowance in the opposite direction. Topstitch 1/4″ from the top edge of the ruffle.
 If you find that you have small spots on each side where the ruffle sticks out. Just flip the pocket piece over and trim those off.
 Pin the long edge of one Fabric B pocket piece to the remaining raw edge of the trim piece with the right sides together. Sew the pinned edge.
 Flip the pieces apart and press the seam allowance toward the ruffle.
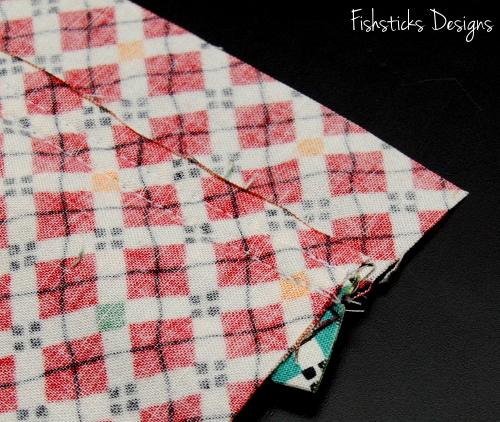
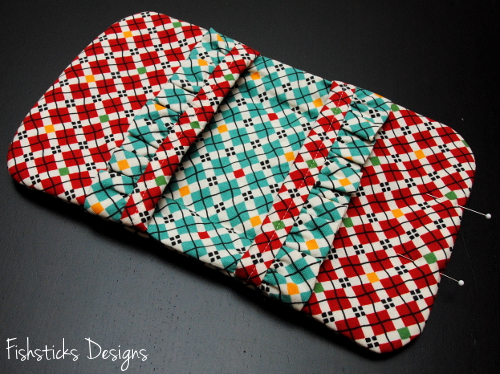
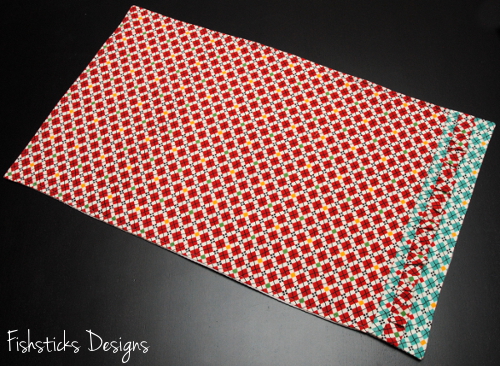
 Fold the pocket over so that the wrong sides are together and the curved edges are all lined up. Press well. Follow the same steps to assemble the remaining pocket.
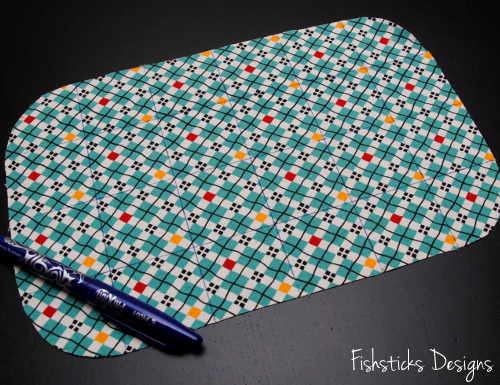
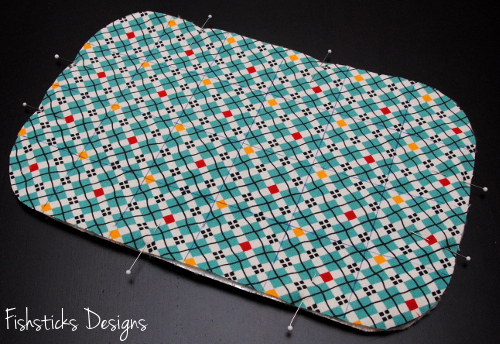
 Set your pocket pieces aside for now. Take one of your base pieces and draw a quilting grid on the right side of it. I used one of my Frixion pens to do this, but you can use a washable or disappearing marker, as well. I placed my lines 1 3/4″ apart, starting from the center in each direction.
 Pin this piece on top of the two layers of Insul-Bright.
 Stitch down each line, starting with the center line and working out. (If your machine has a walking foot, use it for this step and the remaining steps to help keep your fabrics from slipping while you’re sewing.)
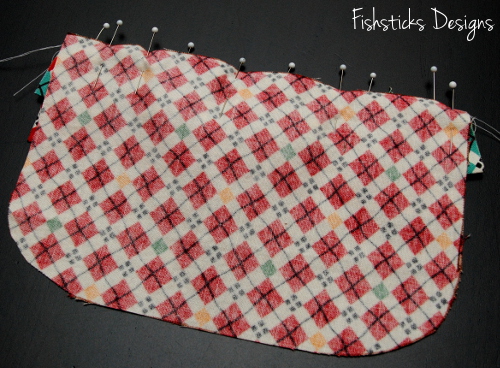
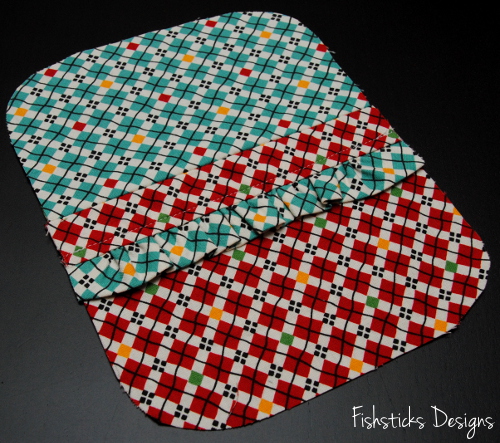
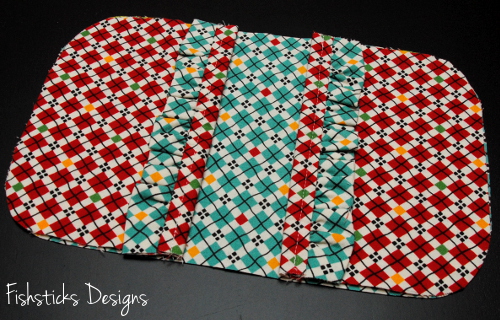
 Place your finished pocket pieces on top of the remaining base piece, lining up the curved edges as shown.
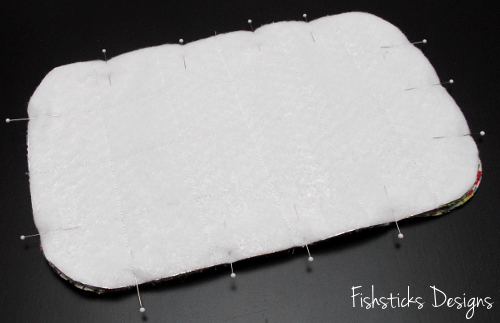
 Flip the quilted base piece/Insul-bright over on top of these so that the right sides are together and the pocket pieces are sandwiched between. Pin in place.
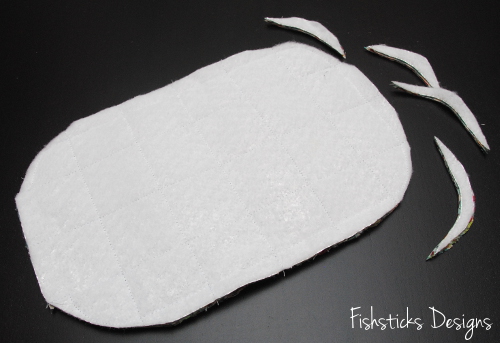
 Stitch all the way around, leaving an opening for turning in one short end. Clip or trim the curves before turning right side out.
 Turn through the opening and push the corners out neatly. Tuck the raw edges of the opening in and press well. Pin the opening closed.
 Topstitch all the way around at 1/4″. (In addition to using your walking foot for this step, a denim needle will help to prevent skipped stitches when going over the thick areas.) Your first potholder is done! Now you just need to make it a mate.
 Let’s move on to the dish towels!
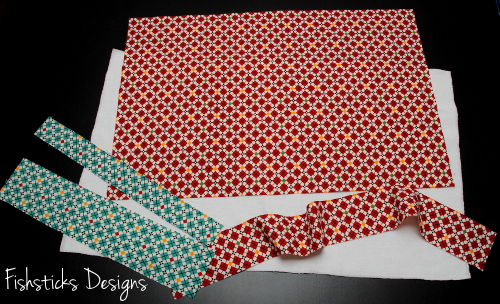
 Start by cutting out your pieces. You’ll need a layer or two of absorbent fabric. (I’m using two layers of diaper cloth from Joanns. Be sure to wash and dry all of your fabrics before getting started!) For each dishtowel, you’ll cut these pieces: 1 or 2 layers of absorbent fabric – 23 1/4″ x 14″ (if you cut two layers, you’ll treat them as one from here on), 1 Fabric A main piece – 21″ x 14″, 1 Fabric A ruffle piece – 22″ x 2 1/2″, 1 Fabric B large trim piece – 3″ x 14″ and 1 Fabric B small trim piece – 1 1/2″ X 14″.
 Follow the same steps that you used for the potholders above to create your ruffle.
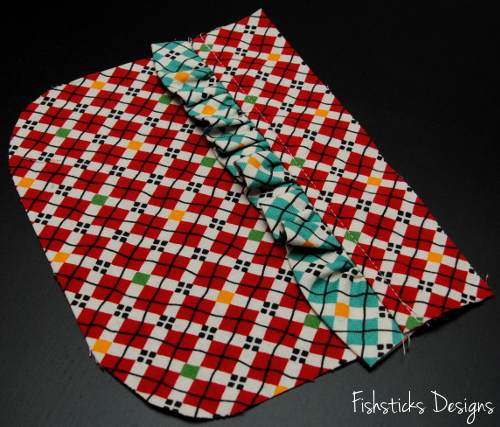
 Pin the gathered edge along one long edge of the smaller trim piece on the right side.
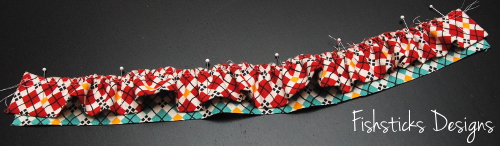 Place the larger trim piece on top so that the right sides are together and the ruffle is sandwiched between. Line up one of the long raw edges of the larger trim piece with the pinned edges of the ruffle and smaller trim piece and pin in place. Sew along the pinned edge.
 Flip the pieces over to the right sides. Press the ruffle towards the larger trim piece with the seam allowance in the opposite direction, but do not topstitch yet.
 Line up the remaining long raw edge of the smaller trim piece along one short edge of the main towel piece with the right sides together. Pin and sew.
 Flip the pieces apart and turn to the wrong side. Press this seam allowance over the seam allowance from the ruffle.
 Flip back over to the right side and topstitch 1/4″ from top of the ruffle.
 Place the finished top face down on your absorbent layers so that the right sides are facing. Pin.
 Stitch all the way around, leaving a 4″ opening in one side for turning. Clip the corners.
 Turn the towel through the opening. Push the corners out neatly and tuck the raw edges of the opening inside. Press well and topstitch all the way around at 1/4″. Your dish towel is done! Make a second one if you’d like, and your Kitchen Gift Set will be ready to gift to your favorite hostess!
The Casual Straight Skirt Tutorial @ Cutting Corners College
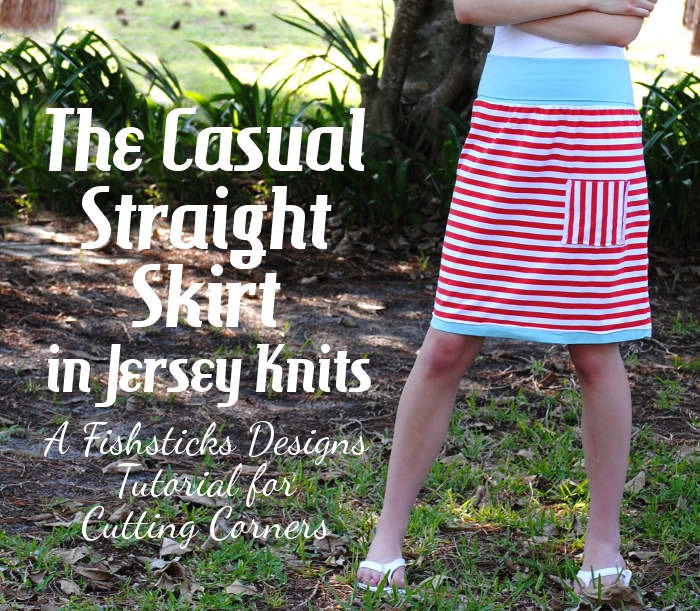 I’ve got a brand new tutorial up at Riley Blake’s Cutting Corners College! The Casual Straight Skirt is a stylish and comfortable skirt that sews up in no time at all.
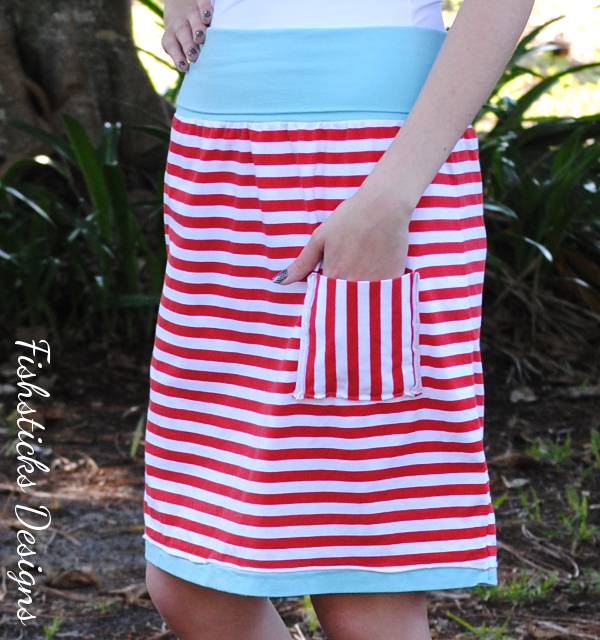 The skirt is made with stretch jersey and takes advantage of those great curling edges in some fun details, and you can make it to fit from toddler to misses with just a few measurements!
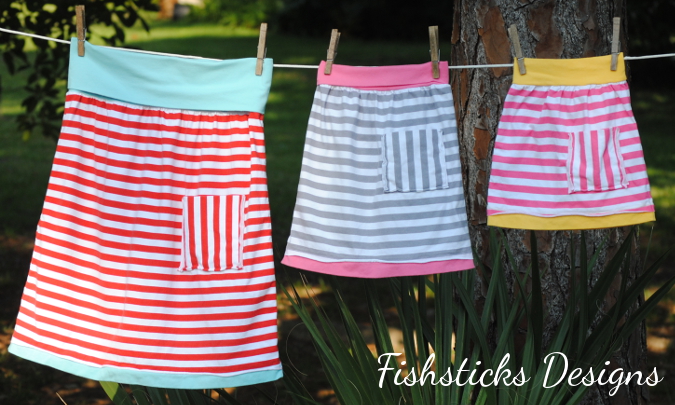 Find the tutorial right here: The Casual Straight Skirt in Jersey Knits.
A Kitchen Gift Set Tutorial & a Huge Giveaway
 I am over at Skip to my Lou today with a tutorial for a Kitchen Gift Set for the Holiday Bake Craft Sew Along.
 I think you are going to love this gift set! It is perfect for any of your holiday hostesses. The set includes these sweet fold-over, oven-mitt pot holders . . .
 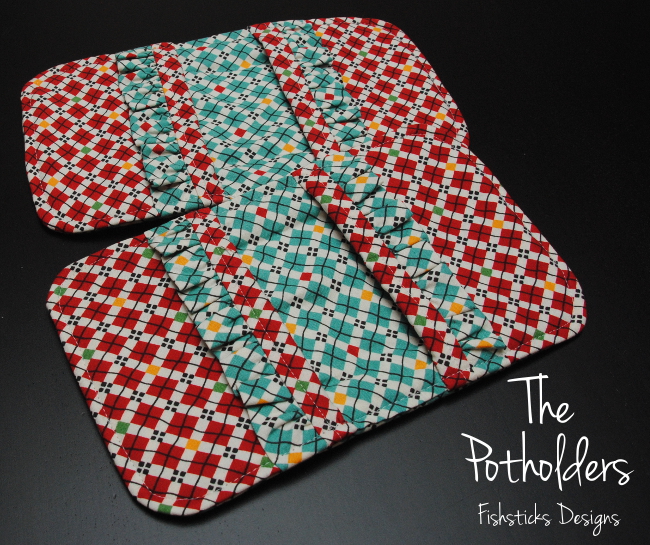 . . . and this pair of pretty, but practical dish towels.
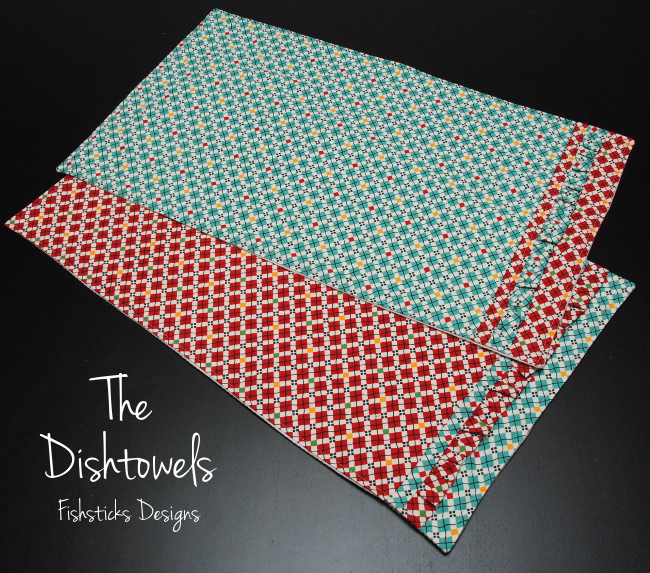 It’s a little early Christmas gift from me to you! But, wait! That isn’t all! I also get to treat you to a SEW Amazing Giveaway as part of our crafty series.
This is one AMAZING giveaway!
We are giving away a fabulous Prize Package worth more than $1000!
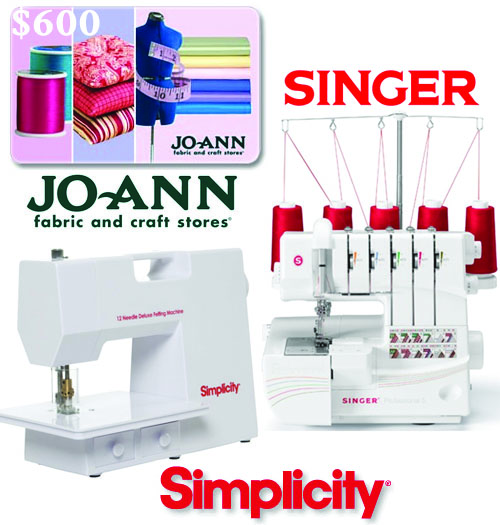 One lucky winner will receive…
$600 JoAnn Fabric and Craft Stores This will get your sewing room stocked and ready to create! Can you imagine?
This singer professional serger will bring your sewing to a whole new level. True to SINGER you will enjoy…
- 2-3-4-5 stitch capability-provides more stitch variety
- 1,300 stitches per minute-professional speed for faster results
- Fully automatic self-adjusting tension system-keeps stitches balanced and even
- Easy threading diagram-easy threading saves time
- Stitch width adjustment-keep seams strong and prevent bunching on any type of fabric.
Simplicity Deluxe Felting Machine Simplicity 12 Needle Deluxe Felting Machine creates felting with ease. Removable needles & foot pedal allow felting with greater speed and precision. Includes: power supply w/ foot pedal, 2 allen wenches, needle shaft with 12 needles inserted (sz 38 needles), 3 replacement needles, tweezers, lint brush, needle guard, instruction book. So cool!
Simply wait for RaffleCopter to load and enter there!a Rafflecopter giveaway
Be sure to check out all the fabulous sewing projects shared this month for this Holiday Bake Craft Sew series going on all month long!
Customizing a Tote Bag for Mom
This post originally appeared in The Make for Mom Series at The Shaffer Sisters in May 2013.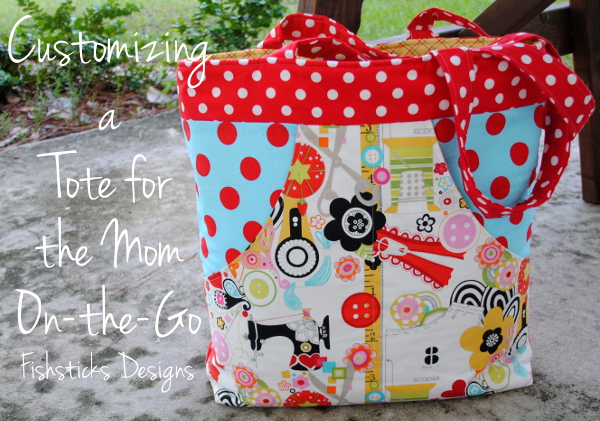 My husband and I have a habit of packing up our kids and heading out on road trips with stops in multiple states to visit friends, family and ministry supporters, and we always try to throw in some sightseeing (homeschooling on the road, right?), too. With so many stops, I need to keep myself organized. I put together this enormous tote bag with tons of pockets just before our last trip which included stops in West Virginia, Tennessee, Washington DC and Virginia. Crazy, right? This bag was such a great help!
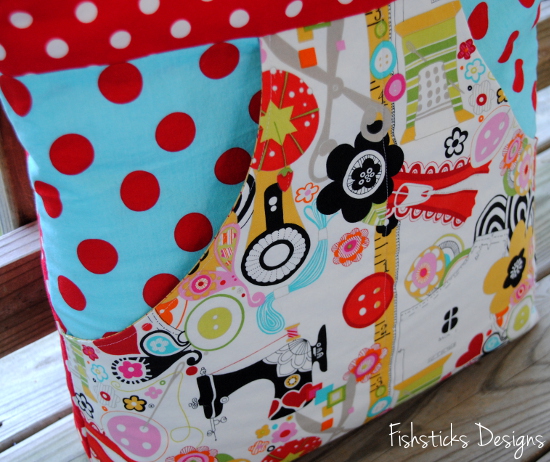 I knew just what I wanted from this bag, so I designed it exactly to my own specifications. It’s sort of huge at 16″ wide by 17″ tall by 4″ deep, but it holds everything that I need it to hold, and it looks pretty doing it!
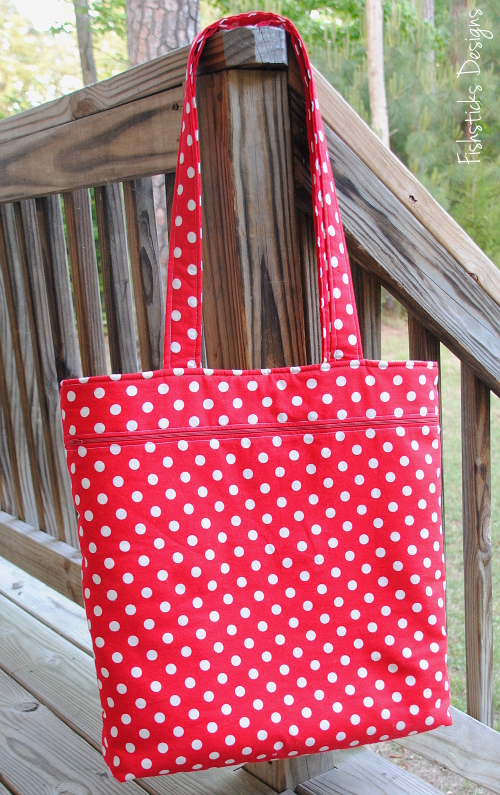 I added decorative pockets to the front and a zippered pocket on the back.
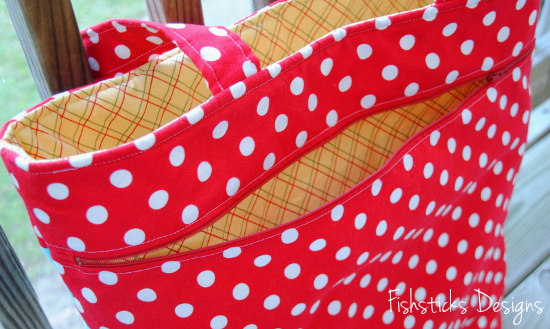 But, what I really want to show you is the inside of the bag.
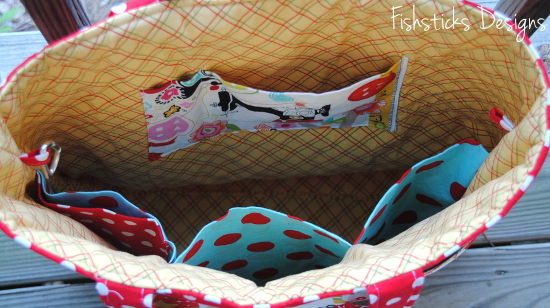 Without inside organization, the size of this bag would make everything disappear. Adding pockets and loops to the inside of any bag, though, is really simple. Once you know how to do it, you can grab your favorite tote bag pattern and customize it perfectly for you!
You’ll want to have your inner bag pieces cut and any interfacing added before starting on these little extras. Have a quilting ruler and a washable or disappearing marker handy. If you’ll be making custom-sized pockets for anything (cell phone, notebook, etc.) then have those ready to be measured, too. I’m using a 1/2″ seam allowance on everything and assuming a 1/2″ seam allowance on your bag pattern.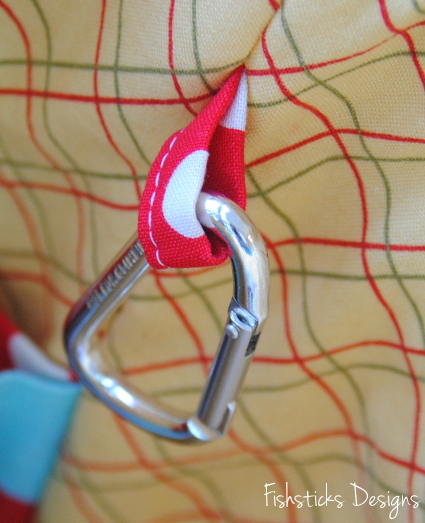 Let’s start with the loops. These little loops are really the most basic thing you can add to a bag, but you’ll be so surprised at what a difference they make! With a bag this big, you simply must have a way to clip in your keys or anything else that you need to be able to access quickly. With a loop or two sewn into the side seams and a carabiner clip, you’re good to go!
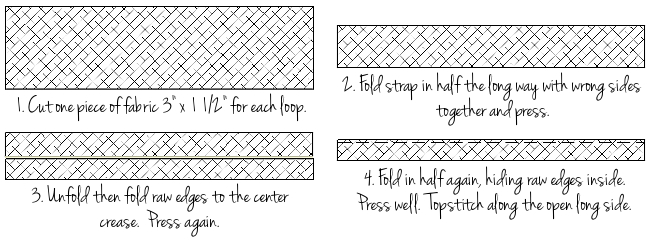 Fold your loop piece over to form a loop, matching up the raw edges. Pin in place as shown and baste it to one side of your unfinished bag inner.
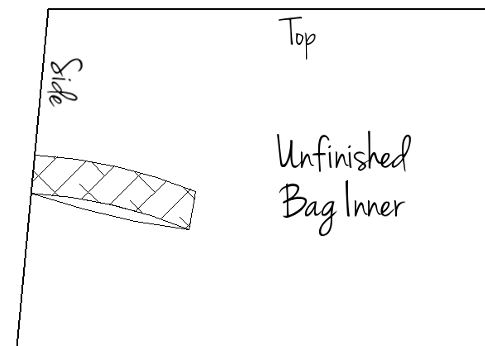 Now, let’s move on to the pockets. I designed this smaller pocket to hold a pen, a pencil and my little notebook.
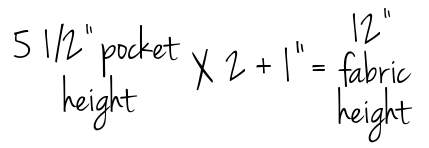
 To make your own custom-sized pocket you have to do a little math, but it’s really simple, I promise! For pens or pencils, a 1″ wide pocket is perfect. I usually make credit card or loyalty card pockets 3 1/2″ wide. (That width works for my I-phone, too.) If you have something specific, like my notebook, measure it across and add 1″ for your pocket width. My notebook is 5 1/2″ wide, so its pocket needs to be 6 1/2″ wide. With me so far? The height of your pocket should at least 3/4 of the height of the things you’re putting in it. That will keep them tucked nicely in place. For a standard pen/pencil/card pocket, I usually go with 4 1/2″ finished height. My notebook is taller, though, so I made this pocket with a finished height of 5 1/2″. Now you should have all your measurements. Here are your formulas: pocket width + pocket width + pocket width + 1″ seam allowance + 1/4″ topstitching allowance = fabric width and pocket height x two + 1″ = fabric height. Just keep in mind that you are limited by the width and height of your bag. Pretty easy, right? Here are my formulas:
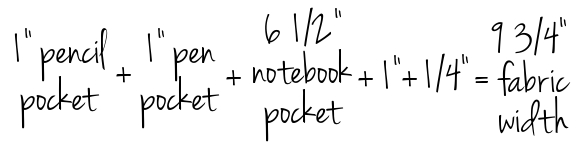
 I’m going to cut my pocket fabric 9 3/4″ wide by 12″ high (or long, I guess). Your pocket width and height may be different, though, based on what you’re putting in it. (If you want to cheat a little, for two pen/pencil pockets and two card pockets, I generally go with 10″ x 10″.) Now that you’ve survived that math, sewing the pocket is super simple. Just fold your pocket piece in half with right sides facing and match up the edges that measure the width of your pocket. (In my case, I’m matching up the 9 3/4″ edges.) Stitch along sides and bottom, leaving a 1 ½” opening in one side for turning.
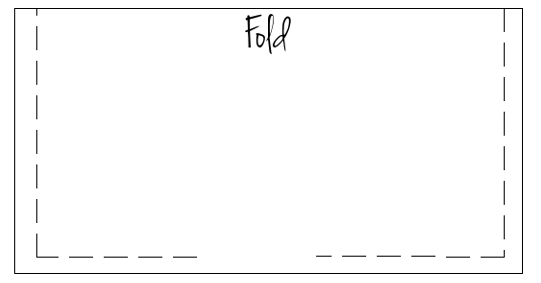 Trim your corners and turn your pocket through the opening. Press it really well. Center your pocket with the folded edge facing the top of the bag on one of your inner bag pieces. You can place it at whatever height you’d like, but I usually go with about 3 ½” to 4″ from the top edge. Topstitch around the sides and bottom 1/8″ from the edge. Once your pocket is sewn onto your bag panel, just use a quilting ruler to measure your pocket widths, then draw lines with your disappearing marker. Stitch down each line, remove the marker and your pockets are done! (A little tip here: stitch from the bottom up to avoid any puckers!)
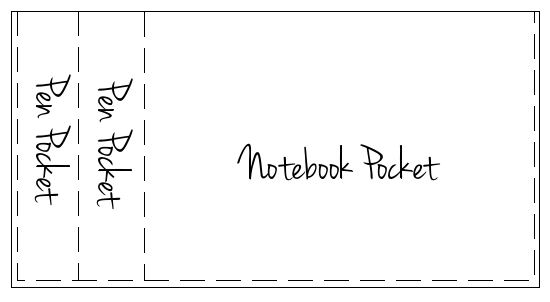 Whew! That wasn’t too hard, right? Ready for one more set of pockets for the other side of your bag?
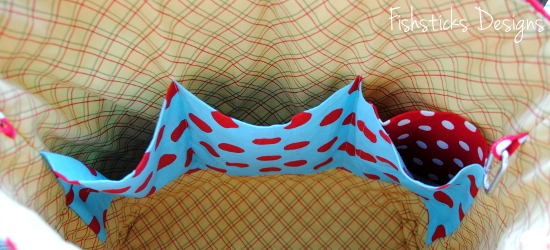 For this set of pockets, you’ll cut your fabric width the same as the width of your bag. You’ll use the same formula that we used above for your fabric height. Since I wasn’t exactly sure of what I’d be putting in these pockets but I wanted them to be pretty roomy, I went with 9″ for my finished height. The width of my bag inner piece was 21″, so I cut my pocket piece 21″ wide by 19″ (9×2+1) high. To sew this pocket, you’ll only need to stitch across the bottom edge because the sides will be tucked inside your bag’s seam allowance. Fold your fabric over with right sides together, the same way you did with the smaller pocket and stitch across the bottom edge.
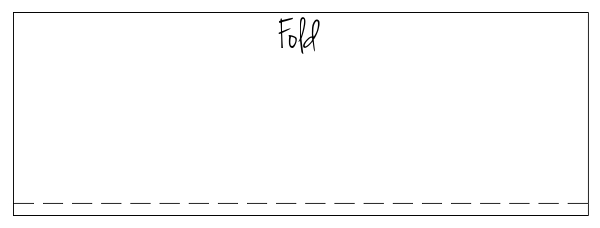 Turn your pocket through one of the short ends and press it well. You can see in the photo above that I tucked another little pocket inside this big pocket. That’s a designated spot for my cell phone. To determine the size of this pocket, simply follow those instructions for the small pocket above. Once you’ve sewn your cell phone pocket, turned and pressed it, you’ll simply topstitch it to the inside of one of your large pockets. Let’s decide on the width of your large pockets first. These pockets can be as wide as narrow as you want them. For mine, I just divided the width of my fabric into thirds. Since my fabric was 21″, that made each pocket about 7″ wide. Using this measurement to be sure my cell phone pocket didn’t end up chopped in half between two pockets, I marked a spot and topstitched my cell phone pocket inside what would become one of the pockets closest to the edge of my bag.
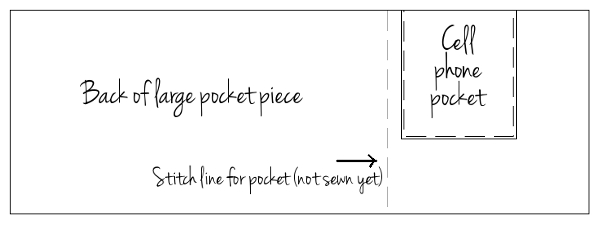 Now you’re ready to sew your large pockets to your bag. Position your pocket piece on your bag inner piece. The positioning with change depending on how tall your bag is, but I placed mine with the top edge 5 1/2″ below the top of the bag. Topstitch the bottom edge at 1/8″. Use a quilting ruler to measure your pocket widths, then draw lines with your disappearing marker. Stitch down each line, remove the marker and these pockets are done, too!
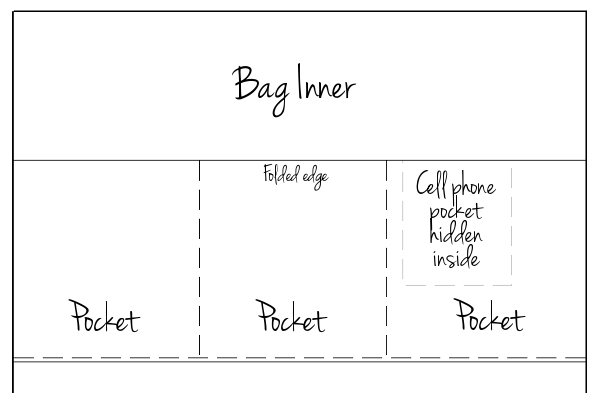 Now all that’s left is to finish your bag according to your pattern instructions. Then fill it up and go!
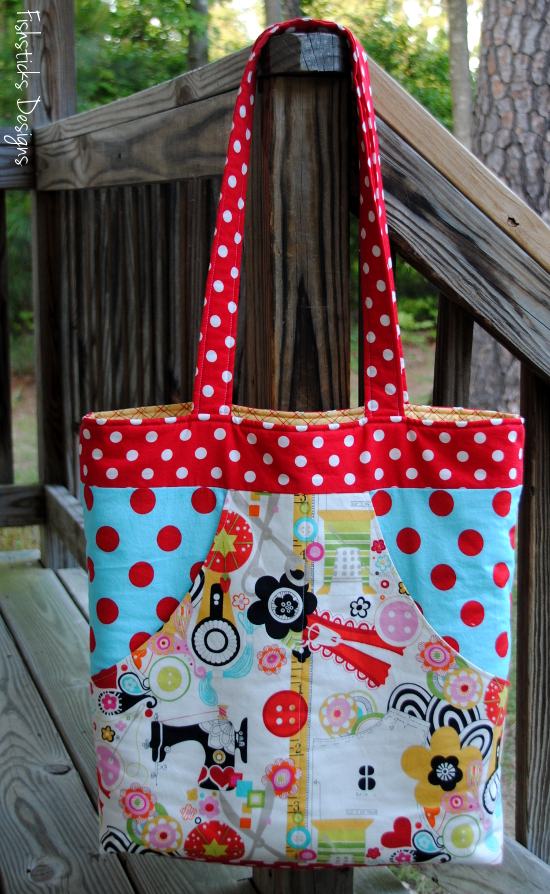
Comfy Pants for the Whole Family at Cutting Corners College!
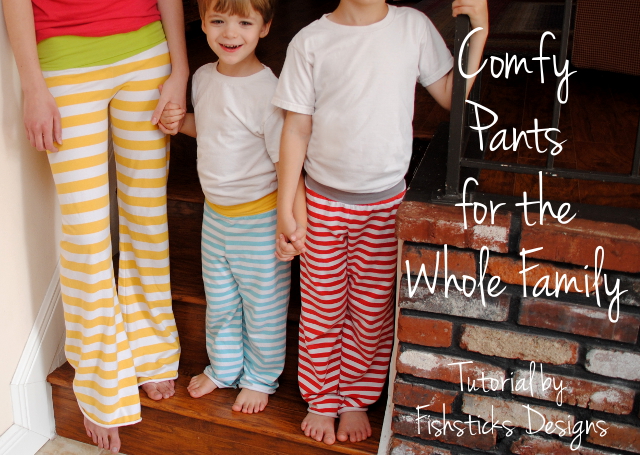 I am so, so excited to be teaching at Riley Blake’s Cutting Corners College today! I would love if you’d click over and check out my tutorial for making comfortable knit pants for your whole family. There are tips for sewing with knit fabrics, instructions for making an elastic-free waistband, and directions for making your own pattern using a good-fitting pair of pants! Just click right here: Comfy Pants for the Whole Family
Chatting about Sewing Outerwear at GYCT
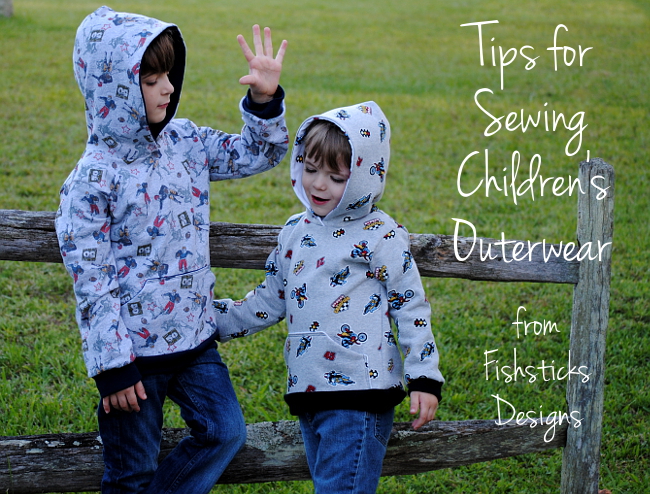 I’m visiting over at Get Your Crap Together today, sharing tips and ideas for sewing children’s outerwear. To check it out, just click on the picture above!
And, as a total aside, the more I look at that photo, the more it looks like Jamie is about to swat Charlie. I promise he was really about to hug him! (Not that that is always the case . . . )
Legos on the Go at Today’s Creative Blog!
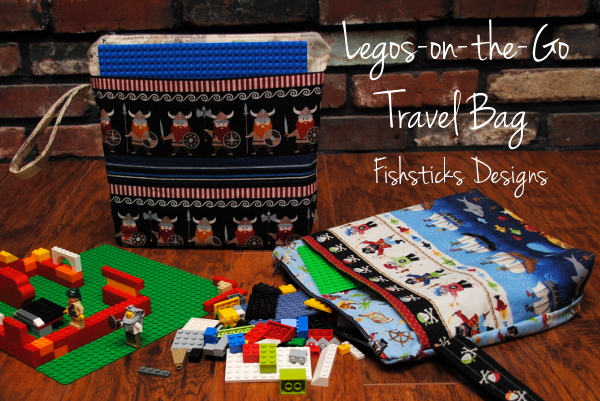 I’m guest posting today in the Celebrate Summer Series at Today’s Creative Blog! Be sure to come check out this quick sewing project that is sure to keep your Lego-loving little ones entertained wherever your summer travels take you: The Legos-on-the-Go Travel Bag Tutorial.
Hopeful Threads Family Month Guest Post
 I’m guest posting over at Hopeful Threads today! Come read my thoughts on creating for family, leaving a legacy and little imperfections: Family Month Guest Post.
Make for Mom with the Shaffer Sisters!
 There’s a great celebration all about MOMS over at the Shaffer Sisters’ blog this month! If you haven’t been over to check things out, you must take a few minutes to scroll through all the great guest blog posts filled with ideas for things you can create for yourself or for any other mom on your list.I’m visiting over there today with a tutorial that will walk you through customizing the inside of any tote bag pattern with pockets and loops — everything a mom needs to stay organized on the go!Just click on either of the tote bag pictures, and you’ll find all the details.


