Travel with Kids
Lego Travel Bag~A Tutorial
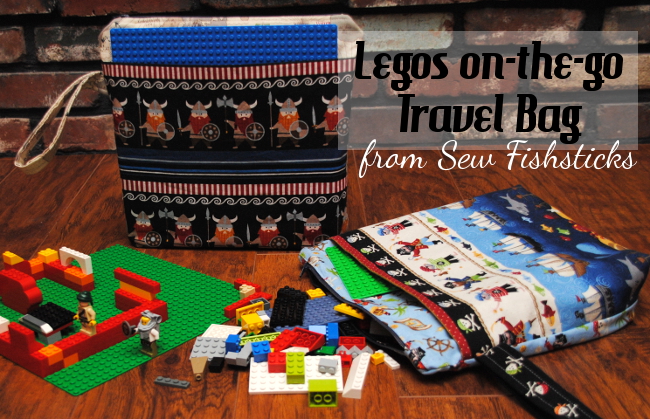
My second Handmade Holiday idea for 2014 is this Lego on-the-go Travel Bag! This tutorial originally appeared on Today’s Creative Blog in July of 2013 as part of their Celebrate Summer Series, but it’s a great gift idea, too … says the mom who has stepped on a billion and one Legos in the middle of the night. It’s a good thing to give those little things their own special storage space!
Sewing for Our Disney World Trip ~ Day 2
 I’m a little behind in sharing our Day 2 Disney outfits because I misplaced my second camera card! The funny thing is that I know where I put it, but it’s not there. Hmmm … We’ll just have to make do with the pictures that I do have.
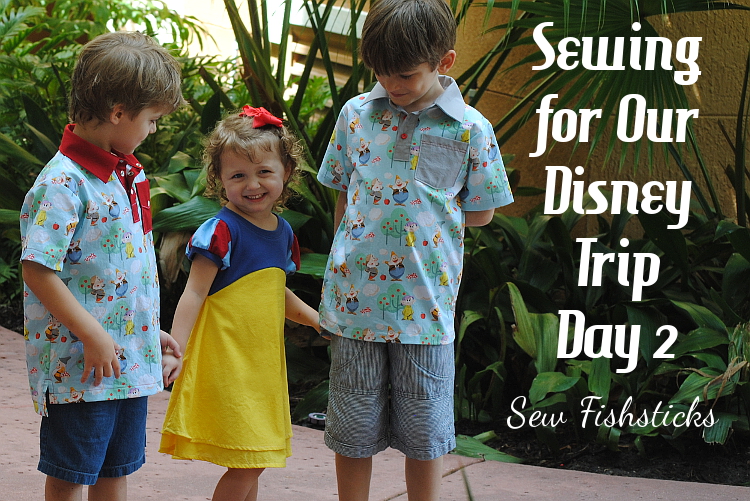
I ran across the Seven Dwarfs fabric at Joann Fabrics while we were visiting with out-of-town family last month and thought it was so cute! I couldn’t resist grabbing a few yards to bring home for the boys! I was really hoping to find Snow White fabric to coordinate with it for Katie’s outfit, but a thorough online search turned up nothing at all. That ended up being just fine, though, because I love how Plan B turned out — meet the Playhouse Dress a la Snow White!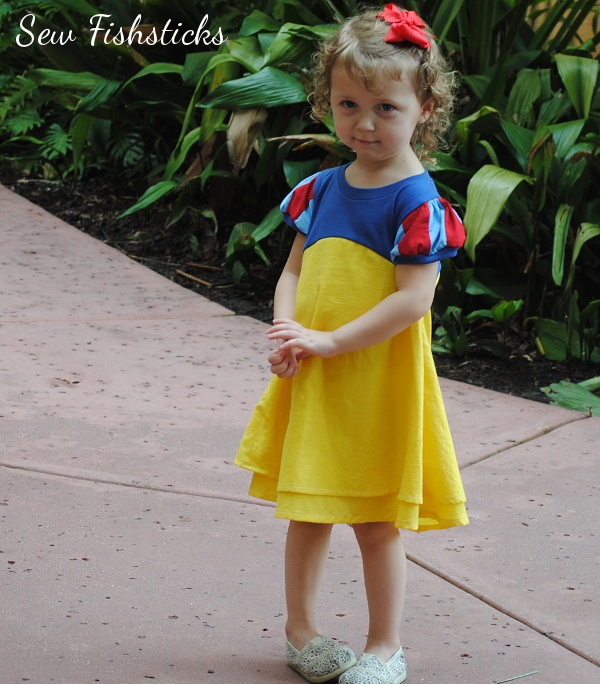 Katie is so slim, I opted to make the Playhouse Dress a size smaller than her ready-to-wear size with added length. For the Snow White sleeves, I pieced 2″ strips of red and light blue Kona cottons, then I cut and sewed them according to the pattern instructions. To add a little more drama to the skirt, I made it a double-layer with the top skirt slightly shorter. The dobby fabric that I used was really thin, so doubling it up kept it from being see-through, too.
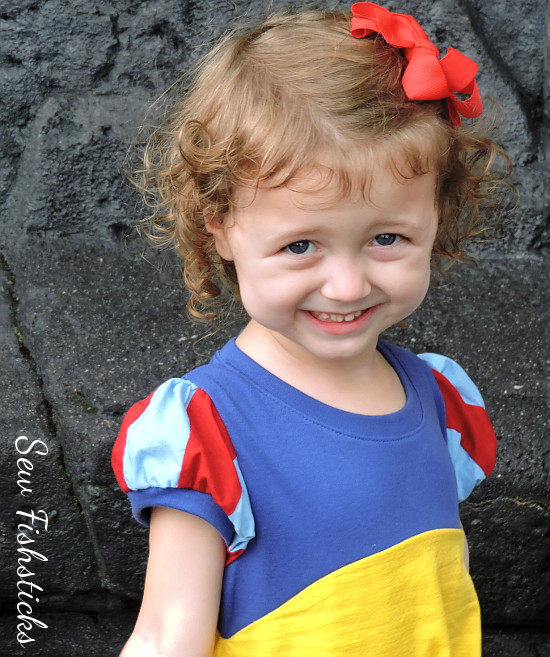 For Charlie and Jamie, I experimented a little with a tunic idea that I’ve been mulling over for a while. We got so many compliments on these shirts at Disney. I’m sure that I’ll be re-visiting this one with some minor modifications!
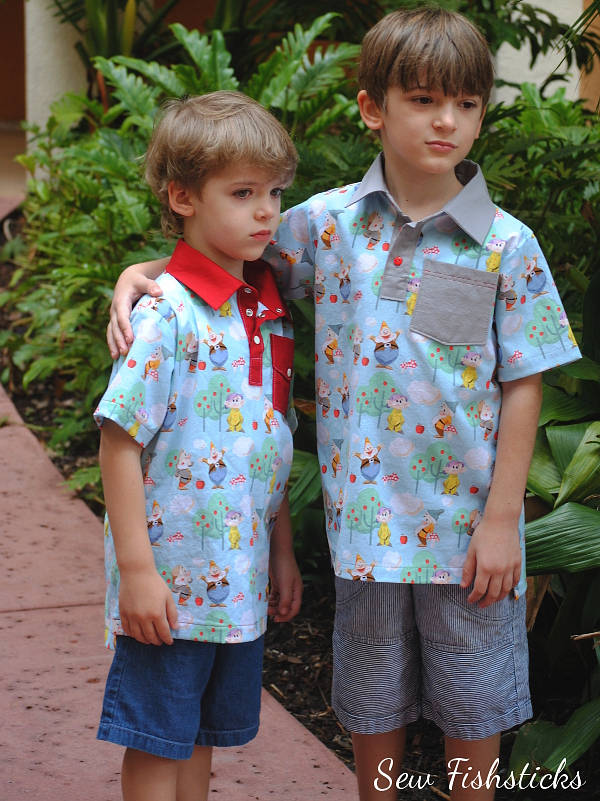 On Jamie’s shirt, I used the pocket from my Everyday Camp Shirt and tiny buttons on the placket. My next versions of these will definitely have narrower collars. These worked just fine, though, since everything Disney is a bit over-the-top! (Both boys are also wearing mama-made shorts — Inside or Out Pocket Pants on Charlie and Sand & Sidewalk Boardshorts on Jamie. They’re wearing Undercover Bottoms Boxer Briefs, too, but you obviously can’t see those!)
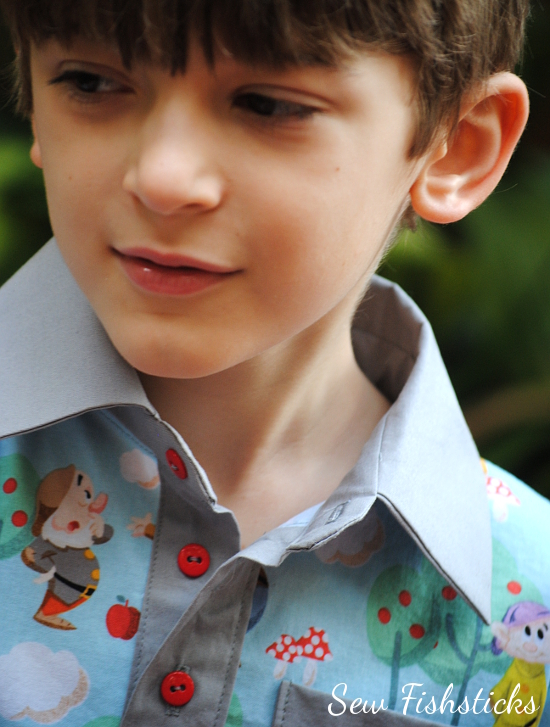 The pocket on Charlie’s shirt is similar to the faux flap pockets that I used on Jamie’s shirt for Disney Day One, and I finished his placket with metal snaps. Both shirts have a side slit and a slightly longer back than front. (You can see that best in the picture at the very top of this post.)
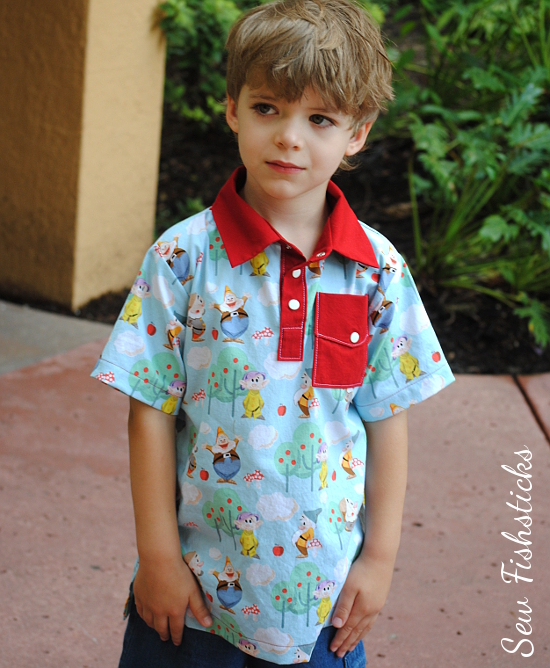 I thoroughly enjoyed sewing these outfits, and the kids loved wearing them. It was so nice to have unique Disney-themed clothing for them to wear on our trip. I’d love to hear your thoughts! Do you sew for vacations? special trips? special occasions? I tend to only do so if I know that what I’m sewing will be used later … my practical mindedness is usually the deciding factor. (The Mickey shirts that I sewed for the boys have already been worn again this week. As for these Seven Dwarfs tunics, I’m thinking of whipping up some Pajama Party PJ pants to match and turning them in fall jammies.)
Sewing for Our Disney World Trip ~ Day 1
 We took a short trip to Disney World this past weekend for Night of Joy, and I couldn’t pass up the opportunity to sew cute outfits for our two youngest boys and our granddaughter! (A few people pointed out to me that I am crazy sewing up all of this right before competing in Project Run & Play, but I really love sewing for these little people, and I’ve been so busy with other work stuff lately, I just had to do it! If you’re popping over from PR&P this morning, a huge “Welcome to Fishsticks!”)
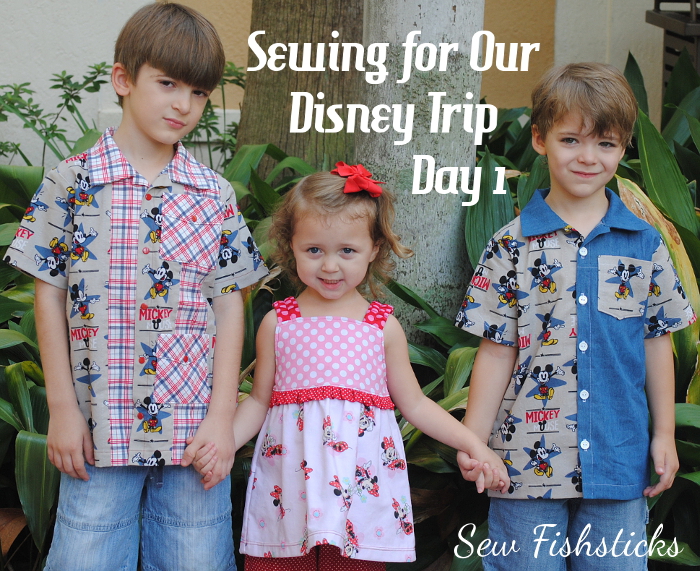
We spent two days/nights at the Magic Kingdom, so each of the little ones got two outfits. I’ll share their second day Disney clothes later this week! For the first day, I went with a Mickey and Minnie theme.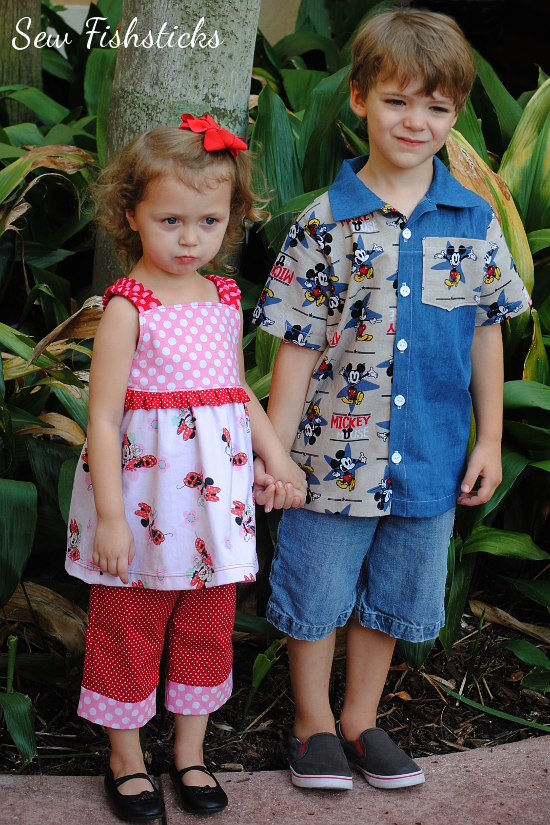 I used my Katie J. Jumper pattern for Katie’s top with a few simple modifications. I started by shortening the pattern to shirt-length using a top with the length that I wanted as a guide. I also added an extra ruffle between the bodice and the skirt. To do that, I just cut a strip of fabric the same width as the top of the skirt piece by 3″. Then, I folded it in half with the wrong sides together and pressed it well. I gathered the raw edges of the ruffle and attached it to the bottom edge of the bodice at the same time that I attached the skirt. It’s a really simple addition that adds a really cute extra feminine detail!
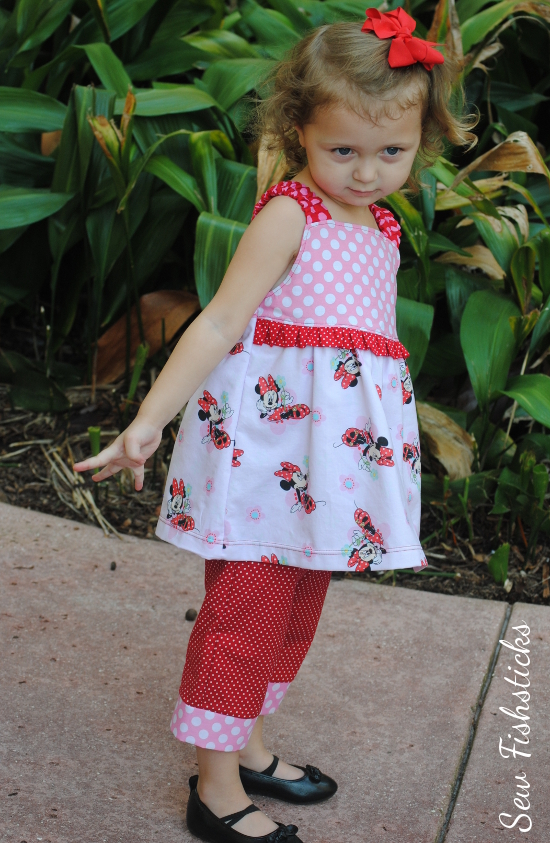 For Katie’s pants, I shortened the narrow version of my Sand & Sidewalk Skate Pants to capri length and added a simple band at the bottom edge instead of the hem. Because I was running out of time, I sewed them with no pockets, and I had them done in a flash!
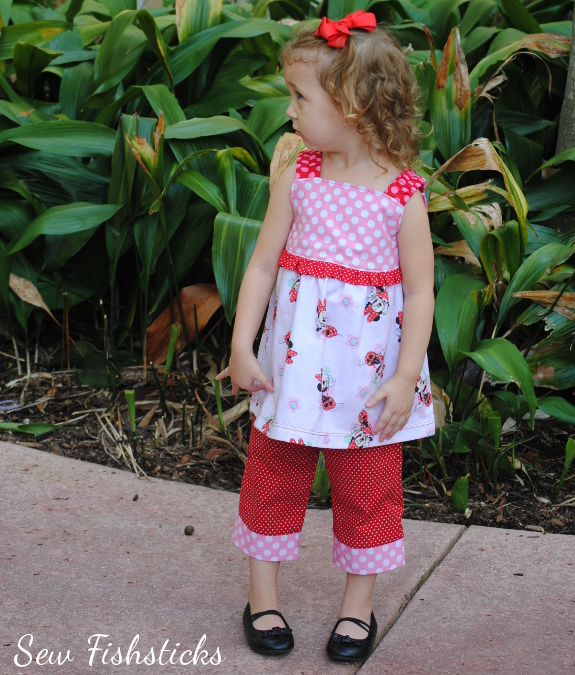 The boys’ tops began with my Everyday Camp Shirt pattern. (They’re both in the big kid sizes now! Eek! They’re growing up too fast.)
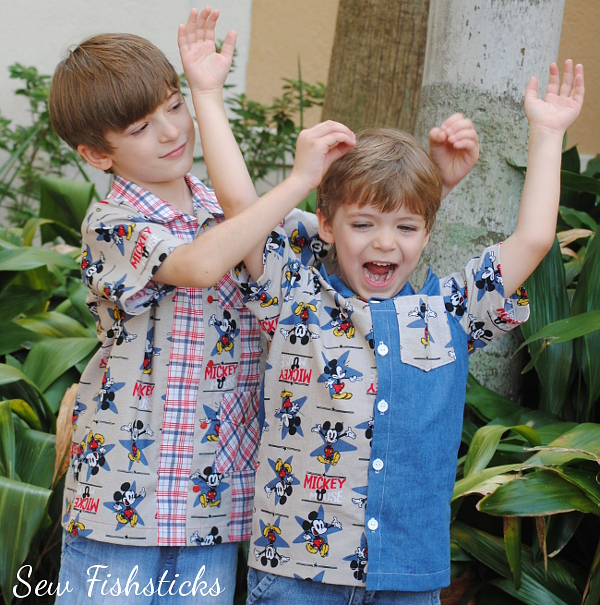 (Jamie was giving Charlie “Mickey Mouse ears”.) I mixed a light chambray fabric with the Mickey fabric for Charlie’s shirt, colorblocking it on the front by cutting the two front pieces in different fabrics.
 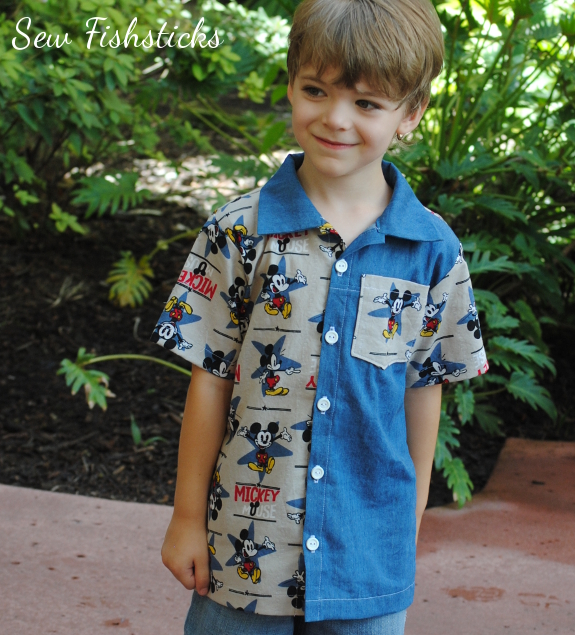 On the back, I added a yoke to show off more Mickeys. Since I made Jamie’s shirt first, and my Mickey fabric was running a little low, piecing Charlie’s shirt together with the second fabric helped stretch it further. The chambray fabric was left over from another project, so I got to use up some of my fabric stash, too!
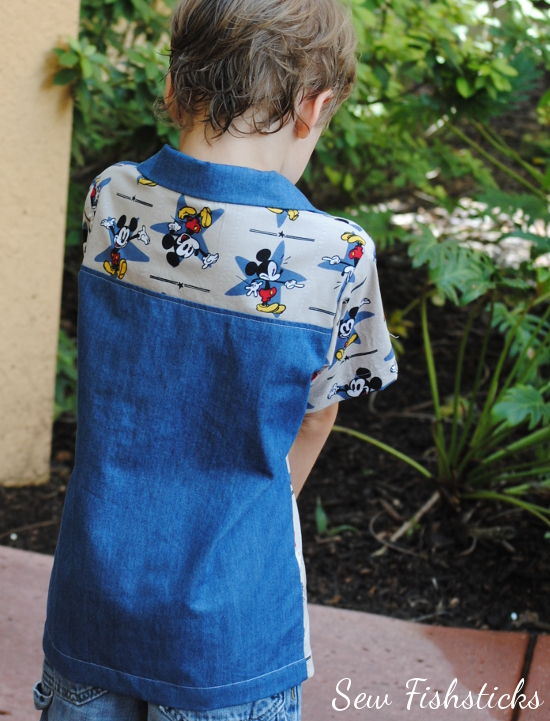 The design of Jamie’s shirt was inspired by the Cuban-style guayabera top.
 I pieced the pocket side of the shirt using that classic guayabera stripe and added pockets with faux flaps. The flaps are sewn down, and the pocket opens at the top like a traditional shirt pocket. I like that it gives the look of a flap but cuts down on ironing!
 I pieced the opposite side of the shirt a little differently so that center strip of Mickeys is nicely framed, and I skipped the second row of pockets.
Jamie’s shirt is finished with metal snaps, and Charlie’s shirt above is finished with 1/2″ buttons. The Mickey and Minnie fabrics and the chambray were all purchased at Joann Fabrics. The plaid fabric on Jamie’s shirt is a Riley Blake Designs print, and the dots are from Michael Miller Fabrics.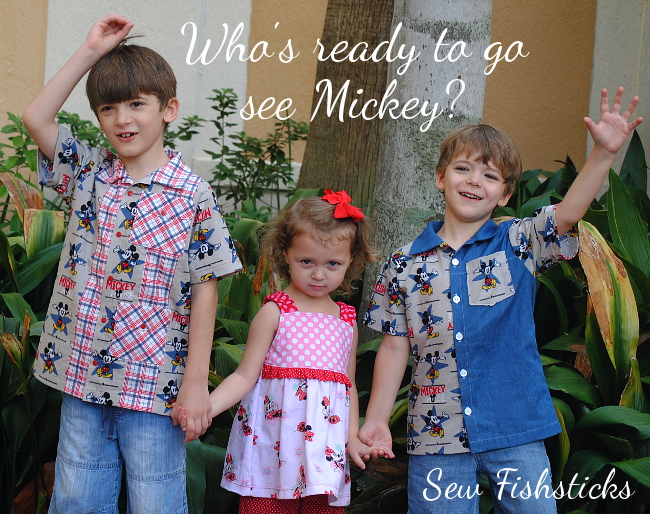 Our plan was to visit with Mickey as soon as we got to Disney so that we could get some quick pictures while everyone was still clean! Katie wasn’t exactly excited about seeing him in person, though.
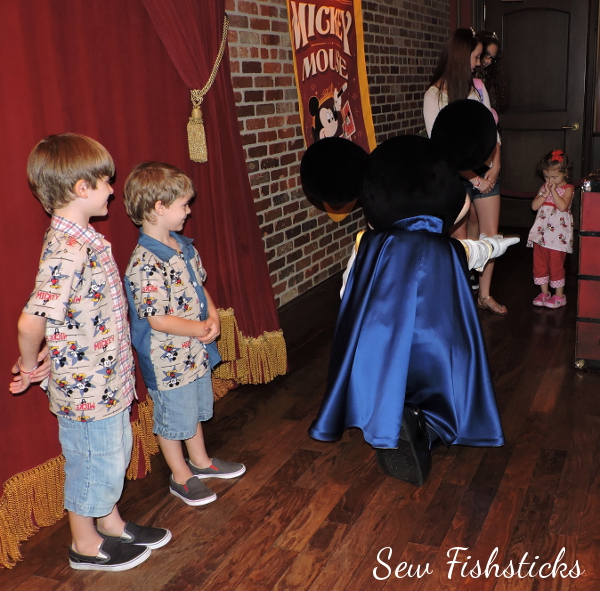 Thankfully, her two little uncles managed to coax her over close enough to snap a few photos.
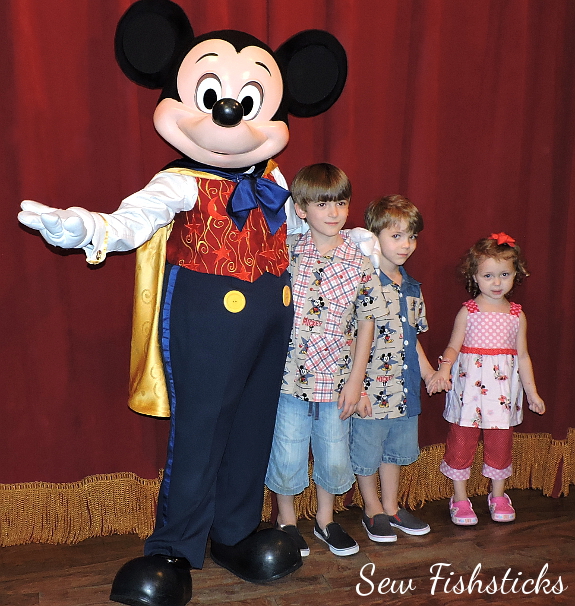 We had a blast at Disney that evening, but we also got drenched in the pouring rain, so the remainder of our pictures look mostly like this one:
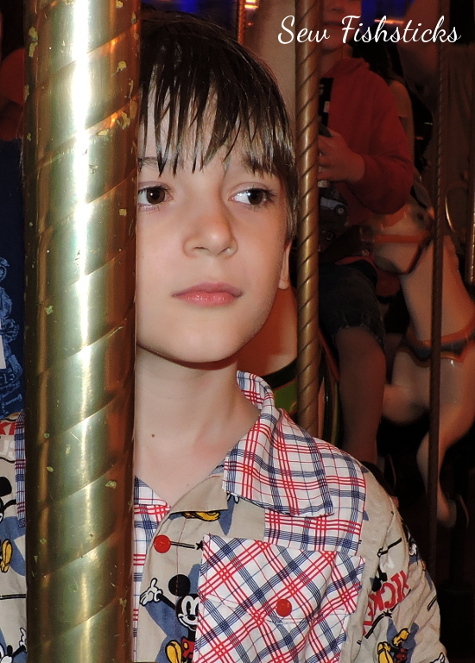 Thankfully, our second night was much drier! Those pictures will be coming on Wednesday morning. In the meantime, though, if you want a peek, just pop over to my Instagram feed: Fishsticks on Instagram. (Feel free to follow me there! You might get some little peeks of my PR&P sewing later this week, too!)
Customizing a Tote Bag for Mom
This post originally appeared in The Make for Mom Series at The Shaffer Sisters in May 2013.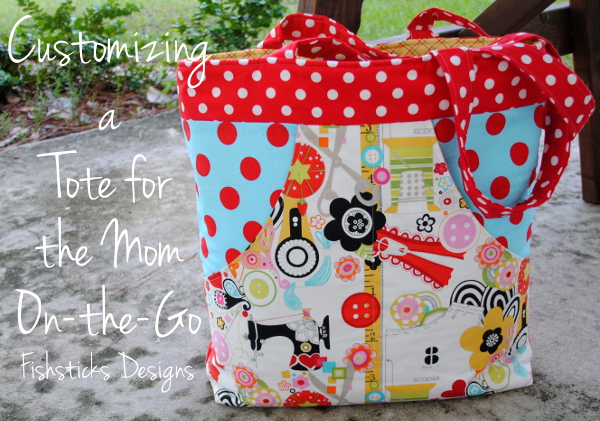 My husband and I have a habit of packing up our kids and heading out on road trips with stops in multiple states to visit friends, family and ministry supporters, and we always try to throw in some sightseeing (homeschooling on the road, right?), too. With so many stops, I need to keep myself organized. I put together this enormous tote bag with tons of pockets just before our last trip which included stops in West Virginia, Tennessee, Washington DC and Virginia. Crazy, right? This bag was such a great help!
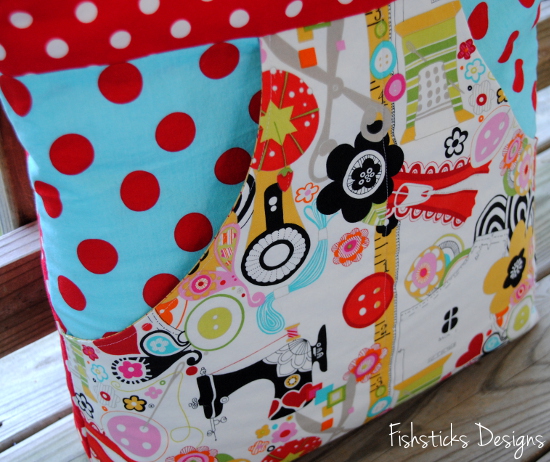 I knew just what I wanted from this bag, so I designed it exactly to my own specifications. It’s sort of huge at 16″ wide by 17″ tall by 4″ deep, but it holds everything that I need it to hold, and it looks pretty doing it!
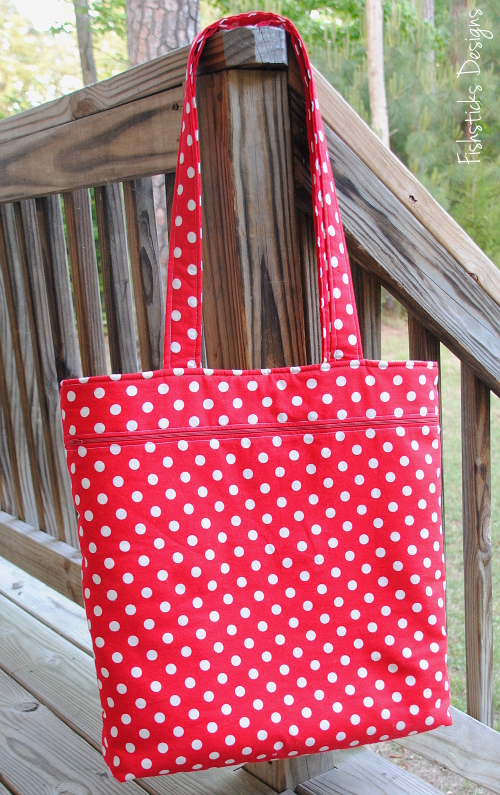 I added decorative pockets to the front and a zippered pocket on the back.
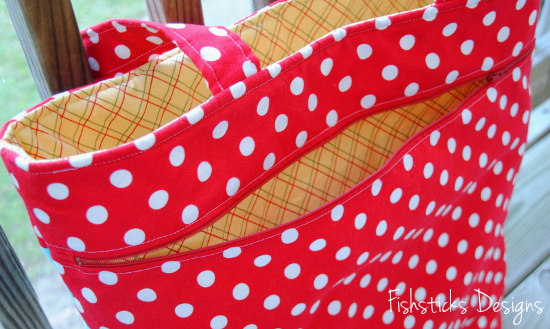 But, what I really want to show you is the inside of the bag.
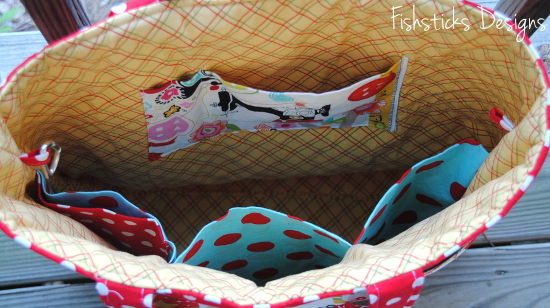 Without inside organization, the size of this bag would make everything disappear. Adding pockets and loops to the inside of any bag, though, is really simple. Once you know how to do it, you can grab your favorite tote bag pattern and customize it perfectly for you!
You’ll want to have your inner bag pieces cut and any interfacing added before starting on these little extras. Have a quilting ruler and a washable or disappearing marker handy. If you’ll be making custom-sized pockets for anything (cell phone, notebook, etc.) then have those ready to be measured, too. I’m using a 1/2″ seam allowance on everything and assuming a 1/2″ seam allowance on your bag pattern.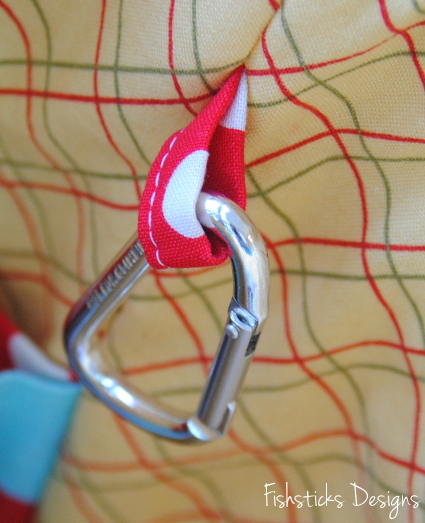 Let’s start with the loops. These little loops are really the most basic thing you can add to a bag, but you’ll be so surprised at what a difference they make! With a bag this big, you simply must have a way to clip in your keys or anything else that you need to be able to access quickly. With a loop or two sewn into the side seams and a carabiner clip, you’re good to go!
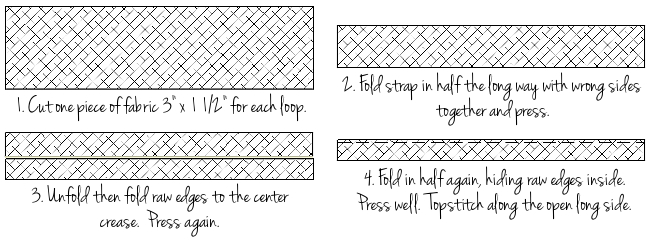 Fold your loop piece over to form a loop, matching up the raw edges. Pin in place as shown and baste it to one side of your unfinished bag inner.
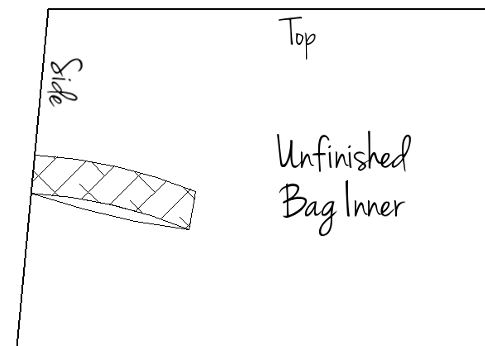 Now, let’s move on to the pockets. I designed this smaller pocket to hold a pen, a pencil and my little notebook.
 To make your own custom-sized pocket you have to do a little math, but it’s really simple, I promise! For pens or pencils, a 1″ wide pocket is perfect. I usually make credit card or loyalty card pockets 3 1/2″ wide. (That width works for my I-phone, too.) If you have something specific, like my notebook, measure it across and add 1″ for your pocket width. My notebook is 5 1/2″ wide, so its pocket needs to be 6 1/2″ wide. With me so far? The height of your pocket should at least 3/4 of the height of the things you’re putting in it. That will keep them tucked nicely in place. For a standard pen/pencil/card pocket, I usually go with 4 1/2″ finished height. My notebook is taller, though, so I made this pocket with a finished height of 5 1/2″. Now you should have all your measurements. Here are your formulas: pocket width + pocket width + pocket width + 1″ seam allowance + 1/4″ topstitching allowance = fabric width and pocket height x two + 1″ = fabric height. Just keep in mind that you are limited by the width and height of your bag. Pretty easy, right? Here are my formulas:
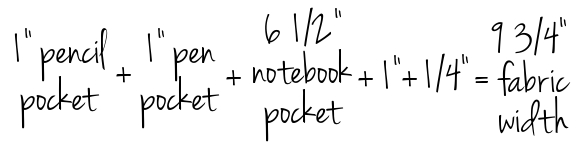
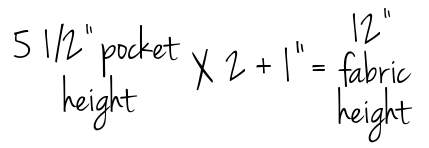 I’m going to cut my pocket fabric 9 3/4″ wide by 12″ high (or long, I guess). Your pocket width and height may be different, though, based on what you’re putting in it. (If you want to cheat a little, for two pen/pencil pockets and two card pockets, I generally go with 10″ x 10″.) Now that you’ve survived that math, sewing the pocket is super simple. Just fold your pocket piece in half with right sides facing and match up the edges that measure the width of your pocket. (In my case, I’m matching up the 9 3/4″ edges.) Stitch along sides and bottom, leaving a 1 ½” opening in one side for turning.
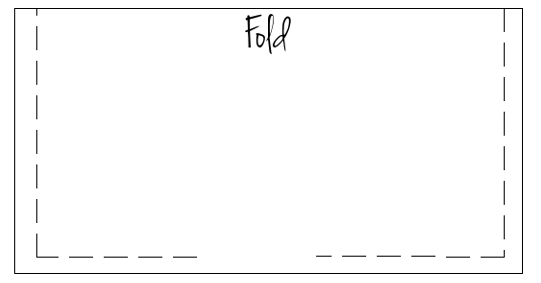 Trim your corners and turn your pocket through the opening. Press it really well. Center your pocket with the folded edge facing the top of the bag on one of your inner bag pieces. You can place it at whatever height you’d like, but I usually go with about 3 ½” to 4″ from the top edge. Topstitch around the sides and bottom 1/8″ from the edge. Once your pocket is sewn onto your bag panel, just use a quilting ruler to measure your pocket widths, then draw lines with your disappearing marker. Stitch down each line, remove the marker and your pockets are done! (A little tip here: stitch from the bottom up to avoid any puckers!)
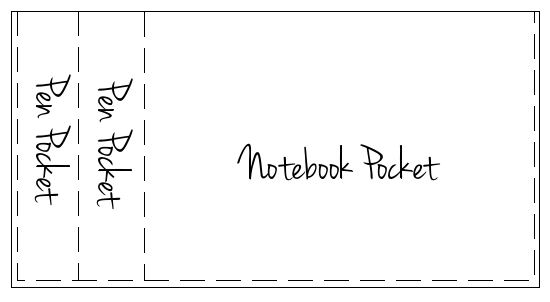 Whew! That wasn’t too hard, right? Ready for one more set of pockets for the other side of your bag?
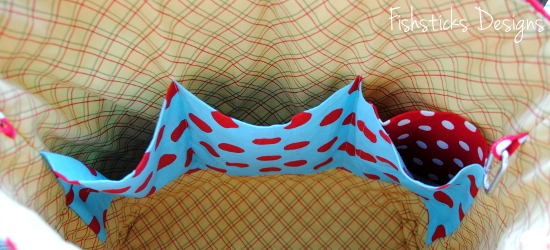 For this set of pockets, you’ll cut your fabric width the same as the width of your bag. You’ll use the same formula that we used above for your fabric height. Since I wasn’t exactly sure of what I’d be putting in these pockets but I wanted them to be pretty roomy, I went with 9″ for my finished height. The width of my bag inner piece was 21″, so I cut my pocket piece 21″ wide by 19″ (9×2+1) high. To sew this pocket, you’ll only need to stitch across the bottom edge because the sides will be tucked inside your bag’s seam allowance. Fold your fabric over with right sides together, the same way you did with the smaller pocket and stitch across the bottom edge.
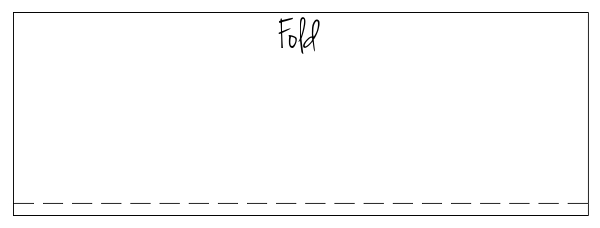 Turn your pocket through one of the short ends and press it well. You can see in the photo above that I tucked another little pocket inside this big pocket. That’s a designated spot for my cell phone. To determine the size of this pocket, simply follow those instructions for the small pocket above. Once you’ve sewn your cell phone pocket, turned and pressed it, you’ll simply topstitch it to the inside of one of your large pockets. Let’s decide on the width of your large pockets first. These pockets can be as wide as narrow as you want them. For mine, I just divided the width of my fabric into thirds. Since my fabric was 21″, that made each pocket about 7″ wide. Using this measurement to be sure my cell phone pocket didn’t end up chopped in half between two pockets, I marked a spot and topstitched my cell phone pocket inside what would become one of the pockets closest to the edge of my bag.
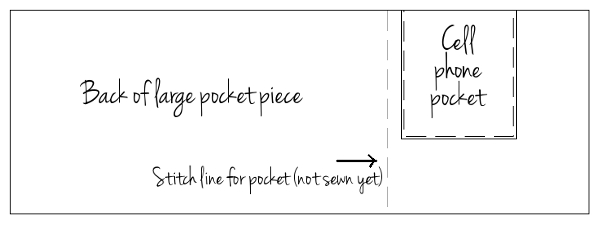 Now you’re ready to sew your large pockets to your bag. Position your pocket piece on your bag inner piece. The positioning with change depending on how tall your bag is, but I placed mine with the top edge 5 1/2″ below the top of the bag. Topstitch the bottom edge at 1/8″. Use a quilting ruler to measure your pocket widths, then draw lines with your disappearing marker. Stitch down each line, remove the marker and these pockets are done, too!
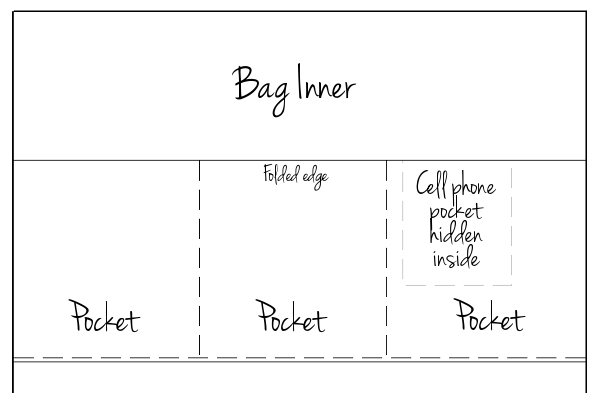 Now all that’s left is to finish your bag according to your pattern instructions. Then fill it up and go!
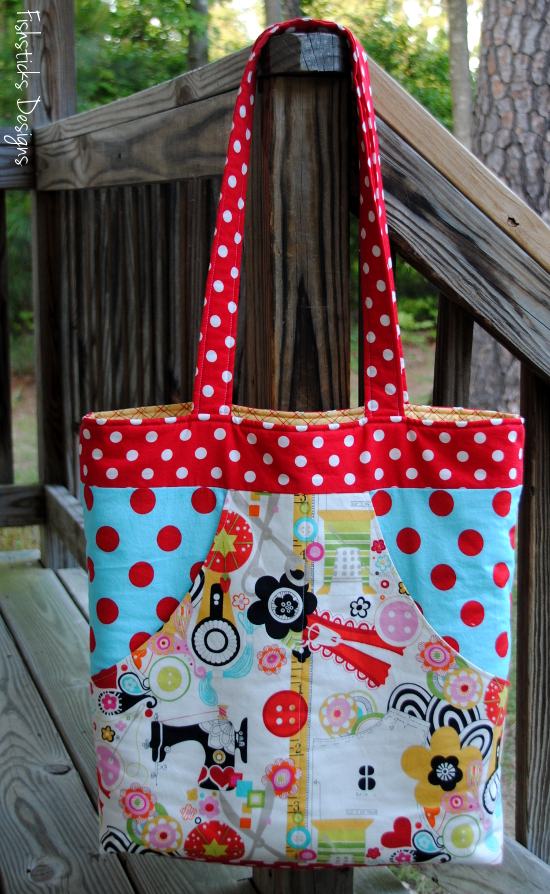
Legos on the Go at Today’s Creative Blog!
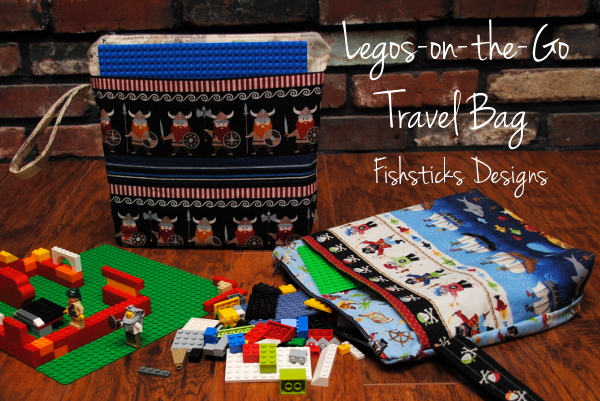 I’m guest posting today in the Celebrate Summer Series at Today’s Creative Blog! Be sure to come check out this quick sewing project that is sure to keep your Lego-loving little ones entertained wherever your summer travels take you: The Legos-on-the-Go Travel Bag Tutorial.
Bento Boxes for Real Food on the Road
 I have plans for a series on family travel to start soon, but I promised that I’d share this sweet little bento box this week! Isn’t it perfect for a family full of Lego-loving little boys?! I found it at Modes4U! It came in the same package as the fabric that I used for my little guys’ travel bags.

When you’re on the road or even just spending the day out at the park, it’s hard to take real foods with you. I had considered bento boxes before, but I hadn’t actually tried one until this trip, and now I think I need one for each member of the family. In case you’ve never heard of bento before, Lunch in a Box defines “bento” as a compact, balanced, visually appealing meal packed in a box. Historically, it’s a Japanese box lunch. And, a quick Pinterest search for “bento lunch” will make you gasp at the artistic talent that many people put into bento lunches! My bento lunch is very simple in comparison! The very top layer of this box has a freezer pack to keep the food in the top storage compartment cold. On this particular day, I packed a boiled egg, cucumber slices, grape tomatoes and cheese — a great real food lunch, and it’s gluten-free to boot!
 The divider between the top and bottom storage compartments holds a little set of chopsticks, in case you need utensils.
 The bottom storage compartment is just as roomy as the first. I really like that this bento box is BPA free and painted with food-safe lacquer. It’s really easy to keep clean and ready to go, and I trust that it’s safe storage for our foods. Because it was warm out the day I took these pictures, I didn’t have food packed in the bottom. Instead, I threw in a ziploc bag of ice and left out the middle divider to be sure that the eggs stayed cold! That was a great bonus to using a double-layer bento box!
 On other days, we packed the bottom layer with pretzels and crackers.
 We packed a lot of picnic lunches while we were traveling this time, and having this handy little box made at least one of our lunches a lot of fun. We’ll have to make sure that we have bento boxes for everyone next time! I love anything that keeps our kids excited about eating real food, especially when the vendors surrounding us are selling stuff that looks and smells good, but isn’t really at all what we want to put in our bodies!

Modes4U Fabric & Travel Bags for My Boys
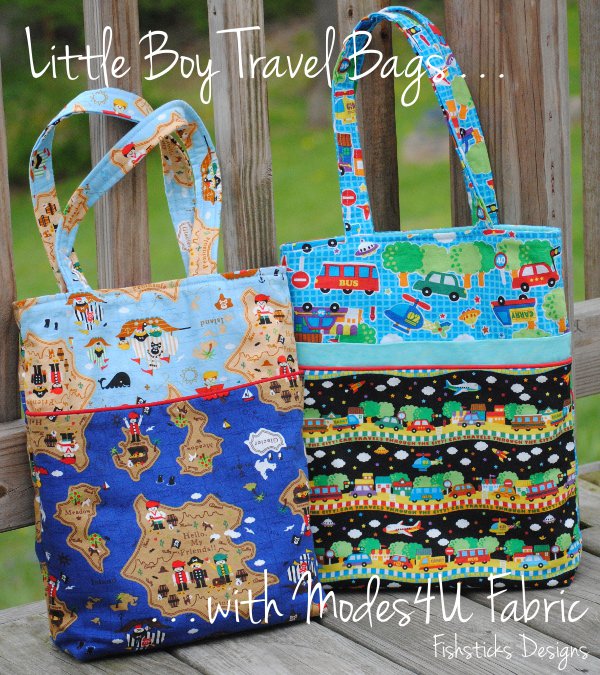 Traveling with little ones is so much easier when everyone has their own place to keep and carry their things. We’re away from home right now on a trip that includes several different destinations and quite a bit of time in the car. Just before we left, I stocked up on activity books for three-year-old Charlie and six-year-old Jamie and whipped up these quick totebags for each of them to keep everything organized!
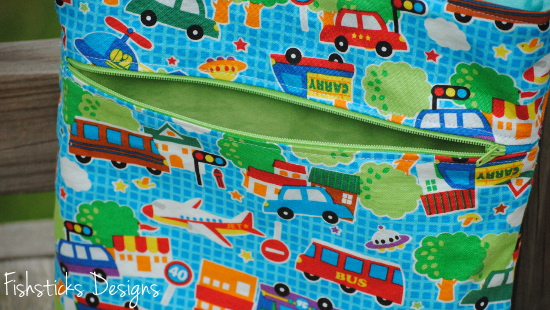
I’d been eyeing some of the adorable oxford Kokka boys’ fabrics at Modes4U. I knew that Jamie would love the pirate fabric, and Charlie is all about anything that drives or flies, so the vehicle fabric was perfect for him! My only worry was whether the fabric would get here in time since it ships from Hong Kong. Thankfully, it arrived in plenty of time — about 7 business days! (Their website does say that it can take up to 15 business days, though, so be sure you have a backup plan if, like me, you have to have the fabric really quickly.)
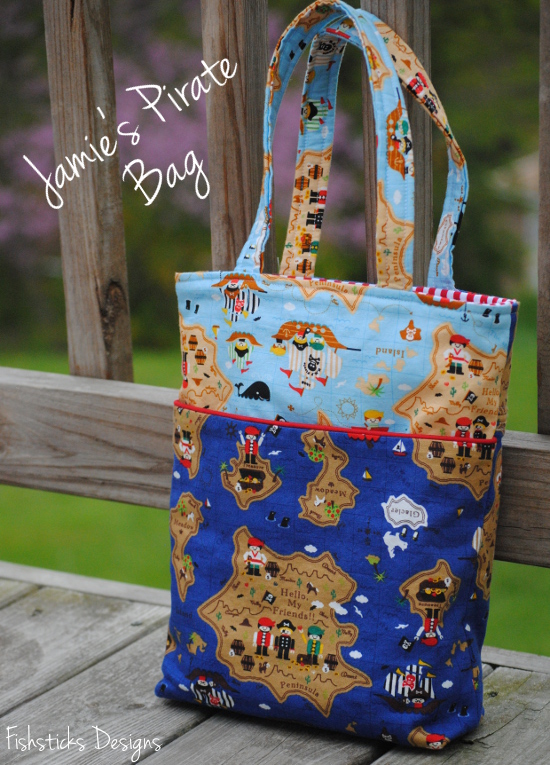 The oxford fabric is sort of a lightweight canvas, so it’s perfect for a simple totebag. For Jamie’s bag, I used two different colors of the same fabric and added piping along the front pocket. Charlie’s bag used two fabrics from the same line that were pretty busy-looking when I put them together. I eased that problem by breaking them up a bit with piping and a strip of solid fabric at the top of the pocket.
 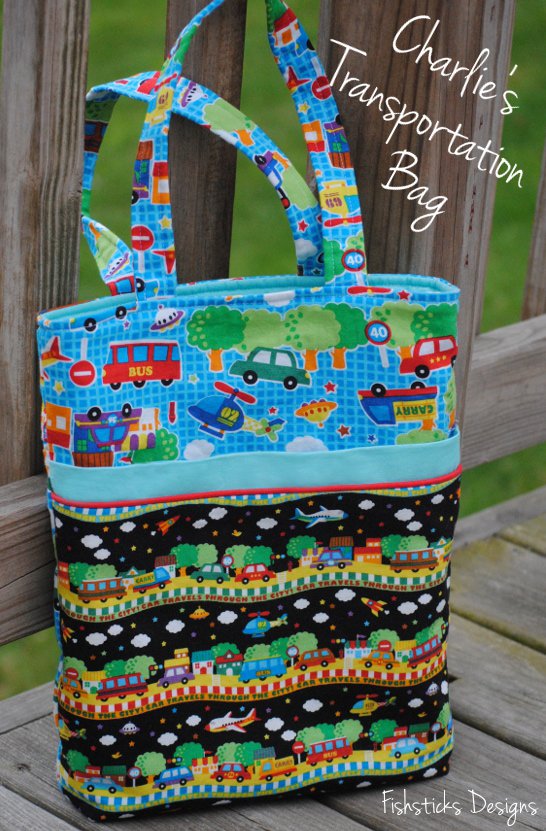 Both bags got zippered back pockets for those little things that tend to need better containment.
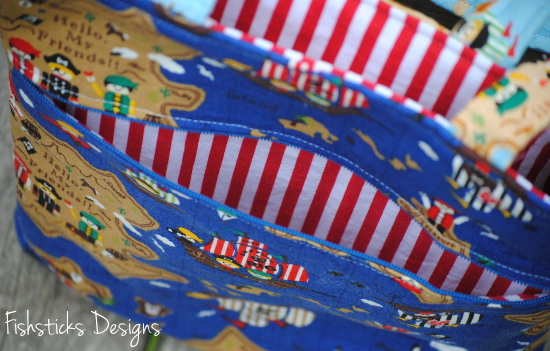
 Inside, I added a couple of colored pencil pockets along with a pocket that is just the right size for the mini-coloring and sticker books that I slipped into their bags. (I love being able to completely customize what I’m sewing for our needs!)
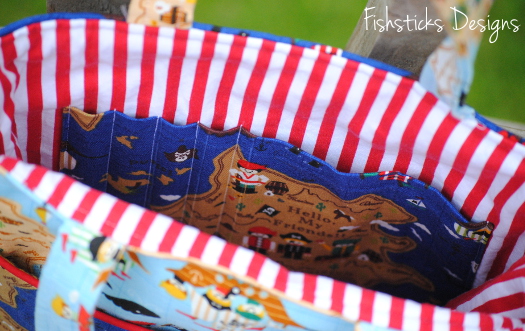
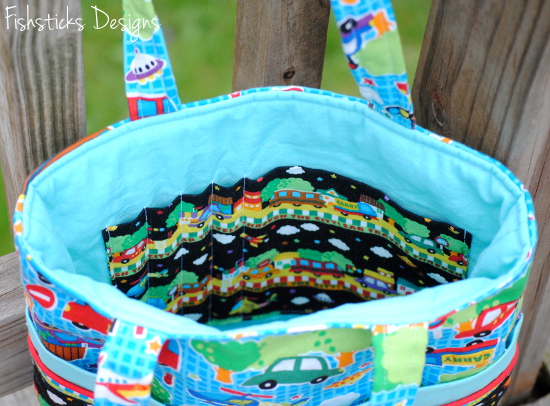 The boys are really enjoying their new bags, and so far, they’ve done a really good job of putting their things away when they’re done so we don’t lose track of or leave anything behind on any of our stops.
For those of you who are moms to boys, Modes4U has an enormous selection of boys’ fabrics! I don’t think there’s a single one that I don’t like! I’ll definitely be back for more. This oxford fabric would be great for summer shorts! They also carry a whole list of other things, including bento boxes. I grabbed one of those, too, that you’ll see later. (I think it’s going to be perfect for next week’s sightseeing.)


