My Patterns
Project Run & Play: The Upcycled Beach Boy
 Challenge #5 at Project Run & Play is The Men’s Dress Shirt Challenge. I adore upcycling things, so I was really excited about this week. So excited that I visited multiple local thrift stores to dig through the dress shirts on several occasions. (I actually purchased a total of eight dress shirts with at least six different ideas in mind. Thanks to thrift store prices, though, I spent less than $30 for all eight!)
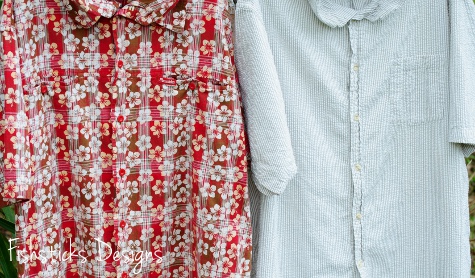 In the end, I settled on the two 100% cotton shirts above. I’ve been rotating between sewing for Jamie, Charlie and Katie, and this week was Jamie’s week. With a size 6 to sew, I needed plenty of fabric. These are both X-large shirts. The seersucker shirt is an X-large tall!
  I had originally planned to do something a little more exciting with the Hawaiian shirt. At least more exciting than turning a big Hawaiian shirt into a little Hawaiian shirt. My plan was to use my camp shirt pattern, but instead of the collar, I was going to sew in a hood. I tried the hood. Really. It’s still thrown on the floor of my sewing room right behind me. After ripping it off and sewing it back on twice, I still wasn’t entirely happy with it. I reached a point where I took a look at the partially finished shirt with the hood attached and wondered to myself if I was just sewing in the hood to make the shirt look different for this blog post, never to be worn again. My practical side won out, and Jamie has a new outfit that is cute, well-made and wearable, even if it is a little un-imaginative!
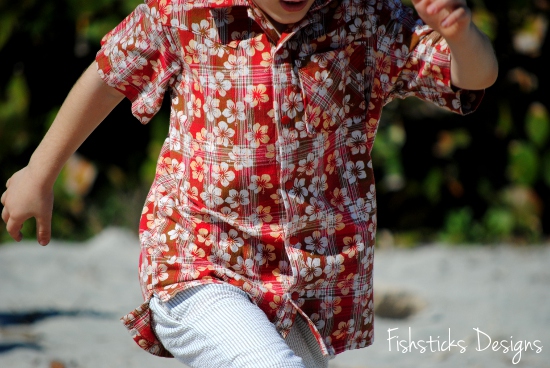 This outfit was made for the beach, and we happen to live less than a 10-minute drive from the beach, AND we were blessed with beautiful beach weather today. (Have I mentioned how much I love being back in Florida?)
 Doesn’t this make you want to come dig your toes in the sand?
 Oh, yes, the outfit! For the top, I started with my Everyday Camp Shirt pattern, the same one that I used for Jamie’s bowling shirt in Week 2 of PR&P. This time, I added angled yokes to the front of the shirt and the bias-cut pocket. (Love the bias-cut pocket!) I also used metal snaps because Jamie prefers them to buttons which are harder for him to do on his own.
  The original men’s shirt had side seam vents and a drop tail that I thought were perfect for the casual beach look, so I recreated them. I was able to cut the shirt out in such a way that I could re-use the original hems on both the body and the sleeves, but I wasn’t quite able to line up the stripes on the side. Eh. I think the pattern is busy enough that it’s not really noticeable.
 The shorts are Mud Puddle Splashers! (I finally got the pants update for the MPS pattern to my testers last night, and I’m hoping to have the finished pattern ready for sale in the next couple of weeks. You guys have been so patient with me during our move and settling in period! New patterns are coming. I promise!) I love the Mud Puddle Splashers for simple, easy, everyday little boy pants. These have the side-seam pockets, the faux fly and the back pockets. (I failed to get any good pictures of the details on the shorts. I was a little too busy just enjoying watching my little ones enjoy the beach . . . in February!)
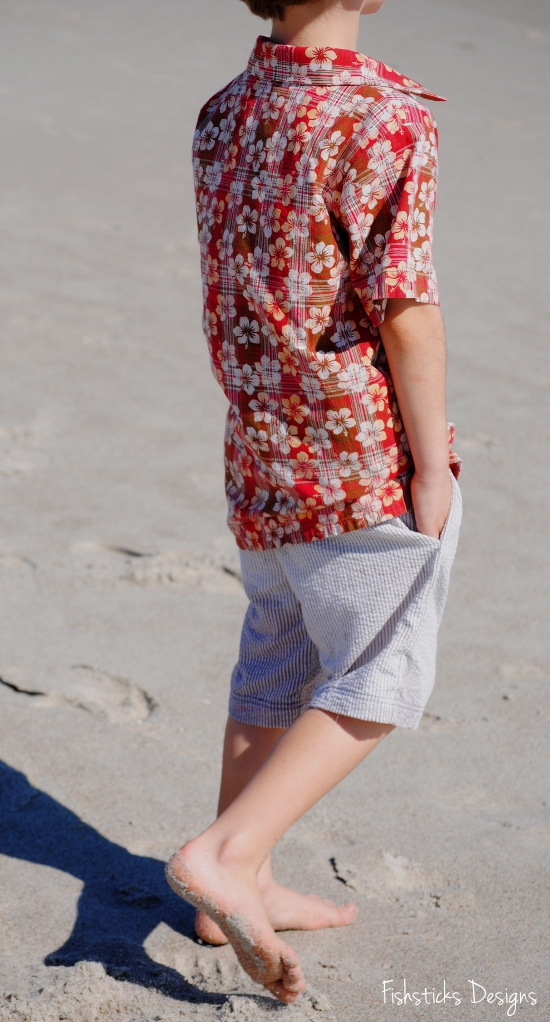 I heard on the radio today that there’s a blizzard blowing in up north, so I’ll leave you with a few more pictures of Jamie’s fun at the beach on this warm morning. (You may feel free to remind me of this post in the middle of July when you’re enjoying comfortable evenings with your windows open, and I’ve barricaded myself in my air-conditioned house because of the sweltering Florida summer heat.)
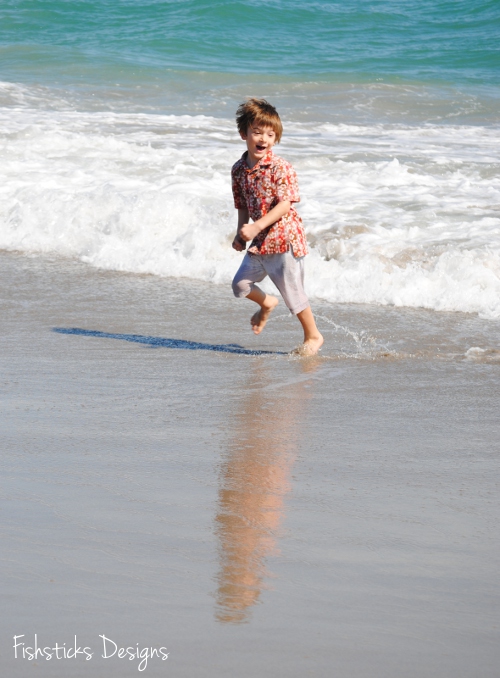


Project Run & Play: Love Is in the Air
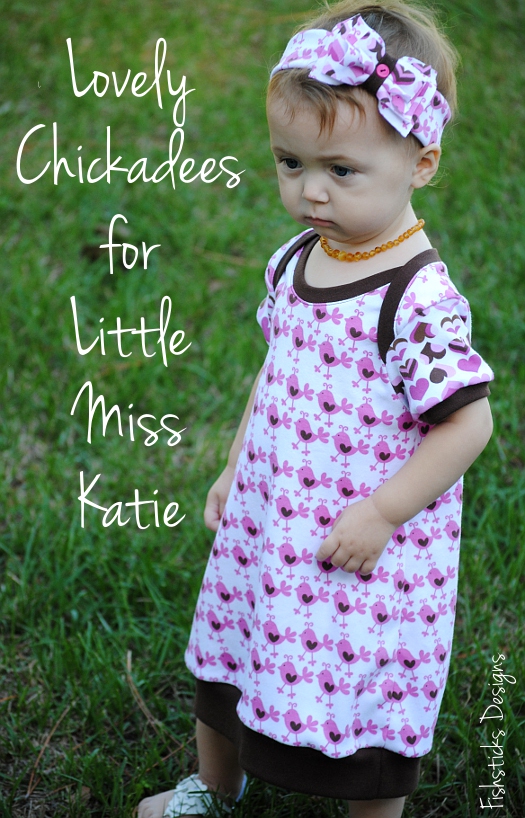
This week’s theme at Project Run & Play is “Love is in the Air”, and I was excited to sew something for my granddaughter, Katie, again this week! I’ve had this Chickadee interlock and the coordinating Hearts hoarded in my stash for years, and I’m so glad that I finally dug them out and used them. They’re perfect for Valentine’s Day, aren’t they?
I used the laptee from my Wee Tot Collection as the base for this little dress. My time was really limited this week because of some other exciting projects that I have in the works. (Be sure to check back here on Friday for a new tutorial and an opportunity to use your sewing talents to give to children in need!) With only one afternoon to sew, I knew I needed to grab a pattern that I not only know really well, but also one that goes together really fast. I think it’s so important to have a handful of patterns that fall into that category. For me, all of those patterns are sewn with knit fabrics. (I can sew a Charlie Tee from cutting to finish in less than an hour every time.)

My modifications give this dress some great character, and they actually saved me even more time! The only time this dress touched the sewing machine was when I topstitched the neckline. Everything else was done on the serger. I trimmed a bit off of the sleeve and added a band to finish it off. To give the body of the dress a little poofiness, I cut it into an A-line and finished the bottom off with a band several inches shorter than the width of the bottom edge.
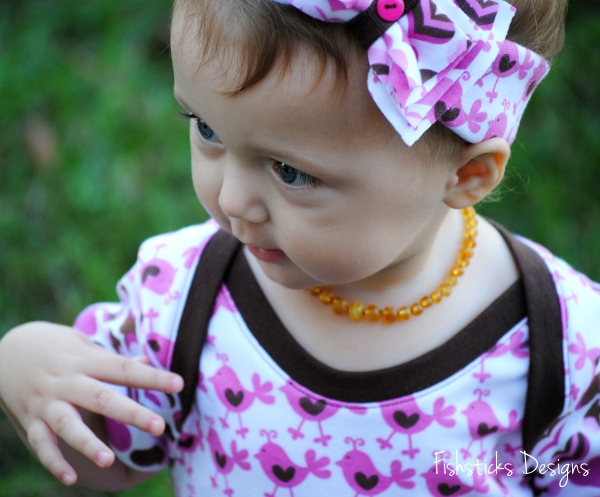
I think the bow might be the one thing that makes this whole outfit, and it’s the first bow that I’ve ever made! It’s just a couple of simple loops of fabric with several pieces of fabric pulled through the smaller loop to make a “bow”. The button was a last minute addition because I didn’t like that the bow part kept sliding and exposing the seam. All of the edges were left raw and just tucked under.

Katie seems to really like the chickadees.

See! There’s a smile!

Project Run & Play: For the Boys
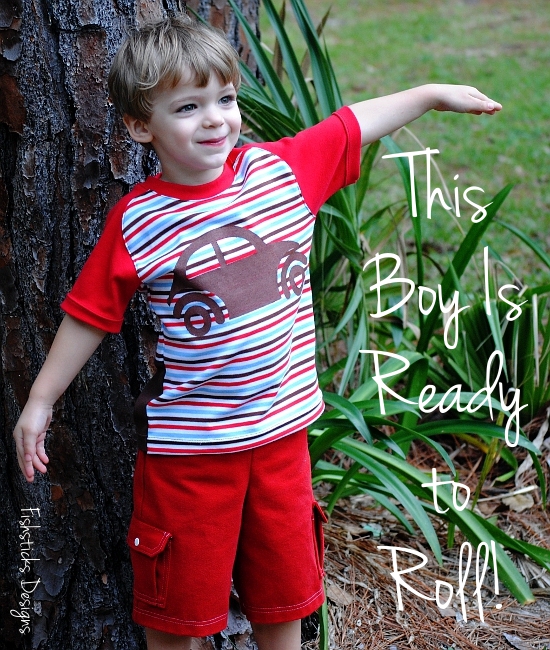
It’s Boy Week at PR&P! I sew for my boys all the time, but I still enjoyed coming up with an idea that is all about my boys! One of the loves that all of my boys, from oldest to youngest, share is the hunt for Punch Buggies. My 19-year-old son, Sean, is the one who taught the little ones to spot them. They aren’t allowed to actually punch anyone when they see one, of course, but my six-year-old Jamie is a champ at spying VW Beetles from blocks away! (Sean’s halfway across the country from us in college now, and the little ones occasionally ask me to text him pictures of Punch Buggies just so that he knows they’re still looking.)
Since I sewed for Jamie last week, Charlie got this week’s outfit. (I’ll have to make a Punch Buggy shirt for Jamie later, though, or there might be a revolt.) I drafted up a Beetle design and used the freezer-paper stenciling technique to paint it on a Patrick Curved Raglan.

I used some color-blocking again this week. This time it was a necessity since I didn’t discover that I was short on fabric until I had already planned the whole outfit. I got creative with it, though, and added a unexpected second car on the back. If I hadn’t told you, would you have even guessed that I didn’t plan it this way all along?

The red shorts are really my favorite part of this outfit. After seeing the red pants that Suzanne from Winter Wonderings, Wanderings, & Whatnot made for her little guy’s Collegiate Cool Look last week, I just had to make red pants for Charlie. I opted for shorts since we live in Florida, and shorts get far more use here than long pants. I wanted to make them with red denim, but red denim isn’t easy to come by, especially locally. A quick trip to one of our local thrift shops, though, turned up the perfect pair of recyclable red jeans!

I made some minor modifications to my Inside or Out Pocket Pants pattern including reusing the main structure of the front pockets from the original jeans. I did have to reconstruct one of them to remove the watch pocket, and I ripped out and redid the topstitching so that it would match the remainder of the shorts. Speaking of the topstitching, I considered using some brown denim accents on these, but in the end, I decided against it so that the shorts could be worn with multiple tops. Instead, I let the white topstitching be the accent.

The back pockets are those from the IOOP pattern with twin needle topstitching.

I added a gusseted cargo pocket and used the pattern’s pocket flap with the addition of a metal snap.

Charlie loves this outfit and couldn’t wait to put it on. Is that not the sweetest smile? I can’t help but notice, though, that those twin curls on either side of his forehead make him look quite mischievous.
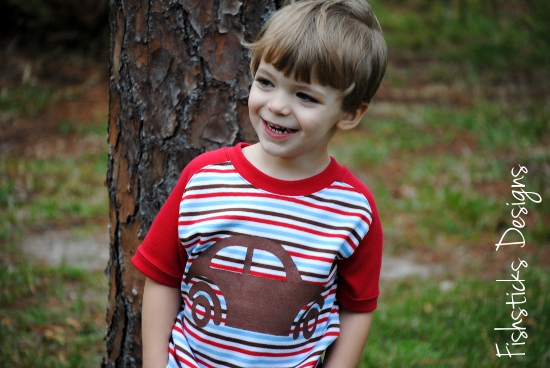
Charlie put the whole outfit to the “boy test” by running, jumping, rolling, falling, etc. in the backyard, and I think it passed with flying colors!

While this week is all about the boys, there were quite a few little boy outfits sewn up the first two weeks, too! I love that! Our little guys are so often neglected when it comes to handmade clothing. It makes me smile to see so many moms making the effort to sew for them, too!
Project Run & Play: Polka Dots & Stripes

This week’s Project Run & Play Challenge is Polka Dots and Stripes. (Have you sewn anything? You should give it a try!) Sunday was my Jamie’s sixth birthday, and he wanted to go bowling. I knew that I wanted to sew a shirt for him, since his birthday is this week, but the idea for a bowling shirt didn’t actually come to me until Sunday morning! Am I the only one who occasionally overlooks the totally obvious?

I printed a new copy of the pdf version of my Everyday Camp Shirt pattern and started drawing lines and chopping it apart where I knew I wanted the color-blocking on the front and the back. Color-blocking is really simple to add to any pattern. Just draw lines where you want your new fabric to begin and end, then add lines on either side for seam allowance. I use 1/2″ seam allowance, and then I just fold the pattern to get the right portion of it when I’m tracing on to the fabric. You could also print two copies of the pattern, though, and actually cut out the separate pieces of the pattern before tracing. Does that make sense? (Maybe I need to do a tutorial with pictures. It’s such a great way to take a pattern that you already love and give it a new look.)

I sort of wish that I’d made the stripe on the sides of the front a little wider. It’s easy to see in real life when Jamie moves around, but it was really hard to get in pictures. This picture does show it well, though!
In addition to the color-blocking on the front, I added a yoke on the back and simply turned the fabric on the bias. When you’re working with stripes, that’s an easy way to add some interest without using a second fabric. I also cut the pocket on the bias and added a strip of the polka dots as trim on the top.

I promise he does smile. He was so excited to go bowling! He just isn’t interested in smiling for the camera lately. Too much pattern cover photography, maybe? Poor kid.

I did the raw-edge applique on the back of the shirt using the method that I explained in my Christmas Tee in a Twinkling Tutorial in November. In case you’d like to make your own Everyday-Camp-Shirt-turned-Bowling-Shirt, here’s a pdf of the applique pattern for you: Bowling Applique. Be sure to link to me if you use it. I’d love to see what you create!
Katie’s Playdate Backpack 12 Days of Handmade Christmas Projects: Day 6
 Our little granddaughter, Katie, is getting so big! It’s definitely time for her to have her own Playdate Backpack. Her Uncle Charlie (Yes, Charlie’s been an uncle since he was one!) uses his every time we go out. It’s perfect for carrying all of his little essential toddler/preschooler things.
  Katie’s mama requested owl fabric for her backpack, and I happened to have this sweet pink Japanese owl fabric hiding in my stash. I think it mixes perfectly with the larger print owls from Jenn Ski’s Ten Little Things collection. I can’t wait to see what Katie and her mama think of it!
  I love the funky orange straps and the green snap hidden under the flap!
A Cyber Monday Evening Sale!
It’s Cyber Monday . . . Evening! Do you have Christmas sewing planned? How about a pattern sale to help with your list? You can use the code “CYBEREVENING” through tomorrow at 6 p. m. eastern to take 30% off of all paper and pdf patterns in my main store here: Fishsticks Designs Pattern Store.
You can also use the code “CYBEREVENING” for 30% off all pdf patterns in my Etsy store through 6 p. m. tomorrow, and you’ll find a special surprise waiting over there!
Remember this pattern?

I’ve had so many emails asking about the Emmy Top & Dress Pattern lately! So, I’m bringing back the pdf version of both the Infant & Toddler sizes and the Big Girl sizes for just one week. You’ll be able to find them right here: The Emmy on Etsy through next Monday, December 3rd. Be sure to grab them while you can!
Family Photo Sewing52 (Family) Projects in 2012: #16, 17 & 18

We took advantage of having all of our children and our granddaughter in this week and planned a family photo session yesterday with the amazing Brandi of Brandi Thompson Photography! After all the planning and sewing that led up to the session, I don’t know how I’m going to manage the couple of weeks that it’ll take to get our proofs back!
I used my Everyday Camp Shirt pattern for shirts for our two youngest boys. When I told Jamie that we were using the colors red, white and blue for pictures, he asked for plain red, with red buttons, and he was not about to be swayed. At least he was okay with me doing the topstitching in white! I actually love the look of a solid colored camp shirt with coordinating stitching. I added a second line of stitching on the sleeve and bottom hems for a little extra color.

For Charlie’s shirt, I chose this red plaid from the Stars & Stripes Collection from Deena Rutter for Riley Blake Designs, and . . .

. . . added airplane buttons for a little extra fun.

I spent more time on Katie’s outfit than I did on anything else. It’s a little sneak peek at a girls’ (yes, I said girls’!) pattern that I’m planning for the fall. Because it’s a new pattern, I had to sew up a few sample dresses to test out the design, sizing and construction. I’m really, really happy with how the final dress came out. (There will be a few other options with this pattern. You know that I won’t give you anything without choices, right? You’ll have to wait a little while to see the rest, though.)

Katie’s dress is organic cotton from the Chick Chick collection by Nancy Mims for Robert Kaufman. I found it last week, along with the plaid fabric for Charlie’s shirt, when I stopped in at The Quilt Asylum.
It’ll be a little bit, but I’ll be sure to share our photos as soon as they are ready!
200 Pairs of Shorts!

Have you heard the news?! We passed 200 pairs of shorts for July’s Hopeful Threads project! That means that not only do we have a huge pile of shorts to bless little boys through Children in Families in Cambodia, but we can send shorts to Ghana, too!
And, there is still time for you to sew! The free Mud Puddle Splashers pattern will be available through midnight tomorrow night. Grab it and sew a few pairs of shorts at naptime or even after the kids are in bed tonight. (Be sure to scroll through my other blog posts from this month for the back pocket addition and tips for sewing knit shorts in a flash!)

Look What I Found!

I was on the hunt for fabric for a couple of projects yesterday, so I ran up to this quilt shop, just north and east of Dallas, in McKinney. It’s called The Quilt Asylum. Is that not the greatest name for a quilt shop?! I love that they always have a nice selection of the latest fabric releases, and the ladies who work there are so friendly and helpful!
I browsed around the store for a bit looking for exactly the right fabric, then I turned and walked back towards the front of the store to see what I missed the first time around. (Do you do that when you shop for fabric? Sometimes I have to look over the rows multiple times to actually see everything!) When I turned, I saw this lovely rack of sewing patterns, and something on that rack of sewing patterns caught my eye! (Do you see what I saw?)

I don’t think I actually sprinted across the store, and I’m sure that I didn’t squeal as if I had just seen my favorite movie star, but I really wanted to do both of those things! Right there, hanging on the rack among stars like Serendipity Studios, Sew Liberated and Indygo Junction, were two Fishsticks Designs patterns!

It was the first time that I walked into a shop and found my patterns for sale! How cool is that? (I do wholesale my patterns directly to a few quilt shops around the country, but the majority of my wholesale distribution is through United Notions. Because of that, I don’t actually know what shops carry my patterns.)
It was so much fun having a few minutes of feeling a little like a celebrity, introducing myself and showing off my designs! Today, though, it’s back to reality, and my every-growing to-do list. My whole family is coming in this weekend, and we have a family photo session scheduled for Monday evening. Today’s goals include getting shirts done for Charlie and Jamie and working on a dress for Katie (one that I hope will end up as a new pattern for the fall).
There are just six days left to download and sew the free Mud Puddle Splashers pattern for Hopeful Threads and Children in Families! The latest count is 130 pairs of shorts! Think we can add 70 more for 200 total by next Tuesday?
In addition to the free pattern and the joy of sewing for someone in need, there are some great giveaways this month, including this Playdate Backpack filled with goodies from me! Each pair of shorts that you sew and donate enters you to win. You can check out all the other prizes including patterns from Figgy’s and Muddy Max Designs over on the Hopeful Threads blog.


Naptime Knit Mud Puddle Splashers

There are still 12 days left to grab the free Mud Puddle Splashers pattern and sew a pair of shorts for the Hopeful Threads’ Little Boys’ Shorts Sewing Project! I thought I’d take advantage of naptime at my house yesterday to show you the quickest way to sew the MPS using knit fabrics.
First, knit fabrics are wider than woven fabrics, so you can save a little time by combining the pocket and the body/leg piece. (You can do this on woven fabrics, too, but keep in mind that it will increase the amount of fabric that you’ll need, especially if you need to match up a stripe or print.) Tape your pattern together and cut out the correct size. Print and cut a second pocket pattern. (It’s page 26 of the pdf.)
 On the back on each pocket piece, measure in and draw a straight line 1″ in from the straight edge.
 On both the front body/leg piece and the back body/leg piece, measure and make a mark 3″ below the waist on the straight side.
 Place each pocket piece on the straight edge of a body/leg piece, overlapping so that the line you drew on the pocket is even with the straight side of the body/leg and the top of the overlap is at the 3″ marking. Tape the pockets in place.

Now you have two pattern pieces where before you had four.

Alright, we’re ready to get started on these shorts. It’s 1:00 here, and all is quiet as naptime has commenced.

Check to make sure the little ones are sleeping peacefully.


Cut out your shorts pieces. You’ll have two fronts cut in opposite directions and two backs cut in opposite directions.

We’re moving right along.

Except for the hem and the elastic channel, I’m using just my serger since these are knit shorts. You can use your sewing machine with a walking foot just as easily, though. The front and back rise are serged up now, and I’ve created my memory crease along the waist. A little spray starch will help when pressing cotton or cotton blend jerseys that like to roll. Sides are pinned together and ready to be serged.

Less than 30 minutes since we started!

That 90 degree angle where the bottom of the pocket connects to the side of the pants can be a little tricky if you’re using your serger. I serge both sides from the bottom up.

When I get to that angle, I simply pull the fabric slightly so that the angle sort of disappears. If you go slowly, you should be able to make that turn without a problem.

If a few of the loops end up off of the fabric, don’t worry, as long as both of the needle stitches are on the fabric. It’ll hold just fine and won’t be noticeable unless someone turns the shorts inside out and looks really closely. With a little practice, you’ll soon be turning that corner beautifully without even thinking about it.

1:42, even with taking a little time to snap a few pictures while I was working.

I’ve hemmed the legs and pinned the inseam. I hemmed these shorts by serging off 1/4″, then folding up 1″ and hemming using the triple-stretch stitch on my sewing machine. You can find a tutorial on how I do that right here: Hemming Knits.

Two minutes to two . . . not going to finish in under an hour, but I’m almost done.

Ready for the elastic.

Before I put the elastic in, though, I’m going to rotate the side around a bit and press those pockets in nicely.

Elastic and tag are in and the shorts are done!

And, I still have time to get a few other chores done, or, better yet, to enjoy an afternoon cup of coffee and a little mama-time on Pinterest!

Hey, there are still a dozen naptimes left in the month! Plenty of time to add to the ever-increasing pile of shorts for Children in Families in Cambodia! I heard that the number has already reached 100! Do you think we can double that number in 12 days?


