Perfect Pattern Parcel
The Daphne Bag from Clover & Violet {Pattern Parcel}
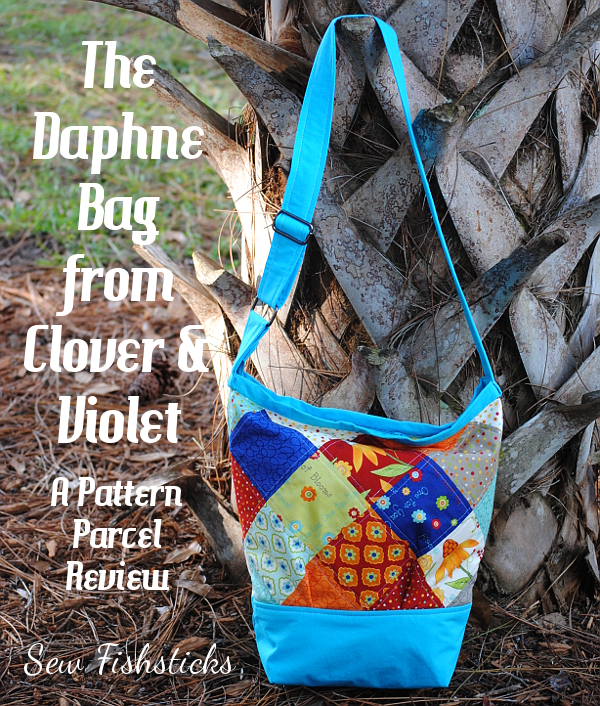 Have you seen the great collection of handbag patterns that are included with Pattern Parcel #7? You can pop over and check them all out by clicking the image below, and read on to see my version of the Daphne Bag from Clover & Violet!

Here at Perfect Pattern Parcel, we believe in supporting independent pattern designers. It’s our opinion that indie patterns are just, well, better than big box patterns, and we’re pretty sure our customers think so too. So, we allow customers to show their support in naming their own price for each Parcel. We also encourage customers to allocate part of their Parcel price to the charity Donorschoose.org in order to help classrooms in need. Pattern Parcel donates all profits after expenses from Parcel sales to the charity as well. Its our goal to raise over $20,000 for Donors Choose this year.
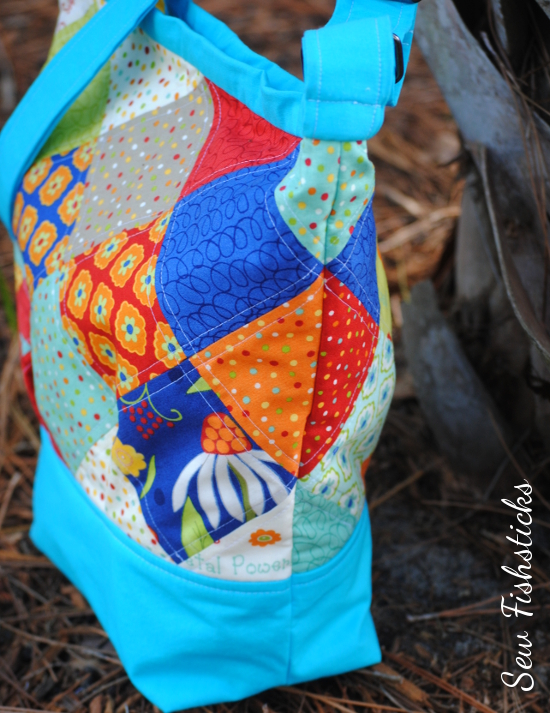
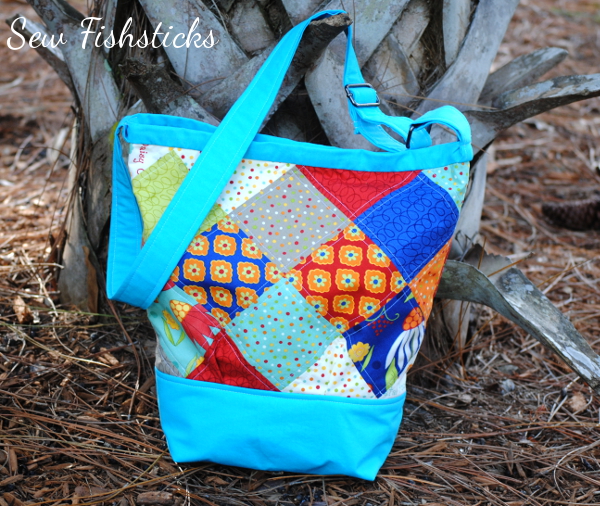 I mentioned in my post yesterday that I’ve really been enjoying quilting lately, so it’s no surprise that the patchwork design drew me to this bag. I used a charm pack of Pat Sloan’s fabric line, “One for You, One for Me“, in the pieced section and American Made Brand solids for the rest of the bag.
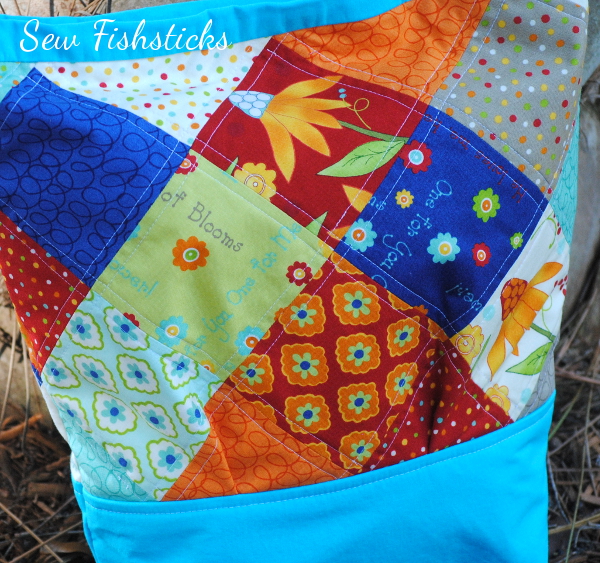 This slouchy satchel features an adjustable strap and a zippered top closure.
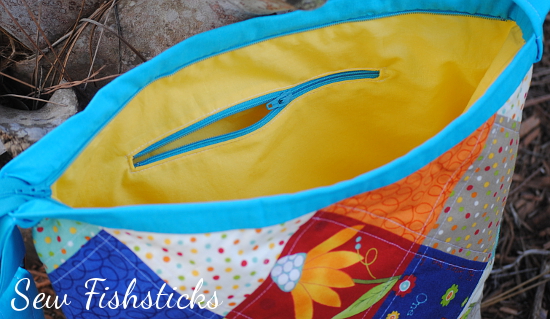
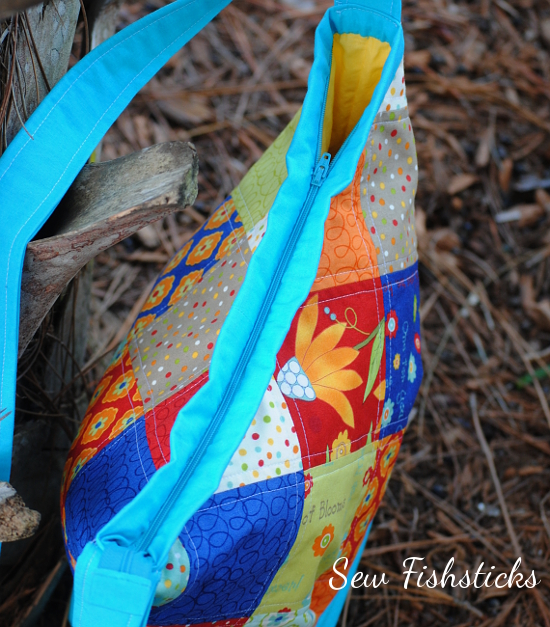 Inside, there’s a zippered pocket …
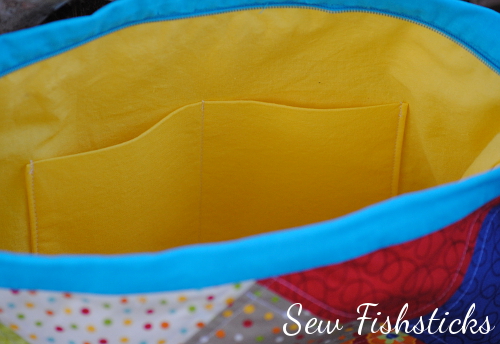
 …and a slip pocket. (I divided my slip pocket in half so that I would have a place to keep my cellphone.)
 I love how this bag turned out! I originally thought maybe I would give it away as a gift, but now I think I’ll keep it! I even have enough charm squares left to make a little wallet to match.
Friday, November 7
Stitched ||
Sew Exhausted
Saturday, November 8
Made by Sara ||Oliver’s Fancy ||
Strawberry Patch Ramblings
Sunday, November 9
from a box ||
Mia’s Creations ||
MOMENTS
Monday, November 10
owen’s olivia ||
While she was sleeping
Tuesday, November 11
Nutta ||
Radiant Home Studio ||
La Pantigana
Wednesday, November 12
Sew Fishsticks ||
Stacy Sews ||
Stitching Insane ||
GnomeAngel
Thursday, November 13
Needle and Ted ||
Patchouli Moon Studio ||
Sprouting JubeJube ||
The Crazy Tailor
Friday, November 14
Casa Crafty ||
A Jennuine Life ||
‘So, Zo… What do you know?’
Saturday, November 15
Stitches by Laura ||
Rebekah Sews ||
Serger Pepper
Sunday, November 16
Blogs Like A Mother ||
Vicky Myers creations ||
Blossom Heart Quilts
Monday, November 17
Shanni Loves ||
So Sew Easy ||
GYCT Designs ||
Tiger In A Tornado
Tuesday, November 18
The Nosy Pepper ||
Keep Calm and Carrion ||
There & Back ||
Sewing Sober
Wednesday, November 19
Sew Like My Mom ||
Knot Sew Normal ||
Stacy Sews ||
sewVery
Thursday, November 20
Mimi’s Mom ||
Our Family Four ||
shades of BOLD ||
Modern Handcraft
Friday, November 21
Shawnta Sews ||
Lulu & Celeste ||
Amanda Rose ||
Robin’s Fabric Nest ||
House of Pinheiro
Dress Up Your Playhouse Dress!
{Perfect Pattern Parcel/Pattern Extra}
 I am so excited that my Playhouse Dress is part of Perfect Pattern Parcel #5!! This collection includes six beautiful and versatile sewing patterns for girls from preschool to preteen.

Here at Perfect Pattern Parcel, we believe in supporting independent pattern designers. It’s our opinion that indie patterns are just, well, better than big box patterns, and we’re pretty sure our customers think so too. So, we allow customers to show their support in naming their own price for each Parcel. We also encourage customers to allocate part of their Parcel price to the charity Donorschoose.org in order to help classrooms in need. Pattern Parcel donates all profits after expenses from Parcel sales to the charity as well. Together we’ve raised over $11,000 for classrooms in need!
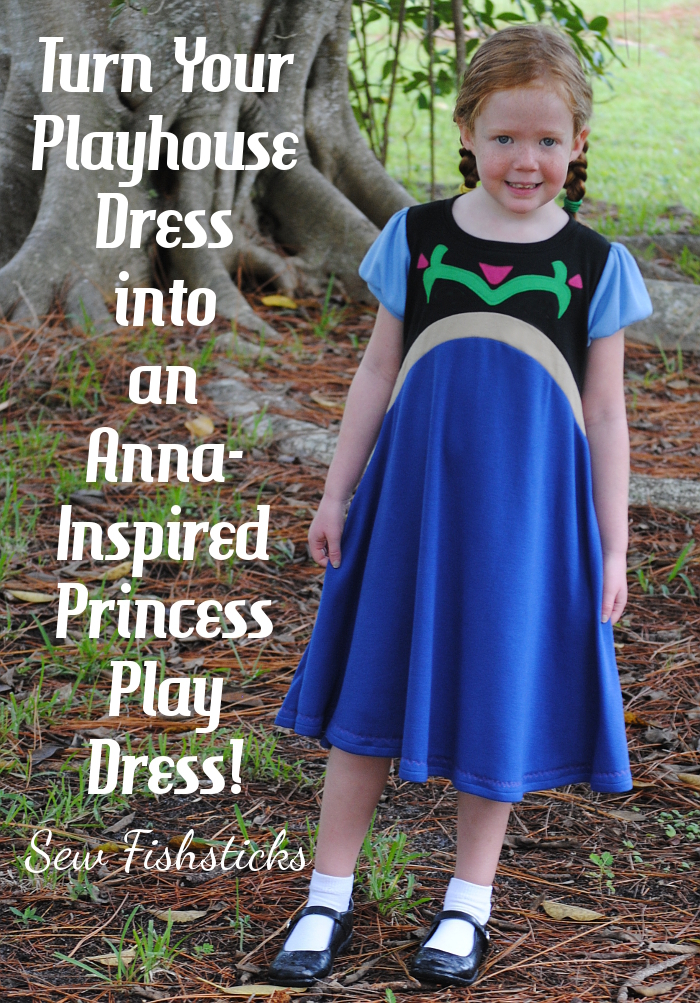
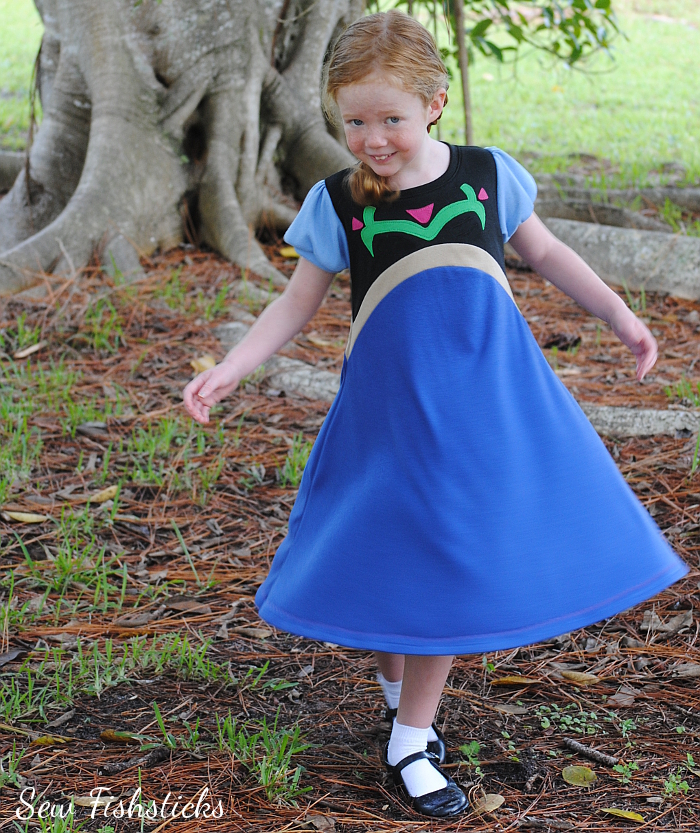
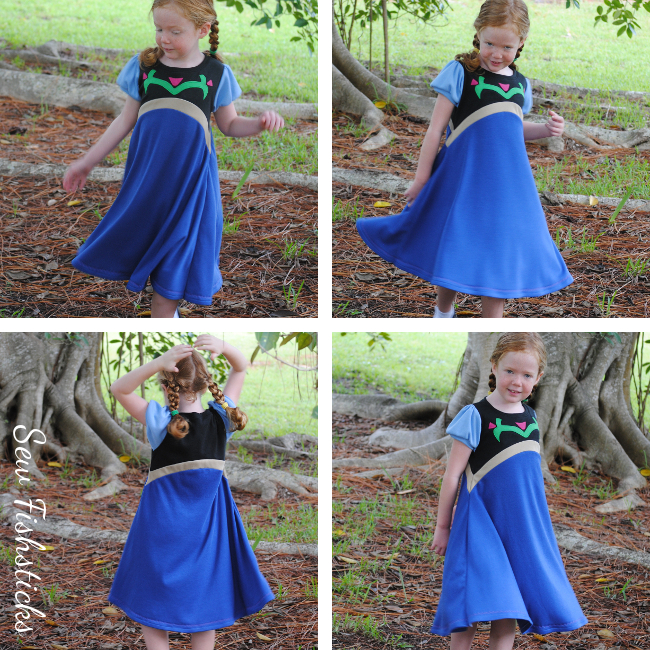
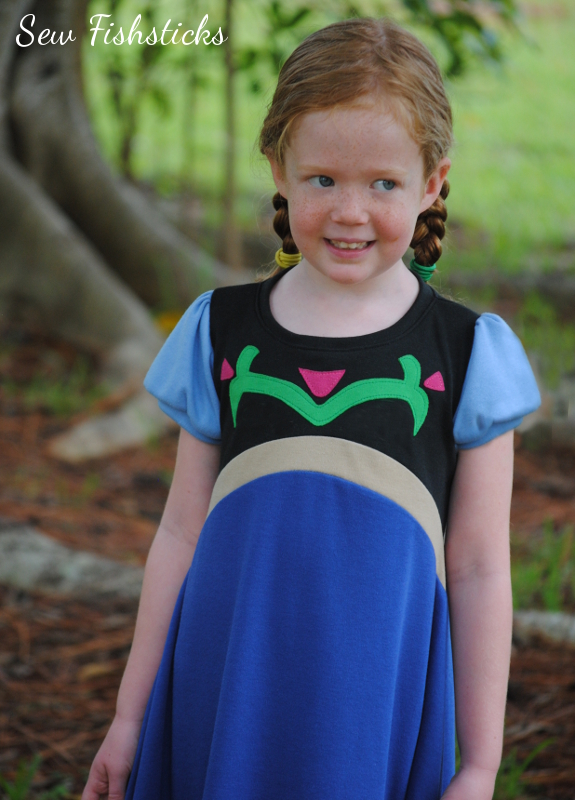 My house is full of little boys, but I’ve heard that there’s this recent movie that little girls have gone a little bit crazy over – a movie about a certain ice princess and her little sister. Because I’m a practical sewist, I don’t generally do costumes, but for our recent trip to the Magic Kingdom, I made a princess-inspired Playhouse Dress for our granddaughter. You can see that dress right here. I love that it’s a play dress that she can wear everyday, but it still makes her feel like she’s dressed up! (If you’ve ever gone to the grocery store with a child in dress-up clothes, I think you’ll totally understand!)
 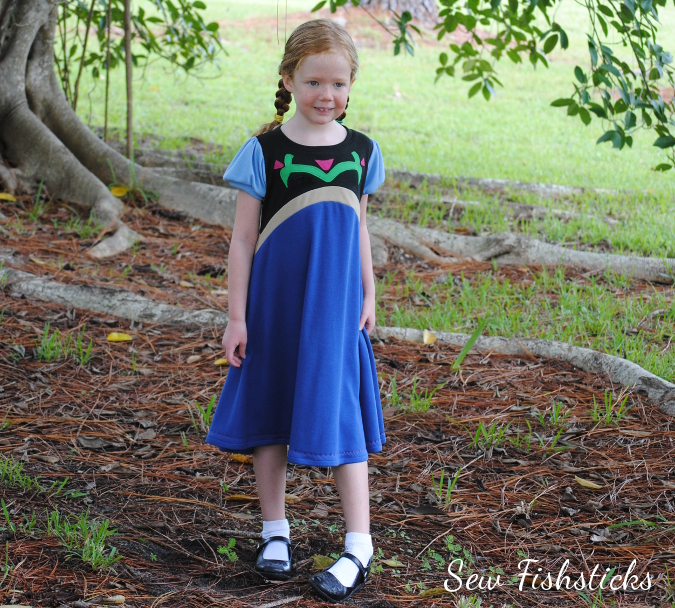 For the Pattern Parcel Blog Tour, I thought I’d show you how you can do the same thing by creating an Anna-inspired Playhouse Dress. I’ve got all of the instructions for you, plus a downloadable PDF for the simple applique.
 You can sew the Playhouse Dress in a combination of knits and wovens or in all knits. Because I wanted this one to be a casual princess-y dress, I sewed it in cotton/polyester interlocks, and I bought them all at Joann Fabrics. I used Black, Fern Green, Sangria, Cornstalk, Royal and Cornflower Blue.
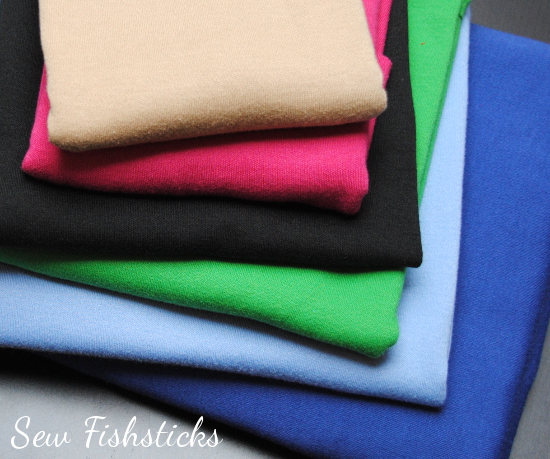 Start by printing and assembling your pattern. The Playhouse Dress is one of my updated patterns, so you can choose to print either all sizes of the pattern nested, or just the individual size that you’re sewing. In addition to printing the the entire pattern, you’ll need a second printing of just the top section of the skirt. I’ll explain that a few steps down, though.
You’ll also need to print the applique design. Click here for sizes 12 months to 4 (on sizes 12 months and 18 months, the center flower is left off) and here for sizes 5 to 12.
Finally, you’ll need a sewable, paper-backed, iron-on adhesive for the applique. I used Heat ‘n Bond Lite.
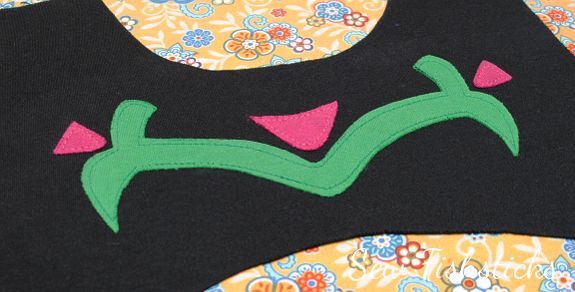
Cut out the front bodice and back bodice of the Playhouse Dress using black interlock. Prepare your applique pieces following the instructions for the iron-on adhesive that you’ve chosen. Use pink fabric for the flowers and green for the vine. I traced my pieces onto the paper backing of the Heat ‘n Bond, then ironed the adhesive to the fabric and cut out the pieces. Once you have all of your pieces ready to be ironed on, place them on the front bodice piece, checking to make sure that everything fits well within the 1/2″ seam allowance and all the pieces are centered properly.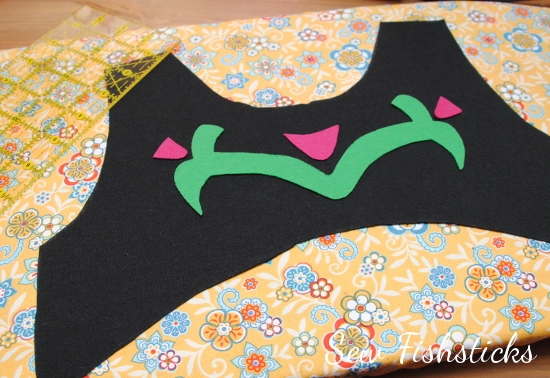 Remove the flowers, and iron on the vine. Depending on the adhesive that you’ve chosen, you may be able to move on to the flowers from here, but the adhesive that I’m using requires that the edges be stitched down. We’re working with knit fabrics that don’t fray, so I’m just going to stitch all the way around 1/8″ from the edge. Those small curves can be tough to go around. Set your stitch length fairly short, sew slowly, and try not to make sharp turns on the curves. Turning the fabric a little bit with each stitch will give you a nicer curve. If you use a matching thread, this doesn’t have to be absolutely perfect stitching.
 Once your vine is done, add your flowers, one at a time.
 Set the bodice pieces aside so that we can work on the skirt. To create the faux sash, you’ll basically be adding a strip of fabric to the top of your front and back skirt pieces. I made my sash 1″ wide finished. The easiest way to do this is to go back once you’ve printed the whole pattern, find which pattern pages to print for just the top portion of the skirt, and print a second set of just those few pages. (You’ll need at least 2″ of the top of the skirt.)
 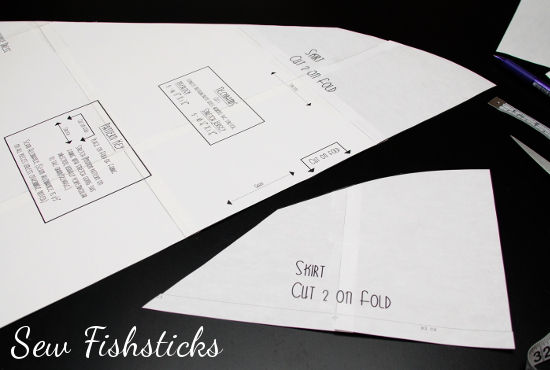 Measure down 1″ from the top of the full skirt pattern and draw a second curve. Use the partial skirt pattern to help draw the curve.
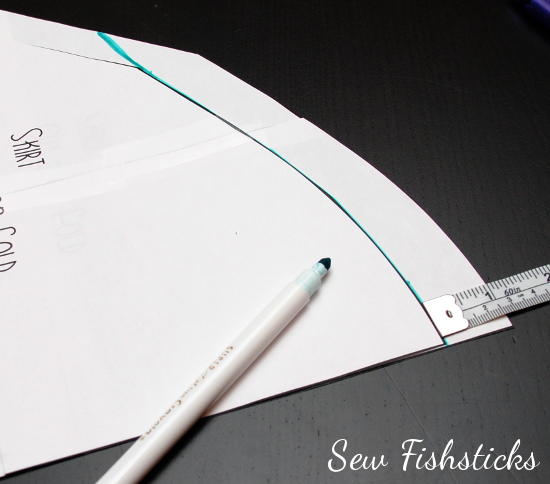 Measure down 2″ from the top of the partial skirt pattern and draw a second curve. Use the full skirt pattern to help draw the curve.
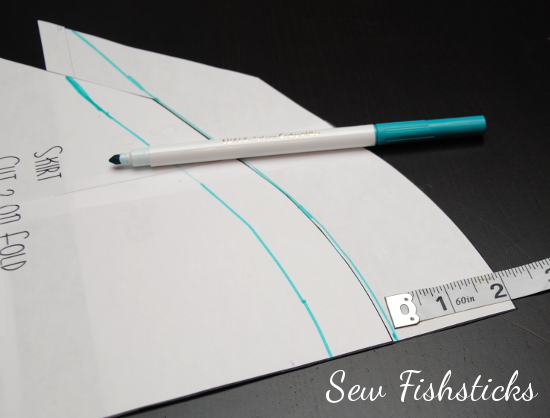 Cut the top 1″ away from the full skirt pattern and discard it. Cut the top 2″ from the partial skirt pattern and keep it. You’ll end up with a full skirt pattern that is 1″ shorter than it originally was and a 2″ “sash” pattern.
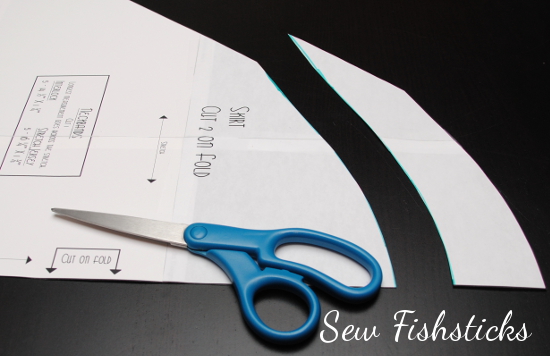 Cut the full skirt pattern from royal blue interlock and the sash pattern from tan or gold interlock – two of each, one for the front and one for the back of the skirt. Pin the bottom edge of each sash piece to the top edge of a skirt piece with right sides together. Start pinning at the center, and gently ease the two curves together as you go.
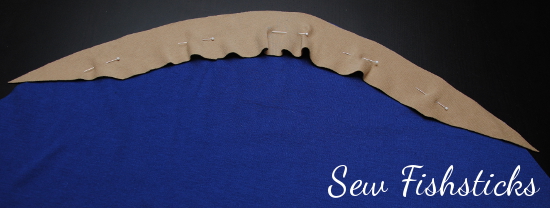 The edges of the sash will overhang a little. When you stitch the two pieces together, your stitching should go right down the center of the points on each side.
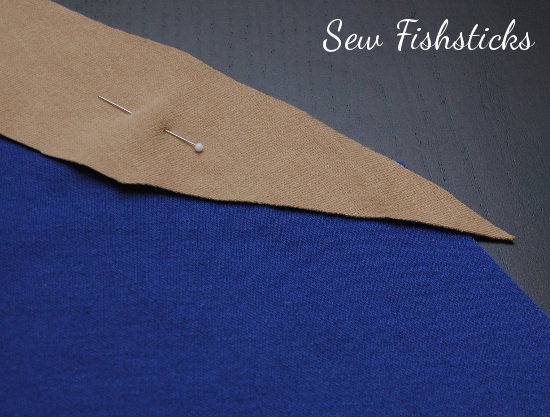 Once these pieces are sewn together, press the seam allowances toward the bottom of the skirt. If you end up with any overhanging fabric on the sides, just trim it away so that the sides are straight again.
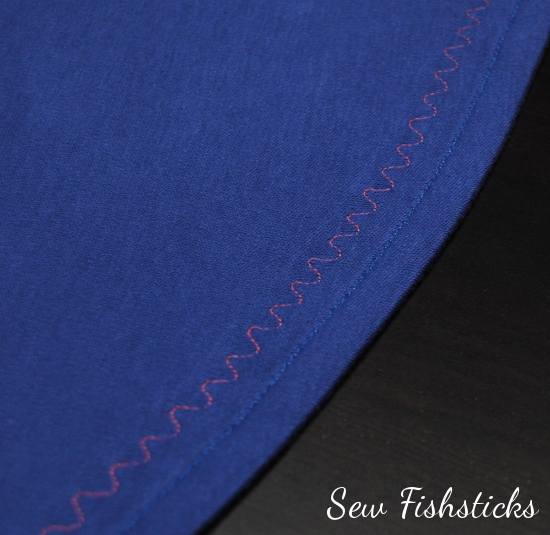
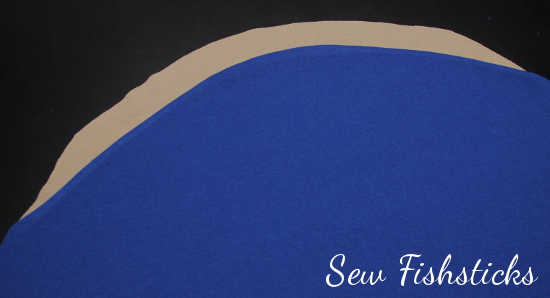 From here, you’ll cut your remaining pieces and follow the instructions for assembling the dress. I added a decorative stitch just above the hem on my skirt pieces.
 When you sew the sides, be careful to line up the points so that you get two nice “V”s on both sides. I found that it was easiest to pin and sew those areas with a long stitch, check the alignment, then serge or sew with a tight finishing stitch once I was happy with how the sides looked.
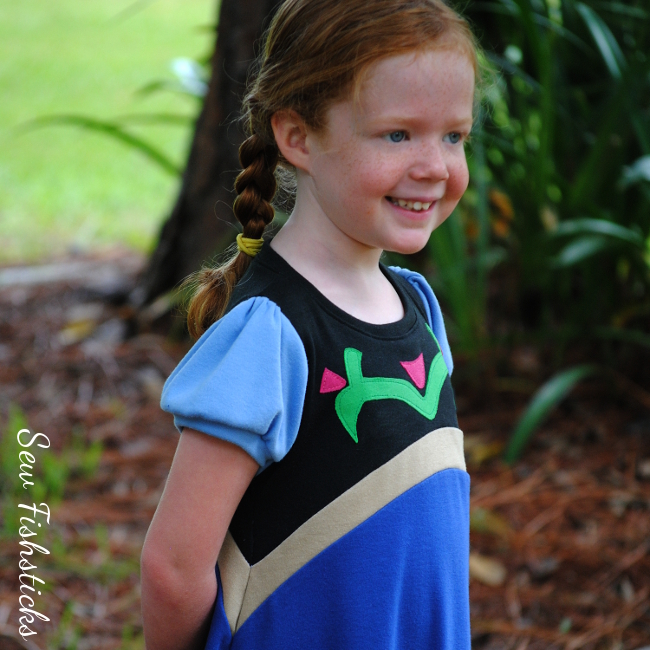 And, that’s it! Your sewing is done, and your little fan of all things Frozen is happy enough to twirl all day!! (Huge thanks to our friends’ daughter, E, for being such a beautiful model for me. I hope you enjoy your Anna Dress!)
 THE PATTERN PARCEL…
Parcel #5: Girls and Tweens includes:
Lily Knit Blazer by Peek-a-Boo Patterns
Everyday Yoga Pant for Girls by Greenstyle
Asymmetrical Drape Top by EYMM
Playhouse Dress by Fishsticks Designs
Mimi Dress and Shirt by Filles a Maman
BONUS PATTERN: Sunki Dress by Figgy’s
Bonus Pattern:
Choose a price of $28 or greater for Parcel #5 and you will automatically also be sent the Bonus Pattern. The Bonus Pattern for this Parcel is the Sunki Dress by Figgy’s. The pattern includes both size runs, so you get 18 months through a 16 tween sizing.
Follow the rest of the tour for more inspiration:
Friday, September 19: Pienkel || Cookin’ and Craftin’
Saturday, September 20: The Life Of A Compulsive Crafter
Sunday, September 21: Keep Calm and Carrion || Felt With Love Designs
Monday, September 22: Radiant Home Studio || Sewing Sober
Tuesday, September 23: Sew Fishsticks || La Pantigana || Amanda Rose
Wednesday,September 24: Shawnta Sews || Sprouting JubeJube || Knot Sew Normal
Thursday, September 25: Make It Perfect || Mimi’s Mom || Climbing the Willow
Friday, September 26: Needle and Ted || Our Family Four
Saturday, September 27: Froo & Boo
Sunday, September 28: Stitches by Laura || Vicky Myers creations
Monday, September 29: Cookin’ and Craftin’ || The Crazy Tailor
Tuesday, September 30: mama says sew || FABulous Home Sewn || The Inspired Wren
Wednesday, October 1: lady and the gents || That’s-Sew-Kari || Sewing Sober
Thursday,October 2: Gracious Threads || Blogs Like A Mother || SewsNBows
Friday, October 3: sew chibi || Lulu & Celeste || Made by Sara
The Perfect Pattern Parcel #1

Oh, how I love finding opportunities for creative people like you and me to exercise our skills and give to others! Have you heard about the Perfect Pattern Parcel? Here’s what the founders have to say about this ingenious new program:
About PPP: Put together two entrepreneurial makers driven by their internal voices and one self-taught hacker with an “if you build it, they will come” mentality, and Perfect Pattern Parcel was born. We are passionate about supporting independent designers in their craft and fostering a community of makers to grow. Our mission is to offer high-quality pdf sewing patterns written by indie designers while supporting children’s education.

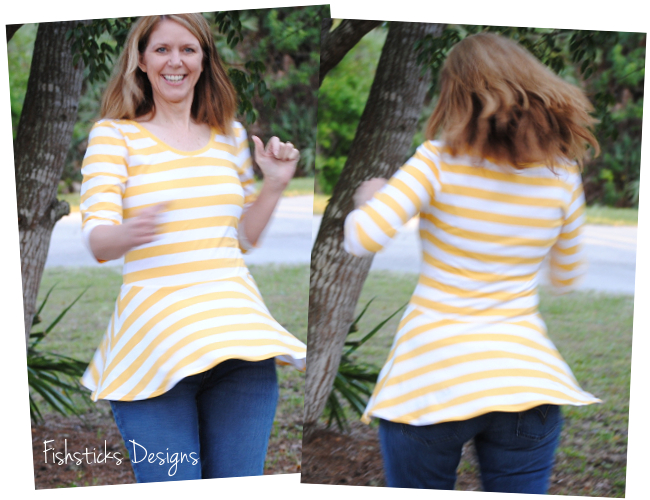
About Parcel #1: Pattern Parcel #1 includes sewing patterns for women that are modern classics, featuring both flattering silhouettes and garments that are comfortable to wear. From a new little black dress to weekend play wear, the patterns in Parcel #1 have got you covered. One of the patterns included in this first Pattern Parcel is the Lady Skater from Kitschy Coo, and I chose to sew a peplum top version for me!
  I found the instructions for turning the Lady Skater dress into a peplum-style top on the Kitschy Coo blog right here: Lady Skater Peplum. I adore the flattering fit of this top. (I texted a picture to my 24-year-old daughter to ask her opinion, and she said, “Super freaking cute!” She also suggested that I should wear it with leggings, but … um … my rear end requires complete coverage when it comes to leggings. Skinny jeans work just fine!) Speaking of my most well-endowed feature, my 16-year-old daughter/photographer insisted that you needed to see the back of the top.
 And, then she said, “You should spin around,” and since I never quite know what to do with myself when someone’s taking my picture, I did!
 The basics of the Perfect Pattern Parcel? You get an amazing set of patterns, all designed by awesome independent designers, and a portion of your purchase price goes to charity. The coolest thing, though? You get to decide what you’re going to pay, even what portion goes to the designers, the charity and PPP. Decide what you pay, give to charity and get patterns … could you possibly ask for more?

One Little Minute
SeamstressErin Designs
One Girl Circus
casa crafty
the quirky peach
Kadiddlehopper
Sew Caroline
Groovybabyandmama
Fishsticks Designs <<< Me!
the Brodrick blog
verypurpleperson
sew a straight line
Adventures in Dressmaking
true bias
Idle Fancy
La Pantigana
Crafterhours
Boy, Oh Boy, Oh Boy Crafts
Max California
YoSaMi
la inglesita
Diary of a Chainstitcher
four square walls
Lauren Dahl
Sewbon
mingo & grace
Dandelion Drift
VeryShannon
Sanae Ishida
buzzmills
Sew Jereli
Figgy’s
Froo & Boo
a happy stitch
Disaster in a Dress
Things for Boys
mama says sew
sew Amy sew
Sew Busy Lizzy
Made With Moxie
imagine gnats


