Blog Tours
The Doll Days! Blog Tour & Giveaway
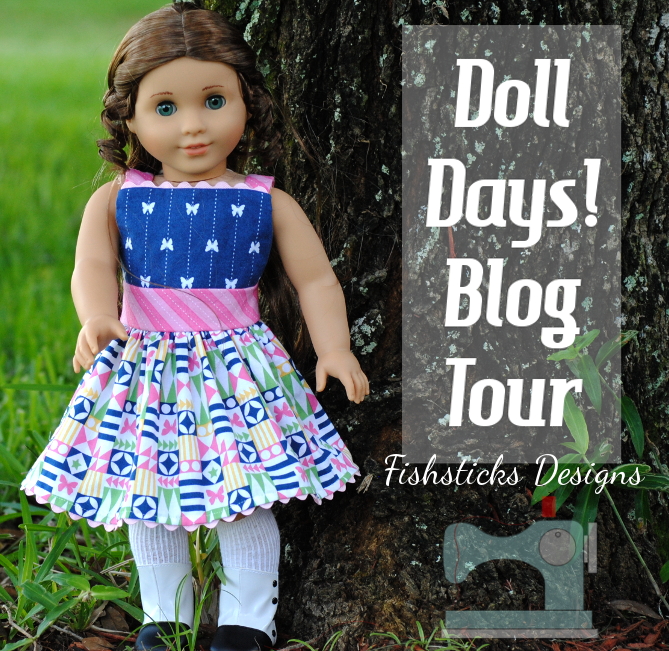 My friend, Erin Hentzel, just released her second book – Doll Days! Sew an Everyday Wardrobe for 18″ Dolls. You might remember that my daughter, Samantha, and I joined in on the tour for Erin’s first book, Sew in Style, almost two years ago, and I’m really excited to join in the fun again! Continue reading
Riley Blake Back-to-School Blog Tour!
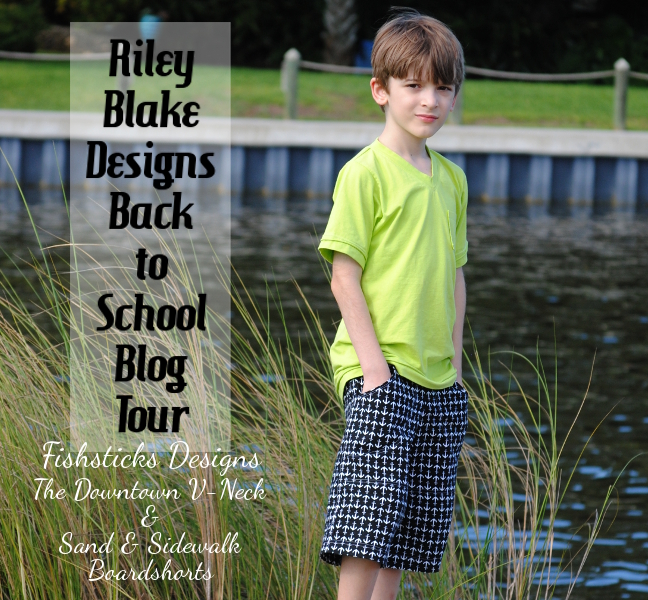 Jamie and I are participating in the Riley Blake Back-to-School Blog Tour today! He’s going into second grade this year, and, like most second-graders, he definitely has his own opinions. He’s been a little bit tough lately when it comes to letting me sew for and then photograph him. This time, I involved him in the whole process. He was really excited that I let him help me choose the fabrics for his outfit, and then he loved having a say in where and how to take the pictures. He did a terrific job, too! Continue reading
The Cultivate Blog Tour
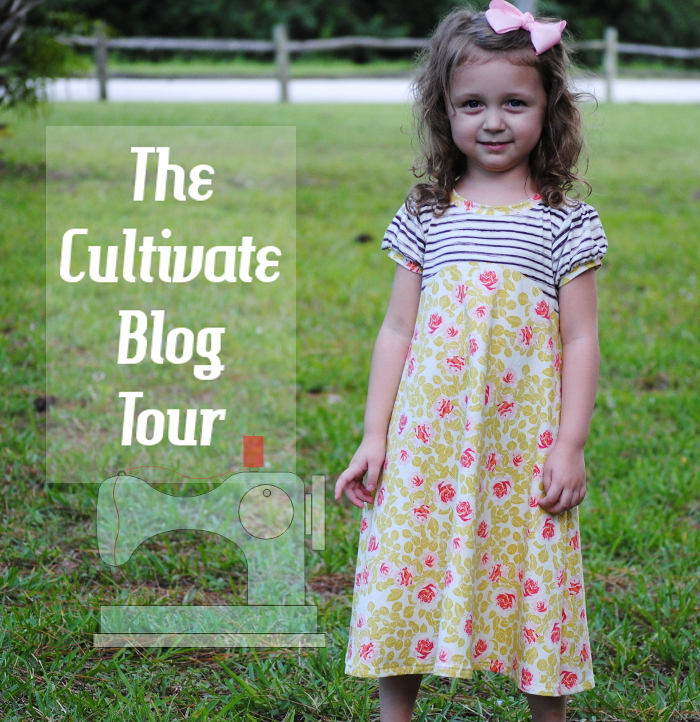 Wheeee! I am so excited to be today’s stop on Bonnie Christine‘s Cultivate Blog Tour! Have you seen the beautiful fabrics that she’s designed for this collection? (And, do you know what a great name she has?) Continue reading
Hooded Ninja Tees ~ RB Knit LOVE
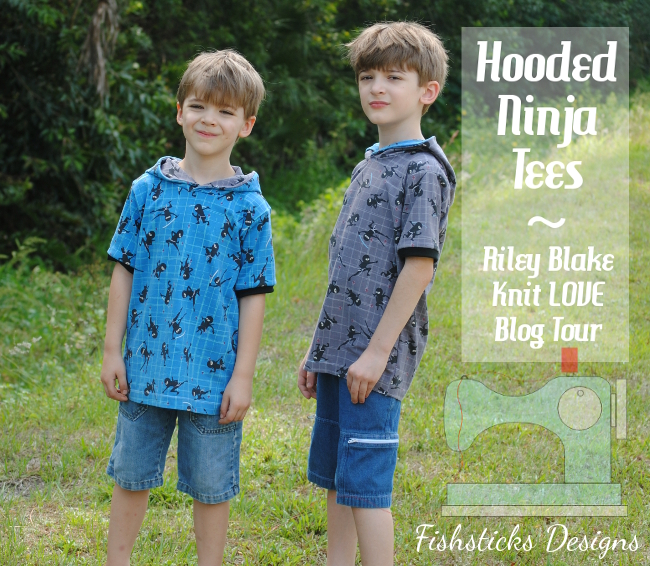 It’s my turn on the Riley Blake Knit LOVE Blog Tour! If you’ve been here for any time at all, you probably already know how much I love working with RB’s stretch jersey knits. They wash and wear beautifully. The weight is perfect. They’re easy to sew, and the selection of prints and basics has grown so large, you’re sure to find something that you love! (Check them all out right here: Riley Blake Knits, and purchase them at your favorite local quilt shop!) Continue reading
Crossroads Denim & Topstitching for a Beautiful Finish!
 I’m the first stop on the Indygo Junction Crossroads Blog Tour! Since my tour date happens to fall on St. Patrick’s Day, I couldn’t resist choosing Midtown Moss for shorts for my two youngest boys. I used my Sand & Sidewalk Boardshorts pattern and paired the shorts up with store-bought tops. Now my boys are ready to celebrate their Irish heritage in handmade style!
Continue reading
The Jungle Jalopy Zippered Pouch Tutorial & a Huge Giveaway!
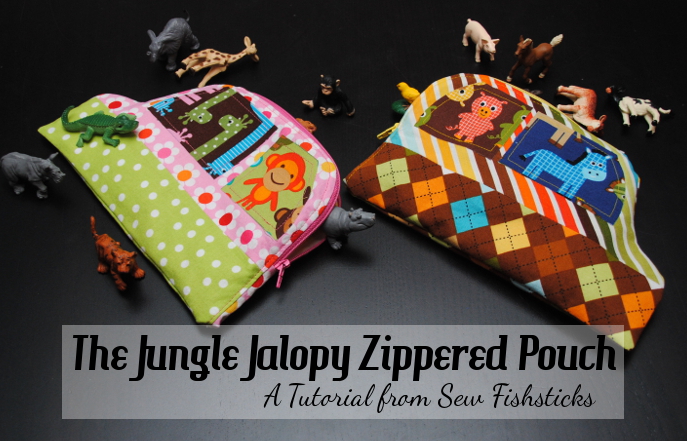 I’m over at Skip My Lou today with a brand new gift tutorial as a part of this year’s edition of the Bake, Craft, Sew & Crochet Along! Just click right here to find the Jungle Jalopy Zippered Pouch Tutorial. Read on for your chance to win a beautiful new Babylock Sewing Machine!
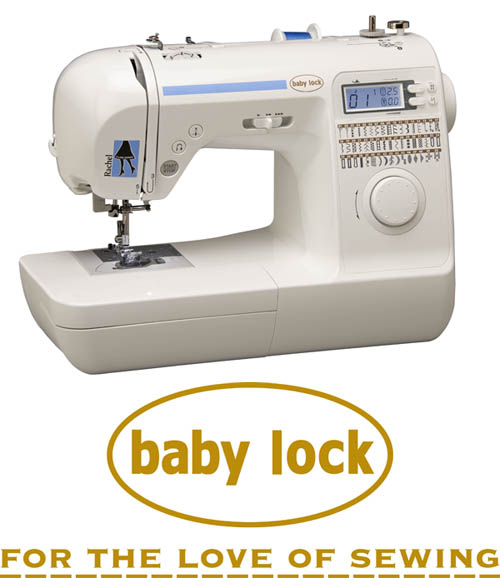
This is one AMAZING giveaway! She is a beauty and her name is Rachel.
 One lucky winner will receive…
this amazing Baby Lock Sewing Machine ($799 Value)
Ready to take your sewing to the next level? The Baby Lock Rachel is the star of any sewing class, and she’s here to help you. This computerized sewing machine is equipped with 50 stitches and push-button features to make every project easier. The value is $799. Click here for more details.
Simply wait for RaffleCopter to load and enter there!
Dress Up Your Playhouse Dress!
{Perfect Pattern Parcel/Pattern Extra}
 I am so excited that my Playhouse Dress is part of Perfect Pattern Parcel #5!! This collection includes six beautiful and versatile sewing patterns for girls from preschool to preteen.

Here at Perfect Pattern Parcel, we believe in supporting independent pattern designers. It’s our opinion that indie patterns are just, well, better than big box patterns, and we’re pretty sure our customers think so too. So, we allow customers to show their support in naming their own price for each Parcel. We also encourage customers to allocate part of their Parcel price to the charity Donorschoose.org in order to help classrooms in need. Pattern Parcel donates all profits after expenses from Parcel sales to the charity as well. Together we’ve raised over $11,000 for classrooms in need!
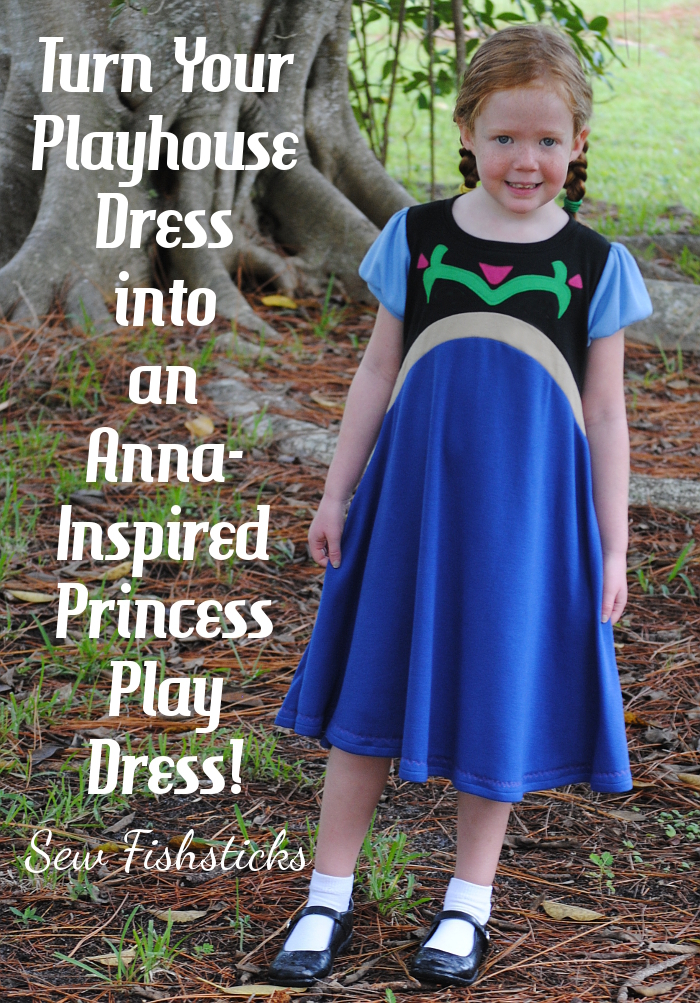
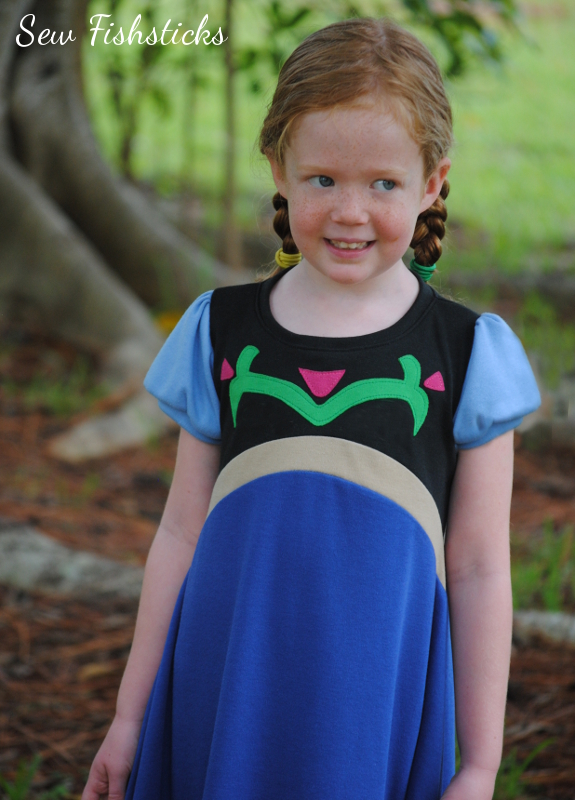 My house is full of little boys, but I’ve heard that there’s this recent movie that little girls have gone a little bit crazy over – a movie about a certain ice princess and her little sister. Because I’m a practical sewist, I don’t generally do costumes, but for our recent trip to the Magic Kingdom, I made a princess-inspired Playhouse Dress for our granddaughter. You can see that dress right here. I love that it’s a play dress that she can wear everyday, but it still makes her feel like she’s dressed up! (If you’ve ever gone to the grocery store with a child in dress-up clothes, I think you’ll totally understand!)
 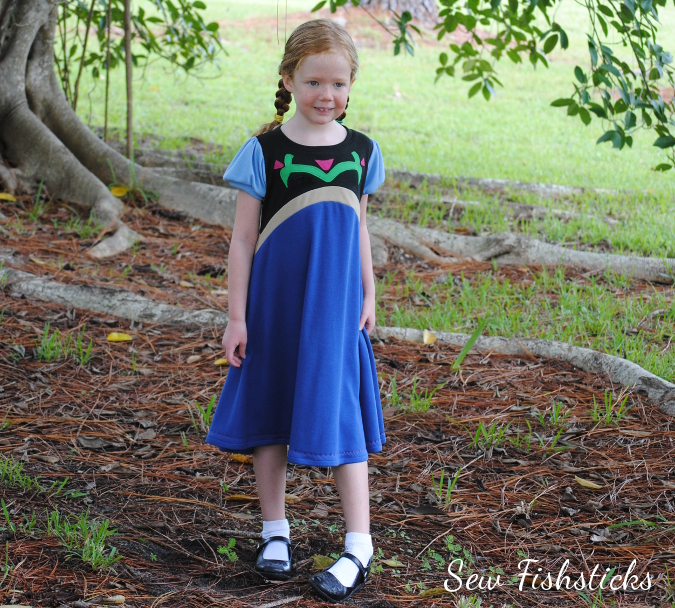 For the Pattern Parcel Blog Tour, I thought I’d show you how you can do the same thing by creating an Anna-inspired Playhouse Dress. I’ve got all of the instructions for you, plus a downloadable PDF for the simple applique.
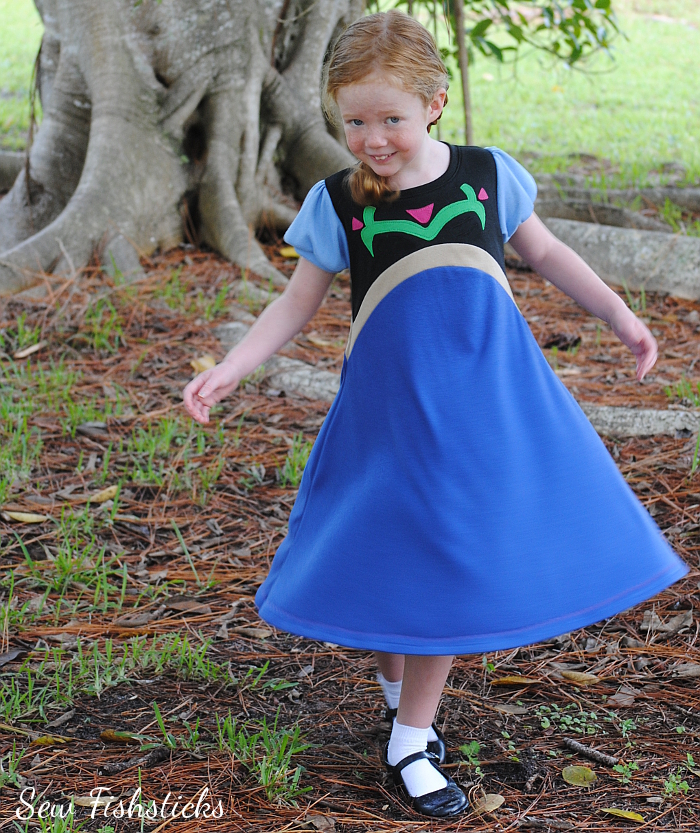 You can sew the Playhouse Dress in a combination of knits and wovens or in all knits. Because I wanted this one to be a casual princess-y dress, I sewed it in cotton/polyester interlocks, and I bought them all at Joann Fabrics. I used Black, Fern Green, Sangria, Cornstalk, Royal and Cornflower Blue.
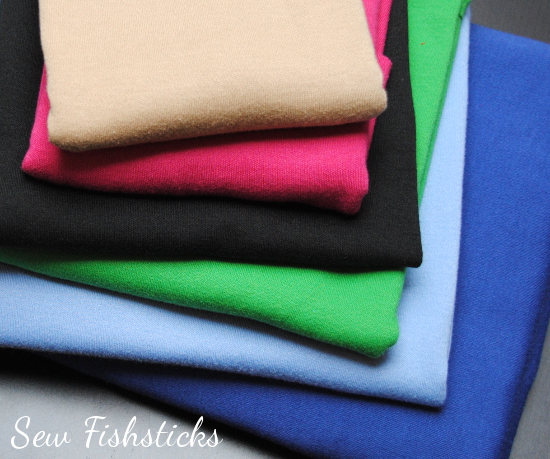 Start by printing and assembling your pattern. The Playhouse Dress is one of my updated patterns, so you can choose to print either all sizes of the pattern nested, or just the individual size that you’re sewing. In addition to printing the the entire pattern, you’ll need a second printing of just the top section of the skirt. I’ll explain that a few steps down, though.
You’ll also need to print the applique design. Click here for sizes 12 months to 4 (on sizes 12 months and 18 months, the center flower is left off) and here for sizes 5 to 12.
Finally, you’ll need a sewable, paper-backed, iron-on adhesive for the applique. I used Heat ‘n Bond Lite.
Cut out the front bodice and back bodice of the Playhouse Dress using black interlock. Prepare your applique pieces following the instructions for the iron-on adhesive that you’ve chosen. Use pink fabric for the flowers and green for the vine. I traced my pieces onto the paper backing of the Heat ‘n Bond, then ironed the adhesive to the fabric and cut out the pieces. Once you have all of your pieces ready to be ironed on, place them on the front bodice piece, checking to make sure that everything fits well within the 1/2″ seam allowance and all the pieces are centered properly.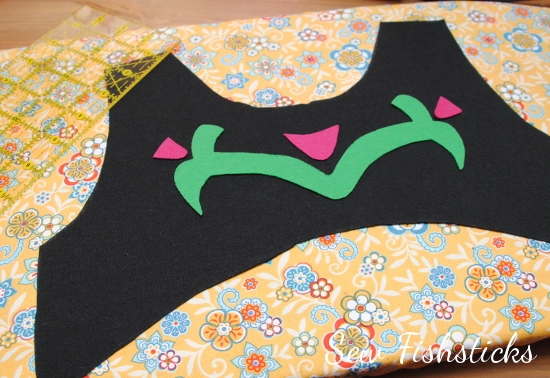 Remove the flowers, and iron on the vine. Depending on the adhesive that you’ve chosen, you may be able to move on to the flowers from here, but the adhesive that I’m using requires that the edges be stitched down. We’re working with knit fabrics that don’t fray, so I’m just going to stitch all the way around 1/8″ from the edge. Those small curves can be tough to go around. Set your stitch length fairly short, sew slowly, and try not to make sharp turns on the curves. Turning the fabric a little bit with each stitch will give you a nicer curve. If you use a matching thread, this doesn’t have to be absolutely perfect stitching.
 Once your vine is done, add your flowers, one at a time.
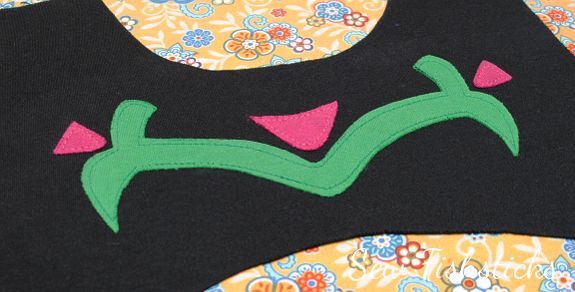 Set the bodice pieces aside so that we can work on the skirt. To create the faux sash, you’ll basically be adding a strip of fabric to the top of your front and back skirt pieces. I made my sash 1″ wide finished. The easiest way to do this is to go back once you’ve printed the whole pattern, find which pattern pages to print for just the top portion of the skirt, and print a second set of just those few pages. (You’ll need at least 2″ of the top of the skirt.)
 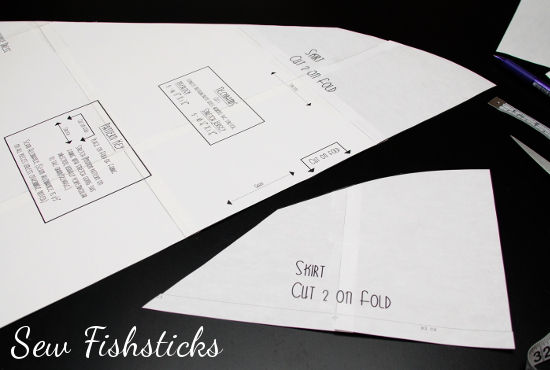 Measure down 1″ from the top of the full skirt pattern and draw a second curve. Use the partial skirt pattern to help draw the curve.
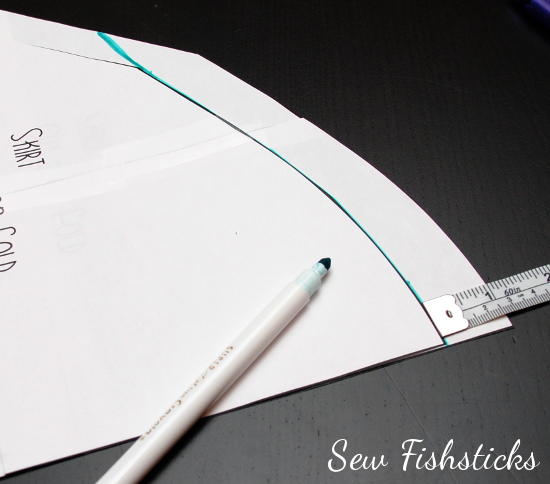 Measure down 2″ from the top of the partial skirt pattern and draw a second curve. Use the full skirt pattern to help draw the curve.
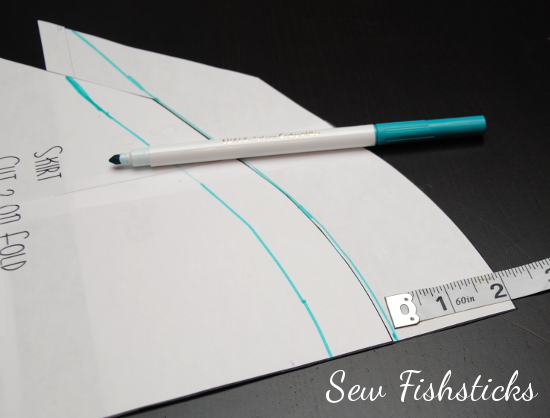 Cut the top 1″ away from the full skirt pattern and discard it. Cut the top 2″ from the partial skirt pattern and keep it. You’ll end up with a full skirt pattern that is 1″ shorter than it originally was and a 2″ “sash” pattern.
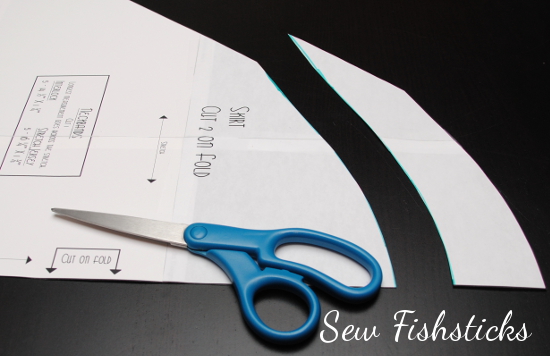 Cut the full skirt pattern from royal blue interlock and the sash pattern from tan or gold interlock – two of each, one for the front and one for the back of the skirt. Pin the bottom edge of each sash piece to the top edge of a skirt piece with right sides together. Start pinning at the center, and gently ease the two curves together as you go.
 The edges of the sash will overhang a little. When you stitch the two pieces together, your stitching should go right down the center of the points on each side.
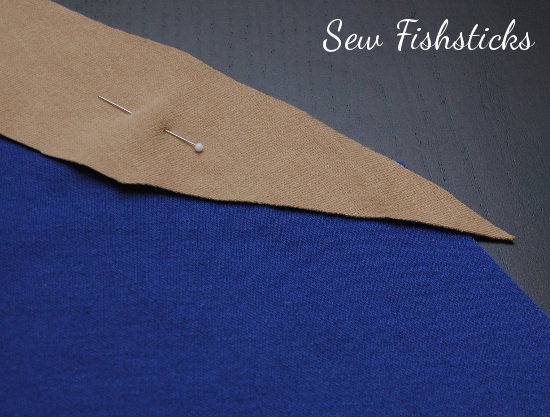 Once these pieces are sewn together, press the seam allowances toward the bottom of the skirt. If you end up with any overhanging fabric on the sides, just trim it away so that the sides are straight again.
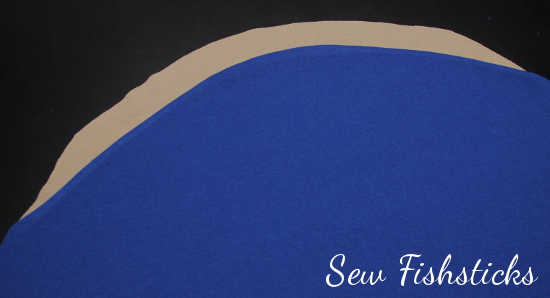 From here, you’ll cut your remaining pieces and follow the instructions for assembling the dress. I added a decorative stitch just above the hem on my skirt pieces.
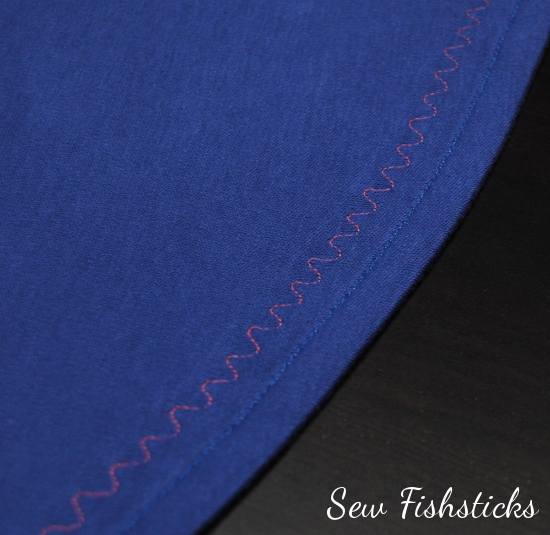 When you sew the sides, be careful to line up the points so that you get two nice “V”s on both sides. I found that it was easiest to pin and sew those areas with a long stitch, check the alignment, then serge or sew with a tight finishing stitch once I was happy with how the sides looked.
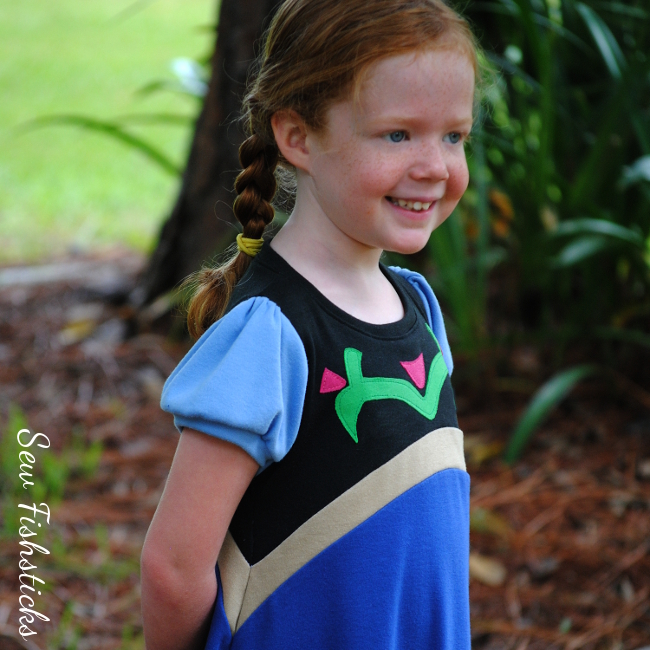 And, that’s it! Your sewing is done, and your little fan of all things Frozen is happy enough to twirl all day!! (Huge thanks to our friends’ daughter, E, for being such a beautiful model for me. I hope you enjoy your Anna Dress!)
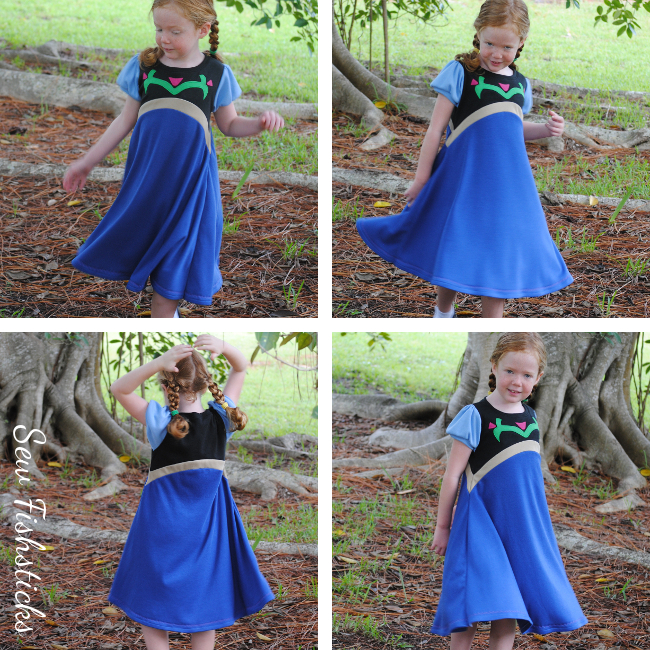 THE PATTERN PARCEL…
Parcel #5: Girls and Tweens includes:
Lily Knit Blazer by Peek-a-Boo Patterns
Everyday Yoga Pant for Girls by Greenstyle
Asymmetrical Drape Top by EYMM
Playhouse Dress by Fishsticks Designs
Mimi Dress and Shirt by Filles a Maman
BONUS PATTERN: Sunki Dress by Figgy’s
Bonus Pattern:
Choose a price of $28 or greater for Parcel #5 and you will automatically also be sent the Bonus Pattern. The Bonus Pattern for this Parcel is the Sunki Dress by Figgy’s. The pattern includes both size runs, so you get 18 months through a 16 tween sizing.
Follow the rest of the tour for more inspiration:
Friday, September 19: Pienkel || Cookin’ and Craftin’
Saturday, September 20: The Life Of A Compulsive Crafter
Sunday, September 21: Keep Calm and Carrion || Felt With Love Designs
Monday, September 22: Radiant Home Studio || Sewing Sober
Tuesday, September 23: Sew Fishsticks || La Pantigana || Amanda Rose
Wednesday,September 24: Shawnta Sews || Sprouting JubeJube || Knot Sew Normal
Thursday, September 25: Make It Perfect || Mimi’s Mom || Climbing the Willow
Friday, September 26: Needle and Ted || Our Family Four
Saturday, September 27: Froo & Boo
Sunday, September 28: Stitches by Laura || Vicky Myers creations
Monday, September 29: Cookin’ and Craftin’ || The Crazy Tailor
Tuesday, September 30: mama says sew || FABulous Home Sewn || The Inspired Wren
Wednesday, October 1: lady and the gents || That’s-Sew-Kari || Sewing Sober
Thursday,October 2: Gracious Threads || Blogs Like A Mother || SewsNBows
Friday, October 3: sew chibi || Lulu & Celeste || Made by Sara
RBD Flannel Showcase Blog Tour: Reversible Button Bibs
 I’m up on the Riley Blake Designs Flannel Showcase Blog Tour! Over the next few months, sewing bloggers will be featuring some of their favorite ways to use flannel fabric in handmades, all using Riley Blake’s great selection of cotton flannel fabrics. RB’s flannel fabric is a favorite here in our house because it has that wonderful soft brushed feel, and it stays that way wash after wash.
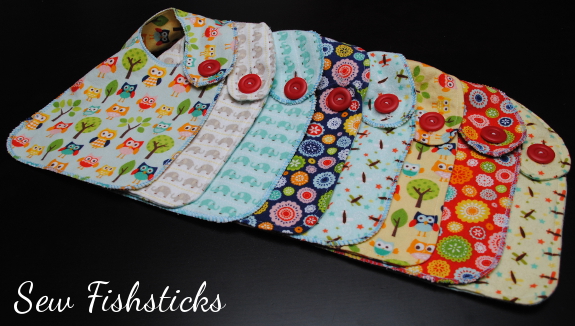 Because it’s 100% cotton and thicker than quilting cotton fabrics, flannel is not only soft, but it’s absorbent, too. That makes it a great choice for those sweet and darling but very drool-ly and spit-uppy babies! Anyone who has spent time with a newborn knows that a collection of absorbent drool bibs makes life much cleaner and drier. Thankfully, bibs are quick and simple to sew, so you can have a stack done in no time, and making them reversible for two looks in one is just as easy. I thought I’d take advantage of the blog tour and show you how!
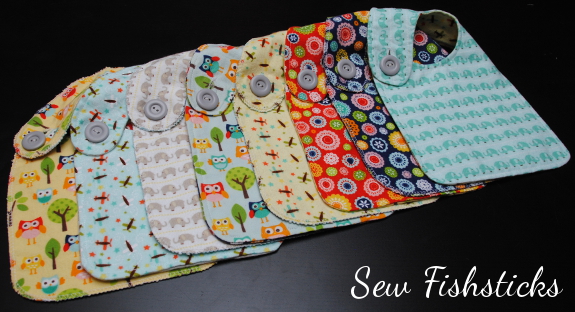 We’re going to start with my free Bibs in All Sizes pattern. To download the pattern, just click here, scroll down to the red link at the bottom of the post and click again. Be sure to save the file to your computer before printing the pattern. In order to make these reversible, I replaced the waterproof backing with another layer of flannel. If you wanted to make these waterproof, though, you could hide a waterproof fabric inside. Follow the instructions for cutting out and assembling your bib, either sewing it with your machine or serging it. (I’m using the infant size here, but toddler, big kid and adult sizes are all included in the free pattern.)
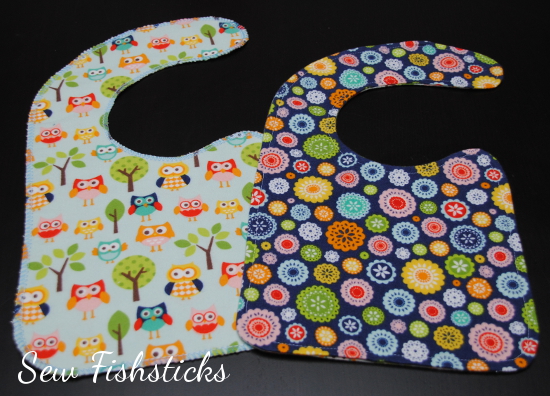 From here, we’ll be adding buttons for fastening rather than the snaps called for in the pattern. For these bibs, I used Riley Blake’s Matte Finish Buttons in Gray and Red.
Measure in from the end of the snap strap ½” on the Infant Size (1″- Toddler, 1 ½”- Big Kid Bib) and mark the center point. This will be the beginning of your button hole. Draw a vertical straight line 1/4″ longer than the width of your button to mark your button hole. Stitch your button hole. (Refer to your machine’s manual for using your automatic button hole attachment.)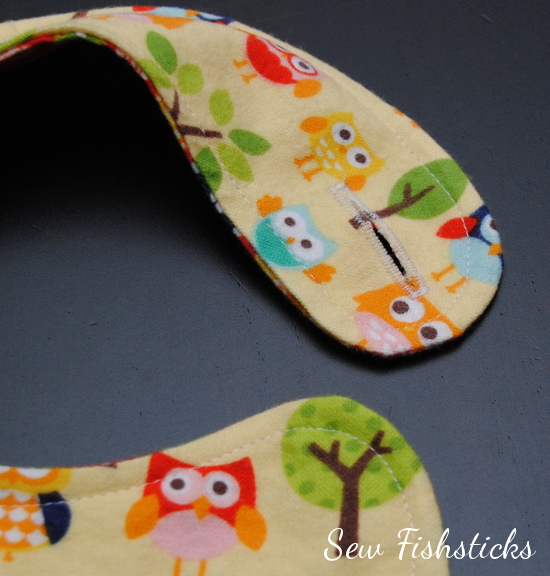 We’re going to sew two buttons back to back so that each side has it’s own button. When you do this, you have to add some space between the buttons to keep them from being too tight. (If you just sewed them back to back without some wiggle room, you wouldn’t be able to pull the buttons through the button hole.) If you have a chopstick (or what I often refer to as a corner-poker-outer) handy, that will work beautifully! Place the chopstick on the front side of the bib, centered on the little hump where you’ll be sewing your buttons.
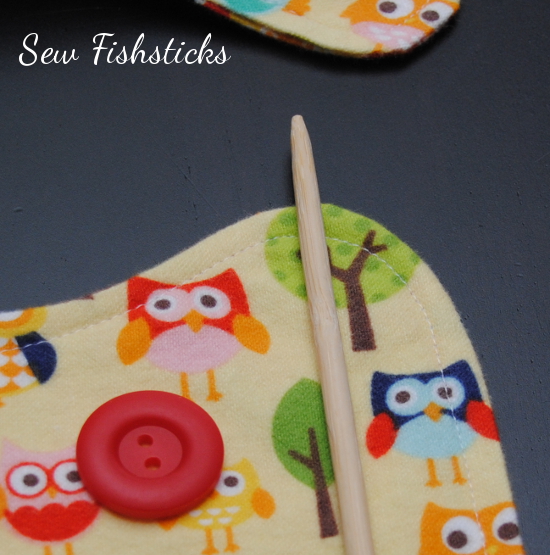 Place the first button on top of the chopstick, just below your topstitching or serger threads. Grab your hand needle and thread, and thread the needle, pulling the thread ends through so that you’ll be stitching with two thread lengths at once. Tie a generously-sized knot in the end of your thread. Pull the thread through from the back into one hole in the button, out the opposite hole and back through to the back of the bib. Be sure that your knot is snug against the back of the bib.
 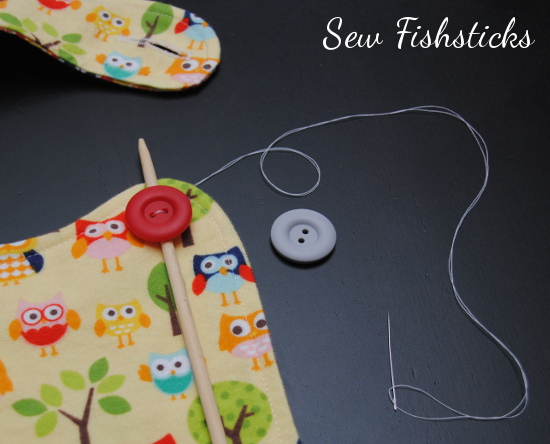 Slide your second button onto the needle and pull it all the way down against the back of the bib, lining it up behind your first button. Poke the needle through the opposite hole in the back button and through the matching hole on the front button.
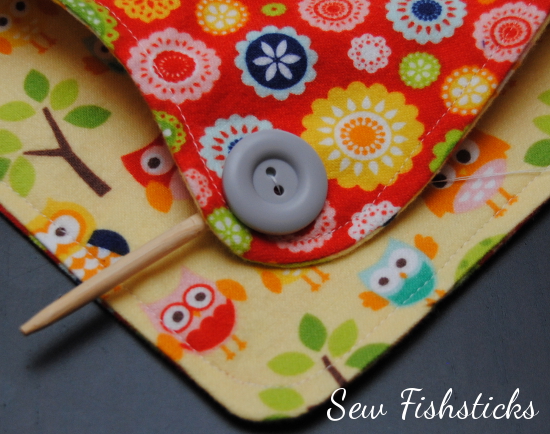 Continue stitching through the two buttons with the chopstick between until your button is well secured. (An important safety note: These buttons must be attached securely and firmly. Be sure to check them regularly. Never ever leave a baby or child alone or sleeping while wearing a bib.)
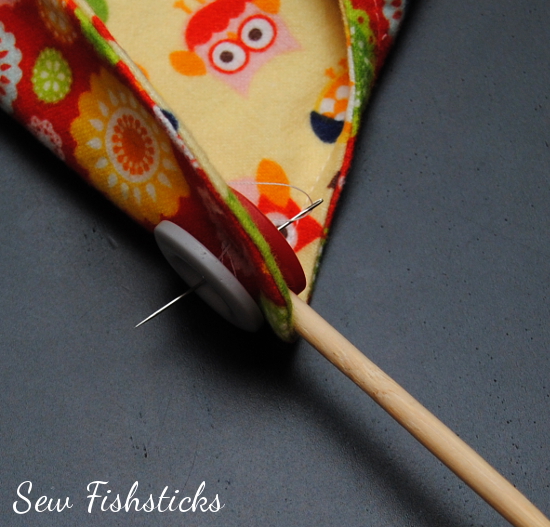 Pull out the chopstick and slide the needle under the threads in the back. Tie a knot around these threads and knot again several times. Trim away the extra thread.
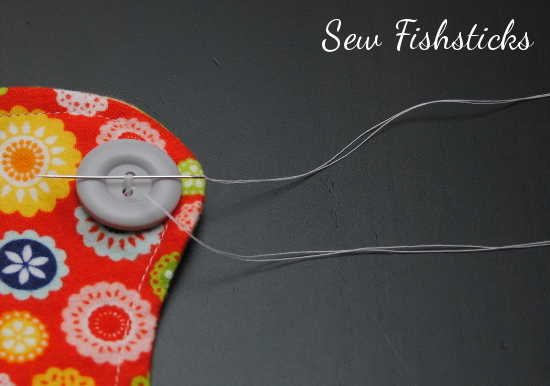 Button your bib on the front side ….
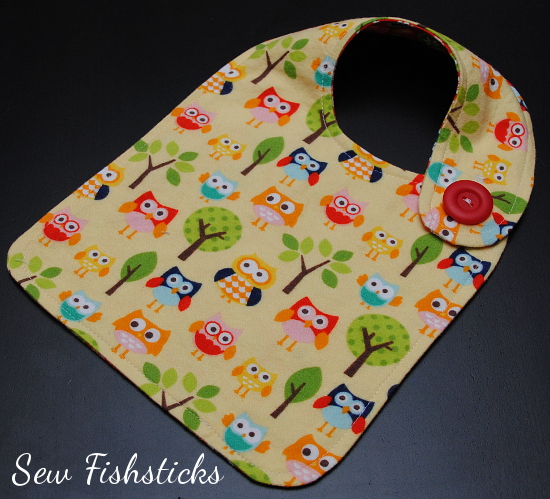 …or flip it over and button it on the other side!
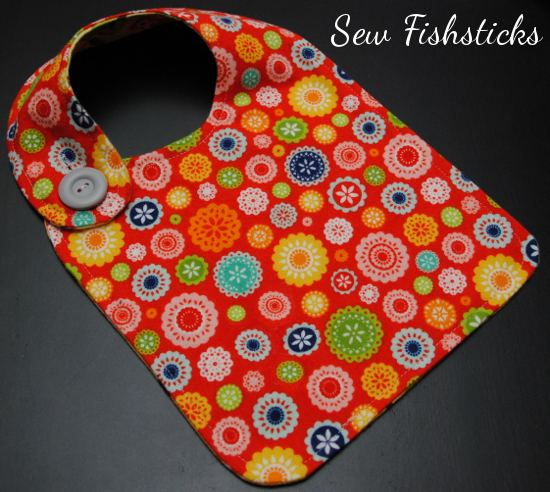
9/9 Quiltscapes
9/12 Fishsticks Designs
9/23 Sassy Quilter
9/26 Simple Simon & Co.
9/30 Fabric Mutt
10/3 Just Let Me Quilt
10/7 Jedi Craft Girl
10/10 Rose and Odin
10/14 Sew We Quilt
10/17 Haberdashery Fun
10/21 Leigh Laurel Studios
10/24 The Cottage Mama
10/28 Flannel Queen
10/31 Lucy Blaire
Indygo Junction’s Newest Book: Dimensional Denim
 Amy Barickman of Indygo Junction recently released a new book called Dimensional Denim, and I got to check it out! Here’s what Amy says about the book, “I was inspired to create this book after I noticed the recent trend for textural home decor and accessory items. While trend shopping I saw more and more items that created texture and interest through fabric manipulation.” The creative ideas in the book combine beautifully with Indygo Junction’s Crossroads Denim, but the book includes some great ideas for recycling old blue jeans, too!
I’ve worked with Crossroads Denim before, and it’s wonderful for denim pants, skirts and jackets, but I hadn’t really thought about using it for home decor projects. My husband and I recently finished a bench that we upcycled from our youngest daughter’s old bed, and since it really needed a toss pillow, that’s what I chose to make!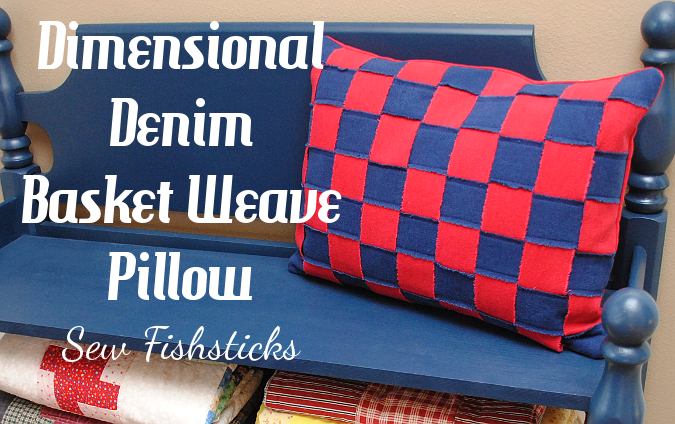 Because of the vintage look of the bench, I thought the Basket Weave Pillow would be just perfect here. I used two colors of Crossroads Denim – Fire Red and Weathered Indygo. (I sort of wish that I’d thrown in some French Vanilla, too, for even more color and interest. The book has instructions for making this pillow in two colors or three.)
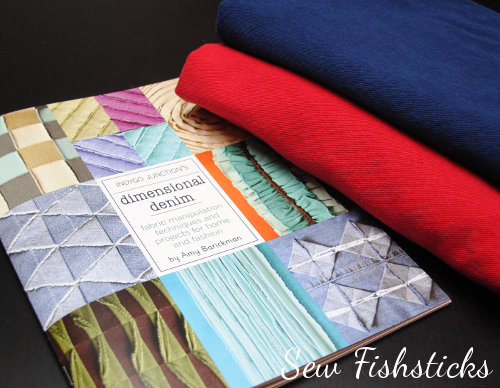 My favorite part of this project might have been tearing those strips. There’s something so satisfying about the ripping sound and that perfectly straight line that you get when you tear along the grain. I got a little carried away, and ended up with plenty of strips for a future project – maybe a vintage-y fabric checker board?
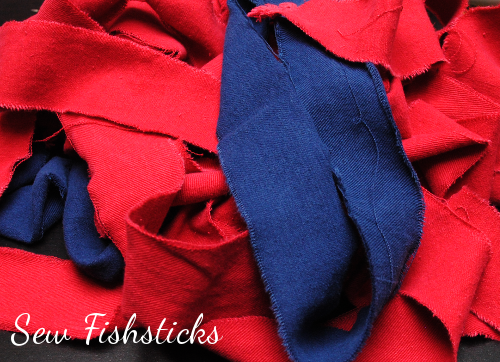 Amy says, “A simple woven design is probably one of the first craft projects most children make in school.” Whether or not you learned this technique in grade school, it really is easy enough that a child could do it, and the end product has a lovely dimensional look.
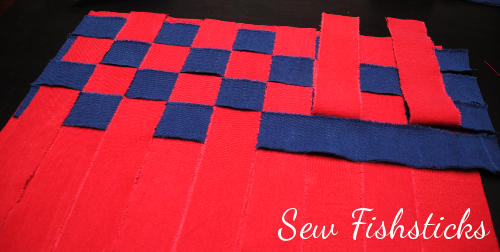 I did have to do a little math to come up with the right length and quantity of strips for my pillow since I was reusing an odd shaped one that I already had on hand. Amy includes all of the details for making a 19″ x 19″ pillow with three fabrics, so you don’t have to do math if you don’t want to. One of the things I really like about the book is that each section teaches you the technique first, followed by an actual project, but it also offers ideas for using that technique for your own projects. It sort of gives you freedom to expand on what you’ve learned!
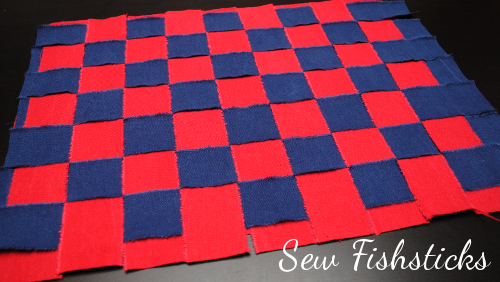 I modified the stitching on my pillow just a little bit because I was afraid my rough and tumble boys might just grab those woven strips and pull them apart. Instead of stitching the X pattern that Amy recommends on random blocks, I topstitched down the torn edges of all of my blue sections and left the red ones loose. Hopefully, those red loops won’t end up being home to too many little action figures. I’m sure that they’ll hold up beautifully, though, if they do!
I adore my finished pillow!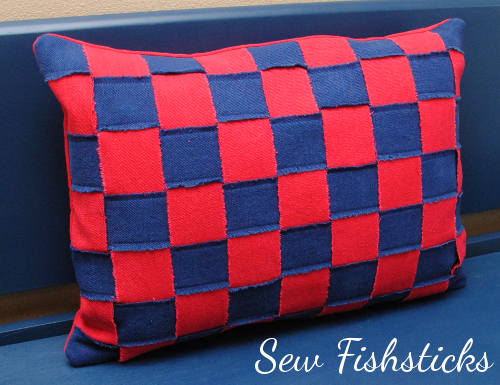
You can enter to win your own copy of Dimensional Denim by clicking over to the Indygo Junction blog, or you can grab a copy right now for 30% off using code DDBT14 at checkout! Be sure to follow along with the rest of the blog tour schedule below!
8/4 Indygo Junction
8/4 Kollabora
8/5 Amy Barickman
8/6 Fishsticks Designs
8/7 Cool2Craft
8/8 The Sewing Loft
8/11 Nancy Zieman
8/12 Skip to My Lou
8/13 Inventive Denim
8/14 Whipstitch
8/15 Coats and Clark
You can find Crossroads Denim at all of these online stores:
The Sew in Style Book Tour, Giveaway & a Dolly Tardis Dress!
 My youngest daughter and I get to share a new book with you today, and it’s a great one for those of you who have girls learning to sew! Samantha and I met Erin Hentzel at Spring Quilt Market in Pittsburgh while we were setting up our booth, and we enjoyed chatting with her about sewing and the sewing industry and her newly released book!
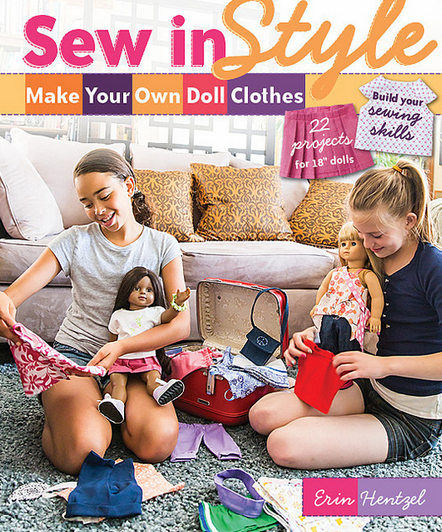 Sew in Style – Make Your Own Doll Clothes was written to teach girls to sew for their own 18″ dolls, and it does a beautiful job of doing just that. At 16, Samantha is probably a little older than the target audience, but she gladly pulled her well-loved American Girl Samantha Doll out of storage and started planning as soon as she saw the book. (Her Samantha Doll is not making an appearance here because when I say “well loved” I mean she looks like she slept with a little girl who loved her very much for many, many years! Instead, we opened up an AG Doll that we picked up on sale a few years ago and kept for some special little girl that we have yet to meet. Is that a little odd? I just know that we’ll meet someone someday who will just be overjoyed with this doll.)
 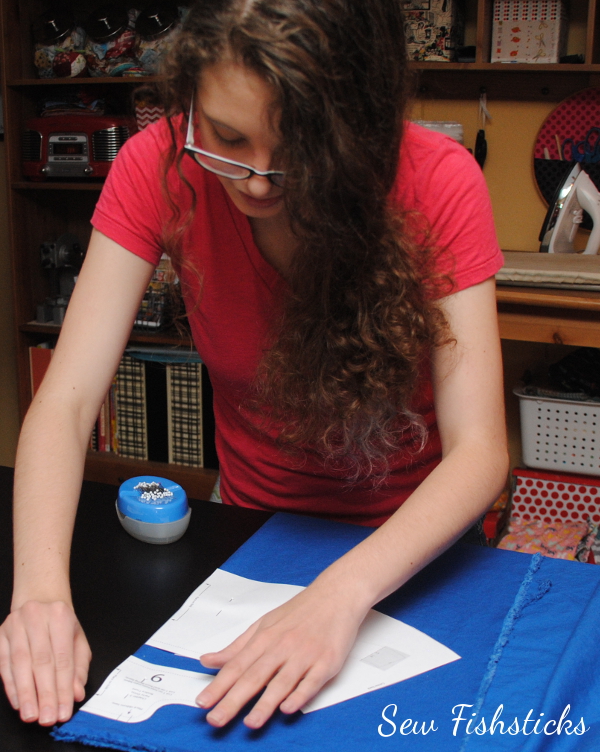 C&T Publishing sent us an eBook copy of the book for this review. This was my first time using one of their eBooks, and I really appreciated the layout. It’s super easy to find what you need, and all of the full-size patterns are included in easy-to-print-and-tape-together format. Samantha scrolled through the book on the computer, and then we printed just the pages she needed.
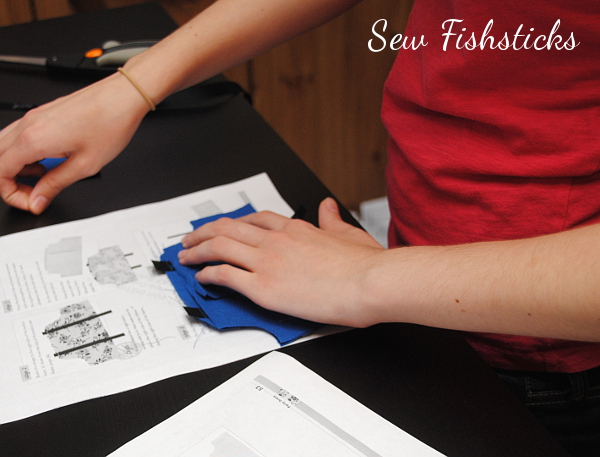 My favorite thing about this book is that I just handed it all over to Samantha and let her go with it. The beginning of the book teaches basic sewing skills with plenty of tips and guidance. Really, the only thing I helped with was brainstorming how to turn the book’s Party Dress into a Tardis Party Dress!
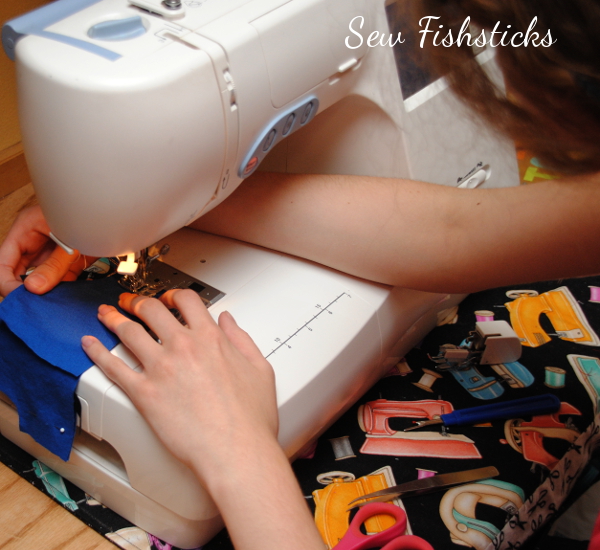 Things have been a little bit Doctor Who crazy around here lately. We started watching the Doctor a few months ago as a family, and I feel like I’m raising a houseful of Whovians at the moment. My two little guys run around the house now battling invisible Daleks and opening things with imaginary sonic screwdrivers, and my teenagers amuse themselves by turning pieces of furniture into police boxes:
Samantha’s idea for designing a dolly Tardis dress did not surprise me at all!
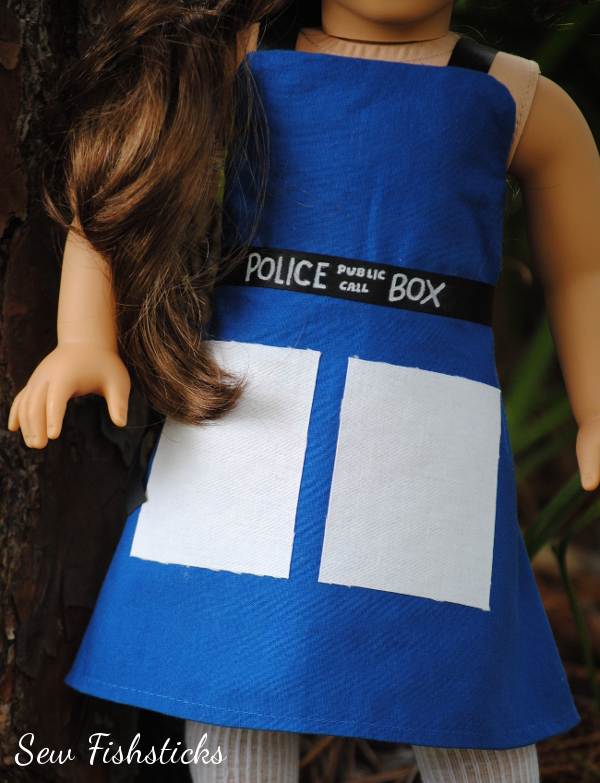 To make this dress, Samantha chose the closest-to-Tardis blue Kona cotton that she could find and black ribbon. She used a white paint pen to inscribe the words “Police Public Call Box” on the ribbon, and she used Wonder Under to iron on the white window patches. I think it turned out really well! What do you think? (We even think that if this particular doll had red hair, she could pass as Amy Pond, and the irony of this whole thing is amusing since Doctor Who is a British series and this is an American Girl Doll.)
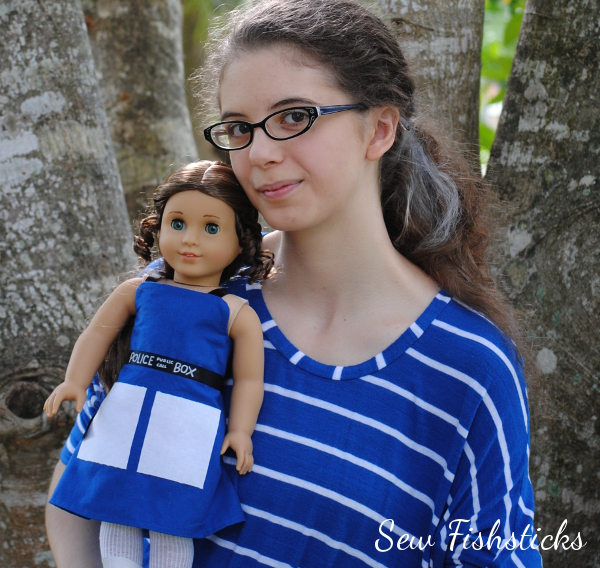 Giveaway is closed! And the winner is lucky #13! Comment #13 was from Heidi K! Congratulations!
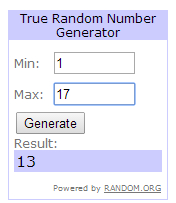
Giveaway ends July 27th, 2014 at 8:00 PM EST. Giveaway is open to U.S and international residents who are 18 years of age or older. One entry per person. Winner will be selected by Random.org. Winner will be announced using the winner’s public username on or before 12:00 PM EST on August 1st, 2014. Prize will be emailed to the winner who must be contactable via email. Email addresses will never be shared.


