Pattern Extras
Pattern Extra: Add a Zippered Pocket to the Sand & Sidewalk Boardshorts
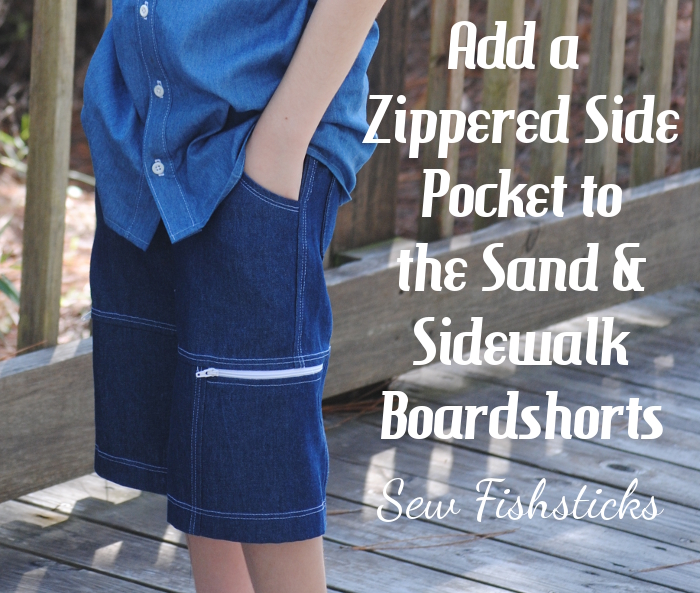 Because you asked, and it makes me happy to make you happy … here are the instructions for incorporating a zippered pocket into the side of the Sand & Sidewalk Boardshorts. Those of us who live in the deep south or in the southern hemisphere will be using this tutorial right away — I promise that I’ll remind those of you up north about it in the spring! In case you’re not familiar with the Sand & Sidewalk Boardshorts and Skate Pants pattern, a front knee panel is incorporated into both the shorts and the pants. This tutorial is only for the shorts. (The curve at the bottom of the knee panel on the pants would make this more difficult.) This tutorial is a little long but the most complicated step is drawing in the back portion of the wrap-around knee panel, and that’s not really hard at all! I’ll walk you through each step, and if you have a question, just ask!
Start by printing and assembling your pattern.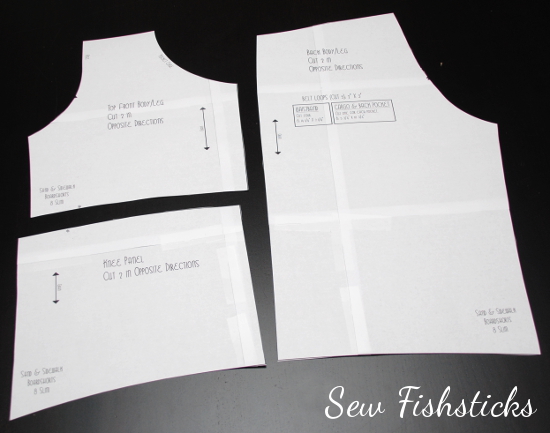 Flip the knee panel pattern piece over onto the bottom edge of the back pattern piece so that their right sides are facing. Line the bottom edges up on the right hand side as you’re facing the pattern pieces. Mark where the top edge of the knee panel hits on the right hand side. (Doing this will assure that the sides of your knee panel will line up properly.)
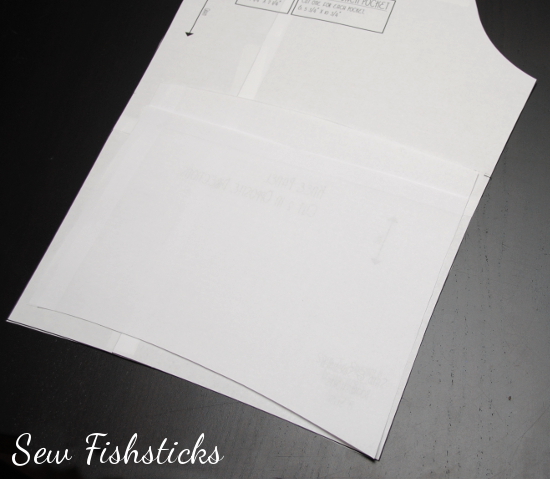 Flip the knee panel back over and place the right hand edge of it so that it’s overlapping the left side of the back pattern piece by 1″ with the bottom edges aligned, as shown. Tape this in place.
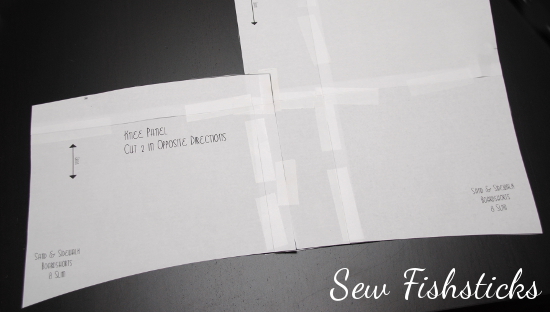 Now comes the slightly tricky part. You’re going to have to draw in a slight, gentle curve from the overlapped edge to the far side of your back pattern piece where you made that mark before. (I’ve found that it’s easier to get a nice curve when I cut than when I’m drawing, so if your curve isn’t perfect now, you may be able to “fix it” when you cut in a minute.) You can see here that I drew the curve starting at the very edge of the back piece, rather than starting at the edge of the overlapped knee panel. This will give you a smooth finish on the top of your pocket.
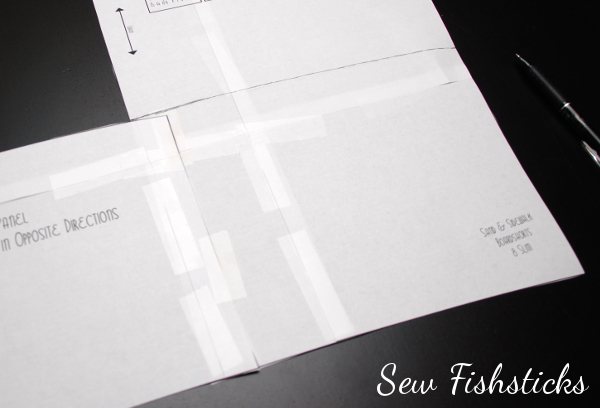 Still with me? Now cut along that curve that you just drew.
 Before you move on, make a notation on the top back pattern piece that you just cut away that says, “Add 1 inch,” with an arrow pointing to the bottom edge. (You’ll need to add an inch when you trace this later to accommodate the seam allowance.)
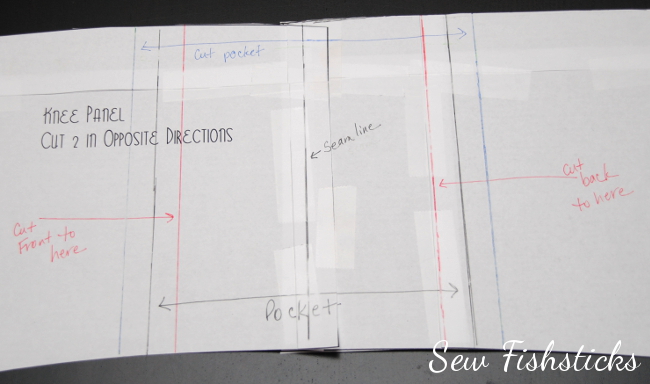
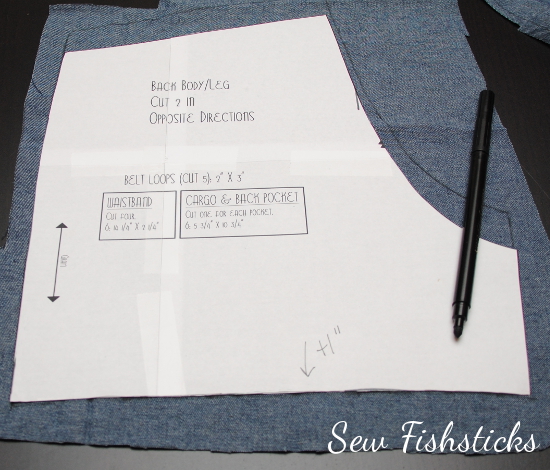
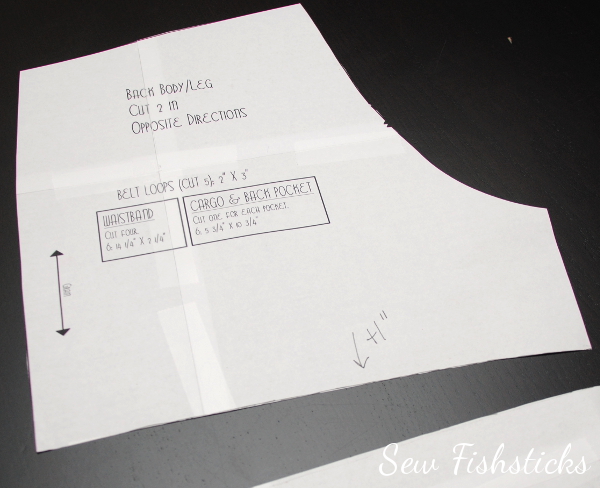 Deep breath. When you finish this, you’ll be ready to modify all sorts of patterns to do fun things like this! Okay, now we need to draw in the pocket. On the size 5 that I did for Charlie, I made the pocket 5″ wide. On the size 7/8 that I sewed for Jamie, I made the pocket 6″ wide. You sort of have to decide what size works best for the size shorts that you’re sewing. (And, you’ll need a zipper slightly longer than the length you decide. Any length will work, as long as it’s at least a bit longer than the width of the pocket.) The center of your wrap-around panel is going to be at the center of that overlap. Draw a line there, then draw straight lines 1/2 the distance of the width of your pocket on each side. In this case, since my pocket is going to be 6″ wide, my lines are both 3″ out from the center. (The center line says, “Seam line”, on my copy because that is where the seam on the upper part of the shorts will line up.)
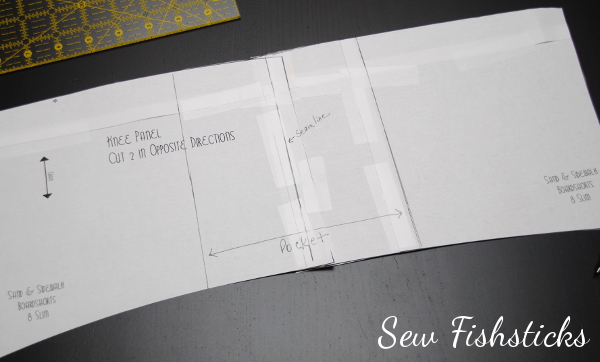 The lines that you just drew in will end up being the finished seam lines, but you need seam allowances drawn in before you can cut out your fabric. If you have different color pens on hand, some color-coding may help keep things clear in this step. I generally use a 1/2″ seam allowance on all of my patterns, so that’s what I’m going with here. To get the width that I’ll cut the pocket, I drew new lines 1/2″ on the outside of the original lines. Those are the blue lines in the following two pictures. For the front and back pieces of my wrap-around panel, I added lines 1/2″ to the inside of the pocket seam lines. Those are the red lines that you see here. I like to draw in arrows and note which part is cut to which line when I draw in these seam allowances. Otherwise, it’s really easy to get mixed up!
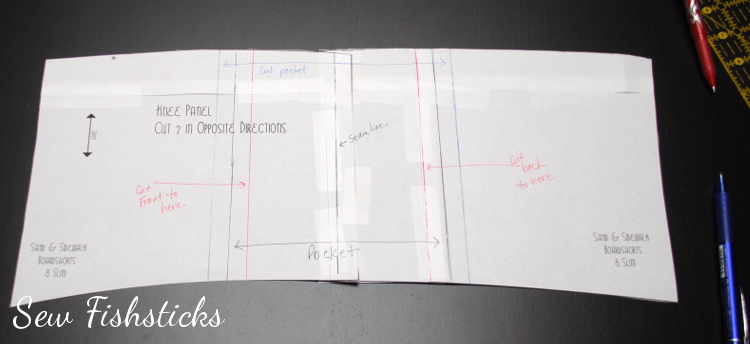
 You’re ready to cut out your fabric pieces! What I usually do is place the pattern on the fabric, trace the outside of the pattern up to the lines that I’ve drawn in …
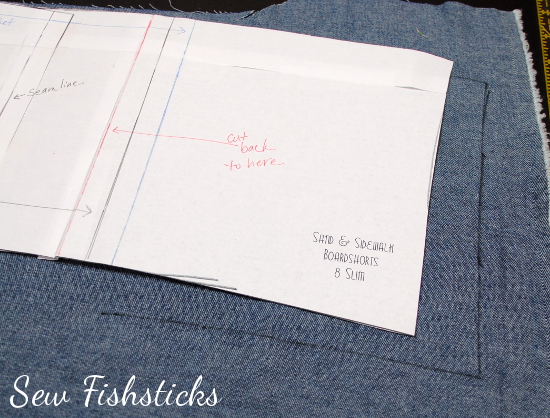 Then, I either fold the pattern back on the line, or I use a straight-edge to draw in the straight line.
 Be sure that you’re tracing your pattern pieces to the correct seam allowance line. You’ll need four pocket pieces (two, then two reversed), and you’ll need two each of the front and back pieces (one, then one reversed). Label your pieces when you trace them!!! I put a letter “B” for the back, a letter “F” for the front and a letter “P” for the pocket using a washable marker at the inside edge. (If you don’t label these, you may end up with a mess.)
 Now that your wrap-around/pocket pieces are all cut out, you’ll need to cut out the rest of your pieces. When you cut out the upper back, you’ll need to add 1″ for the seam allowance. (Since you didn’t add 1/2″ to the back knee panel that you created, you’re adding the seam allowance for it and the seam allowance for the back at the same time. Just trust me, that you need an inch. You do not need to add seam allowance to the front piece, since it has the seam allowance already added in.)
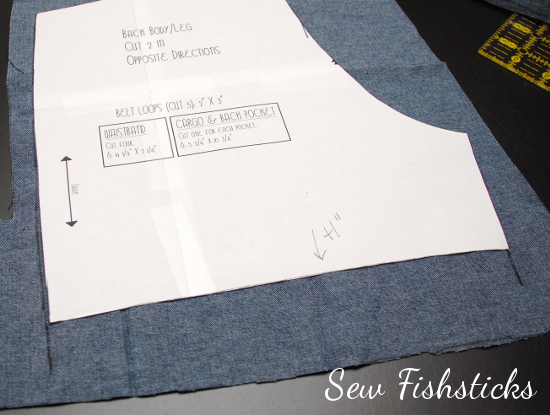
 Time to sew in the zipper! Are you ready? Lay out the pattern pieces for the wrap-around on one leg, and arrange them in order. This photo shows the pieces for the left leg. The front piece is all the way to your left, the two pocket pieces are in the middle (both with right sides facing up) and the back piece all the way to your right. You want your zipper to close with the pull towards the front of the pants.
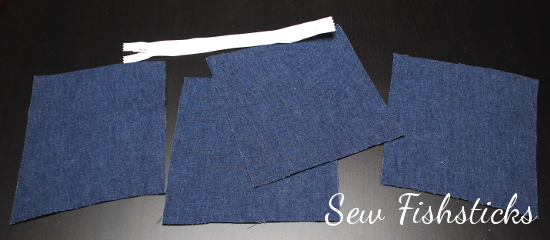 Set everything to the side except for the front pocket piece. Turn your zipper face down, as shown, on the top edge of this piece and line up the edges. Pin the zipper so that the pin heads will be facing you as you guide the zipper through your machine. That will allow you to remove them as you get to them.
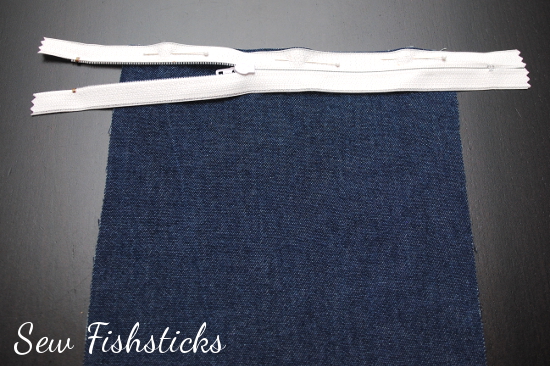 Put the zipper foot on your machine and adjust the needle so that it falls 1/4″ from the zipper’s outside edge. (Remember this setting because when you sew the other side of the zipper, it will be hidden between two layers of fabric, and you want both sides to be even.) Stitch the zipper in. When you get to zipper pull, backstitch, remove the fabric from the machine, pull the zipper pull past and start stitching again where you left off.
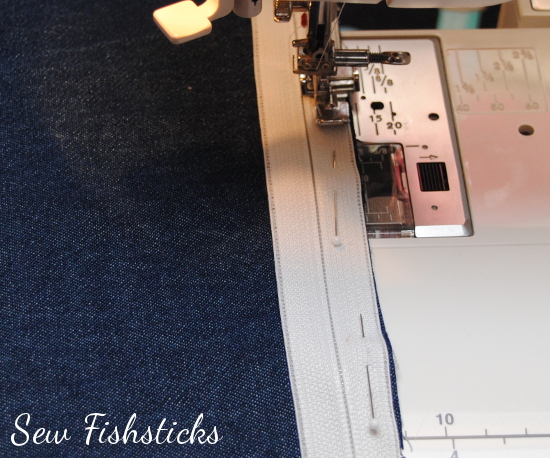 Once you have this side of the zipper stitched in, I like to flip over to the back and trim away some of the fabric so that those raw edges will end up sewn neatly under the zipper when it’s topstitched. (If you don’t do this, those edges may fray with washing and end up getting caught in the zipper teeth. You won’t have to do this on the other side of the zipper since it will be sewn between two layers of fabric.)
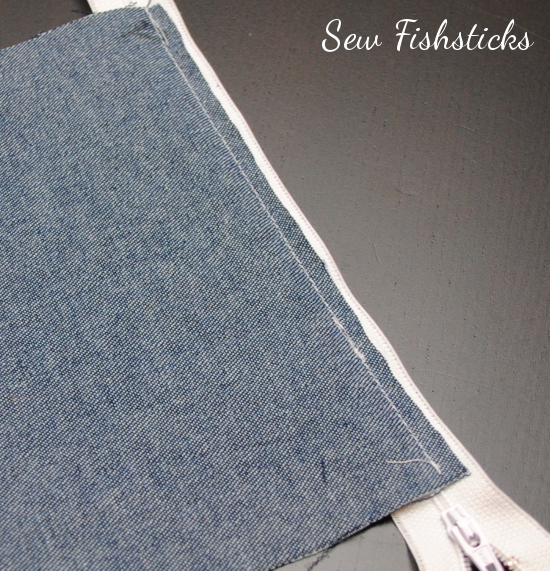
Flip the pocket down away from the zipper and press it lightly. (Be careful because plastic zippers can melt!) Topstitch 1/4″ from the seam.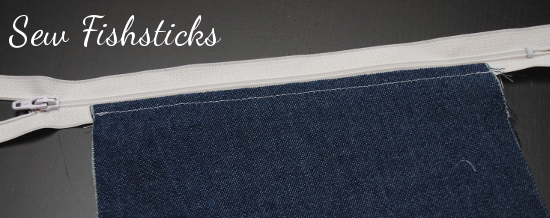 Pull the zipper pull over so that it’s above the pocket and cut away the extra zipper.
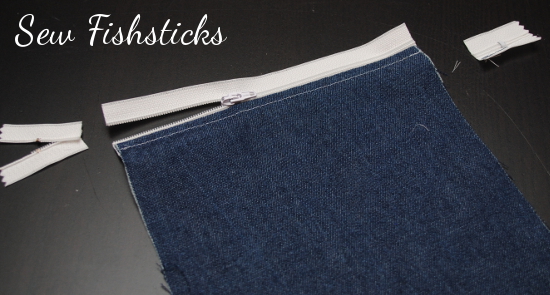 Place the second pocket piece behind the front. Line up the top edge of this piece with the top edge of the zipper and pin. Flip the front piece up at the bottom edge and trim away enough of the bottom pocket piece so that it falls 1/2″ shorter than the front piece. (This will reduce the bulk when you hem the shorts.)
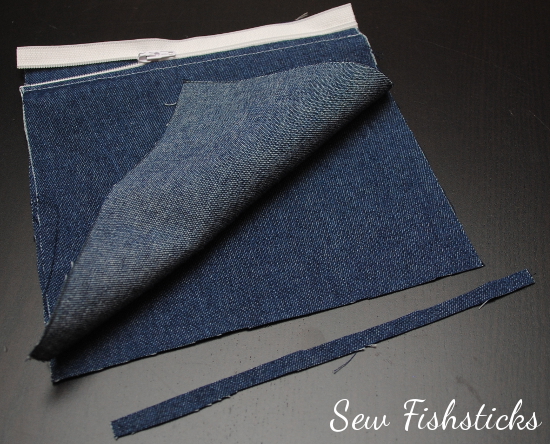 Sew the back wrap-around panel piece to the back side of the pocket. Serge or overcast your seam allowance to prevent fraying. Before sewing the front of the wrap-around to the pocket, pull the zipper pull back and pin the zipper teeth close together.
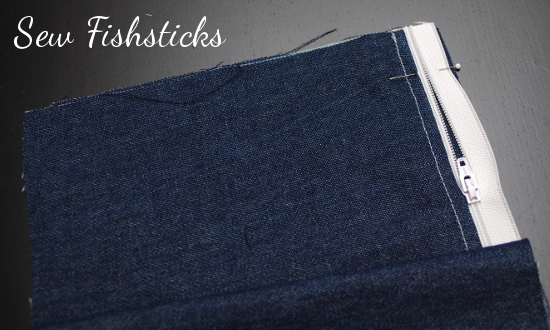 Sew the front of the wrap-around piece to the pocket. Serge or overcast the seam allowances.
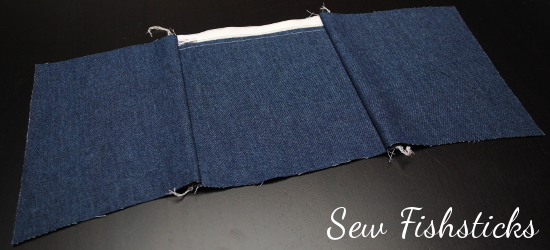 Pull out that twin needle and topstitch down both sides of the zipper. (Or just sew two rows of side-by-side topstitching.)
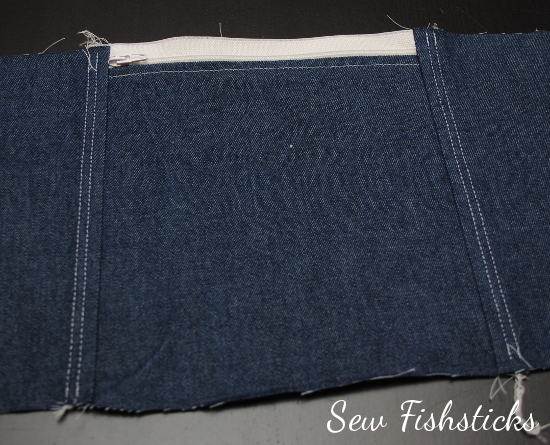 If you haven’t already assembling the top portion of this leg, do so now. (This top portion looks slightly different than the pattern because it’s the modified version that I did for Project Run & Play.)
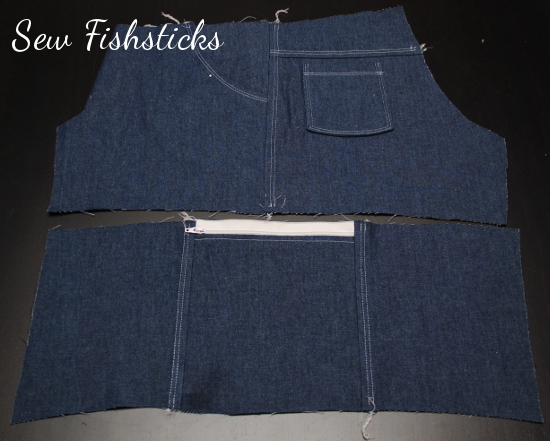 When you pin the wrap-around panel to the bottom edge of the top portion of the leg, pin the top edge of the zipper in the same way that you pinned the bottom edge of the zipper earlier. This time the zipper will be sandwiched between two layers of fabric, so be careful to line up the three edges evenly. Sew the pieces together using your zipper foot with the same settings you used for the bottom of the zipper.
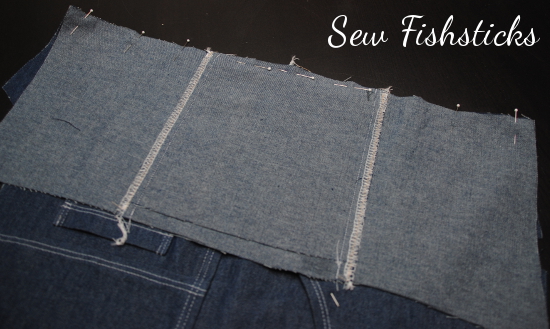 When you overcast or serge this seam allowance, you’ll need to open the zipper, go part-way, stop, pull the zipper past and start again where you left off.
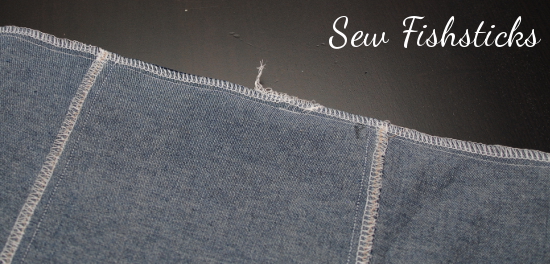 Topstitch above the seam using a twin needle or stitching two rows of side-by-side stitching.
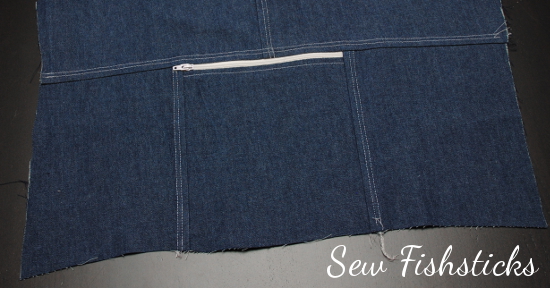 From here, you’ll do the other leg, then follow the instructions in the pattern to complete the shorts. Be careful, though, when you line up the inseams the make sure that the wrap-around seams are lined up as closely as possible.
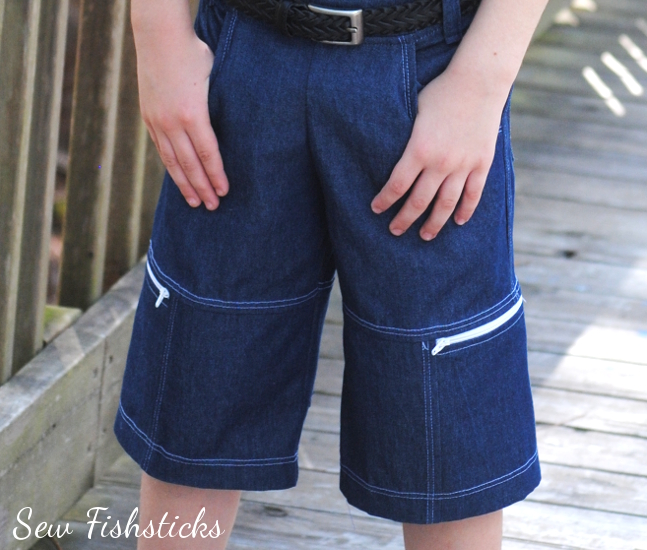 That wasn’t too hard, was it? A few little tips/notes: first, I didn’t put this together in a PDF, but my blog has Print-friendly button at the bottom of each post, that will make it easier for you to print if you prefer. Second, because you’re basically drawing in your pattern and you’re not a computer, you may get edges that don’t quite line up. As long as they’re small pieces, just trim them so that they do line up and move on. Those little tiny misalignments aren’t going to affect the fit of the final piece.
Go sew some cool shorts! And, then share them with us! We would love to see them in the Fishsticks Sewing Group or on the Fishsticks Fan Page or tag me on Instagram!
Dress Up Your Playhouse Dress!
{Perfect Pattern Parcel/Pattern Extra}
 I am so excited that my Playhouse Dress is part of Perfect Pattern Parcel #5!! This collection includes six beautiful and versatile sewing patterns for girls from preschool to preteen.

Here at Perfect Pattern Parcel, we believe in supporting independent pattern designers. It’s our opinion that indie patterns are just, well, better than big box patterns, and we’re pretty sure our customers think so too. So, we allow customers to show their support in naming their own price for each Parcel. We also encourage customers to allocate part of their Parcel price to the charity Donorschoose.org in order to help classrooms in need. Pattern Parcel donates all profits after expenses from Parcel sales to the charity as well. Together we’ve raised over $11,000 for classrooms in need!
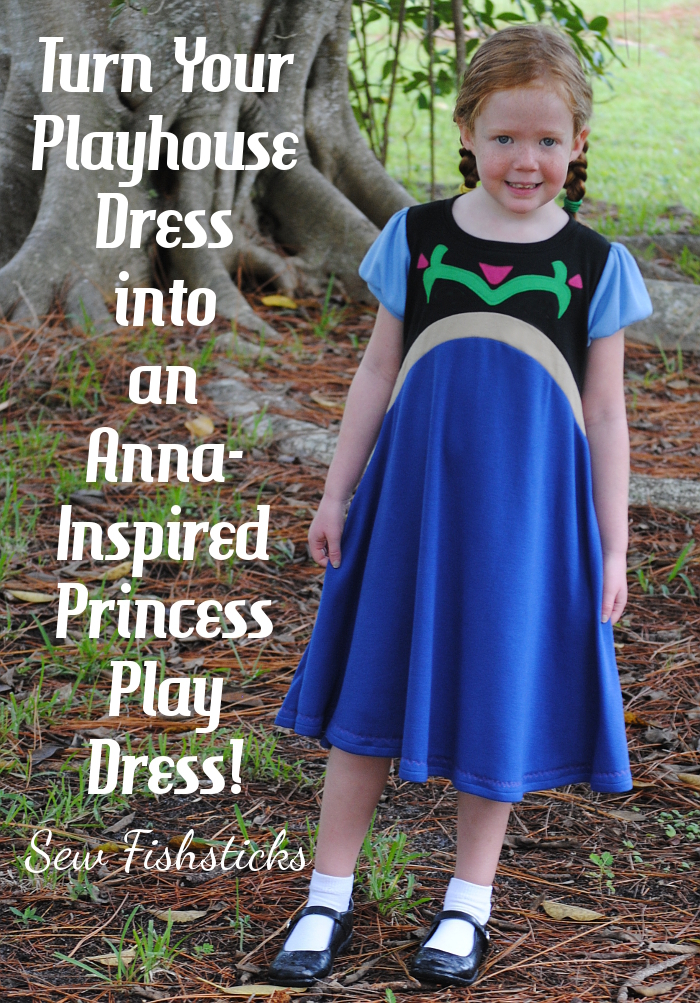
 My house is full of little boys, but I’ve heard that there’s this recent movie that little girls have gone a little bit crazy over – a movie about a certain ice princess and her little sister. Because I’m a practical sewist, I don’t generally do costumes, but for our recent trip to the Magic Kingdom, I made a princess-inspired Playhouse Dress for our granddaughter. You can see that dress right here. I love that it’s a play dress that she can wear everyday, but it still makes her feel like she’s dressed up! (If you’ve ever gone to the grocery store with a child in dress-up clothes, I think you’ll totally understand!)
 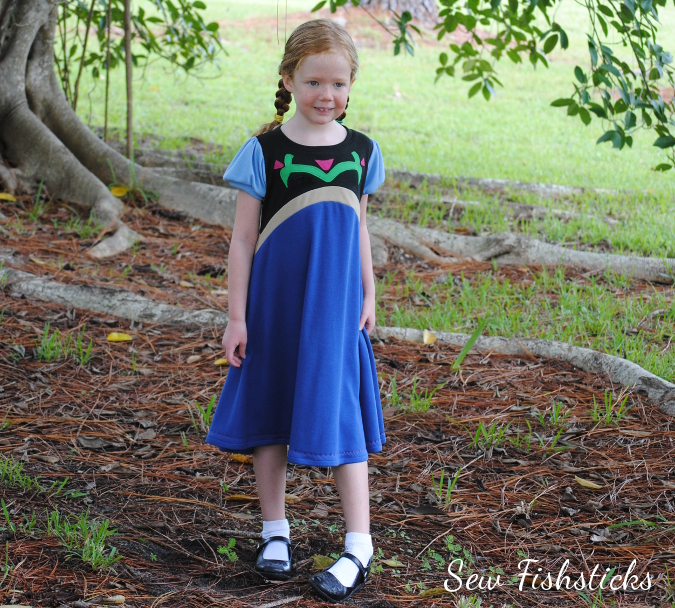 For the Pattern Parcel Blog Tour, I thought I’d show you how you can do the same thing by creating an Anna-inspired Playhouse Dress. I’ve got all of the instructions for you, plus a downloadable PDF for the simple applique.
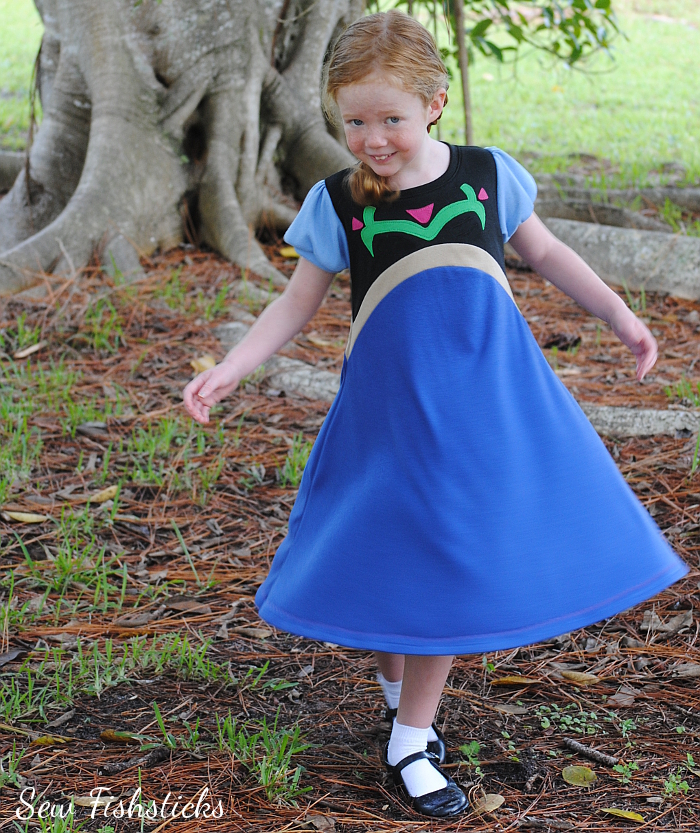 You can sew the Playhouse Dress in a combination of knits and wovens or in all knits. Because I wanted this one to be a casual princess-y dress, I sewed it in cotton/polyester interlocks, and I bought them all at Joann Fabrics. I used Black, Fern Green, Sangria, Cornstalk, Royal and Cornflower Blue.
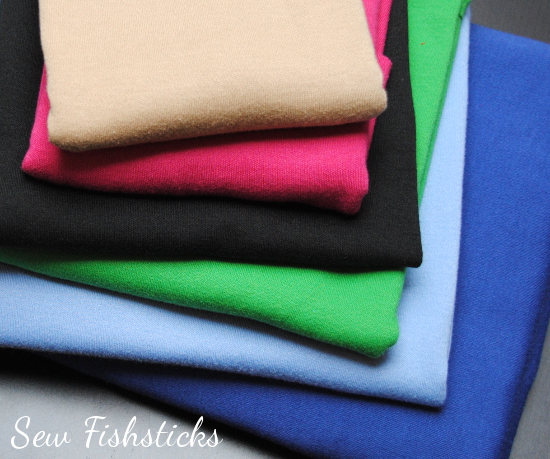 Start by printing and assembling your pattern. The Playhouse Dress is one of my updated patterns, so you can choose to print either all sizes of the pattern nested, or just the individual size that you’re sewing. In addition to printing the the entire pattern, you’ll need a second printing of just the top section of the skirt. I’ll explain that a few steps down, though.
You’ll also need to print the applique design. Click here for sizes 12 months to 4 (on sizes 12 months and 18 months, the center flower is left off) and here for sizes 5 to 12.
Finally, you’ll need a sewable, paper-backed, iron-on adhesive for the applique. I used Heat ‘n Bond Lite.
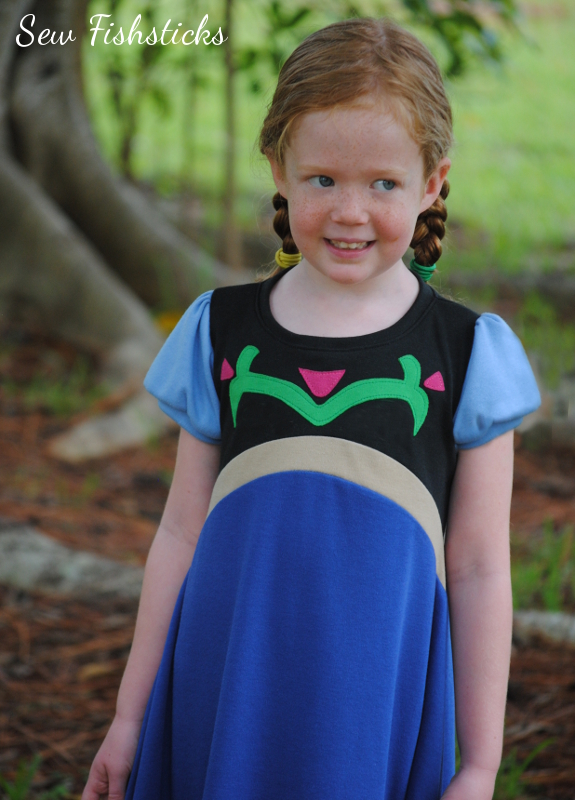
Cut out the front bodice and back bodice of the Playhouse Dress using black interlock. Prepare your applique pieces following the instructions for the iron-on adhesive that you’ve chosen. Use pink fabric for the flowers and green for the vine. I traced my pieces onto the paper backing of the Heat ‘n Bond, then ironed the adhesive to the fabric and cut out the pieces. Once you have all of your pieces ready to be ironed on, place them on the front bodice piece, checking to make sure that everything fits well within the 1/2″ seam allowance and all the pieces are centered properly.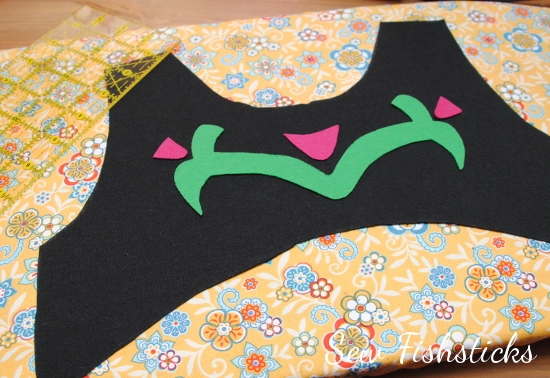 Remove the flowers, and iron on the vine. Depending on the adhesive that you’ve chosen, you may be able to move on to the flowers from here, but the adhesive that I’m using requires that the edges be stitched down. We’re working with knit fabrics that don’t fray, so I’m just going to stitch all the way around 1/8″ from the edge. Those small curves can be tough to go around. Set your stitch length fairly short, sew slowly, and try not to make sharp turns on the curves. Turning the fabric a little bit with each stitch will give you a nicer curve. If you use a matching thread, this doesn’t have to be absolutely perfect stitching.
 Once your vine is done, add your flowers, one at a time.
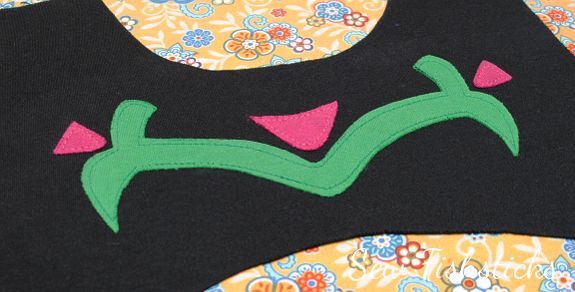 Set the bodice pieces aside so that we can work on the skirt. To create the faux sash, you’ll basically be adding a strip of fabric to the top of your front and back skirt pieces. I made my sash 1″ wide finished. The easiest way to do this is to go back once you’ve printed the whole pattern, find which pattern pages to print for just the top portion of the skirt, and print a second set of just those few pages. (You’ll need at least 2″ of the top of the skirt.)
 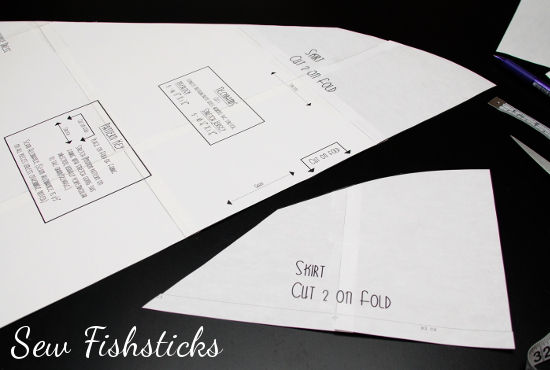 Measure down 1″ from the top of the full skirt pattern and draw a second curve. Use the partial skirt pattern to help draw the curve.
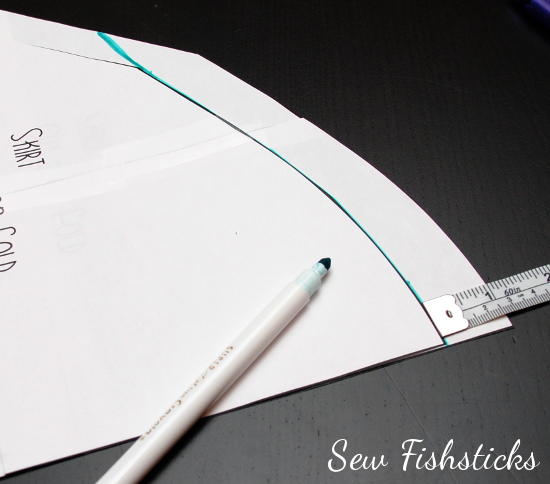 Measure down 2″ from the top of the partial skirt pattern and draw a second curve. Use the full skirt pattern to help draw the curve.
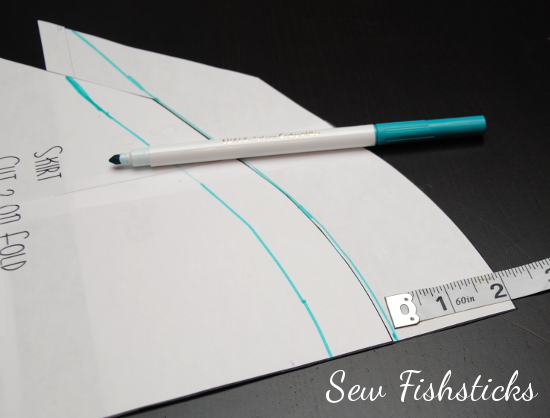 Cut the top 1″ away from the full skirt pattern and discard it. Cut the top 2″ from the partial skirt pattern and keep it. You’ll end up with a full skirt pattern that is 1″ shorter than it originally was and a 2″ “sash” pattern.
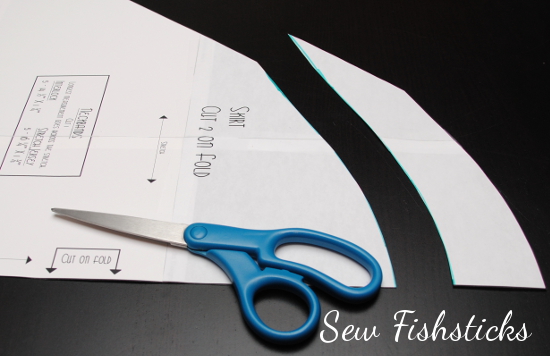 Cut the full skirt pattern from royal blue interlock and the sash pattern from tan or gold interlock – two of each, one for the front and one for the back of the skirt. Pin the bottom edge of each sash piece to the top edge of a skirt piece with right sides together. Start pinning at the center, and gently ease the two curves together as you go.
 The edges of the sash will overhang a little. When you stitch the two pieces together, your stitching should go right down the center of the points on each side.
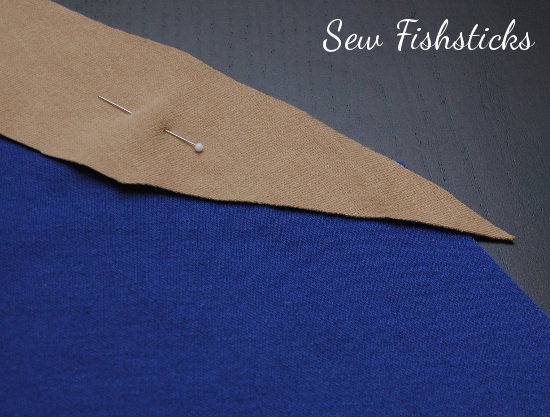 Once these pieces are sewn together, press the seam allowances toward the bottom of the skirt. If you end up with any overhanging fabric on the sides, just trim it away so that the sides are straight again.
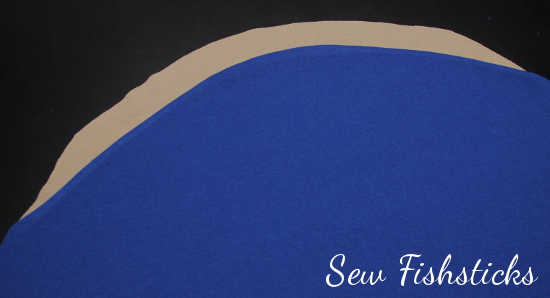 From here, you’ll cut your remaining pieces and follow the instructions for assembling the dress. I added a decorative stitch just above the hem on my skirt pieces.
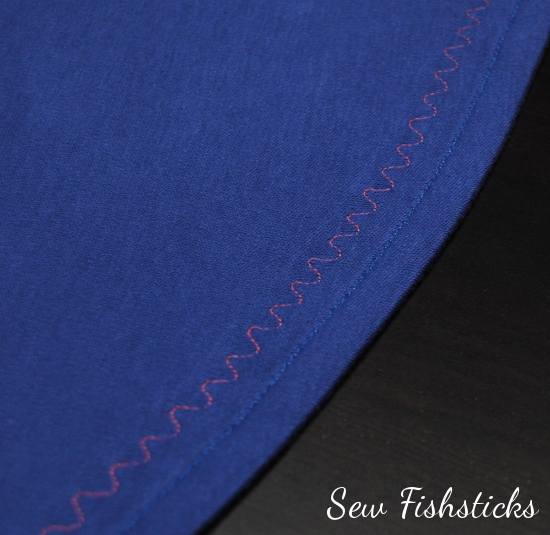 When you sew the sides, be careful to line up the points so that you get two nice “V”s on both sides. I found that it was easiest to pin and sew those areas with a long stitch, check the alignment, then serge or sew with a tight finishing stitch once I was happy with how the sides looked.
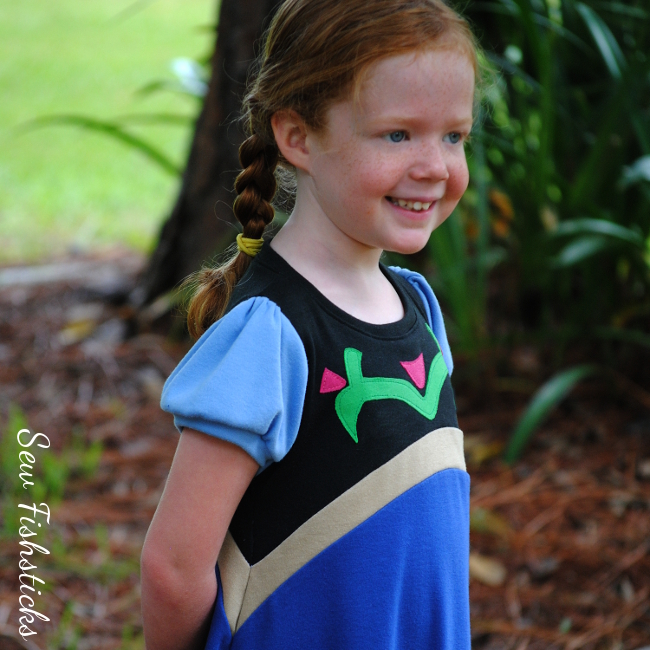 And, that’s it! Your sewing is done, and your little fan of all things Frozen is happy enough to twirl all day!! (Huge thanks to our friends’ daughter, E, for being such a beautiful model for me. I hope you enjoy your Anna Dress!)
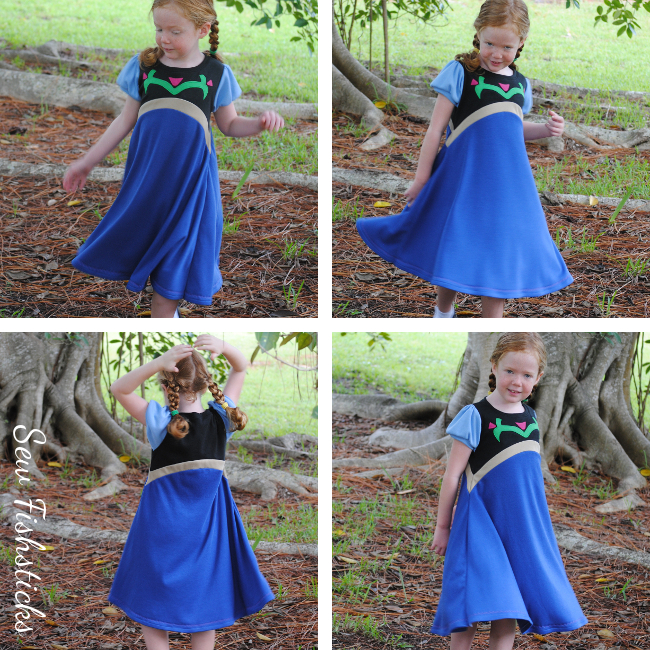 THE PATTERN PARCEL…
Parcel #5: Girls and Tweens includes:
Lily Knit Blazer by Peek-a-Boo Patterns
Everyday Yoga Pant for Girls by Greenstyle
Asymmetrical Drape Top by EYMM
Playhouse Dress by Fishsticks Designs
Mimi Dress and Shirt by Filles a Maman
BONUS PATTERN: Sunki Dress by Figgy’s
Bonus Pattern:
Choose a price of $28 or greater for Parcel #5 and you will automatically also be sent the Bonus Pattern. The Bonus Pattern for this Parcel is the Sunki Dress by Figgy’s. The pattern includes both size runs, so you get 18 months through a 16 tween sizing.
Follow the rest of the tour for more inspiration:
Friday, September 19: Pienkel || Cookin’ and Craftin’
Saturday, September 20: The Life Of A Compulsive Crafter
Sunday, September 21: Keep Calm and Carrion || Felt With Love Designs
Monday, September 22: Radiant Home Studio || Sewing Sober
Tuesday, September 23: Sew Fishsticks || La Pantigana || Amanda Rose
Wednesday,September 24: Shawnta Sews || Sprouting JubeJube || Knot Sew Normal
Thursday, September 25: Make It Perfect || Mimi’s Mom || Climbing the Willow
Friday, September 26: Needle and Ted || Our Family Four
Saturday, September 27: Froo & Boo
Sunday, September 28: Stitches by Laura || Vicky Myers creations
Monday, September 29: Cookin’ and Craftin’ || The Crazy Tailor
Tuesday, September 30: mama says sew || FABulous Home Sewn || The Inspired Wren
Wednesday, October 1: lady and the gents || That’s-Sew-Kari || Sewing Sober
Thursday,October 2: Gracious Threads || Blogs Like A Mother || SewsNBows
Friday, October 3: sew chibi || Lulu & Celeste || Made by Sara
Go Fish Extra:
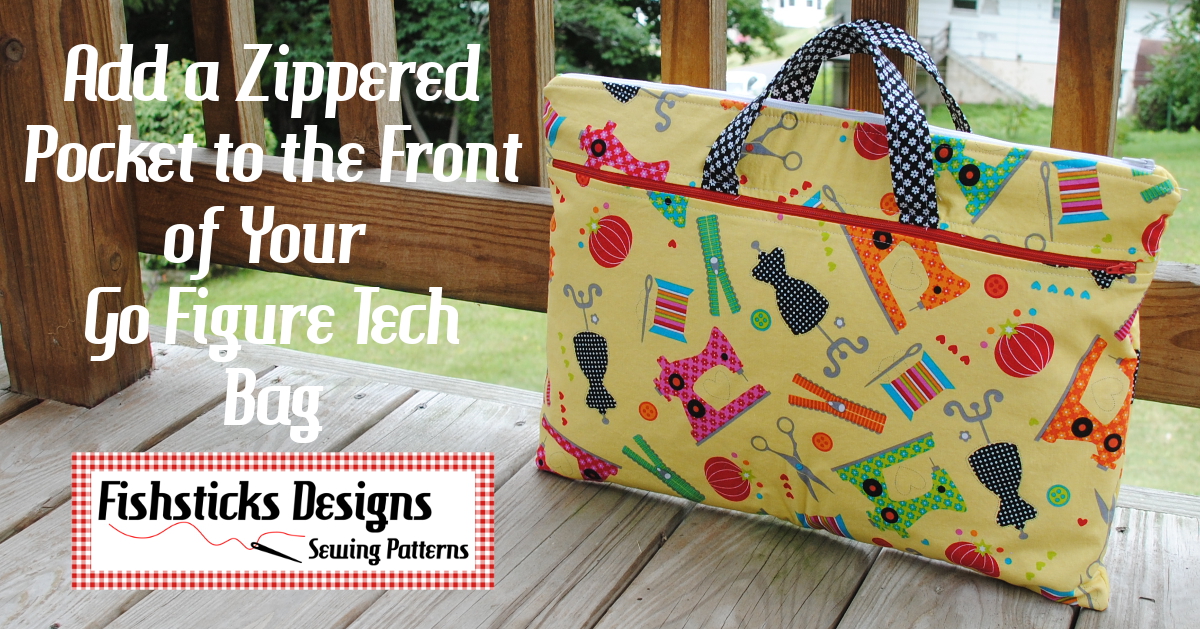
Add a Zippered Pocket to the Front of Your Go Figure Tech Bag
I mentioned a few weeks ago that I’m working on adding a section to my website of “extras” that you can add to your Go Fish Series patterns. These will all be free downloads, and I think that sewing them will help you build skills that you can take to your other sewing, too!
My first Go Fish Extra is this quick tutorial for adding a zippered pocket to the front of your Go Figure Tech Bag. The GFTB is a zippered tote that you customize to fit your electronic device …. tablet, e-reader or laptop. There’s this perfect point on the outside for a giant zippered pocket. This is actually one of those things that I wanted to include in the original pattern, but since these are designed as tri-fold sewing cards in paper format, sometimes I just run out of room!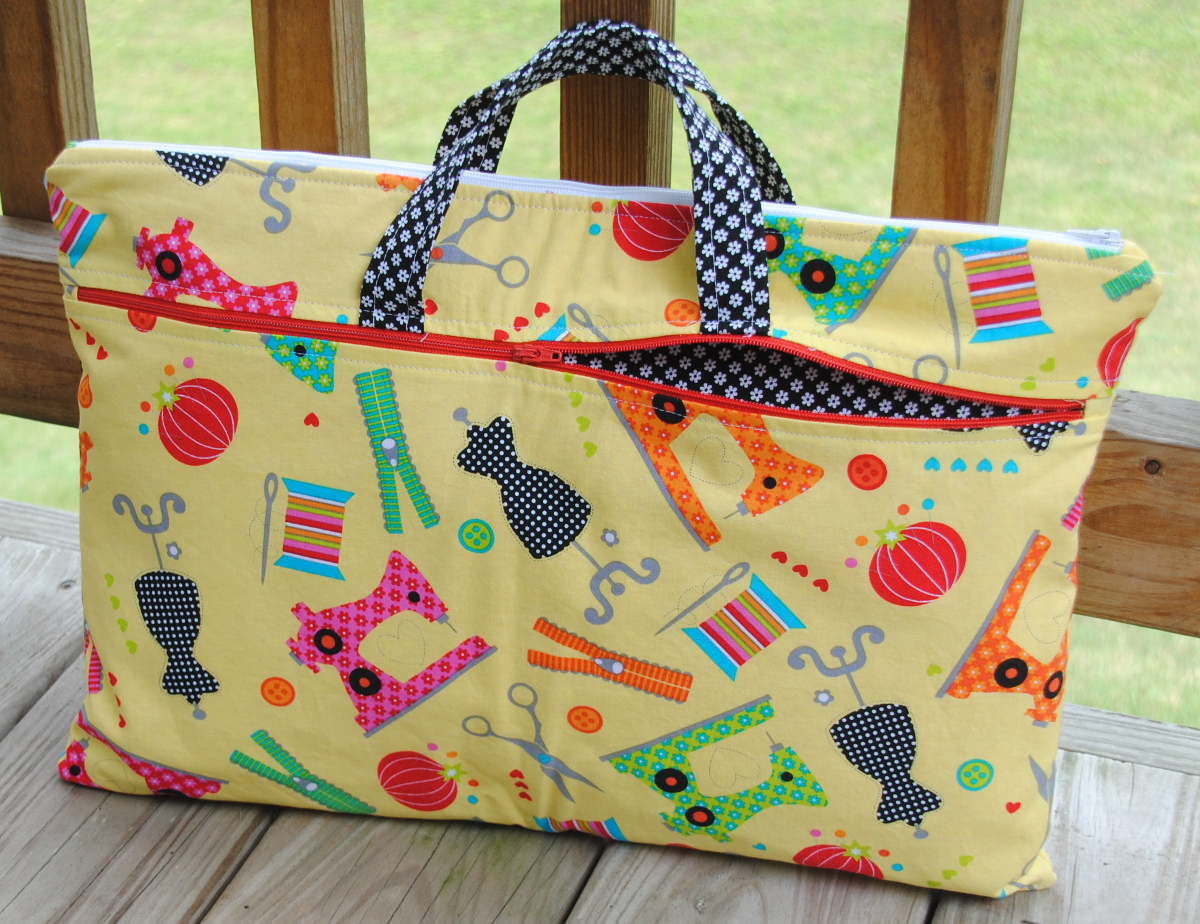 I put this tutorial together in PDF format for you, and you can download it right here.
Operation Pajama Drawer: Pajama Party PJ Pants in a Jiffy
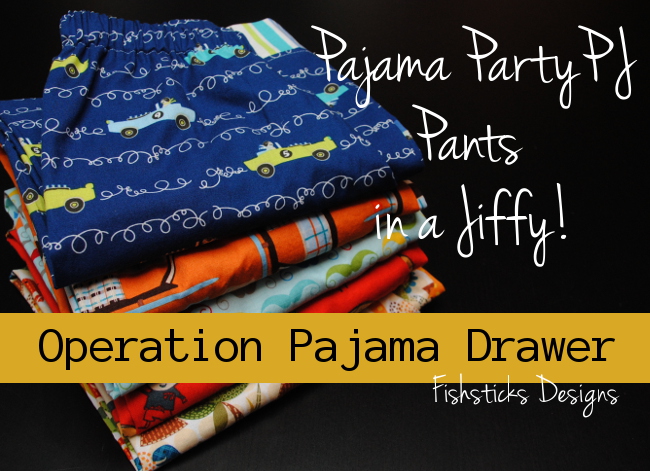 When you’re trying to fill up a pajama drawer quickly, sometimes you just need a quick, easy and straightforward pair of PJ pants! (I’ll be honest and say that I almost always sew our woven pajama pants using this method.) To get started, you just need to print the pants from the Pajama Party PJs pattern, then assemble and cut out the pattern pieces, except for the pocket. We’ll be skipping the side seam pocket on these to make them up fast.
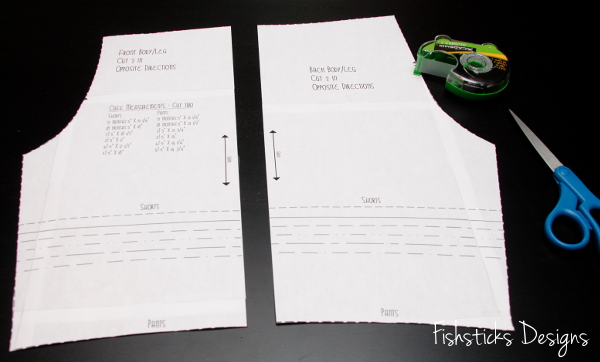 Now grab a ruler and a pencil. Because the seam allowance is 1/2″, you’re going to be overlapping your two pattern pieces 1″ total. Use your ruler and pencil to draw a straight line 1″ from the straight side of either pattern piece.
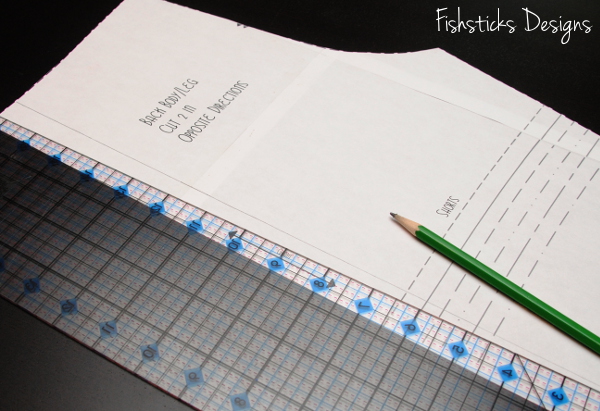 Line the straight side of your second pattern piece up with the line that you just drew and tape the pieces together. (You may have a tiny little piece that pokes out the top, just trim that away so that you have a nice even angle.) Now you have a one-piece pants pattern.
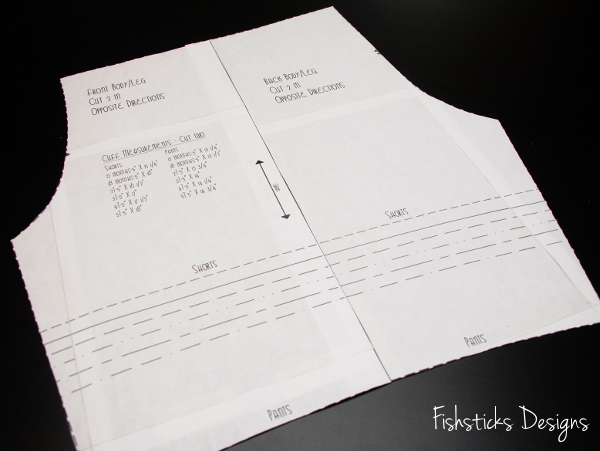 Use this one-piece pattern to cut the pieces from your fabric, being sure to cut one, then one reversed (so that you have a left and a right leg).
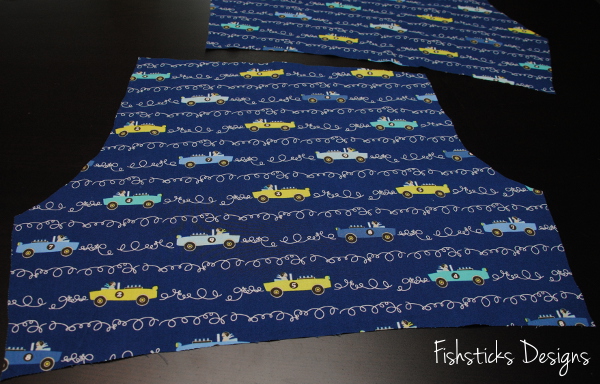 Fold each piece over to match up their inseams and just follow the pattern instructions from there!
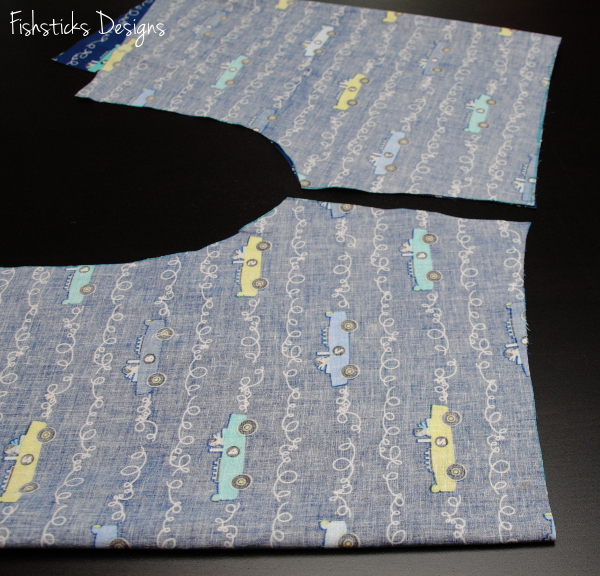 Here are a few other little tips for sewing pajama pants quickly. First, if you have multiples to sew, cut them all out at the same time. I’ve found that assembly line sewing is way faster than doing one piece at a time. My only little caveat here is, “Don’t cut out multiples if you’re using a pattern that you’ve never sewn before!” Please, always cut and sew and test the finished sizing once before cutting out a pile of anything.
  Lastly, just use white thread. Especially if you’re sewing more than one pair of pants, changing thread colors will slow you way down! If you’re picky, then choose fabrics that will work nicely with white. Once your elastic is in the waist and the waistband gathers up, though, it’s not likely that you’re even going to notice the color of the thread.
 As a total random aside, I named this blog post because my granny used to always say that she was going to do something “in a jiffy”. She just meant that it was going to get done quickly. I started wondering though what that means exactly, and apparently it is an actual measurement with different meanings in computing, astrophysics and quantum physics. In computing, a jiffy is the duration of one tick of the system timer interrupt. Typically, this time is 0.01 seconds. (Source.) Sewing pajama pants this way is fast, but not that fast!


