Handmade Decor: The Great TV Coverup!
 This might be my favorite home decor project ever, and I can’t wait to share it with you! As many of you know already, we moved into a new-to-us house this past fall, and we’ve been working since then on decorating it to make it truly ours. We have a very limited decorating budget, so I’m doing my best to create decor as much as possible. I love handmade things, so handmade decor works perfectly for us! I thought I’d try to start sharing a handmade decor idea here on my blog once a week . . . at least until I run out of house to decorate.
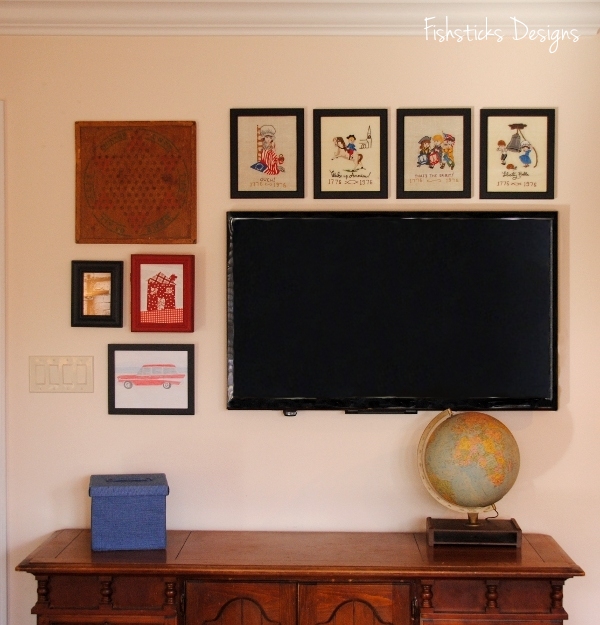
That’s our TV wall above. It’s one of the first things you see when you walk in our front door, and while my family enjoys owning and watching television, I don’t like having it on display when we have guests over. I knew that we couldn’t really purchase a piece of furniture to hide the TV, so I went hunting for ideas to cover it up when we wanted to do so. I found some great ideas on Pinterest, including several that balanced a canvas print on the television using brackets attached to the print. I liked that idea because it’s simple and cheap, but I thought maybe I could take it a few steps further.
We started by mounting our television and pulling the cords into the wall so that they’re all hidden. (I say “we”, but really, Ray did all of that work while I stayed out of the way!) Once the TV was mounted, I checked all the measurements: length, width and depth from wall. With measurements in hand, I went hunting for the perfect canvas. I found that when you’re looking for a larger canvas, it’s usually less expensive to purchase one with a print on it rather than a plain white canvas. The canvas that worked for us started out as an alphabet print from Hobby Lobby. (I promise I took a before picture, but I have hunted everywhere and cannot find it.) On clearance, I paid $25 for the canvas.
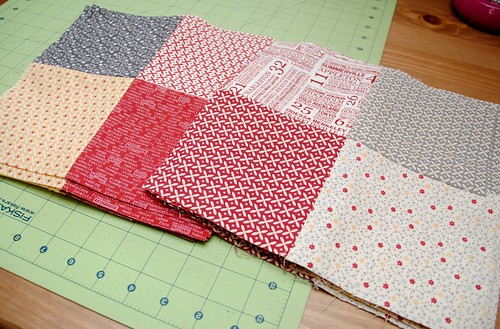 I had this stack of quilt blocks that I pieced early last year during a quilt-along, a quilt-along that I failed to completely quilt along with. That’s okay, though, because these blocks were ready and waiting and perfect for this project. I measured everything out to determine the width that I needed for my sashing and a border wide enough to wrap all the way around the back of the canvas. Once the quilt top was pieced together, I was ready to to assemble my “canvas quilt”. Because the canvas print was pretty bright, I covered the canvas with white cotton fabric then stretched my quilt top over it and stapled it in place.
  I wanted the canvas to slide completely over the television, but the back had some braces that needed to come out for that to be possible. I called in Ray’s help again. (I feel like I should add here that he was worried the frame might not hold it’s angles well without the support, but he was willing to saw out the supports as long as I knew that was a possibility. Thankfully, the frame held together beautifully!)
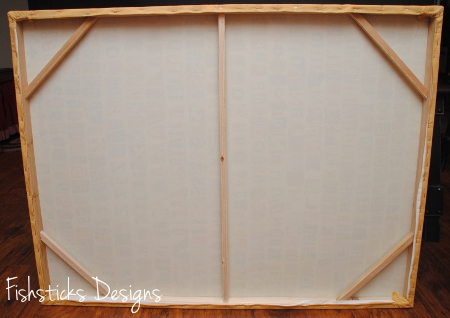
 With that, this project was done! Because you can see the TV from all sides in our home, I love that this cover mounts all the way over the TV. It’s also really lightweight, so I don’t worry that it will cause any harm to the television.
 We had friends over last week, and late in the evening, someone asked me, “Do you own a television?” She happened to be standing right next to it and had no idea! Exactly what I was hoping for!
Hopeful Threads, Dinner for Two & Big Kid Bibs for Hidden Treasures
 Woohoo! It’s February! I have been bubbling over with excitement about today for weeks now! Not only do I have the magnificent privilege of getting to work with Kristy and all of the incredibly giving Hopeful Threads followers this month, but I get to be involved in a project that I know is going to be a huge blessing to everyone involved, from those who contribute their sewing talents to the beautiful children and caregivers who receive these handmade gifts.
 I was visiting with my friend, Heather, several weeks ago, and she mentioned that she was getting ready to sew some waterproof bibs to send to China with her daughter, Ransley. Actually, I think she simply asked me if I thought diaper-making PUL would work as a waterproof backing for the bibs that she was making. I thought it would be perfect and offered her some scraps that I had in a box in my garage. A few days later, she texted me about the PUL, and I called her to ask some more questions. The more I heard, the more I was sure that this was a great project for all you sewists who are so kind and generous about offering your time and talents each month to give to those in need! A quick email to Kristy and an even quicker response from her, and I was busy at work putting together everything that you would need to start sewing!
 First, though, a little bit about the children who will be receiving your gifts. This is Ransley, above, on her last visit to the Hidden Treasures Home just outside of Fuzhou, China. Ransley is leaving in the next few months to go serve on staff at Hidden Treasures for the next few years. She shared with me that God showed her such peace, love and joy on her last journey there. The home is filled with children, many of whom have special needs, but it’s also filled with love and fun and hope. You can read many of the children’s stories and browse through photos on the homes’ official website right here: Loaves and Fishes International and the Hidden Treasures Foster Home. I urge you to take a few minutes to read about these sweet little ones.
 When I asked Heather to tell me about the bibs she was sewing, she shared that she’d been asked to sew some when Ransley last journeyed to China. The older special needs children often need bibs to keep their clothing clean and dry, but larger bibs are harder to come by, especially in China. The staff at Hidden Treasures actually sent her a pattern drawn up on a paper bag and suggested that she sew them with cotton fronts and vinyl shower curtain backing.
 Heather sent over about a dozen sewn that way, but she heard they didn’t hold up as well as she’d hoped. I was so excited to jump in and offer suggestions that I hope will produce bibs they will be able to use for years to come! And, after reading this inscription on the original paper bag pattern, I feel so incredibly blessed to have the opportunity to offer my experience!
 Are you ready to get sewing?
 I have two different bib options for you, but let’s start with a little about fabrics and notions. For the waterproof backing, I highly recommend diaper-making polyurethane laminate. You’ll find it labeled PUL in most fabric shops. (Natures Fabrics is offering a 10% discount on PUL for participants. Just type in the code loavesfishes1 when you checkout. You must only have PUL in your cart to check out with the code.) Rip-stop nylon is an alternative waterproof backing.
These bibs will be packed into spare suitcases for the trip to China, so they need to be absorbent, but not too thick. I’m suggesting sewing them with cotton woven quilting fabric or flannel on the front and a hidden flannel layer for a little extra absorbency without too much thickness. Please pre-wash all cotton fabrics.
One last thing, the staff at Hidden Treasures has specifically asked for bibs with no Velcro (or other hook and loop) because the children tend to rub their heads against it, and it can be irritating. The first bib pattern is a traditional tie bib. These work really well for the needs of the children at Hidden Treasures. (Now that this project has ended, this tie bib tutorial is no longer available, but be sure to grab my tutorial for the snap bib in four sizes here: The Bibs in All Sizes Tutorial.)
 The second bib pattern is a snapped bib with a wrap-around back. These are very quick to make and great for both the needs of the children at Hidden Treasures and perfect for your little ones at home, too. (My favorite tool for attaching metal snaps is The Snap Source Snapsetter. It’s what I use for campshirts, pajamas, overalls, anything that needs metal snaps, and at only $9, it’s quite economical, too!) Just click this picture for the Snap Bib PDF pattern download.
 Be sure to add pictures of your bibs to the Flickr album: Dinner for 2 Album. Thank you so much for giving your talents, your time, your stash, yourselves for these little ones!
Project Run & Play: Love Is in the Air
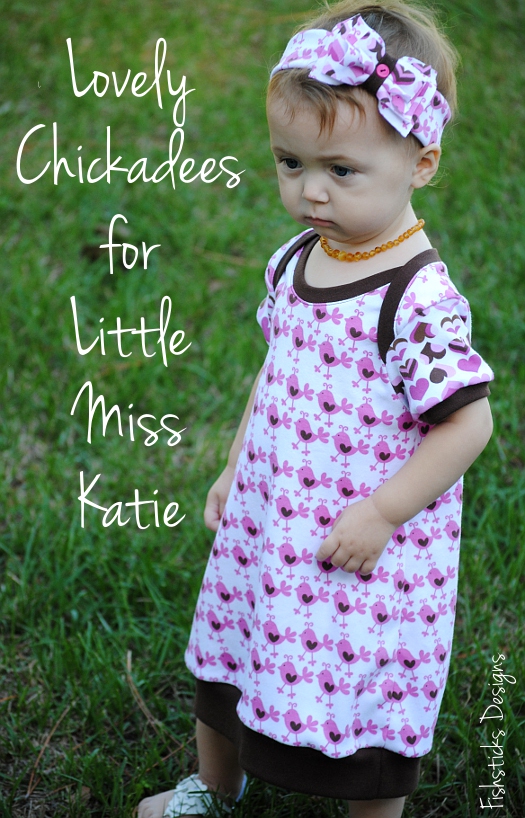
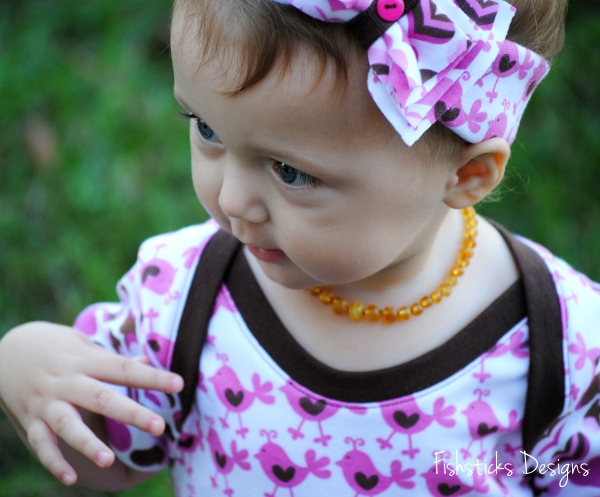
This week’s theme at Project Run & Play is “Love is in the Air”, and I was excited to sew something for my granddaughter, Katie, again this week! I’ve had this Chickadee interlock and the coordinating Hearts hoarded in my stash for years, and I’m so glad that I finally dug them out and used them. They’re perfect for Valentine’s Day, aren’t they?
I used the laptee from my Wee Tot Collection as the base for this little dress. My time was really limited this week because of some other exciting projects that I have in the works. (Be sure to check back here on Friday for a new tutorial and an opportunity to use your sewing talents to give to children in need!) With only one afternoon to sew, I knew I needed to grab a pattern that I not only know really well, but also one that goes together really fast. I think it’s so important to have a handful of patterns that fall into that category. For me, all of those patterns are sewn with knit fabrics. (I can sew a Charlie Tee from cutting to finish in less than an hour every time.)

My modifications give this dress some great character, and they actually saved me even more time! The only time this dress touched the sewing machine was when I topstitched the neckline. Everything else was done on the serger. I trimmed a bit off of the sleeve and added a band to finish it off. To give the body of the dress a little poofiness, I cut it into an A-line and finished the bottom off with a band several inches shorter than the width of the bottom edge.
I think the bow might be the one thing that makes this whole outfit, and it’s the first bow that I’ve ever made! It’s just a couple of simple loops of fabric with several pieces of fabric pulled through the smaller loop to make a “bow”. The button was a last minute addition because I didn’t like that the bow part kept sliding and exposing the seam. All of the edges were left raw and just tucked under.

Katie seems to really like the chickadees.

See! There’s a smile!

January Riley Blake Mystery Quilt Block – Chevron
Cindy and Jina from Riley Blake just started a Mystery Block of the Month Quilt, and I thought I’d sew along. The first block in the set of nine is this chevron block. You can find the instructions in both video and pdf form on the Riley Blake blog: Mystery Quilt Block #1
![]()
I considered subtitling this post: “The Quilt Block that Almost Wasn’t,” but I want you to want to sew along, too. Instead, how about the subtitle, “The Quilt Block that Tried to Defeat Me and Lost!”? If you’ve been around me for very long, you might know already that I tend to be the instant-gratification type of sewist. I was really excited about this block, but when I read the pdf instructions and saw that it required piecing together 36 – 2 1/2″ half square triangles, I was a little skeptical about whether or not I’d make it all the way through. That’s a whole lot of tiny triangles!
![]()
I found that the hardest part for me, though, was patiently trimming down and squaring up all 36 of those blocks! About five blocks in, I decided that I needed someone to keep me company, so I called my mom. It’s amazing how much more quickly a job that feels a little tedious goes by when you’re enjoying a great conversation. (Thanks, Mom!)
![]()
By the time I decided that I had to hang up or my neck was going to fall off from balancing the phone while cutting and sewing, I had finished squaring up everything, and I had two rows of the half square triangle blocks sewn together. From there, things moved along quite well until I stopped for a second to see how it was all coming out and something didn’t look quite right.
![]()
Ugh. It’s a good thing that I was far enough in at that point that I was determined to get this thing done! (Somewhere along the way, I started promising myself a cup of chai and some chocolate when I was finished. The promise of chocolate has a way of keeping me incredibly focused.) A few minutes of seam ripping, and I was back on track. And, I think the end result was worth all the work. You probably won’t see me sewing up dozens of these, but I’m quite happy with the way this one came out and very glad that I conquered it, and I can’t wait to see next month’s block!
![]()
Boutique 4 Quilters & Visit Your Local Quilt Shop Day!

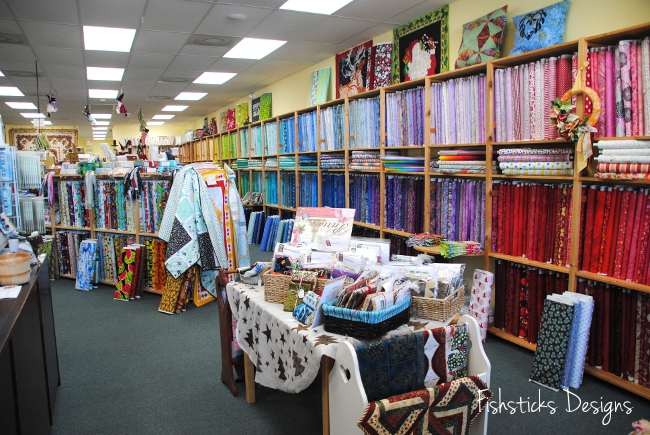
Did you know that today is Visit Your Local Quilt Shop Day? It is! And, I made sure to stop by my local quilt shop, Boutique 4 Quilters, this morning to see what’s new in the store, to chat with the amazing staff and to fill my need for puppy love.

I met Anita, the owner of Boutique 4 Quilters, in Kansas City last spring at Quilt Market before we’d even made the move back to Florida. When I saw the city on her business card, I was so excited! I made my first stop into the shop while we were still living with friends here and felt so welcomed. Each time I’ve been back in since, I’ve been greeted like an old friend! I love that so much. It’s what makes me want to head there as soon as I have a project in mind or just stop in when I need a quick break from whatever craziness is going on. (Browsing fabric and chatting with other sewing enthusiasts is good therapy for those who love sewing!)

This shop is literally packed full of beautiful, fresh, modern fabrics. There is a great selection of everything from batiks to novelty fabrics to patterns (so many patterns!) and, of course, you’ll find all sorts of sewing notions, too.
I simply cannot resist a sea of fat quarters. I brought home six new ones today to add to my stack of I-Spy fabrics for a quilt that I’m hoping to finish for Charlie’s birthday next month.

I think I need some of these red and white linens, but I have to figure out a project for them first! Any ideas? Something for my house, I think.

I mentioned that I stop in here for puppy love, too, didn’t I? I was a little sad this morning, that I didn’t get my usual greeting from a friendly golden retriever. Anita almost always has one of her sweet companions in the shop with her. She was on her way out of the shop when I arrived today, though, so she let me swipe this sweet picture of Humphrey (all ready to cut your fabric for you) from the shop’s Facebook page. I’m so glad because any blog post about Boutique 4 Quilters just wouldn’t be complete without it! Is that not the cutest face?

Of course, I realize that Visit Your Local Quilt Shop Day will likely be over by the time that you’re reading this post, but it doesn’t have to be a special day to drop in! Just go! And, be sure to introduce yourself and ask questions and get to know the shop owner and the staff. It’s so nice to have a place where you can chat and feel at home and browse fabric and notions to your heart’s content!
Project Run & Play: For the Boys
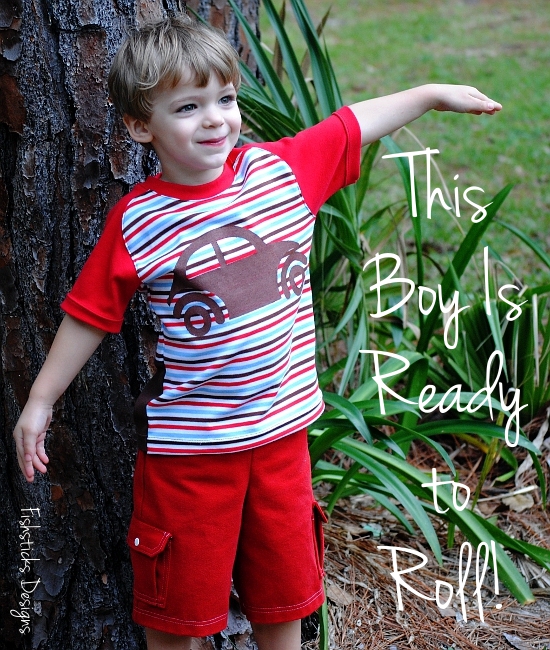
It’s Boy Week at PR&P! I sew for my boys all the time, but I still enjoyed coming up with an idea that is all about my boys! One of the loves that all of my boys, from oldest to youngest, share is the hunt for Punch Buggies. My 19-year-old son, Sean, is the one who taught the little ones to spot them. They aren’t allowed to actually punch anyone when they see one, of course, but my six-year-old Jamie is a champ at spying VW Beetles from blocks away! (Sean’s halfway across the country from us in college now, and the little ones occasionally ask me to text him pictures of Punch Buggies just so that he knows they’re still looking.)
Since I sewed for Jamie last week, Charlie got this week’s outfit. (I’ll have to make a Punch Buggy shirt for Jamie later, though, or there might be a revolt.) I drafted up a Beetle design and used the freezer-paper stenciling technique to paint it on a Patrick Curved Raglan.

I used some color-blocking again this week. This time it was a necessity since I didn’t discover that I was short on fabric until I had already planned the whole outfit. I got creative with it, though, and added a unexpected second car on the back. If I hadn’t told you, would you have even guessed that I didn’t plan it this way all along?

The red shorts are really my favorite part of this outfit. After seeing the red pants that Suzanne from Winter Wonderings, Wanderings, & Whatnot made for her little guy’s Collegiate Cool Look last week, I just had to make red pants for Charlie. I opted for shorts since we live in Florida, and shorts get far more use here than long pants. I wanted to make them with red denim, but red denim isn’t easy to come by, especially locally. A quick trip to one of our local thrift shops, though, turned up the perfect pair of recyclable red jeans!

I made some minor modifications to my Inside or Out Pocket Pants pattern including reusing the main structure of the front pockets from the original jeans. I did have to reconstruct one of them to remove the watch pocket, and I ripped out and redid the topstitching so that it would match the remainder of the shorts. Speaking of the topstitching, I considered using some brown denim accents on these, but in the end, I decided against it so that the shorts could be worn with multiple tops. Instead, I let the white topstitching be the accent.

The back pockets are those from the IOOP pattern with twin needle topstitching.

I added a gusseted cargo pocket and used the pattern’s pocket flap with the addition of a metal snap.

Charlie loves this outfit and couldn’t wait to put it on. Is that not the sweetest smile? I can’t help but notice, though, that those twin curls on either side of his forehead make him look quite mischievous.
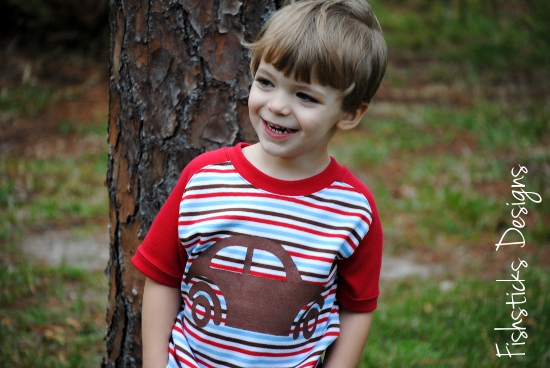
Charlie put the whole outfit to the “boy test” by running, jumping, rolling, falling, etc. in the backyard, and I think it passed with flying colors!

While this week is all about the boys, there were quite a few little boy outfits sewn up the first two weeks, too! I love that! Our little guys are so often neglected when it comes to handmade clothing. It makes me smile to see so many moms making the effort to sew for them, too!
Love at First Sight

Have you ever walked into a vintage store, or thrift store, or yard sale, and had something demand that you take it home? I had a lovely afternoon of shopping this past Friday with my two girls, my granddaughter and my oldest daughter’s best friend. There’s this amazing little downtown area not too far from here where all of the shops are locally-owned small businesses, and there is a huge array of things to browse through . . . lots of it handmade! It’s one of my favorite places to spend an afternoon.

Late in the day, it started to rain, so we ducked into a little strip of stores that all open into a shared indoor breezeway and wandered into Anchors and Acorns. The owner, Karen, was friendly and welcoming, and the whole shop is full of beautiful and whimsical vintage items. I happened to glance down as I walked around a table in the center of the room, and instantly fell in love. This sweet old girl looked like she was sitting there just waiting for me.
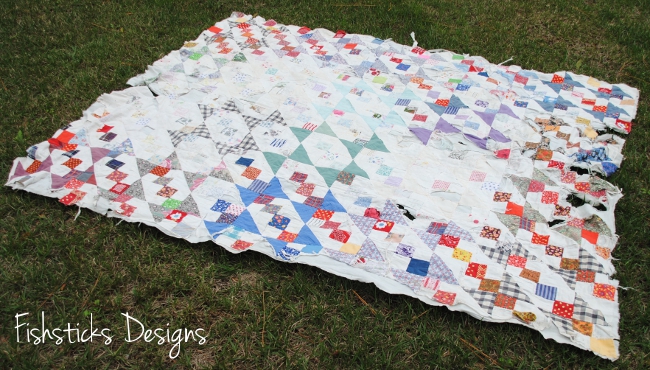
Yes, she is quite tattered. She’s got plenty of wear and tear and some random age spots. It even looks as if someone has cut pieces from her and ripped her binding off completely. One day in the past, though, she was fresh and new and loved by someone. Maybe I was a little affected by something that the kids and I had read in our history lesson earlier in the week. “Katherine of Aragon is forty-four years old. The freshness has faded from her cheeks.” I’m only a few years shy of that! I like to think that the freshness is far from fading from my cheeks, but the truth is, we all get a little “tattered” with age. That doesn’t change the fact that there’s beauty in all of us, though.
Can you just imagine the stories that she could tell of the hands that created her, of the fabrics used to piece her together, perhaps of little ones that she covered and comforted through sickness or scary dreams, maybe stories of picnics in meadows and days at the beach on the sand?

She’s long past her prime now (another wash or two might be the end of her), but she’ll do a beautiful job of decorating my sewing studio, and I hope that she’ll remind me on a regular basis that beauty is about far more than appearance. There’s an unmatched beauty that emerges with age and experience. You just have to look past what you see with your eyes.

Project Run & Play: Polka Dots & Stripes

This week’s Project Run & Play Challenge is Polka Dots and Stripes. (Have you sewn anything? You should give it a try!) Sunday was my Jamie’s sixth birthday, and he wanted to go bowling. I knew that I wanted to sew a shirt for him, since his birthday is this week, but the idea for a bowling shirt didn’t actually come to me until Sunday morning! Am I the only one who occasionally overlooks the totally obvious?

I printed a new copy of the pdf version of my Everyday Camp Shirt pattern and started drawing lines and chopping it apart where I knew I wanted the color-blocking on the front and the back. Color-blocking is really simple to add to any pattern. Just draw lines where you want your new fabric to begin and end, then add lines on either side for seam allowance. I use 1/2″ seam allowance, and then I just fold the pattern to get the right portion of it when I’m tracing on to the fabric. You could also print two copies of the pattern, though, and actually cut out the separate pieces of the pattern before tracing. Does that make sense? (Maybe I need to do a tutorial with pictures. It’s such a great way to take a pattern that you already love and give it a new look.)

I sort of wish that I’d made the stripe on the sides of the front a little wider. It’s easy to see in real life when Jamie moves around, but it was really hard to get in pictures. This picture does show it well, though!
In addition to the color-blocking on the front, I added a yoke on the back and simply turned the fabric on the bias. When you’re working with stripes, that’s an easy way to add some interest without using a second fabric. I also cut the pocket on the bias and added a strip of the polka dots as trim on the top.

I promise he does smile. He was so excited to go bowling! He just isn’t interested in smiling for the camera lately. Too much pattern cover photography, maybe? Poor kid.

I did the raw-edge applique on the back of the shirt using the method that I explained in my Christmas Tee in a Twinkling Tutorial in November. In case you’d like to make your own Everyday-Camp-Shirt-turned-Bowling-Shirt, here’s a pdf of the applique pattern for you: Bowling Applique. Be sure to link to me if you use it. I’d love to see what you create!
Bagging it Up in January with Hopeful Threads
Have you sewn a bag for the January Hopeful Threads project yet? I’ve set a little goal for myself to sew something for every project that Kristy posts this year. (I’m trying to be careful not to set huge sewing goals this year because, in case you didn’t notice, I didn’t hit any of the ones that I set for myself on my blog last year! I’m not terribly upset about it, though. I was a temporary single mother while trying to sell our house in Texas for over six months before moving halfway across the country to join my husband in Florida, and then we were in temporary quarters for two months before finally settling in our new home. I think that’s plenty of reason to change my priorities!)
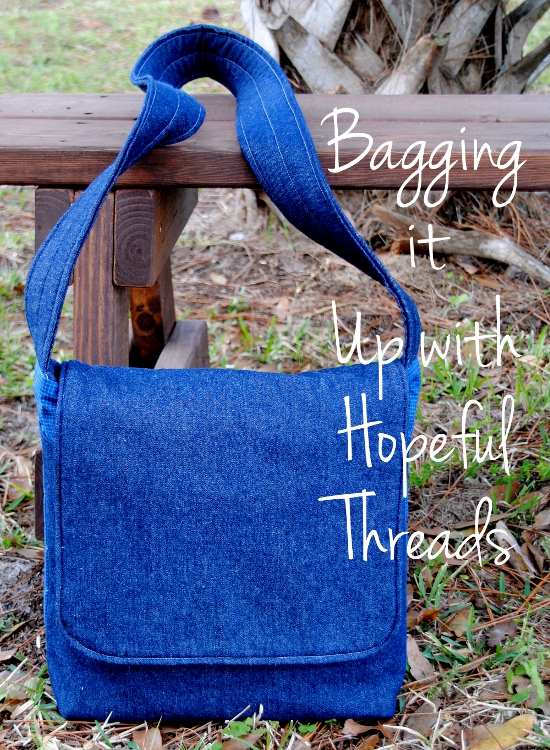
I used my own Messenger Bag Tutorial to sew up this denim bag. (I cut it out on Thursday night and took it with me to a “sewing/playdate” at a friend’s house on Friday.) I was hoping that sticking to denim and dark blue plaid would give it a masculine feel. What do you think?
I modified the pattern slightly by adding a front pocket under the flap, along with a magnetic snap closure.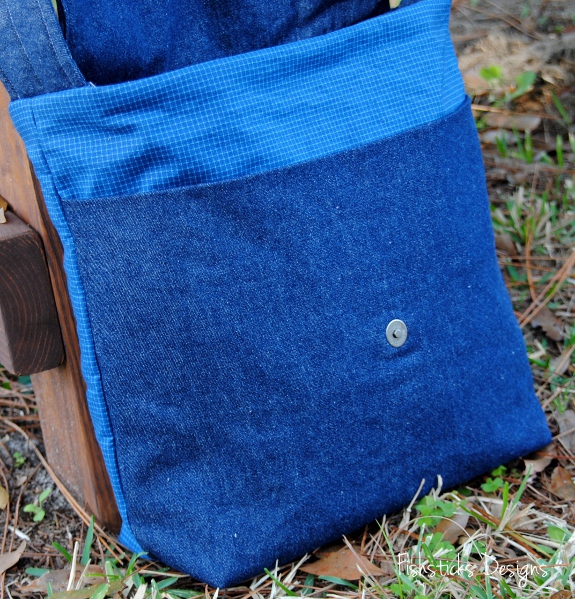 Inside, there are a couple of extra smaller pockets for those things that you don’t want to lose down in the bottom of the bag. I just skipped the pen/pencil pockets from the tutorial and divided the inside pocket in half instead.
Kristy has been posting some great tutorial links on the Hopeful Threads Facebook page. Be sure to go check them out! If you don’t have time to do a more complicated bag like this one, maybe you can squeeze in a simple tote bag during naptime one day this week?
Project Run & Play: Remix
 Have you been following along at Project Run & Play? It’s so much fun to see the amazing kids clothing that is posted everyday! Season 6 started on Monday, and I thought instead of just following along this time, I’d sew along! (Not for the contest, just for the motivation and the challenge. I often seem to be in need of a little extra motivation!)
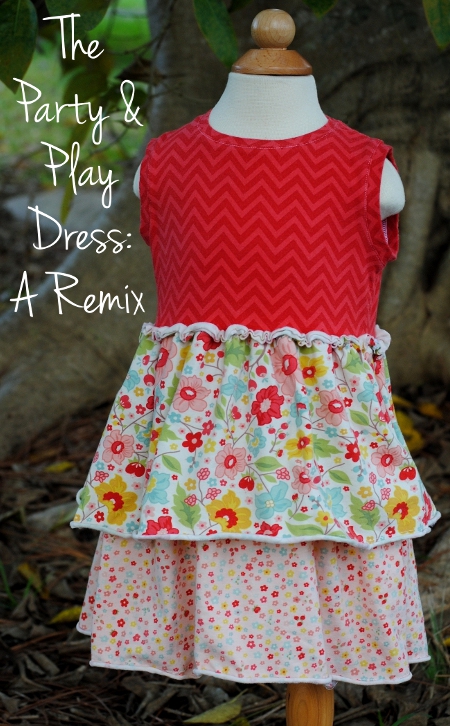
First up is The Pattern Remix Challenge, and the pattern is a great little girls’ pattern: The Cottage Home Party Dress. My remixed design uses Riley Blake’s new cotton/spandex jersey. On the bodice, I added a neckband and armbands and skipped the lining. (Katie’s not here now to try this on, but I suspect that I’m going to have to adjust the armholes to make them a little smaller.) At the waist, I left off the band and added some interest by sewing the gathered raw edge of the skirt to the outside of the bodice. I adore how the gathered edge curled and made such a sweet “ruffle”.
  For the skirt, I cut two pieces, one shorter than the other and layered them. To finish the hem, I just ran a line of stitching about 1/2″ from each edge and let the raw edge roll up after washing.
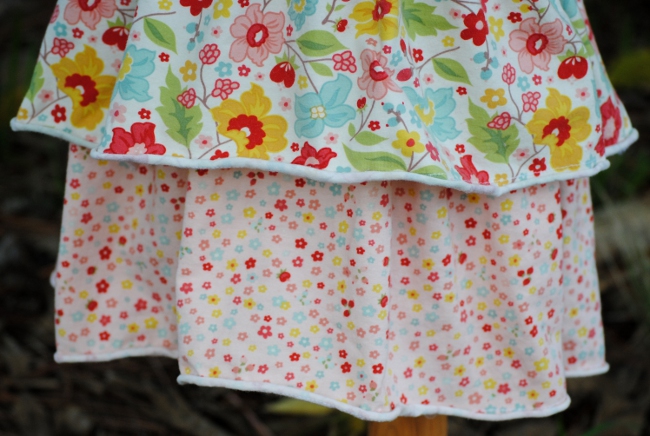 I didn’t snap any pictures of the back of the dress, but since it’s sewn with knit fabrics, I just made it a simple pull-over without fasteners. I think the final result is a quick and easy dress that works for playing or partying!
Next week is Stripes and Polka Dots. Anyone else sewing along?


