My Patterns
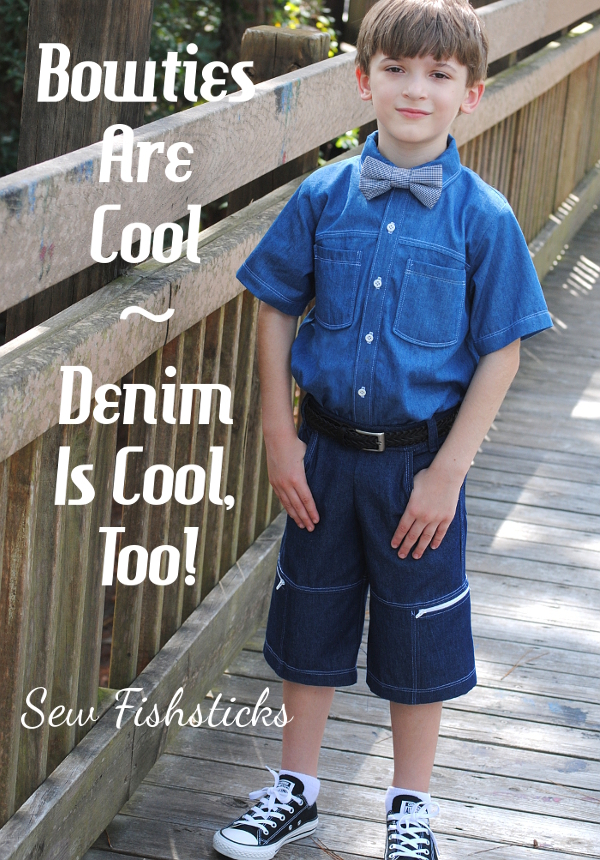
Bowties are Cool ~ Denim is Cool, Too!
 I know – Denim Week at PR&P is over! I’m running behind. I spent quite a bit of last week working on upcoming new patterns and Quilt Market samples, and then my site was down unexpectedly for a little while. I am happy to report that I did finish up Jamie’s outfit, though, and he got the bowtie that he wanted!
We’re sort of big Doctor Who fans around here. The 11th Doctor is my personal favorite … “I will always remember when the Doctor was me.” I love that Jamie thinks bowties are cool. For the record, though, I asked him which Doctor was his favorite. “David Tennant,” he said. I tried to convince him that surely he was mistaken, “But, Matt Smith wore the bowtie!” “Well, David Tennant is my favorite, but I really like Matt Smith’s bowtie!”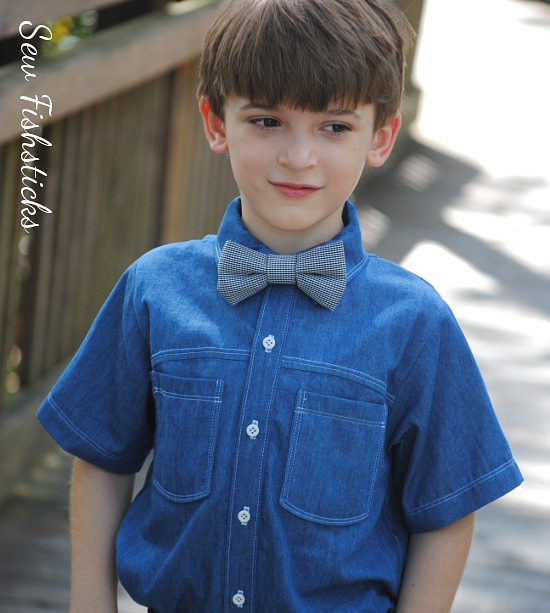 Since I’m still sewing along with the Project Run & Play challenges, and last week was the Denim Challenge, Jamie got a whole denim outfit. I did a quick Pinterest search when I was first starting on this outfit, and I found tons of denim shirts with jeans … even a few with bowties! That was great encouragement to go with my plan of a denim button-down top with jean shorts.
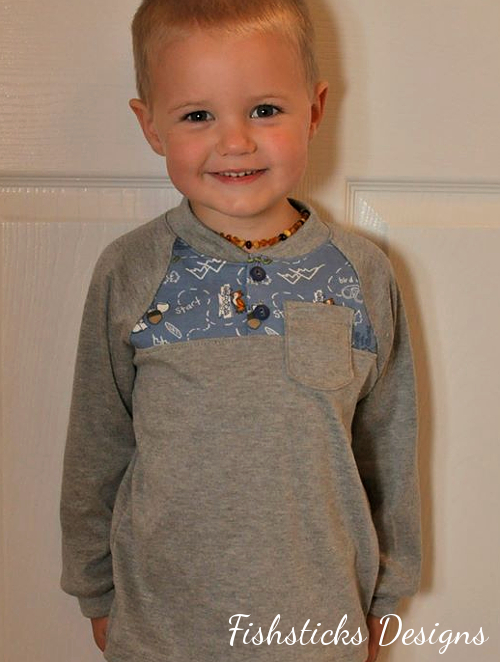
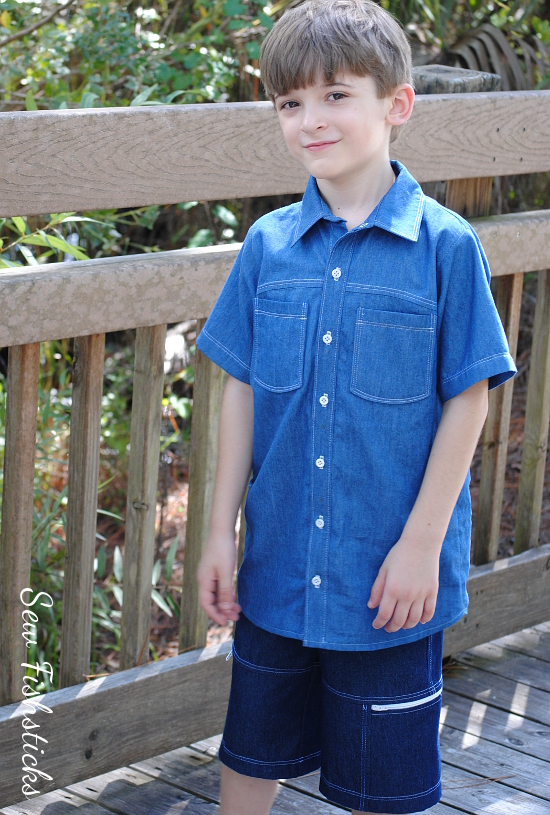 For the top, I started again with my Everyday Camp Shirt. This time I added a high curved yoke and pockets with curved bottoms on the front. I narrowed the collar like I did with Charlie’s shirt last week, and put in that same collar stand, too. I cut the button placket separately to give it more definition, and added a curved yoke on the back. I also gave the top a shirt-tail hem.
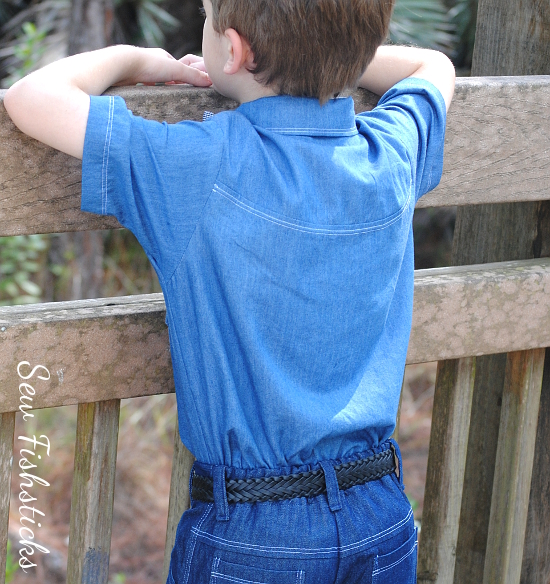 This button-down has a ton of topstitching. Topstitching seems to be my personal theme for this PR&P season!
 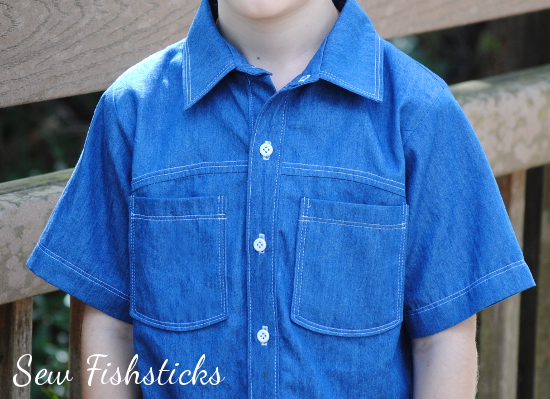 Because my sweet Australian followers so kindly asked me to go ahead with doing a tutorial for that side zipper-pocket on the Sand & Sidewalk Boardshorts, I used that pattern again, primarily because I wanted to take photos of the pocket process, but also because I really love this pattern! I added the belt loops this time, but skipped the extra topstitching on the front pockets. On the back, I added a curved yoke to mimic those on the shirt, and I used those same curved-bottom pockets. I really like all the curves in this outfit!
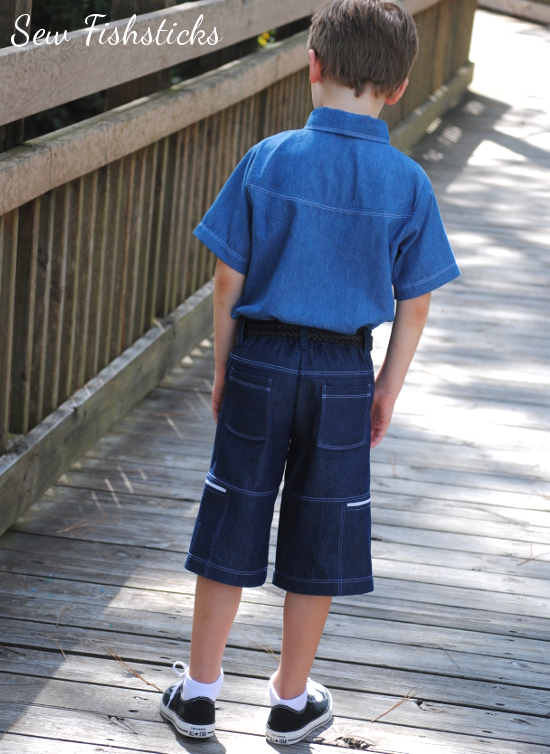 I have all the photos done, so hopefully, I’ll have that pocket tutorial ready for you in the next few days!
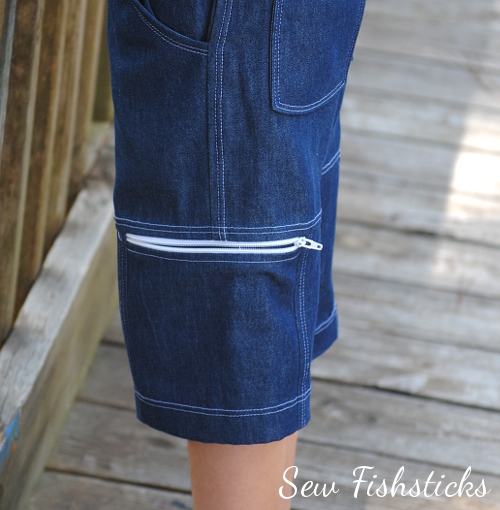 Of course, this outfit works really well without the bowtie, too. And, I think that it’ll be worn far more often this way than with the tie … maybe? Hmmm … I suppose I’ll have to wait and see what Jamie decides!
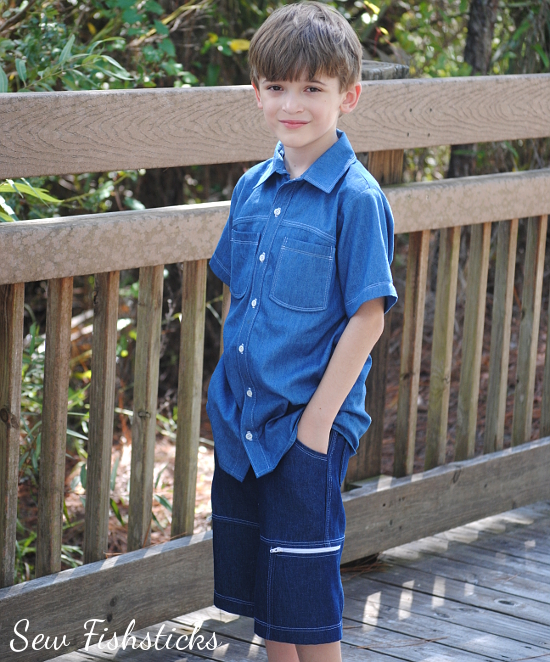 You may be able to tell from my pictures that Jamie is almost always very serious and thoughtful. Getting him to smile for pictures is nearly impossible! (Isn’t it cool how children from the same family can be so different?)
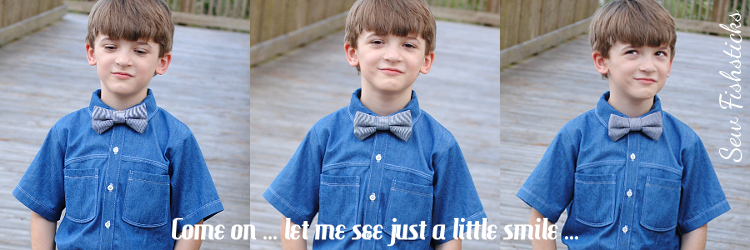 On to my signature look. Hopefully, I’ll have that one done and posted before the week is up!
Fabric in the top is from Joann fabrics.
Fabric in the shorts is from Robert Kaufman Fabrics.
The bowtie fabric and the buttons on the shirt are upcycled from thrifted men’s tops. (The buttons are from one of the shirts that I used for last week’s look!)
Back to the Beach ~ Old Made New Again!
 I adore upcycling!! And, there are a few reasons why. The one that stands out, of course, is that it’s environmentally responsible to make something new from something old, rather than throwing it out. There are some other great reasons, too, though! First, it’s a great way to save your pennies! I so often hear that sewing for your children can get expensive, and it can. Salvaging fabric from used clothing is easy on the budget! Second, the aisles of thrift shops are a great place to find fabrics that are hard to come by elsewhere. You might even find yourself buying and working with fabrics that you wouldn’t have considered using otherwise. Perhaps my favorite motivation, though, for re-using old clothing is that you get to see how the fabric wears! When you purchase fabric new and unwashed, it’s hard to know what it will look like twenty washes later. With used clothing, the fabric has already been washed and dried multiple times, so you can see how it’s holding up!
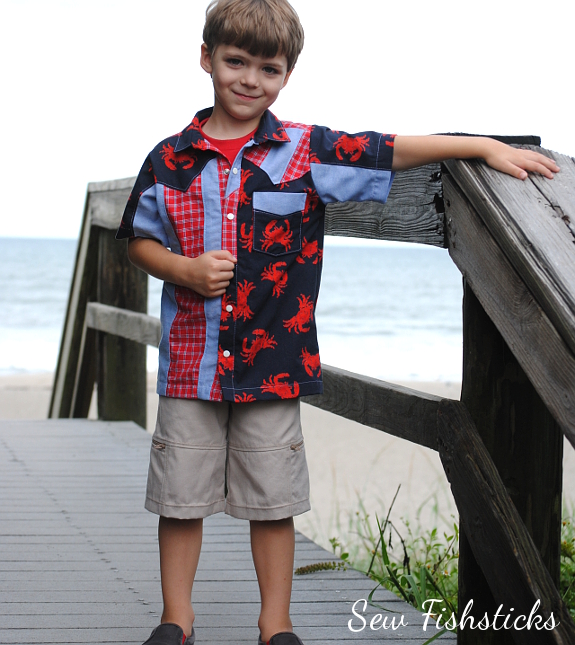 This week’s challenge theme at Project Run & Play was the “Hand-me-down Makeover”. With last week’s disappointing loss, I wasn’t planning to continue sewing along, BUT on the last day of voting, Jamie came running into my studio and excitedly exclaimed, “I know you’re sewing for Charlie this week, but next week, can you make me an outfit with a bow tie?” Apparently, I’d gotten my boys really excited about having a new handmade outfit every week for four weeks. Without even thinking, I started explaining to Jamie that his Inspector Gadget outfit was losing, and I probably wouldn’t sew the remaining outfits …. and he cried. And, then I cried. And, then I promised to sew the rest of the weeks. So, here we are!
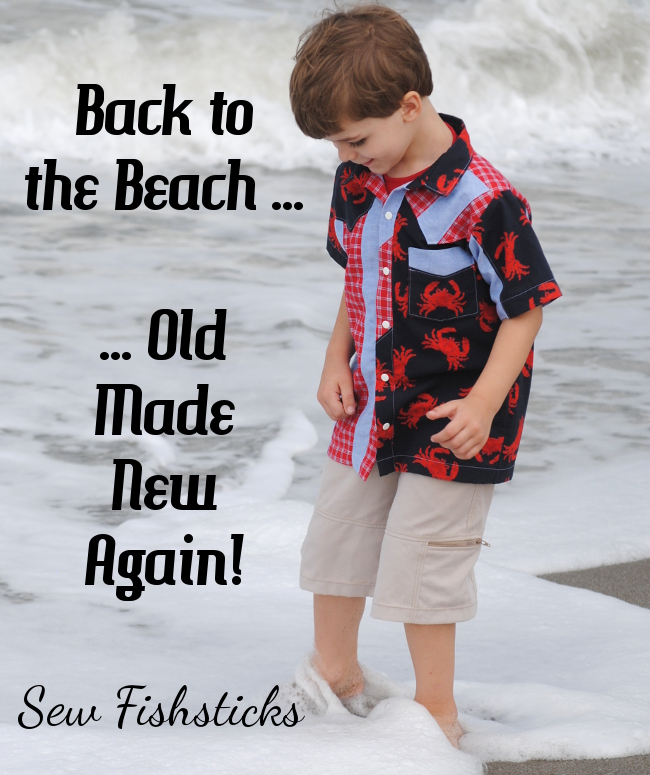
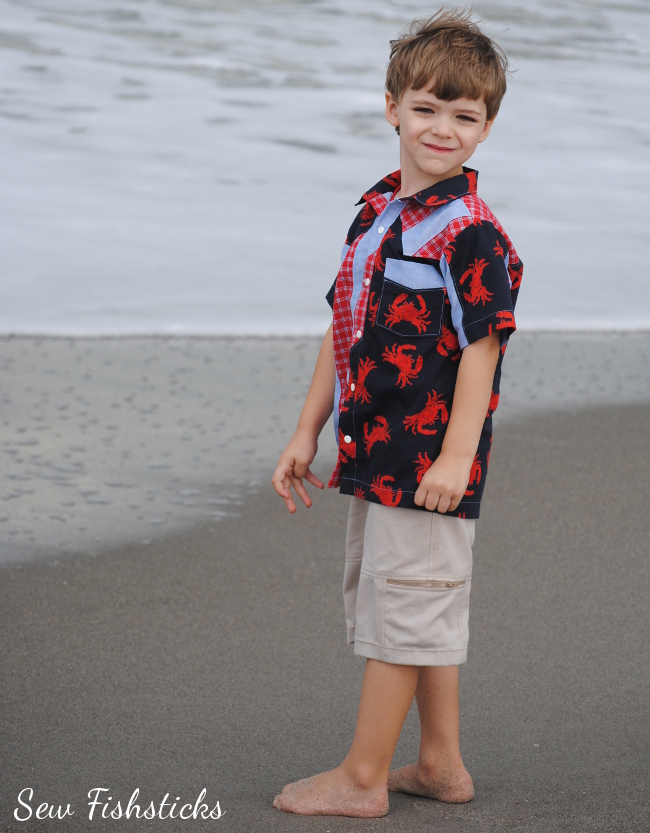
The very first time that I sewed along with PR&P, there was an upcycling challenge — using men’s button-down shirts, I think — and I made a beach outfit for Jamie. You can see that outfit here: the Upcycled Beach Boy. When I was scouring the racks of a local thrift store and ran across a navy blue button-down shirt printed all over with bright red crabs, I thought it seemed fitting to go Back to the Beach this time around!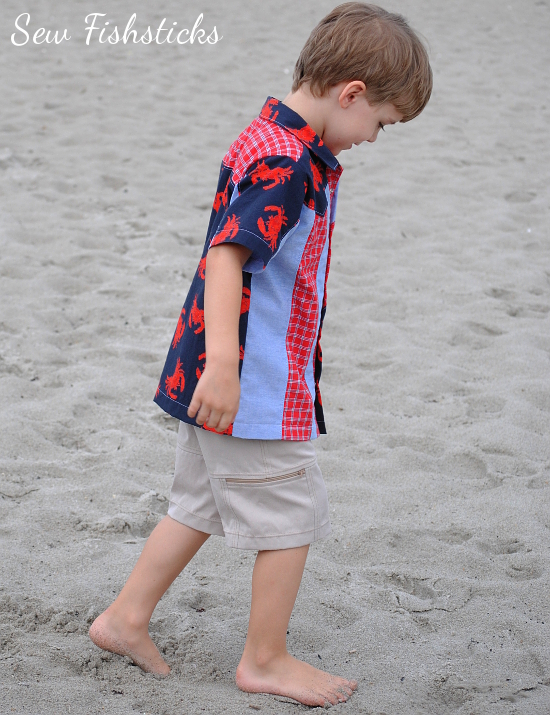 For the camp shirt, I began with three cotton woven shirts which I chopped up and pieced back together to create a casual, fun, beach-y top.
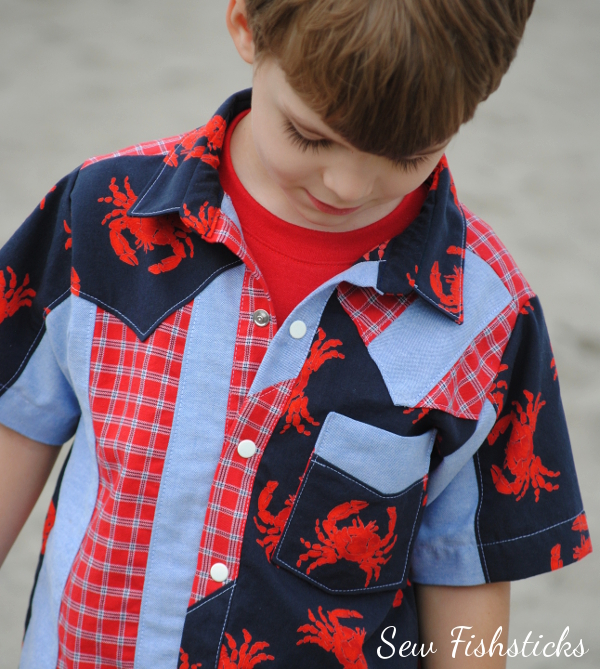
 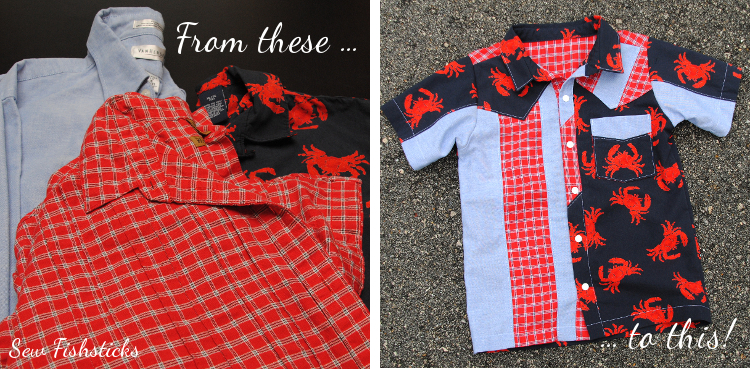 I modified my Everyday Camp Shirt pattern by shifting the shoulder seam towards the front, narrowing the collar and adding a collar stand. I also drafted up a western-style yoke for each shoulder. I finished the top with metal snaps, at Charlie’s request. “So I can do it myself!”
Oh, my! Those eyelashes!
The back has a pieced, straight yoke.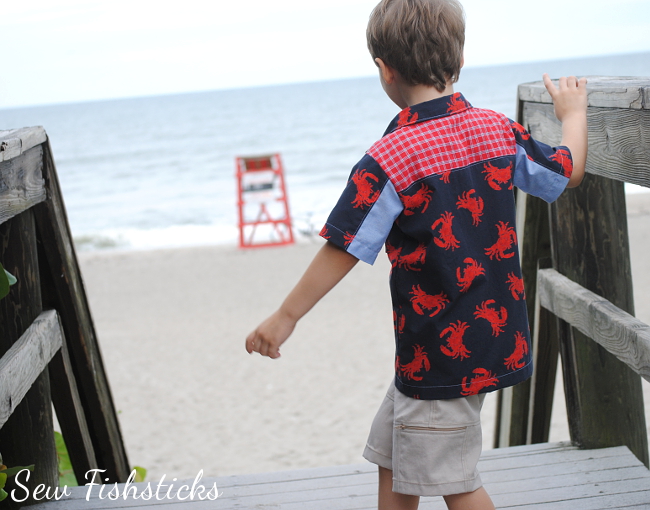 Charlie was so excited about the crabs on this shirt! As soon as we got to the beach, he started telling me this story about a crab and his family who live under the sand and the water. He’s such a great story-teller!
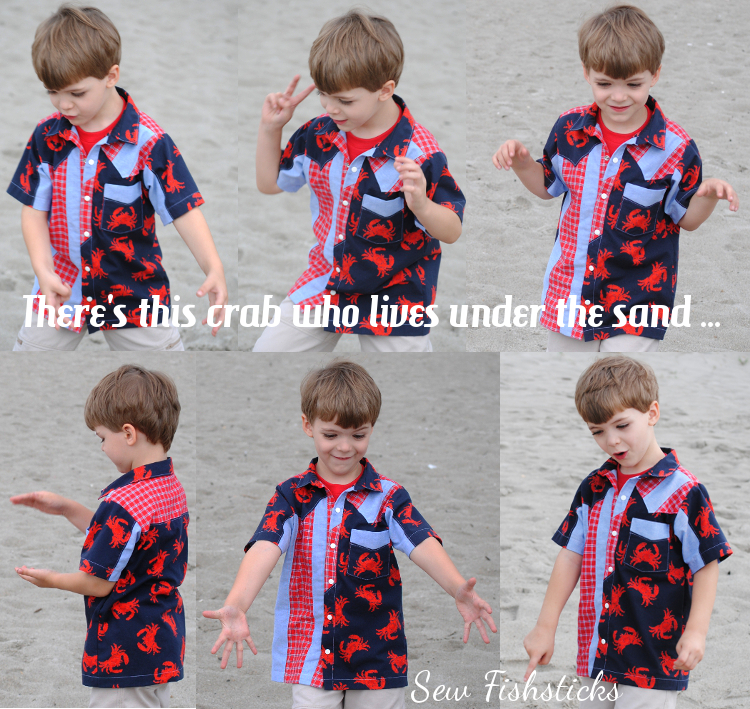 Under the camp shirt, Charlie is wearing a tank top made from my free The Tank pattern with the addition of the pocket from my Honor Roll Raglan.
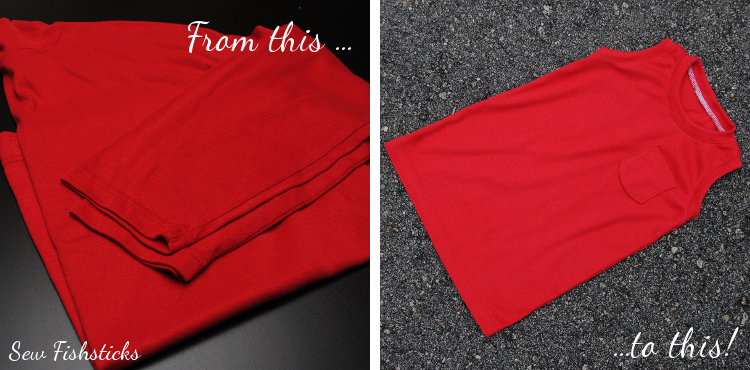 The tank started life as a red cotton interlock mock-turtleneck.

Beach photoshoots are so much fun!
The shorts are my favorite part of this whole outfit because of the cool side zipper pockets! I upcycled the shorts from a men’s khaki twill cotton shirt. (I used every spare inch of the shirt fabric!)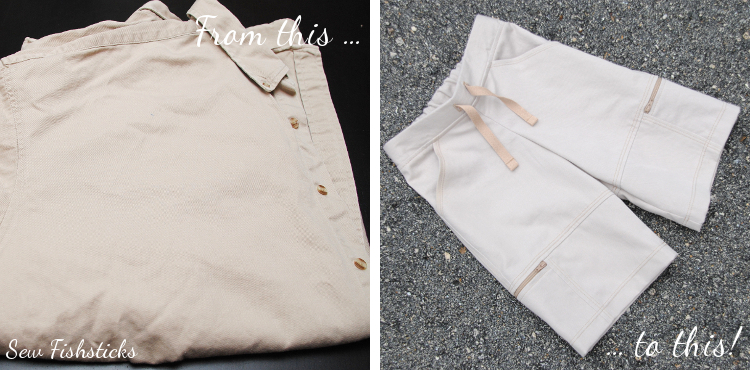 I used my Sand & Sidewalk Boardshorts pattern for these. I loved the way that last week’s zipper fly turned out, so I was going to do another, but Charlie begged for “pull-on pants”, so I went with the drawstring finish instead.
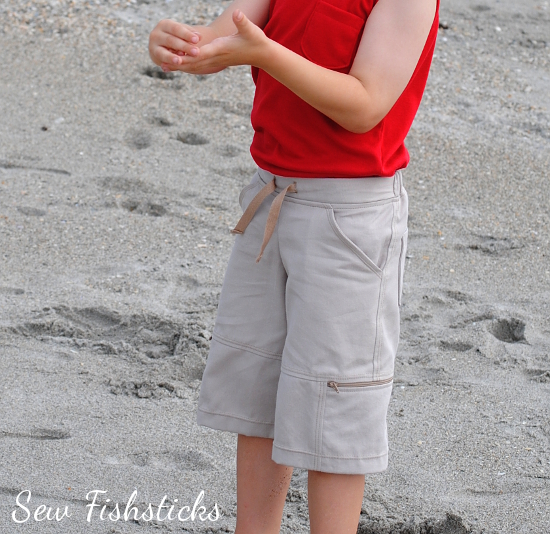 I had the idea for this zipper pocket early in the process.
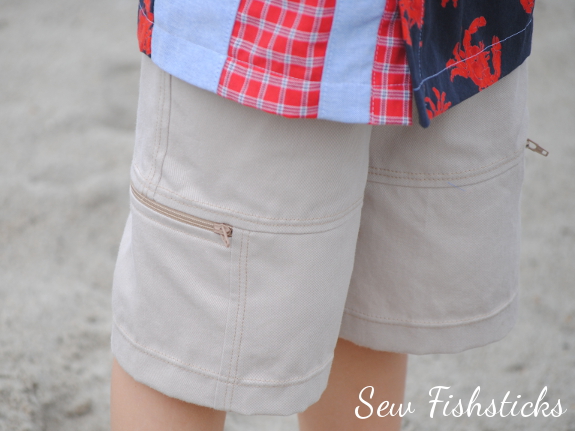 I originally thought I would just work it into the knee panel, but after discussing it with a friend, I decided that it really needed to be on the side. So, I wrapped the knee panel all the way around and pieced the pocket into the center of it. (I can totally do a tutorial for it, if there’s interest! Maybe in the spring when those of you who don’t live in Florida are sewing shorts again?)
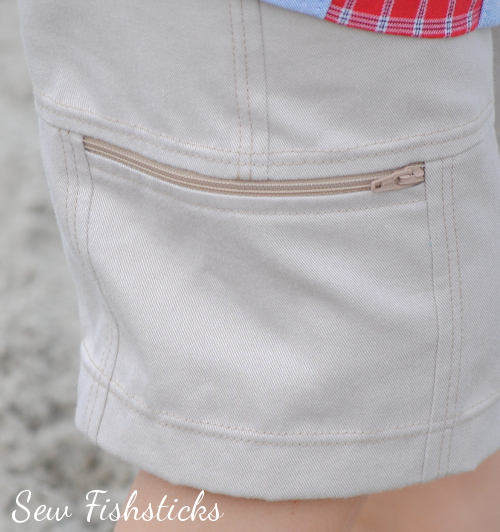 It’s the perfect pocket for shell-collecting!
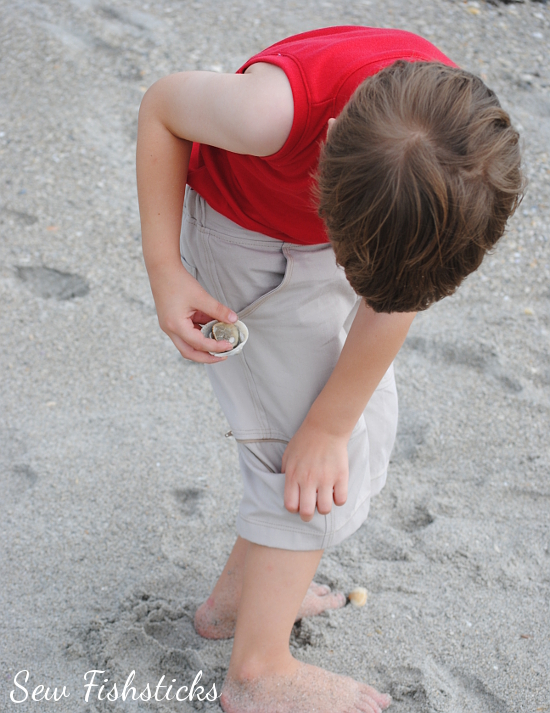 I used the Everyday Camp Shirt pocket for the back pockets on these pants. (I actually did the same thing last week, and really liked the look.)
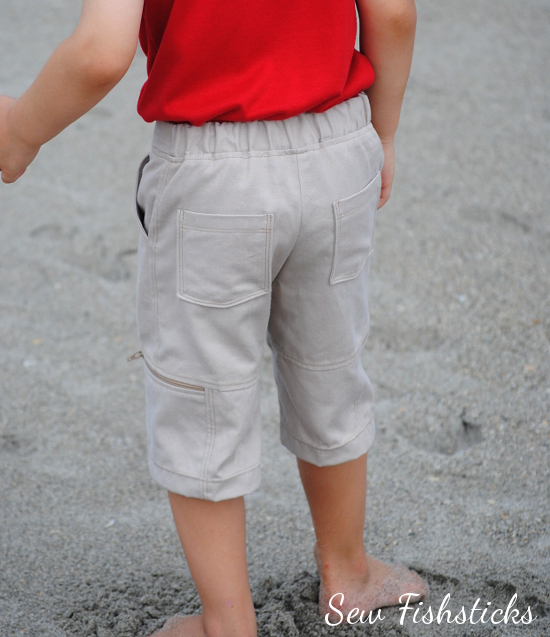 This is a great Florida fall outfit! Charlie declared it just right for running …
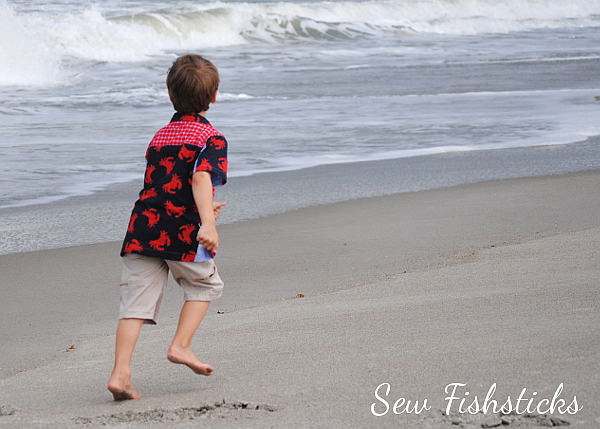 … jumping …
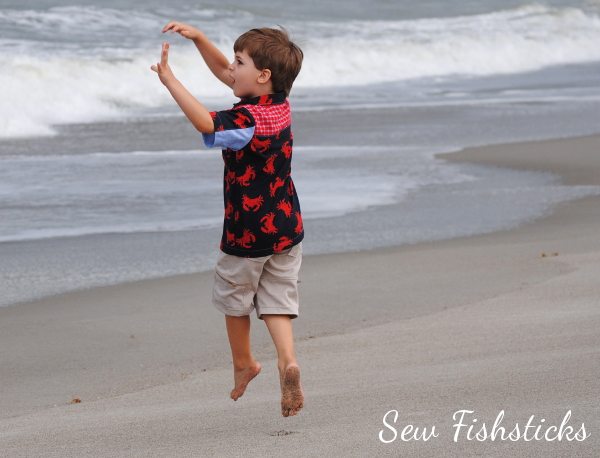 … and bird chasing!
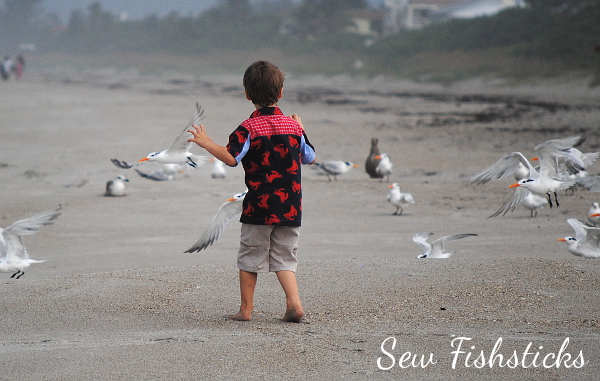 Wait! One more … this is just before he got soaking wet from head to toe!
Can I just put my toes in … pleeeeeeeeeeeaaaase?
Dress Up Your Playhouse Dress!
{Perfect Pattern Parcel/Pattern Extra}
 I am so excited that my Playhouse Dress is part of Perfect Pattern Parcel #5!! This collection includes six beautiful and versatile sewing patterns for girls from preschool to preteen.

Here at Perfect Pattern Parcel, we believe in supporting independent pattern designers. It’s our opinion that indie patterns are just, well, better than big box patterns, and we’re pretty sure our customers think so too. So, we allow customers to show their support in naming their own price for each Parcel. We also encourage customers to allocate part of their Parcel price to the charity Donorschoose.org in order to help classrooms in need. Pattern Parcel donates all profits after expenses from Parcel sales to the charity as well. Together we’ve raised over $11,000 for classrooms in need!
 My house is full of little boys, but I’ve heard that there’s this recent movie that little girls have gone a little bit crazy over – a movie about a certain ice princess and her little sister. Because I’m a practical sewist, I don’t generally do costumes, but for our recent trip to the Magic Kingdom, I made a princess-inspired Playhouse Dress for our granddaughter. You can see that dress right here. I love that it’s a play dress that she can wear everyday, but it still makes her feel like she’s dressed up! (If you’ve ever gone to the grocery store with a child in dress-up clothes, I think you’ll totally understand!)
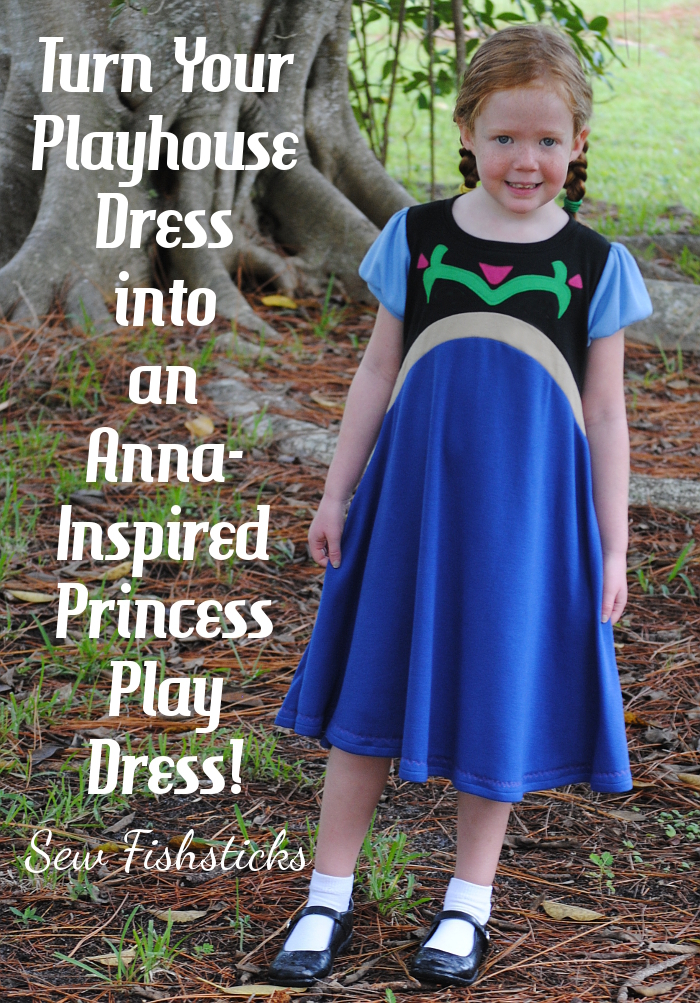
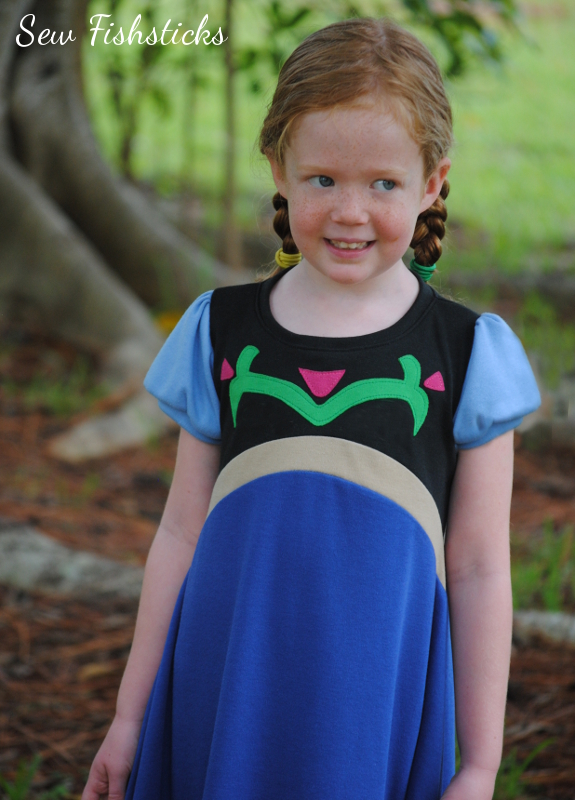
 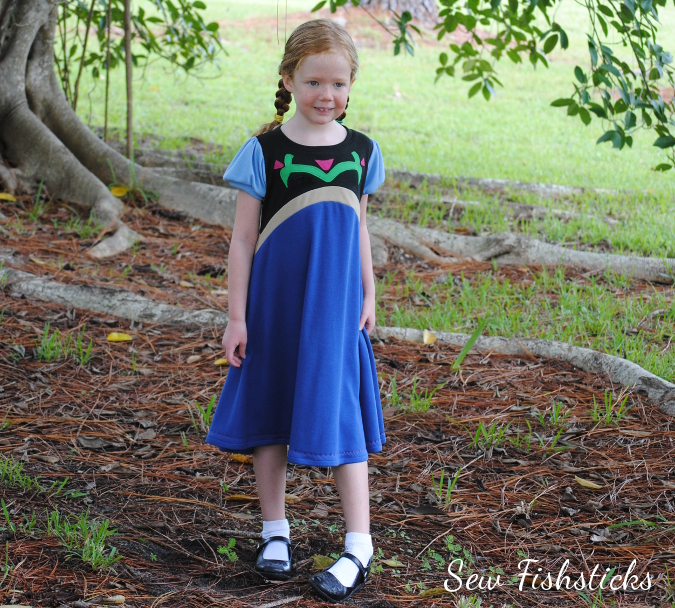 For the Pattern Parcel Blog Tour, I thought I’d show you how you can do the same thing by creating an Anna-inspired Playhouse Dress. I’ve got all of the instructions for you, plus a downloadable PDF for the simple applique.
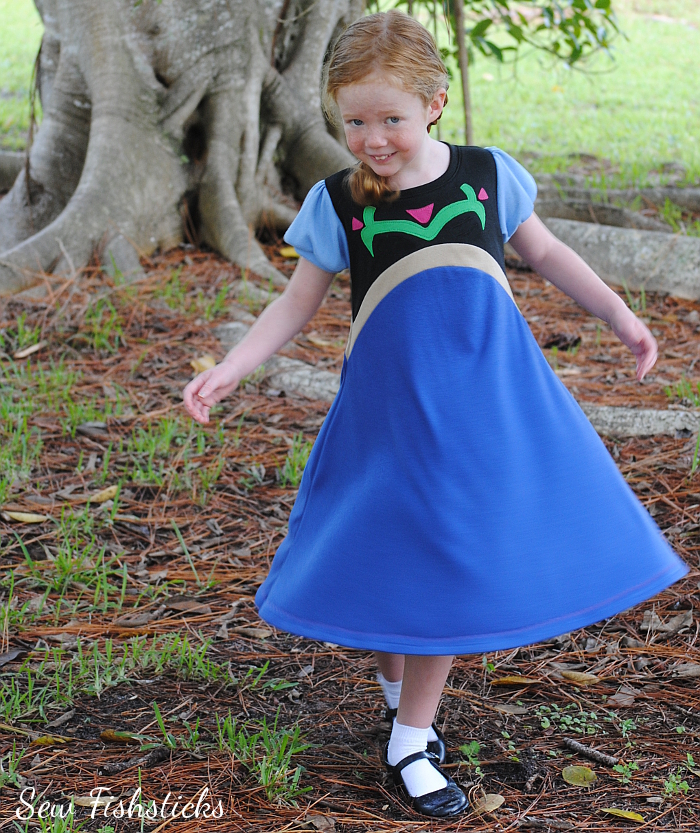 You can sew the Playhouse Dress in a combination of knits and wovens or in all knits. Because I wanted this one to be a casual princess-y dress, I sewed it in cotton/polyester interlocks, and I bought them all at Joann Fabrics. I used Black, Fern Green, Sangria, Cornstalk, Royal and Cornflower Blue.
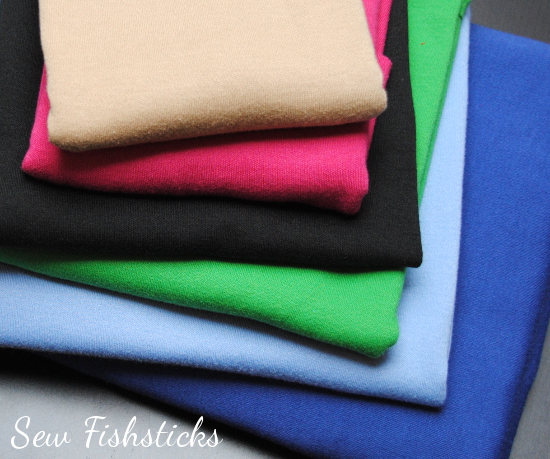 Start by printing and assembling your pattern. The Playhouse Dress is one of my updated patterns, so you can choose to print either all sizes of the pattern nested, or just the individual size that you’re sewing. In addition to printing the the entire pattern, you’ll need a second printing of just the top section of the skirt. I’ll explain that a few steps down, though.
You’ll also need to print the applique design. Click here for sizes 12 months to 4 (on sizes 12 months and 18 months, the center flower is left off) and here for sizes 5 to 12.
Finally, you’ll need a sewable, paper-backed, iron-on adhesive for the applique. I used Heat ‘n Bond Lite.
Cut out the front bodice and back bodice of the Playhouse Dress using black interlock. Prepare your applique pieces following the instructions for the iron-on adhesive that you’ve chosen. Use pink fabric for the flowers and green for the vine. I traced my pieces onto the paper backing of the Heat ‘n Bond, then ironed the adhesive to the fabric and cut out the pieces. Once you have all of your pieces ready to be ironed on, place them on the front bodice piece, checking to make sure that everything fits well within the 1/2″ seam allowance and all the pieces are centered properly.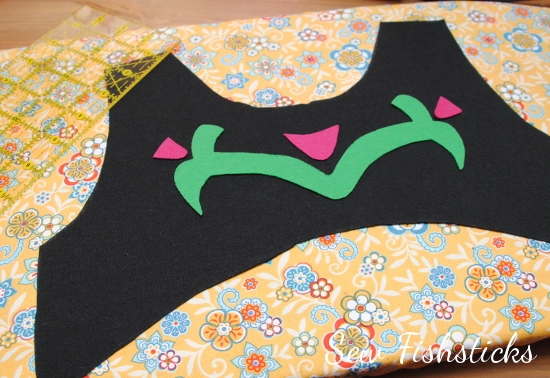 Remove the flowers, and iron on the vine. Depending on the adhesive that you’ve chosen, you may be able to move on to the flowers from here, but the adhesive that I’m using requires that the edges be stitched down. We’re working with knit fabrics that don’t fray, so I’m just going to stitch all the way around 1/8″ from the edge. Those small curves can be tough to go around. Set your stitch length fairly short, sew slowly, and try not to make sharp turns on the curves. Turning the fabric a little bit with each stitch will give you a nicer curve. If you use a matching thread, this doesn’t have to be absolutely perfect stitching.
 Once your vine is done, add your flowers, one at a time.
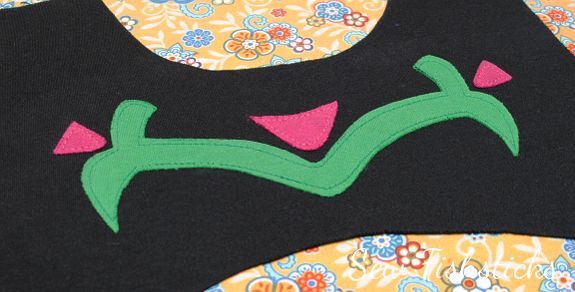 Set the bodice pieces aside so that we can work on the skirt. To create the faux sash, you’ll basically be adding a strip of fabric to the top of your front and back skirt pieces. I made my sash 1″ wide finished. The easiest way to do this is to go back once you’ve printed the whole pattern, find which pattern pages to print for just the top portion of the skirt, and print a second set of just those few pages. (You’ll need at least 2″ of the top of the skirt.)
 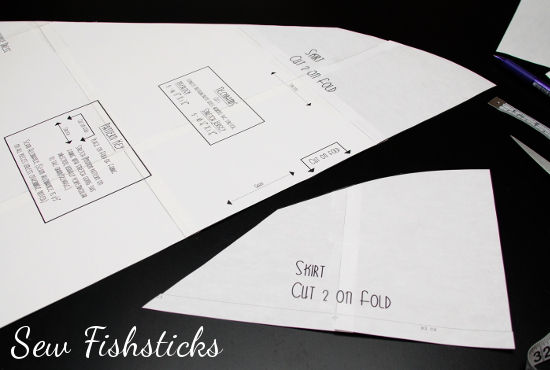 Measure down 1″ from the top of the full skirt pattern and draw a second curve. Use the partial skirt pattern to help draw the curve.
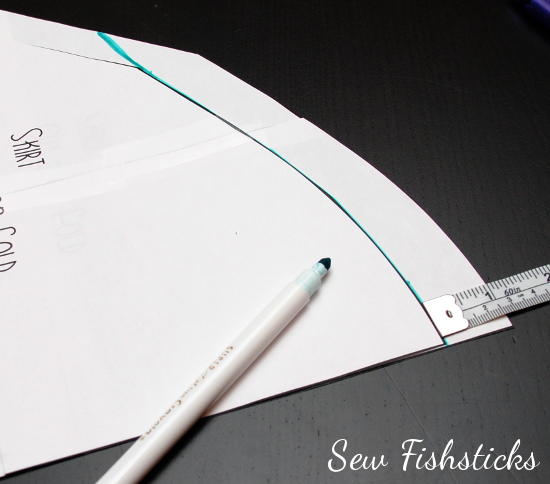 Measure down 2″ from the top of the partial skirt pattern and draw a second curve. Use the full skirt pattern to help draw the curve.
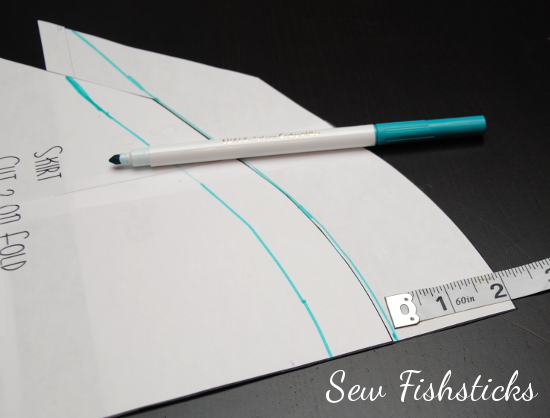 Cut the top 1″ away from the full skirt pattern and discard it. Cut the top 2″ from the partial skirt pattern and keep it. You’ll end up with a full skirt pattern that is 1″ shorter than it originally was and a 2″ “sash” pattern.
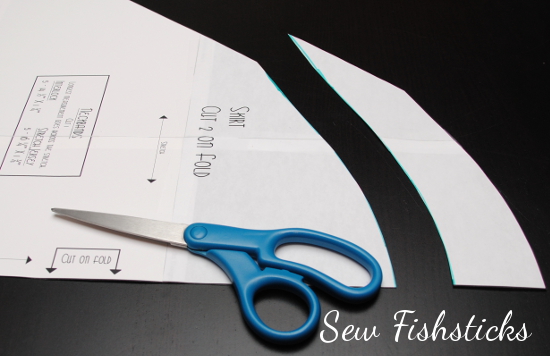 Cut the full skirt pattern from royal blue interlock and the sash pattern from tan or gold interlock – two of each, one for the front and one for the back of the skirt. Pin the bottom edge of each sash piece to the top edge of a skirt piece with right sides together. Start pinning at the center, and gently ease the two curves together as you go.
 The edges of the sash will overhang a little. When you stitch the two pieces together, your stitching should go right down the center of the points on each side.
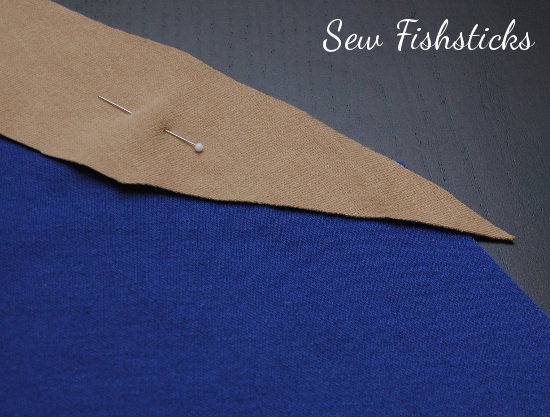 Once these pieces are sewn together, press the seam allowances toward the bottom of the skirt. If you end up with any overhanging fabric on the sides, just trim it away so that the sides are straight again.
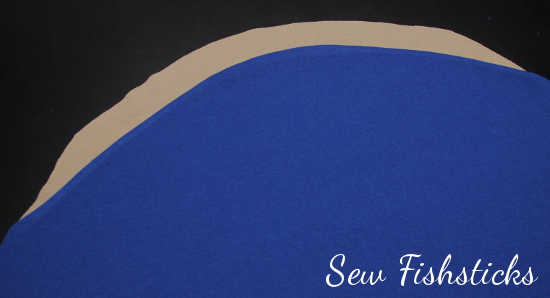 From here, you’ll cut your remaining pieces and follow the instructions for assembling the dress. I added a decorative stitch just above the hem on my skirt pieces.
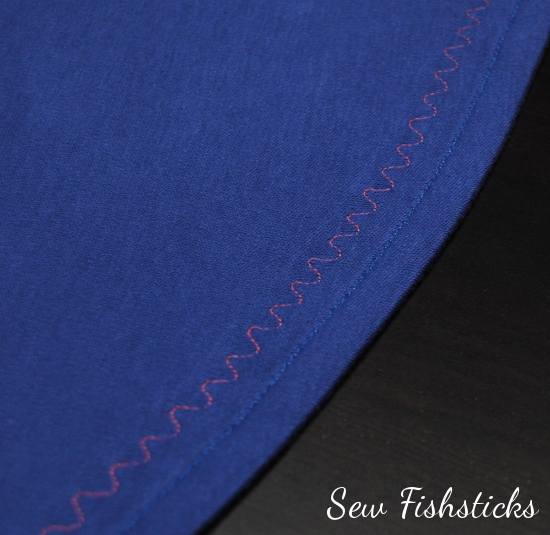 When you sew the sides, be careful to line up the points so that you get two nice “V”s on both sides. I found that it was easiest to pin and sew those areas with a long stitch, check the alignment, then serge or sew with a tight finishing stitch once I was happy with how the sides looked.
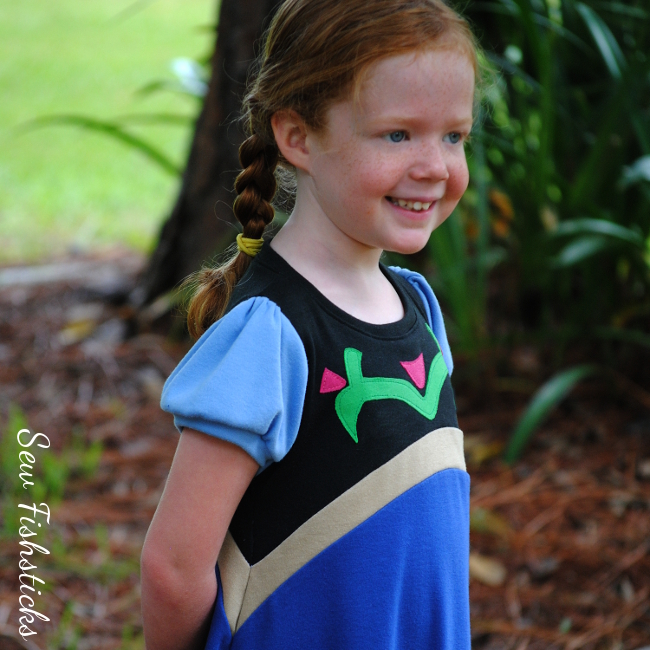 And, that’s it! Your sewing is done, and your little fan of all things Frozen is happy enough to twirl all day!! (Huge thanks to our friends’ daughter, E, for being such a beautiful model for me. I hope you enjoy your Anna Dress!)
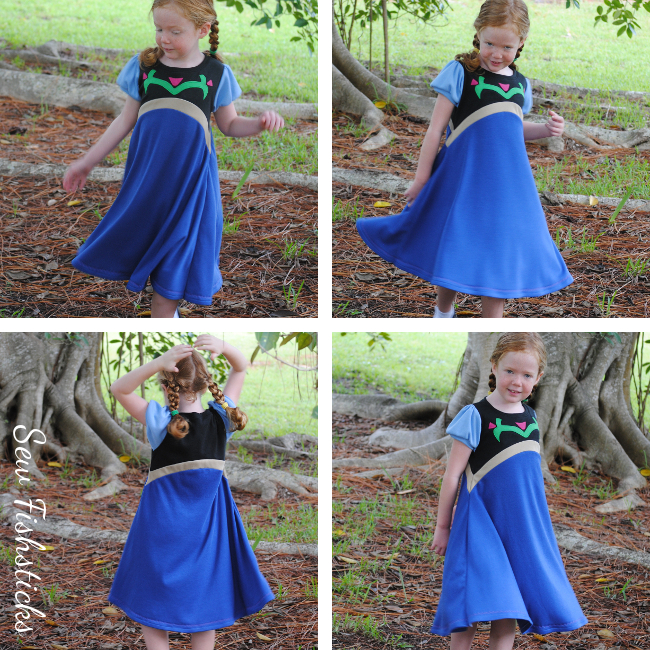 THE PATTERN PARCEL…
Parcel #5: Girls and Tweens includes:
Lily Knit Blazer by Peek-a-Boo Patterns
Everyday Yoga Pant for Girls by Greenstyle
Asymmetrical Drape Top by EYMM
Playhouse Dress by Fishsticks Designs
Mimi Dress and Shirt by Filles a Maman
BONUS PATTERN: Sunki Dress by Figgy’s
Bonus Pattern:
Choose a price of $28 or greater for Parcel #5 and you will automatically also be sent the Bonus Pattern. The Bonus Pattern for this Parcel is the Sunki Dress by Figgy’s. The pattern includes both size runs, so you get 18 months through a 16 tween sizing.
Follow the rest of the tour for more inspiration:
Friday, September 19: Pienkel || Cookin’ and Craftin’
Saturday, September 20: The Life Of A Compulsive Crafter
Sunday, September 21: Keep Calm and Carrion || Felt With Love Designs
Monday, September 22: Radiant Home Studio || Sewing Sober
Tuesday, September 23: Sew Fishsticks || La Pantigana || Amanda Rose
Wednesday,September 24: Shawnta Sews || Sprouting JubeJube || Knot Sew Normal
Thursday, September 25: Make It Perfect || Mimi’s Mom || Climbing the Willow
Friday, September 26: Needle and Ted || Our Family Four
Saturday, September 27: Froo & Boo
Sunday, September 28: Stitches by Laura || Vicky Myers creations
Monday, September 29: Cookin’ and Craftin’ || The Crazy Tailor
Tuesday, September 30: mama says sew || FABulous Home Sewn || The Inspired Wren
Wednesday, October 1: lady and the gents || That’s-Sew-Kari || Sewing Sober
Thursday,October 2: Gracious Threads || Blogs Like A Mother || SewsNBows
Friday, October 3: sew chibi || Lulu & Celeste || Made by Sara
Go Fish Extra:
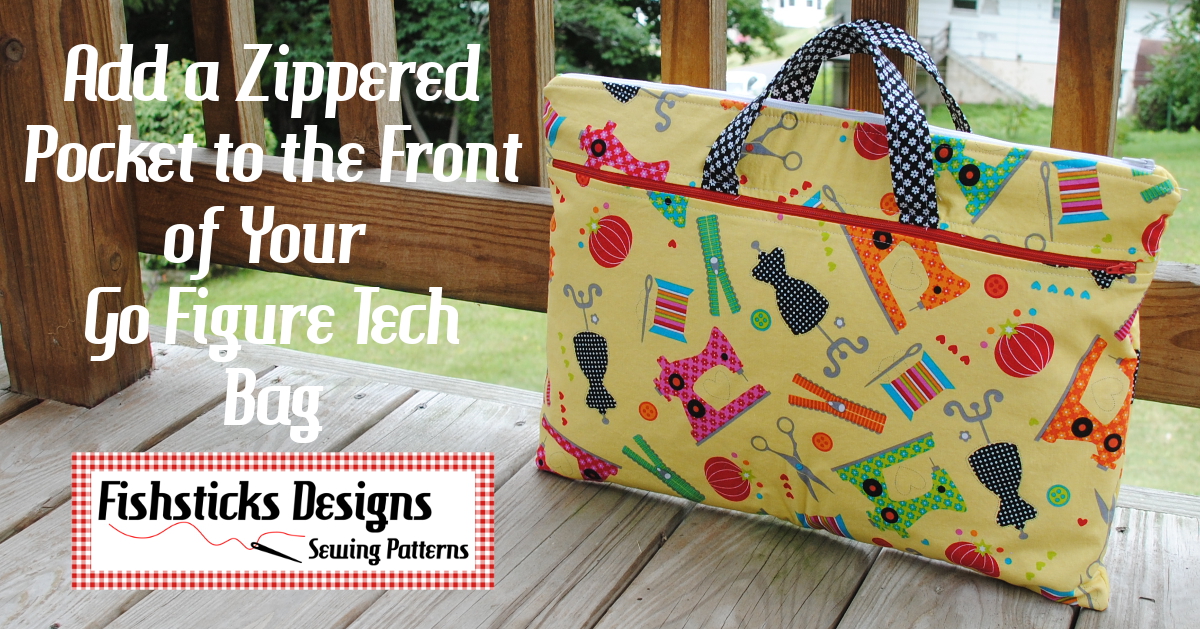
Add a Zippered Pocket to the Front of Your Go Figure Tech Bag
I mentioned a few weeks ago that I’m working on adding a section to my website of “extras” that you can add to your Go Fish Series patterns. These will all be free downloads, and I think that sewing them will help you build skills that you can take to your other sewing, too!
My first Go Fish Extra is this quick tutorial for adding a zippered pocket to the front of your Go Figure Tech Bag. The GFTB is a zippered tote that you customize to fit your electronic device …. tablet, e-reader or laptop. There’s this perfect point on the outside for a giant zippered pocket. This is actually one of those things that I wanted to include in the original pattern, but since these are designed as tri-fold sewing cards in paper format, sometimes I just run out of room!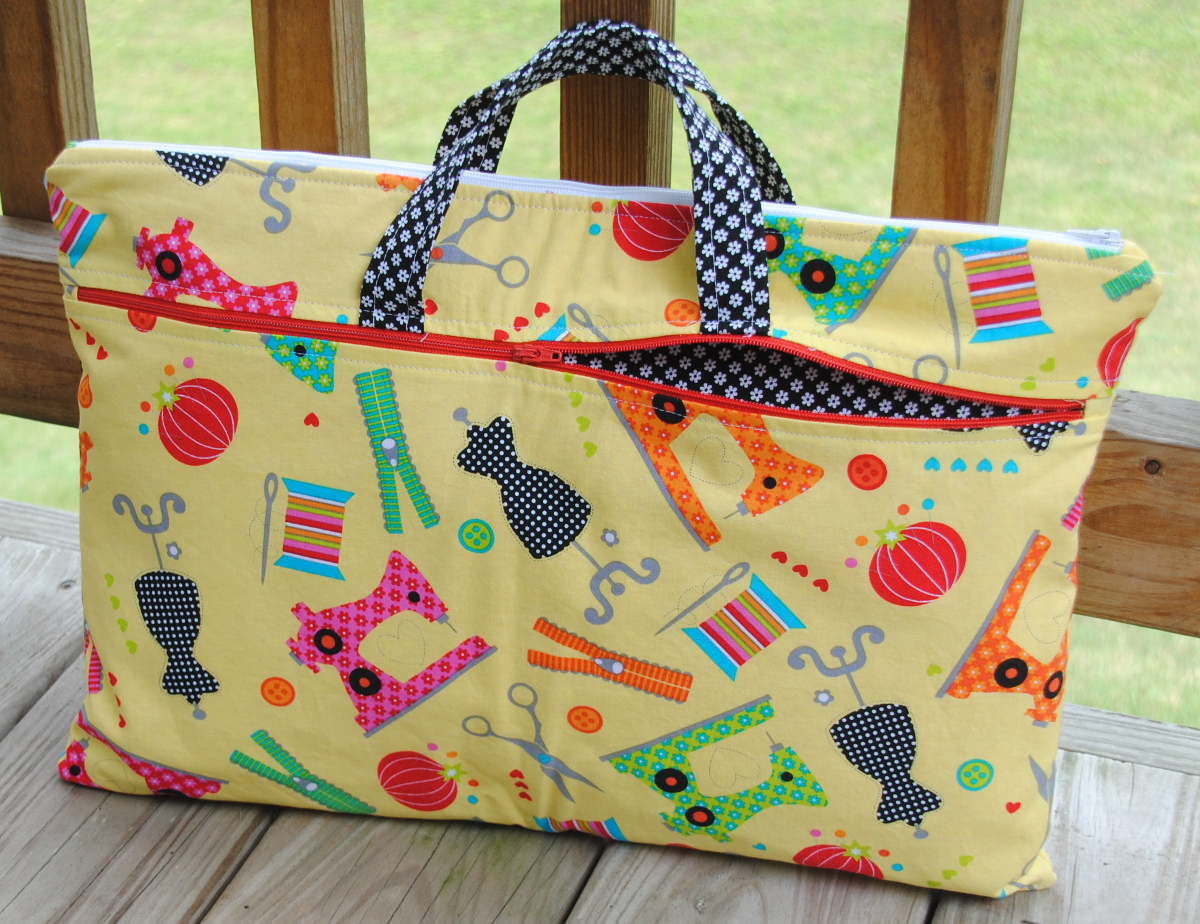 I put this tutorial together in PDF format for you, and you can download it right here.
Sewing for Our Disney World Trip ~ Day 2
 I’m a little behind in sharing our Day 2 Disney outfits because I misplaced my second camera card! The funny thing is that I know where I put it, but it’s not there. Hmmm … We’ll just have to make do with the pictures that I do have.
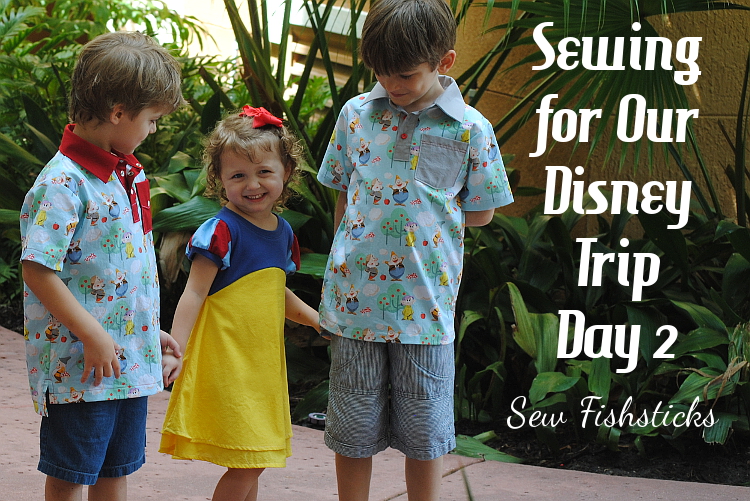
I ran across the Seven Dwarfs fabric at Joann Fabrics while we were visiting with out-of-town family last month and thought it was so cute! I couldn’t resist grabbing a few yards to bring home for the boys! I was really hoping to find Snow White fabric to coordinate with it for Katie’s outfit, but a thorough online search turned up nothing at all. That ended up being just fine, though, because I love how Plan B turned out — meet the Playhouse Dress a la Snow White!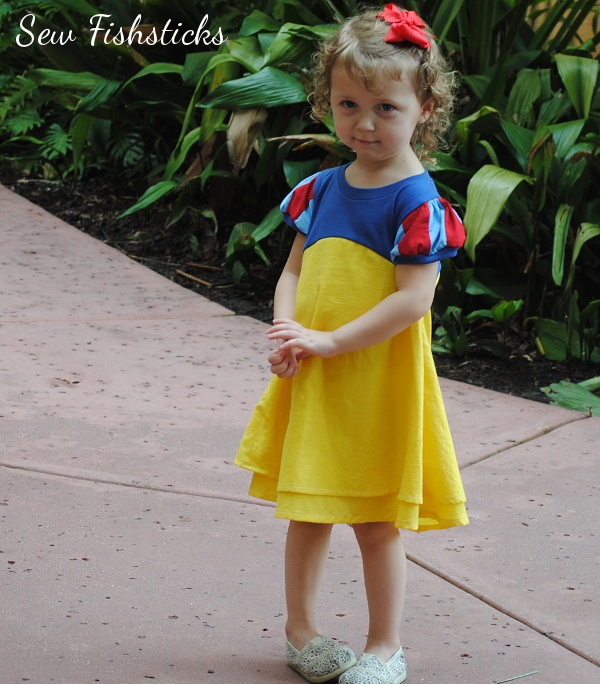 Katie is so slim, I opted to make the Playhouse Dress a size smaller than her ready-to-wear size with added length. For the Snow White sleeves, I pieced 2″ strips of red and light blue Kona cottons, then I cut and sewed them according to the pattern instructions. To add a little more drama to the skirt, I made it a double-layer with the top skirt slightly shorter. The dobby fabric that I used was really thin, so doubling it up kept it from being see-through, too.
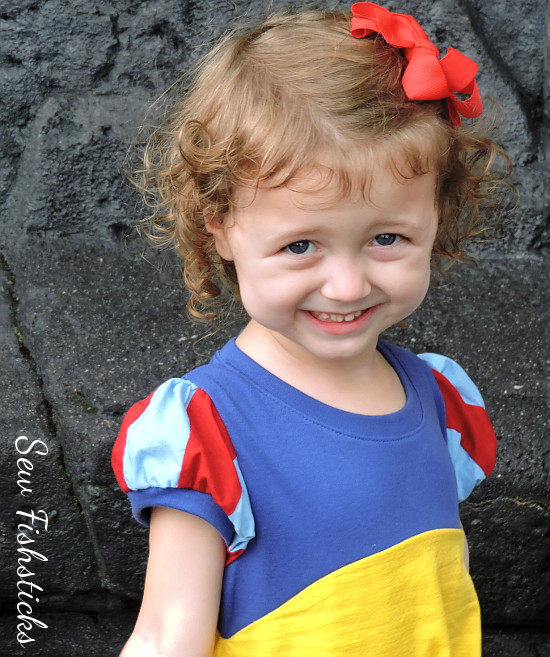 For Charlie and Jamie, I experimented a little with a tunic idea that I’ve been mulling over for a while. We got so many compliments on these shirts at Disney. I’m sure that I’ll be re-visiting this one with some minor modifications!
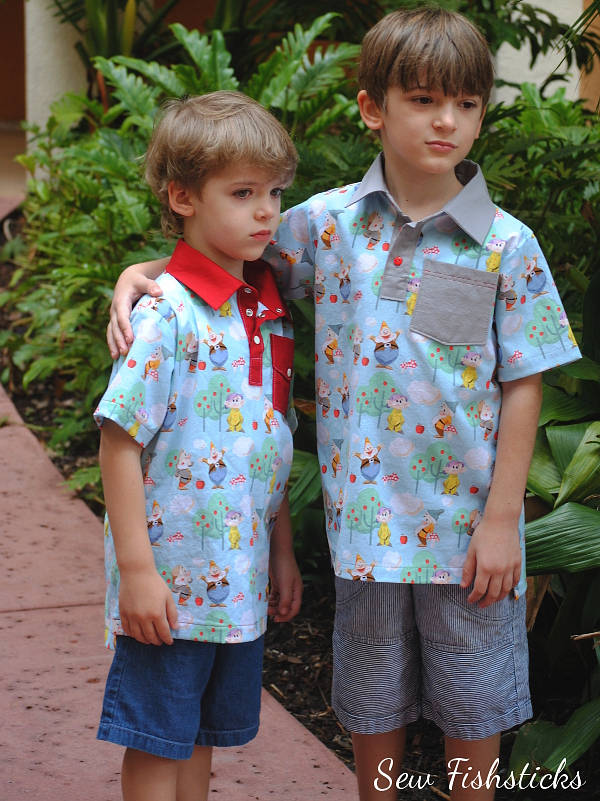 On Jamie’s shirt, I used the pocket from my Everyday Camp Shirt and tiny buttons on the placket. My next versions of these will definitely have narrower collars. These worked just fine, though, since everything Disney is a bit over-the-top! (Both boys are also wearing mama-made shorts — Inside or Out Pocket Pants on Charlie and Sand & Sidewalk Boardshorts on Jamie. They’re wearing Undercover Bottoms Boxer Briefs, too, but you obviously can’t see those!)
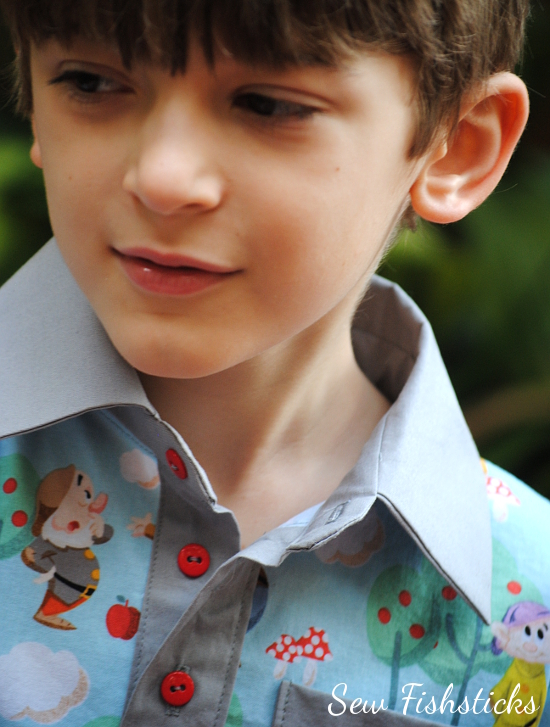 The pocket on Charlie’s shirt is similar to the faux flap pockets that I used on Jamie’s shirt for Disney Day One, and I finished his placket with metal snaps. Both shirts have a side slit and a slightly longer back than front. (You can see that best in the picture at the very top of this post.)
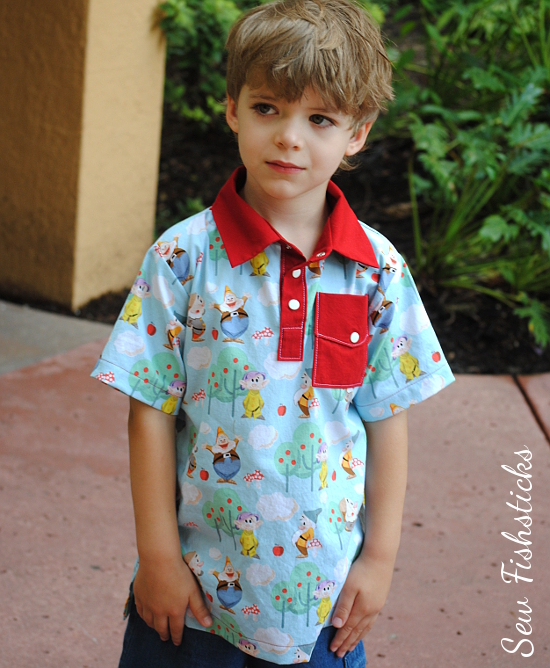 I thoroughly enjoyed sewing these outfits, and the kids loved wearing them. It was so nice to have unique Disney-themed clothing for them to wear on our trip. I’d love to hear your thoughts! Do you sew for vacations? special trips? special occasions? I tend to only do so if I know that what I’m sewing will be used later … my practical mindedness is usually the deciding factor. (The Mickey shirts that I sewed for the boys have already been worn again this week. As for these Seven Dwarfs tunics, I’m thinking of whipping up some Pajama Party PJ pants to match and turning them in fall jammies.)
Sewing for Our Disney World Trip ~ Day 1
 We took a short trip to Disney World this past weekend for Night of Joy, and I couldn’t pass up the opportunity to sew cute outfits for our two youngest boys and our granddaughter! (A few people pointed out to me that I am crazy sewing up all of this right before competing in Project Run & Play, but I really love sewing for these little people, and I’ve been so busy with other work stuff lately, I just had to do it! If you’re popping over from PR&P this morning, a huge “Welcome to Fishsticks!”)
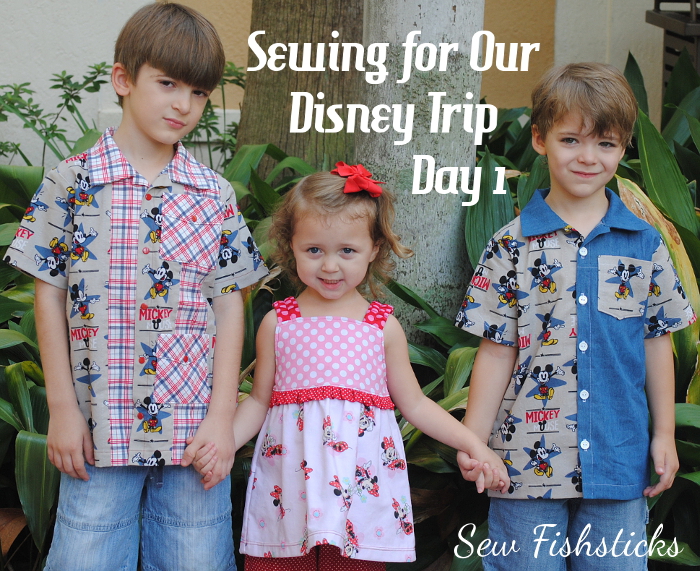
We spent two days/nights at the Magic Kingdom, so each of the little ones got two outfits. I’ll share their second day Disney clothes later this week! For the first day, I went with a Mickey and Minnie theme.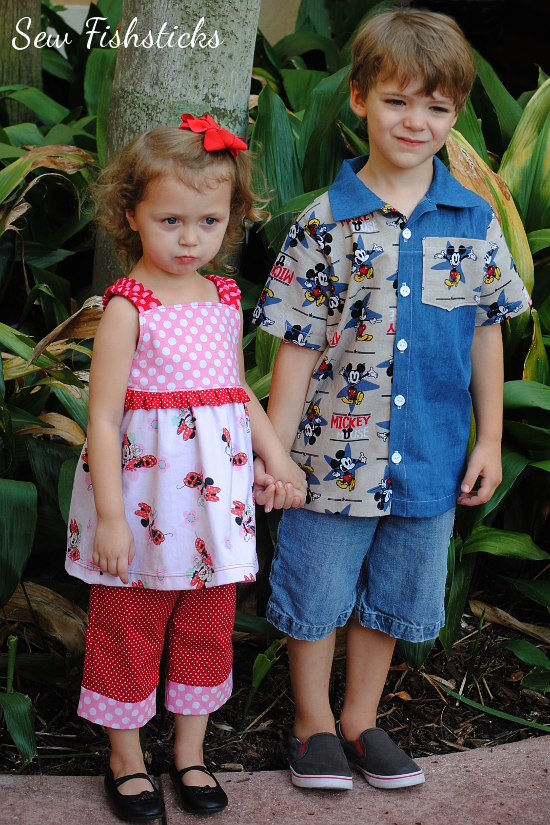 I used my Katie J. Jumper pattern for Katie’s top with a few simple modifications. I started by shortening the pattern to shirt-length using a top with the length that I wanted as a guide. I also added an extra ruffle between the bodice and the skirt. To do that, I just cut a strip of fabric the same width as the top of the skirt piece by 3″. Then, I folded it in half with the wrong sides together and pressed it well. I gathered the raw edges of the ruffle and attached it to the bottom edge of the bodice at the same time that I attached the skirt. It’s a really simple addition that adds a really cute extra feminine detail!
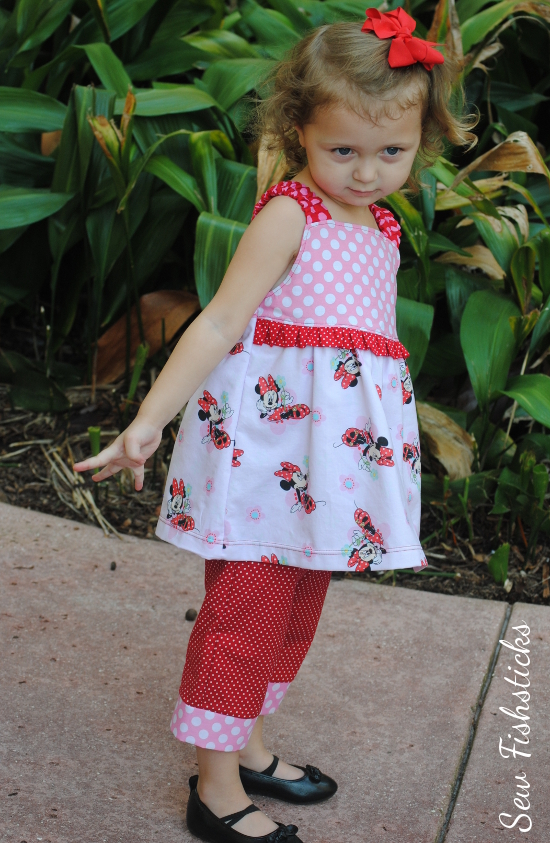 For Katie’s pants, I shortened the narrow version of my Sand & Sidewalk Skate Pants to capri length and added a simple band at the bottom edge instead of the hem. Because I was running out of time, I sewed them with no pockets, and I had them done in a flash!
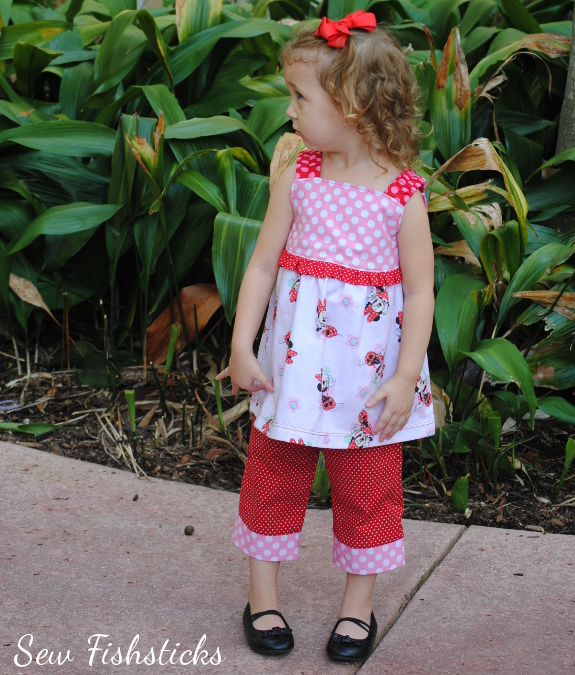 The boys’ tops began with my Everyday Camp Shirt pattern. (They’re both in the big kid sizes now! Eek! They’re growing up too fast.)
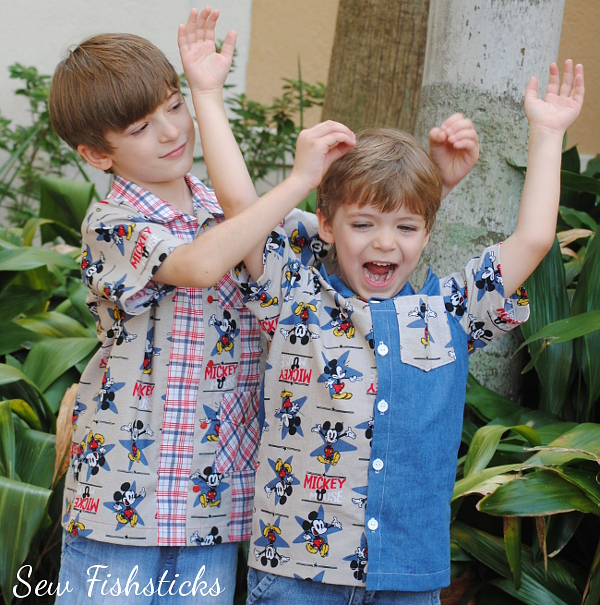 (Jamie was giving Charlie “Mickey Mouse ears”.) I mixed a light chambray fabric with the Mickey fabric for Charlie’s shirt, colorblocking it on the front by cutting the two front pieces in different fabrics.
 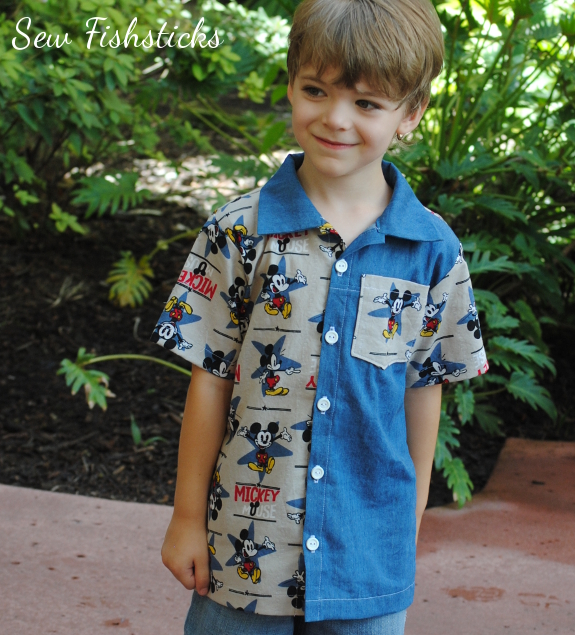 On the back, I added a yoke to show off more Mickeys. Since I made Jamie’s shirt first, and my Mickey fabric was running a little low, piecing Charlie’s shirt together with the second fabric helped stretch it further. The chambray fabric was left over from another project, so I got to use up some of my fabric stash, too!
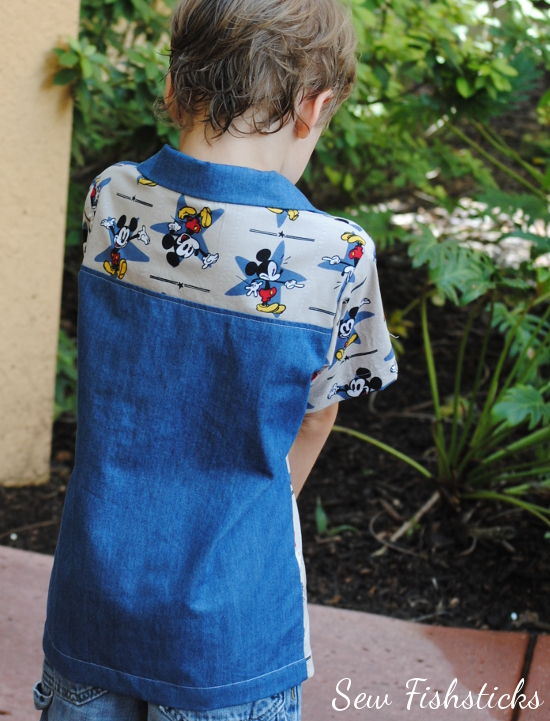 The design of Jamie’s shirt was inspired by the Cuban-style guayabera top.
 I pieced the pocket side of the shirt using that classic guayabera stripe and added pockets with faux flaps. The flaps are sewn down, and the pocket opens at the top like a traditional shirt pocket. I like that it gives the look of a flap but cuts down on ironing!
 I pieced the opposite side of the shirt a little differently so that center strip of Mickeys is nicely framed, and I skipped the second row of pockets.
Jamie’s shirt is finished with metal snaps, and Charlie’s shirt above is finished with 1/2″ buttons. The Mickey and Minnie fabrics and the chambray were all purchased at Joann Fabrics. The plaid fabric on Jamie’s shirt is a Riley Blake Designs print, and the dots are from Michael Miller Fabrics.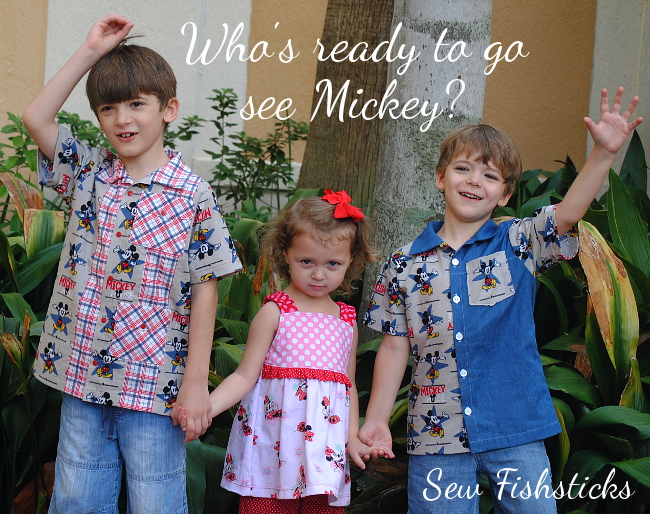 Our plan was to visit with Mickey as soon as we got to Disney so that we could get some quick pictures while everyone was still clean! Katie wasn’t exactly excited about seeing him in person, though.
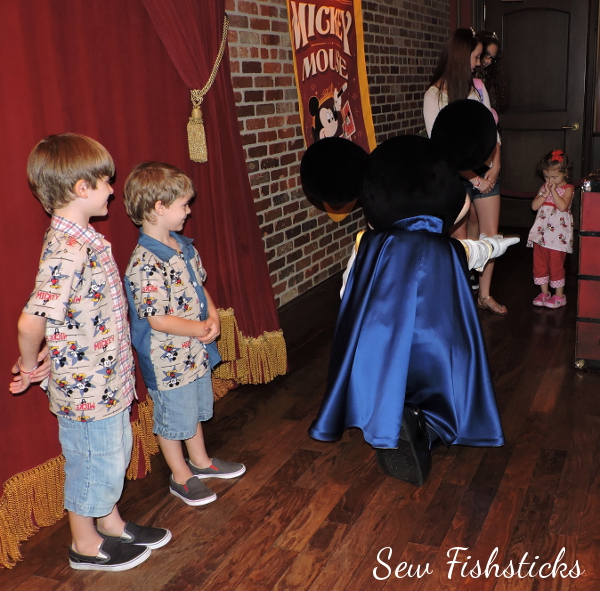 Thankfully, her two little uncles managed to coax her over close enough to snap a few photos.
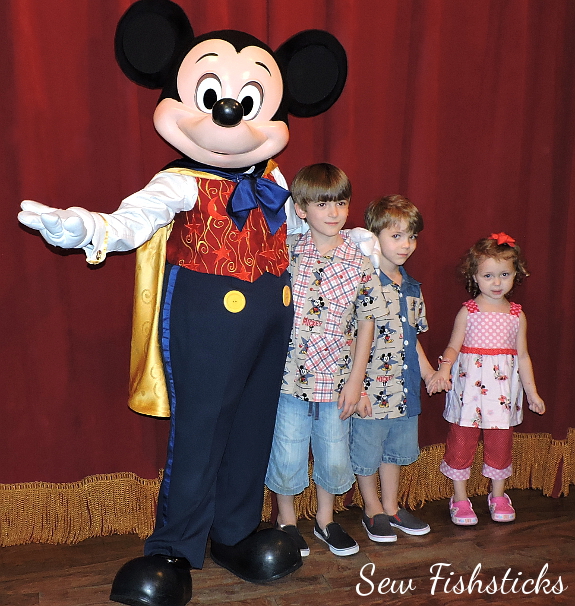 We had a blast at Disney that evening, but we also got drenched in the pouring rain, so the remainder of our pictures look mostly like this one:
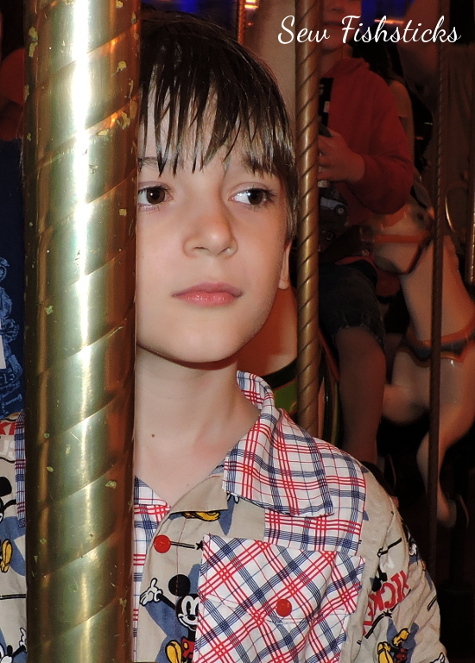 Thankfully, our second night was much drier! Those pictures will be coming on Wednesday morning. In the meantime, though, if you want a peek, just pop over to my Instagram feed: Fishsticks on Instagram. (Feel free to follow me there! You might get some little peeks of my PR&P sewing later this week, too!)
Use the Checker Distributors Website to Shop Local!
I mentioned a few days ago that Checker Distributors has a great new feature on their website that will help you to find my paper patterns, along with notions and fabric and patterns from many other independent designers, all at your local quilt shop! This is one of the things that Checker is doing to encourage quilters and sewists to jump into the Shop Local Movement which encourages the growth of small businesses.
Checker doesn’t sell directly to the consumer, but because they do sell wholesale products to quilt shops, they can tell you many of the local quilt shops that carry what you’re looking for. (There are other distributors who work in the fabric industry, of course, so this is not an exhaustive list, but it’s a great starting point!) Here’s how this feature works: First, click over to the Checker Distributors website. Once you’re there, to find my patterns, click on “Patterns” at the top of the screen. On the next screen, find the drop-down menu that says, “Select Vendor”, then click on the letter “F”.
 Look for “Fishsticks Designs”. Click again to see all of my available patterns.
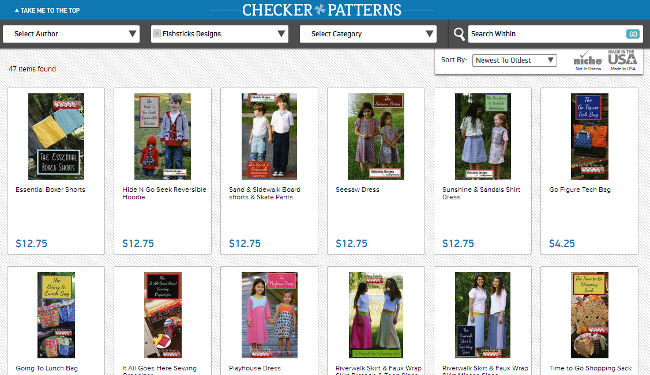 Choose the pattern that you’d like to find.
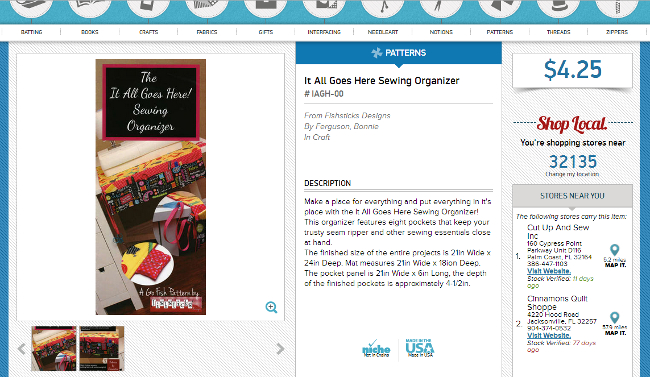 Now, look over to the right-hand side of the page, and you’ll see “Shop Local”. Just input your zip code there, and you’ll see a list of the closest shops to you that have stocked that pattern recently through Checker.
 If the shop has a website, you’ll be able to click on their link from this list. (If the shop is a bit too far for you to drive or if you just don’t have time, ordering online from a shop close by means that you’ll get your order faster and still be supporting a local small business.) You can also get directions to your local shop by clicking on the Map It button.
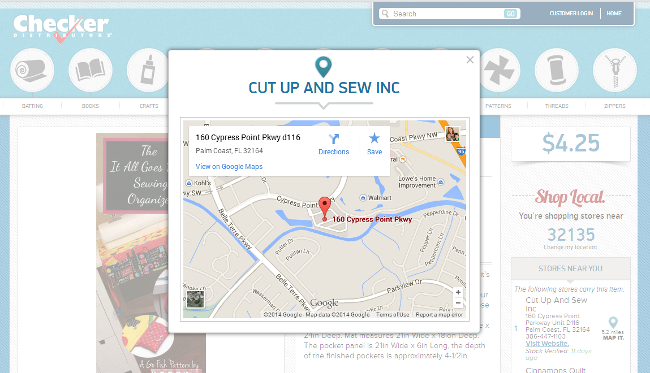 Pretty cool and super easy, right? Now, go find your favorite paper patterns and visit your local quilt shop to buy them. You’ll be glad you did!
Checker Open House 2014
 I was invited this year to join in the annual open house at Checker Distributors which was held last weekend in Maumee, Ohio. Checker is a distributor that works with independent fabric and quilt shops around the world. Their primary focus is gathering together fabric, notions, patterns — anything that a local quilt or fabric shop might want to stock in their store — to create a sort of one-stop shop for the local store owner. This makes it faster and easier for independent shops to do their wholesale shopping, and it helps get patterns and notions from independent designers, like me, into stores that otherwise might not even know about our products. Checker doesn’t sell to individuals, but they have a really cool new feature on their website that will help you find your favorite designers’ patterns, notions and fabric in your local shop. I’m going to wait to share that until tomorrow, though, because I think it deserves a post of its own!
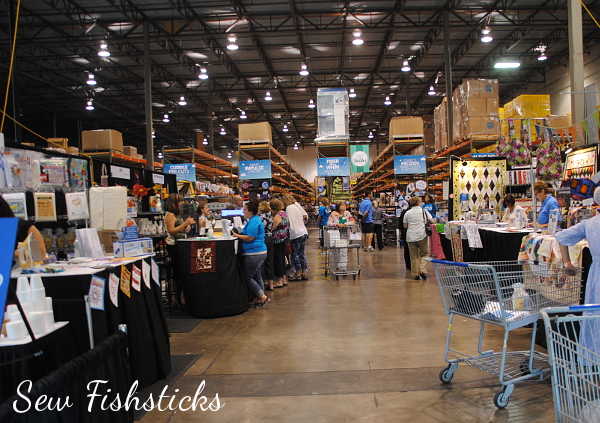 Once a year, Checker clears out a portion of their warehouse and sets up booths for designers to come in and share their products with shop owners — some who live in the local area and some who travel from far away. (I even met two shop owners who live here in Florida!)
 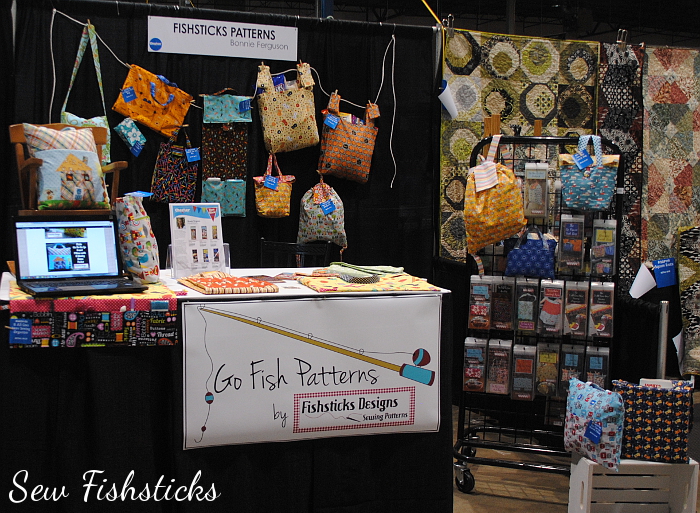 Because they’ve been really popular with independent stores, I showcased my Go Fish Pattern Series! I also unveiled an area on my website that you’ll be able to access starting next week, where you will find free downloadable “extras” to add to your Go Fish Pattern projects. These extras are great for shops who want to offer them to their customers, include them in their classes or use them for store samples.
 I loved getting to talk with so many business owners and hear from them directly, but I also had a great time socializing after hours with the other designers and the Checker staff! Checker fed us so much yummy food. (I won’t share how many extra pounds I brought home!)
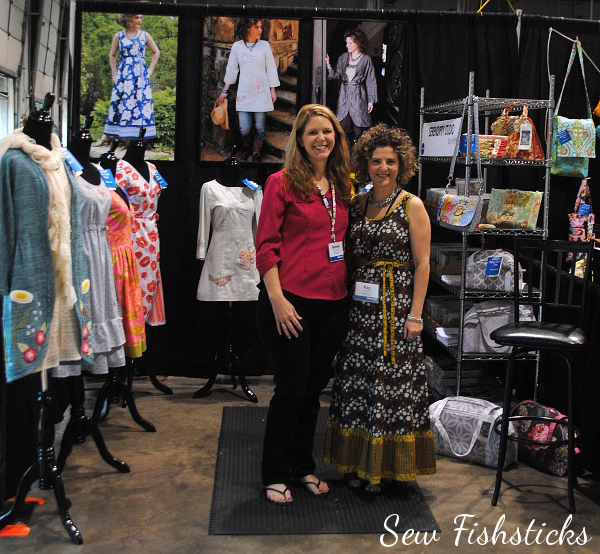 Kay Whitt from Sew Serendipity was on one side of me, and Stephanie Prescott of A Quilter’s Dream was on my other side. The whole place was filled with incredibly talented and wonderful people!
 Attendees visited the vendor booths and shopped from Checker’s fabric warehouse, loading up carts with all sorts of goodies. Checker also offered short classes during the weekend, each one designed to help independent shops grow different areas of their businesses.
 I had a great time, and I definitely recommend attending if you have the opportunity! As a vendor, you’ll have the opportunity to promote your products directly to attendees who are ready and willing to share them with their customers, and as a store owner or buyer, you’ll enjoy the chance to meet designers and chat with them face-to-face about how their products can help build your business.
Bundle Up Boys ~ Today is the Day!
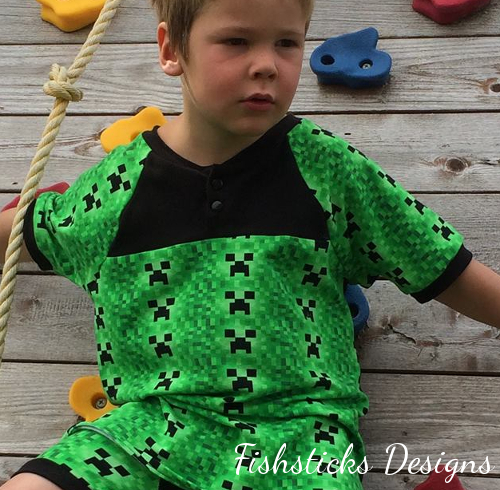
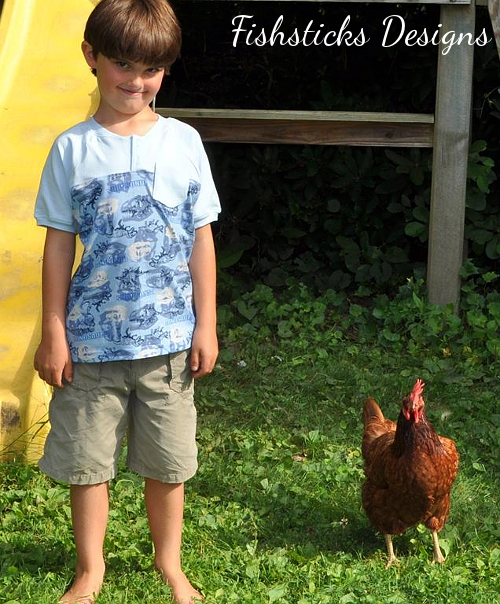
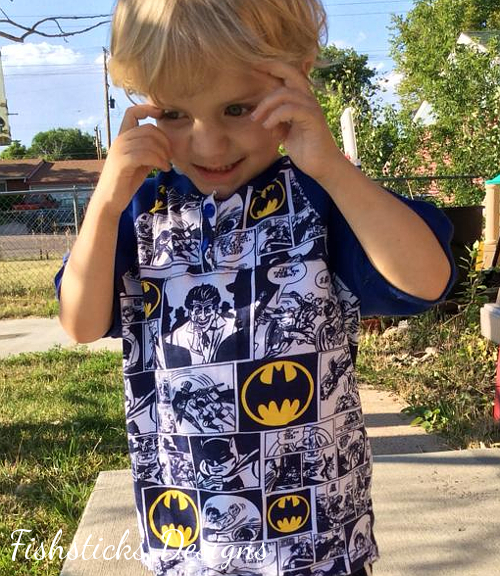
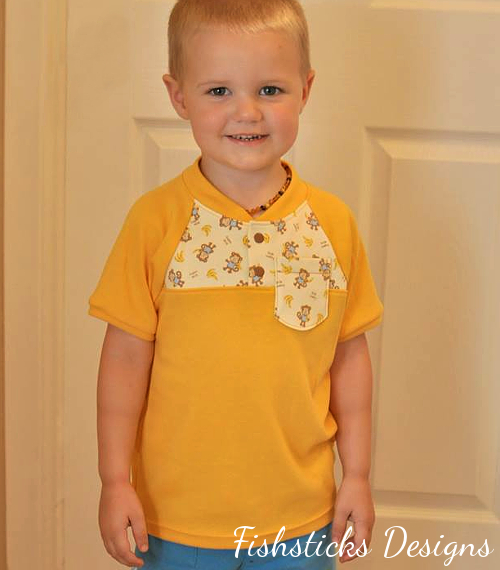
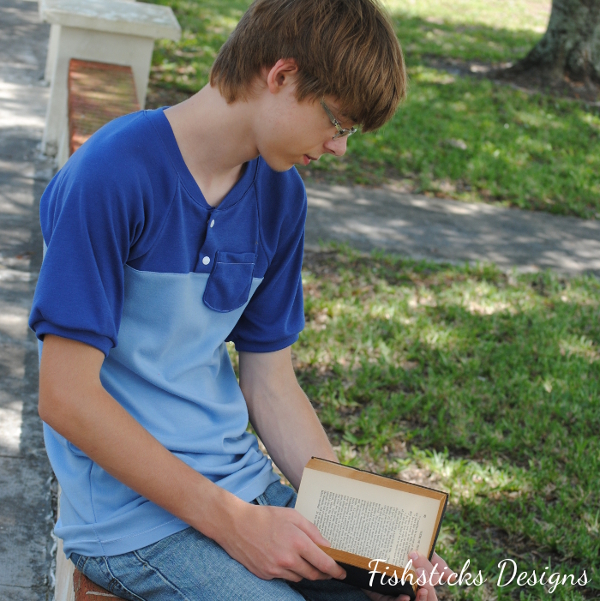
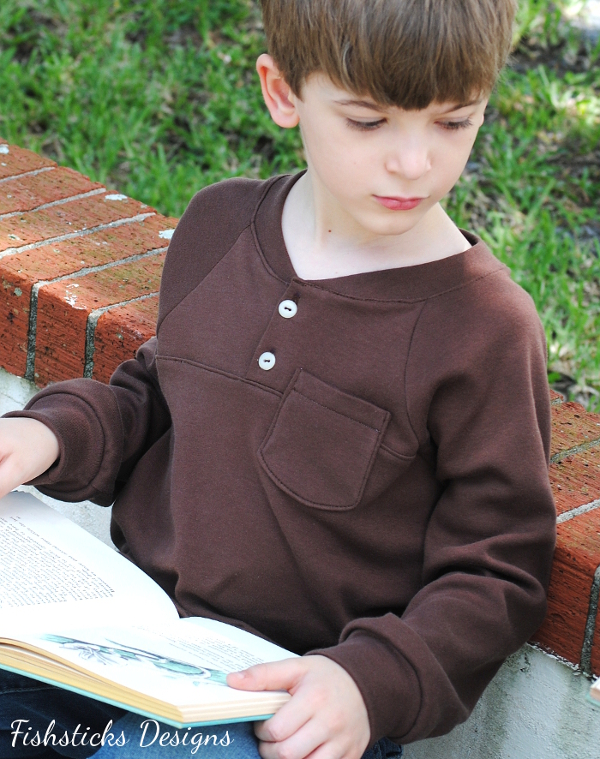
![]() Today is the day that the Bundle Up Boys Collection is available for sale! You’ll have one week to pick and choose from all 12 patterns to customize your bundle. Find all the details right here: Bundle Up Sale. My testers did such a great job on my contribution to the collection: the Honor Roll Raglan Henley. Here are a few of their photos:
Today is the day that the Bundle Up Boys Collection is available for sale! You’ll have one week to pick and choose from all 12 patterns to customize your bundle. Find all the details right here: Bundle Up Sale. My testers did such a great job on my contribution to the collection: the Honor Roll Raglan Henley. Here are a few of their photos:
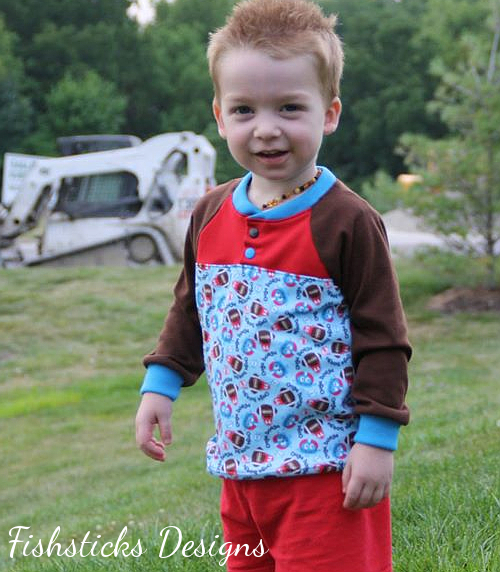
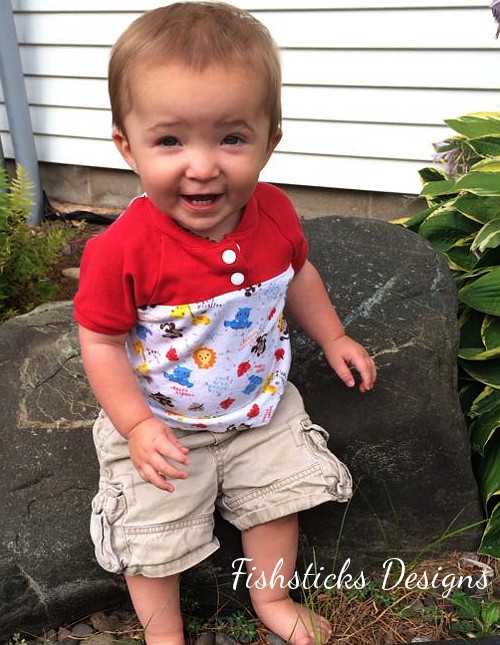


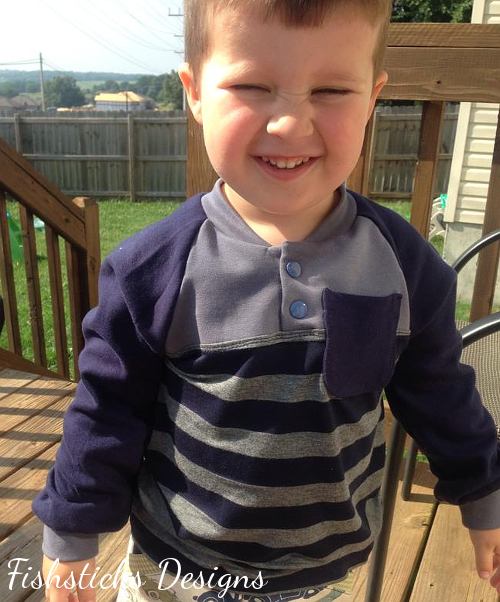
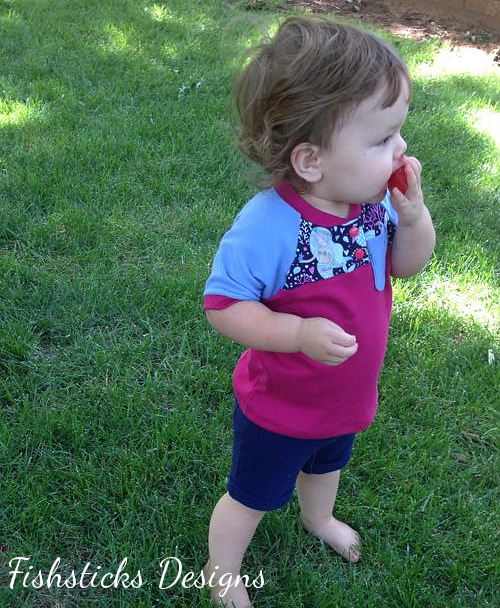
 You can click on the photos to see larger versions, if you’d like. The top with the band at the bottom was made using the waistband from my Charlie Tee to give the top a slightly different look, and I sneaked in a girly version so you can see how easy it is to make this top more feminine with the right choice of fabrics!
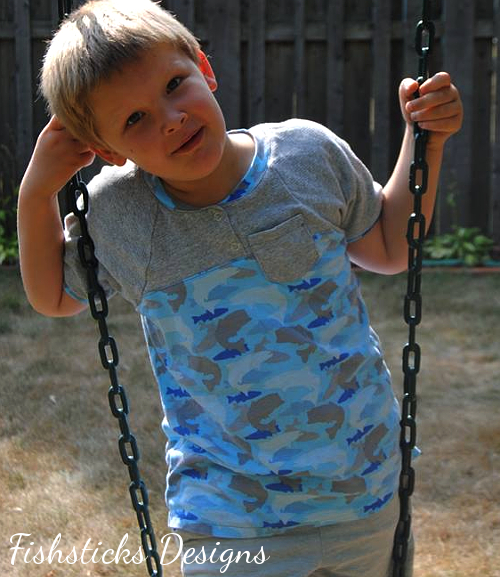
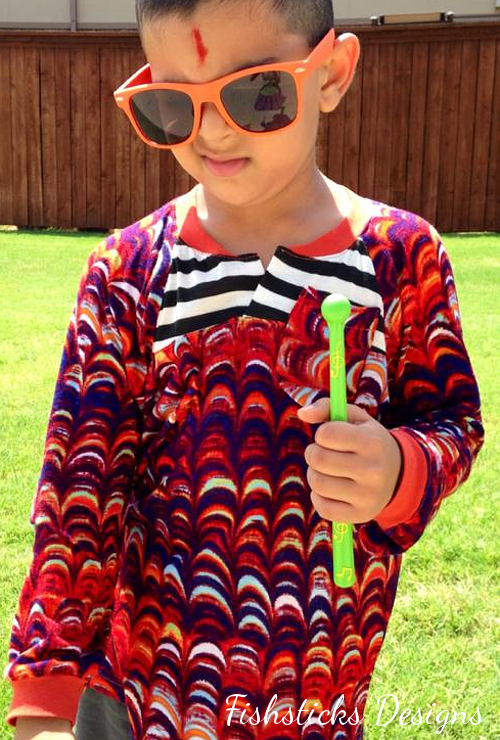
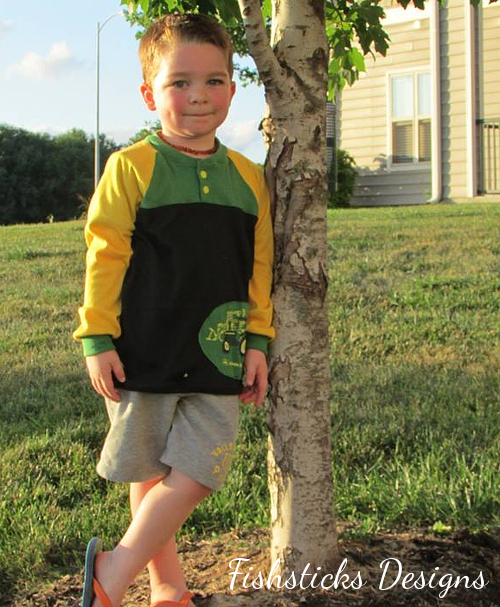
Here are a few of my favorite shots of my boys looking studious in their Honor Roll Raglan Henleys!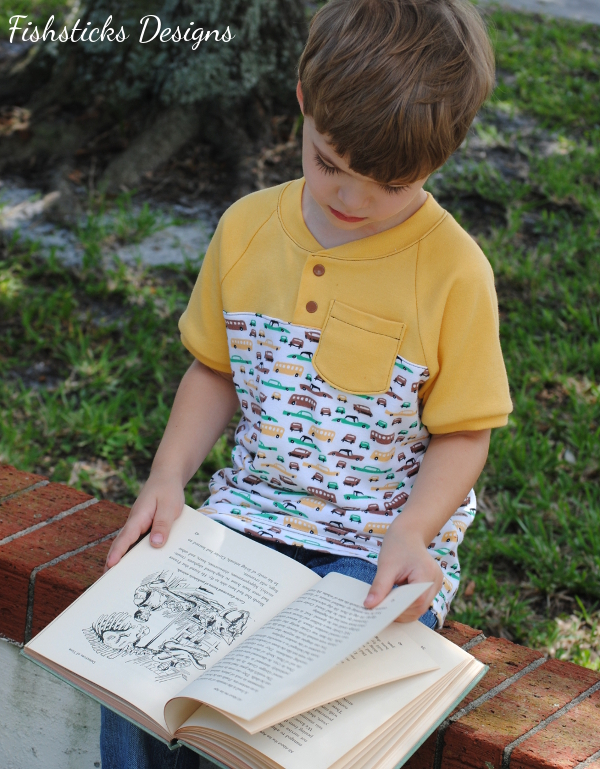
 Now is the time to build your boys’ pattern bundle, so you’ll be ready to stitch up an amazing fall or winter wardrobe for your little guys! Just click here to get started.
The Boys Bundle Up Pattern Collection ~ Details & Giveaway

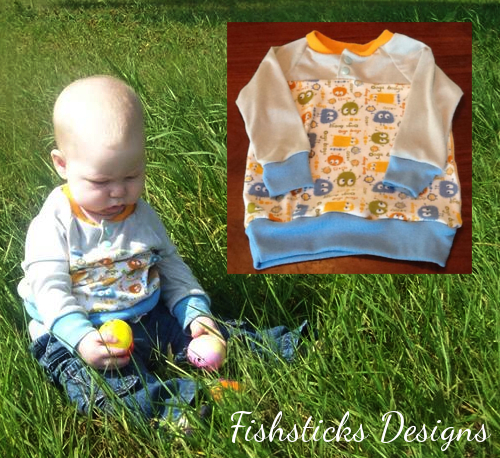
I’ve got a new boys’ pattern coming, and it’s part of an amazing collection of a dozen brand new PDF patterns for boys – a collection that you can purchase at a great price! The Boys Bundle Up will be available for one week from August 22nd through August 29th. (After the sale, you’ll be able to buy the individual patterns from their designers at the regular price.)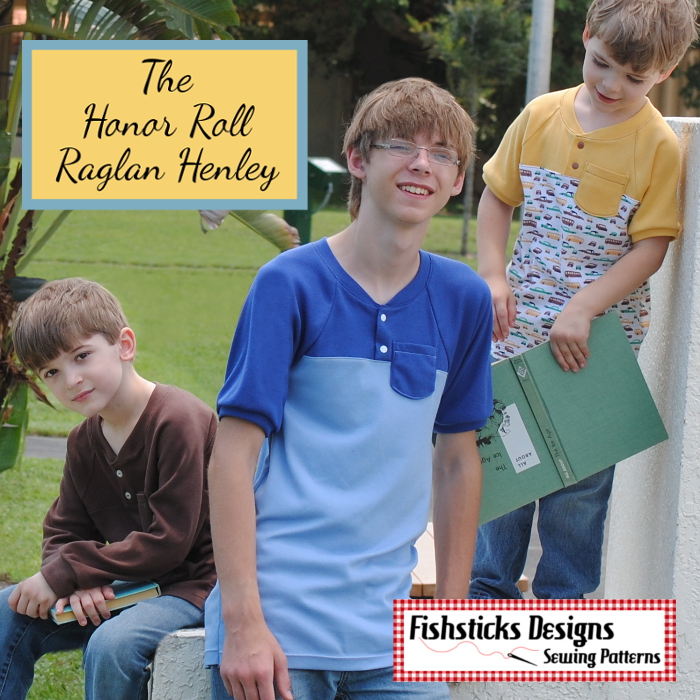 My contribution to the Boys Bundle Up is the Honor Roll Raglan Henley! This top has a huge range of sizes, starting at 12 months and going all the way to 16. It’s a knit top that combines the traditional Henley with a modern curved raglan sleeve and an optional pocket. When the collection is ready for sale, you’ll find all of the details right here: Bundle Up Sale.

While you’re waiting for the sale to start, you can check out the ongoing review posts on the Pattern Revolution Blog. That’s not all, though, you can enter to win the whole set of patterns before you can even buy it!! Just fill out the Rafflecopter at the bottom of this post. Before you enter, though, check out all of the other amazing boy patterns that are included:

.jpg "12 awesome new boy's patterns coming Aug 22-29 at www.bundleupsale.com. Get hot new patterns 50% off. The more you buy, the more you save.")


