Tutorials
Adding Footies to the Jamie Jumper – Guest Tutorial
My friend, Allison, from Alternate Endings put together this simple tutorial for adding feet to the Jamie Jumper, and I asked her if she’d mind letting me share it on my blog. If you’re looking to make footie PJs for your little ones this winter, just grab your Little One Layette or Wee Tot Collection pattern, and check this out!
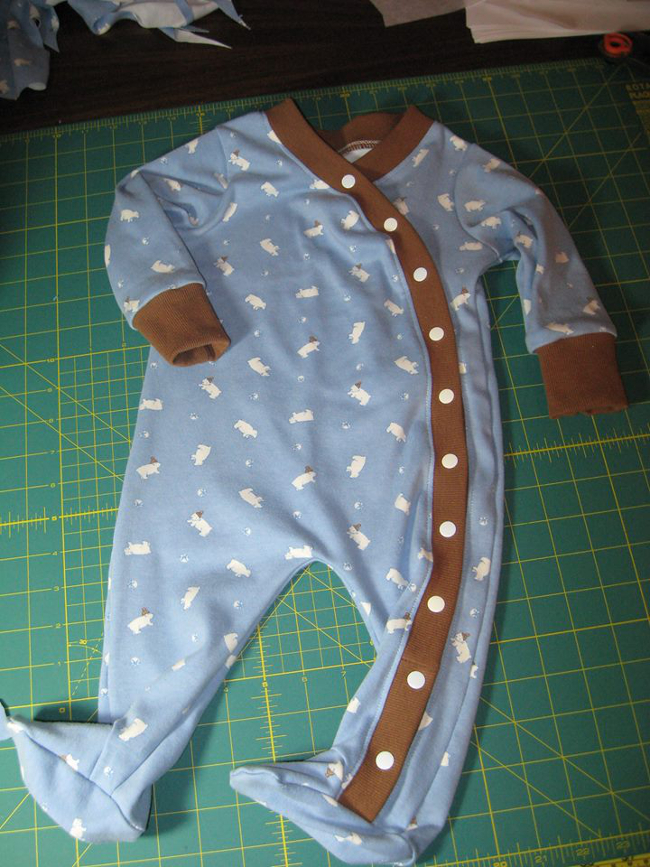
Turn your Jamie Jumper into Jamie Jumper Footie PJs
Begin by laying out your pattern pieces (except for leg cuffs – you won’t need them) as directed in the instructions, adding 2″ to the bottom of each leg section. Also add at least 2-3 inches to each piece of binding. If it’s too long you can cut off the excess. You will also need to cut out pieces for the feet. I used pattern pieces from a different pattern, but you can also use the bottom and top pieces for a soft-sole shoe pattern, or just trace around your child’s foot with these approximate shapes, being sure to give some wiggle room and adding a 1/2″ seam allowance. (The half piece is for the top of the foot, and the whole piece is the sole.) If it fits your baby, it should work just fine.
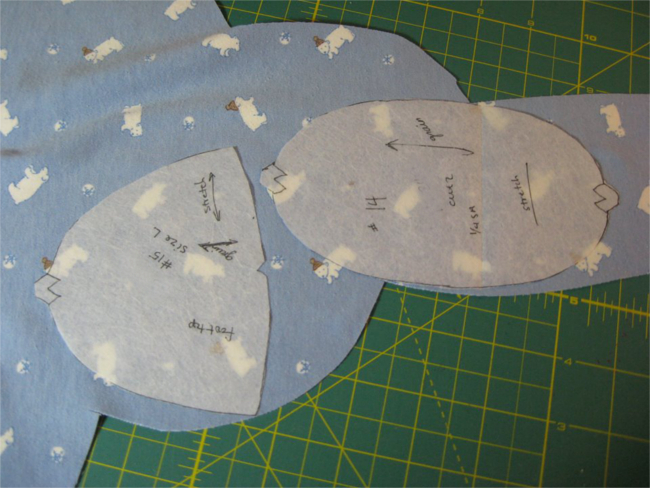 Assemble your Jamie Jumper as usual, leaving off the leg cuffs. And don’t forget to make a few mistakes like I did. You know, things like forgetting to cut the binding an extra two inches longer and having to move the serger next to the sewing machine so you can sew an extra strip of binding on without having to remove the garment from the serger. Please make that mistake. It will make me feel so much better.
After the JJ is assembled, you need to cut a rounded “V” shape onto the bottom front of each leg – approximately 1″ wide and 1-1/4″ high. Round the pointed part a bit. When you make the V for the side with the ribbing/binding, be careful not to cut it too close to the ribbing. Leave about 1/4″ between the ribbing and the V so you have room to attach the foot pieces.
 Attach the top part of the footie to each “V”, right sides together. Match the middles and sides. You will probably have to stretch the V a little to make it fit.

 After you have attached the top portion of the footie, turn your JJ inside out and attach the bottom part of the footie to the bottom of the Jumper, right sides together. Match ends and sides. You will probably not need to stretch anything for this to fit – unless you have a very large-footed kid.
 Turn garment right side out, admire your handiwork, and finish jumper as directed.
Tutorial by Allison Sanders Morton.
Shared with permission.

Twin Needle Hemming – A Tutorial
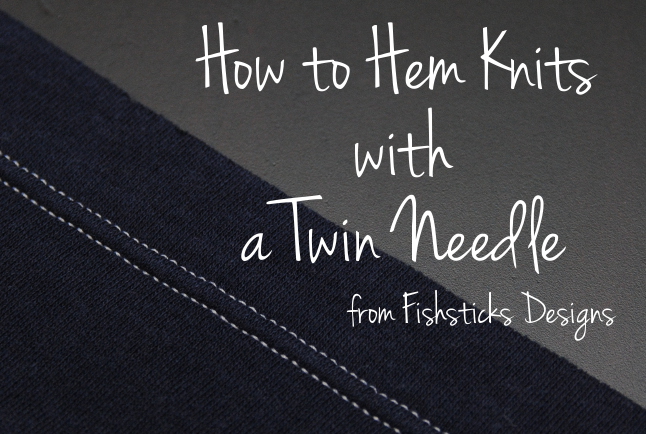 I originally shared this information as part of the Charlie Tee Sew-along in July of 2013, but I thought it deserved to be turned into a stand-alone tutorial so that it’s easy for you to refer to when necessary. The twin needle is a perfect choice for hemming knits, not only because it gives your sewing a beautiful finished look, but also because it gives you two rows of stitches on the front (see above), and a nice stretchy zig-zag on the back (see below). That stretch in the twin needle hem goes a long way in helping to prevent popped stitches.
 Let’s get started! First you need a few tools: a twin needle (also referred to as a double needle), your regular spool of thread and a second source of thread (I use a bobbin). Since you’re working with knits, it’s best to use a ballpoint or stretch twin needle. Those are hard to find locally, but they are pretty easy to find online: stretch twin needle, ballpoint twin needle. I prefer the 4.0 mm twin needle — that number refers to the measurement between the left and right needles. You can use a 2.5 mm if you’d like your stitches closer together.
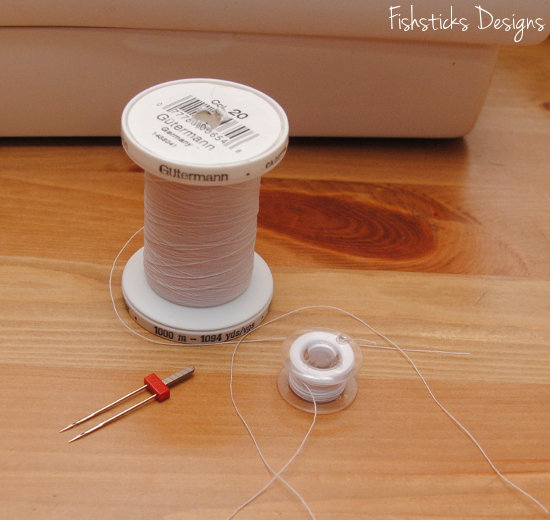 Some sewing machines, like mine, have a button or switch that needs to be pushed to change from single to double-needle sewing. Here’s what that button looks like on my machine. Go ahead and press that button. Remove your single needle and replace it with the twin needle.
 Many sewists put both thread sources on the pin that holds your regular spool. On my machine the threads tend to tangle when I do it this way.
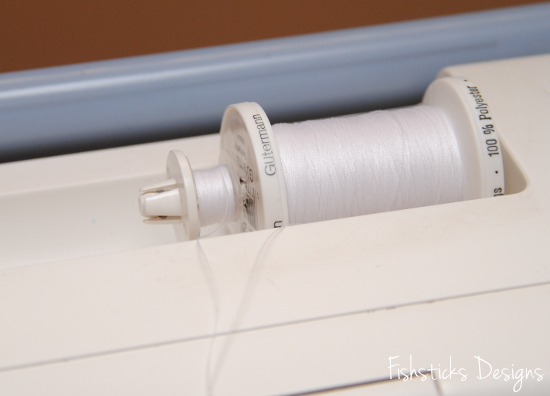 Some machines have a extra removeable pin just for a second spool of thread. I think mine did at one time, but I’m not sure where it’s disappeared to. It’s not a problem, though, since I’m using a bobbin for my second thread. I just pop that bobbin onto the bobbin-winding pin with the thread feeding towards the front of the machine.
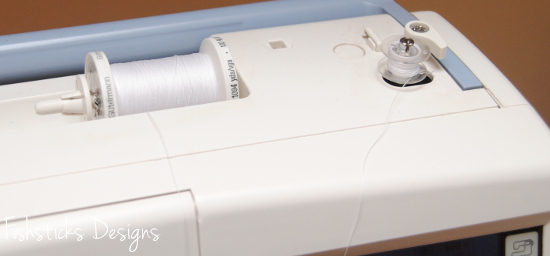 You can thread the twin needle by pulling both threads through as one. My machine is a little bit picky, though, and I’ve had to work with it until I found the best way to thread the twin needle. What I do is thread the left needle first from the spool of thread, then I press and hold that thread in place on top of the machine just before it enters the guides while I thread the right needle from the bobbin.
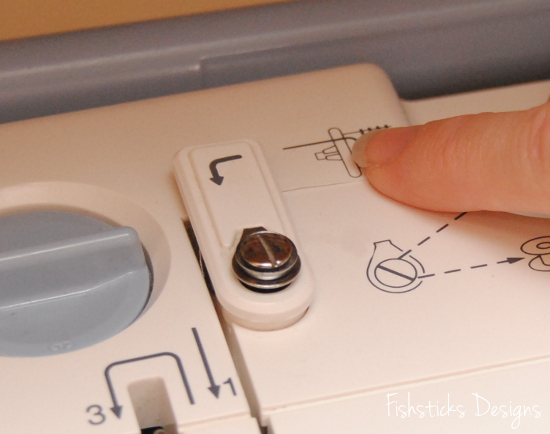 Once I have both needles threaded, I pull the threads back away from the machine as one.
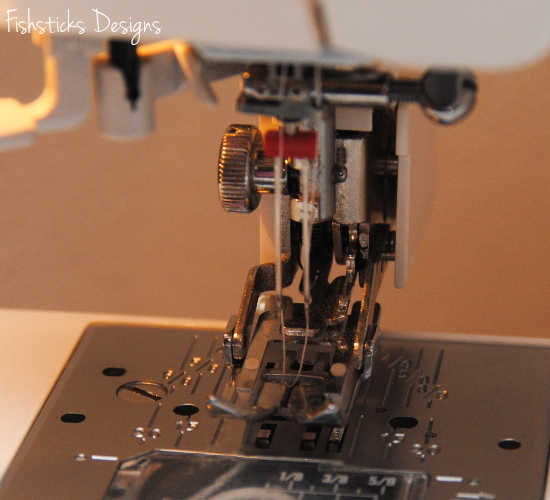 Now that your twin needle is threaded, we’re ready to get hemming! I serge the raw edges of my hems, but that is purely for aesthetic reasons. (I like for the inside of my garments to look as nice as the outside.) Because knits don’t fray, you can totally skip this step if you want to.
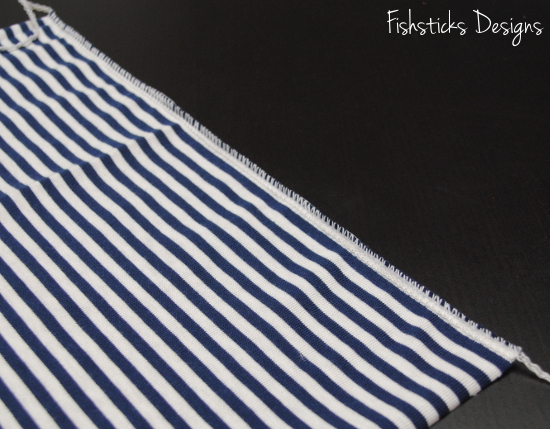 With a hot steam iron, press your hem allowance to the inside. If your knit is particularly stretchy or uncooperative, use a little spray starch when you iron.
 Because we’re going to be stitching on the right side of the fabric, and I don’t want to sew over my pins, I use long pins and position them so that the heads hang off of the folded edge. This way, I can make sure that the hem is pinned properly, and I can remove them as I get to them while I’m sewing.
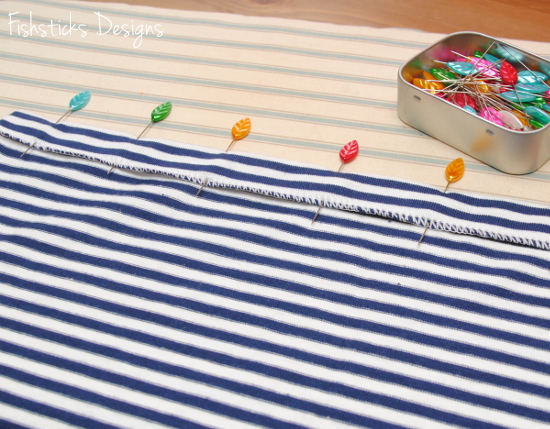 I like to start my hems about 1/2″ in from the edge of the fabric. Set your stitch length to 3.0 or 3.5. (Shorter stitch lengths stretch fabrics.) I backstitch about 1/4″, then stitch all the way across feeling through the fabrics to make sure that my stitching is falling just inside the raw edge on the underside of the fabric. I stop stitching about 1/4″ from the opposite side, backstitch to 1/2″ then sew forward again to the end. (Starting your stitching a bit in from the edge will help to keep your machine from “eating” the end of your knit fabrics. Backstitching to 1/2″ will help make sure that you don’t chop off your fastening stitches when you serge later.)
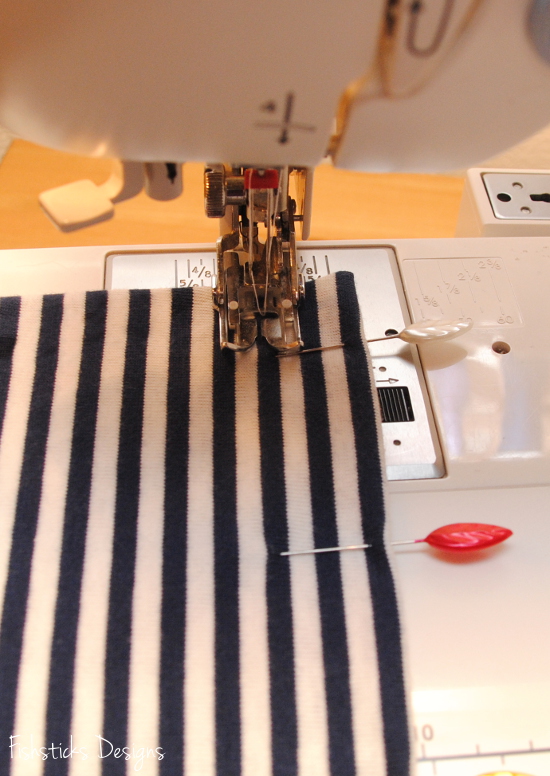 Be careful not to stretch or pull your fabrics as you’re sewing. Just guide and let the feed-dogs pull them through. (This is much easier with a walking foot!) Pulling on your fabrics while you’re sewing can lead to hems that look like this:
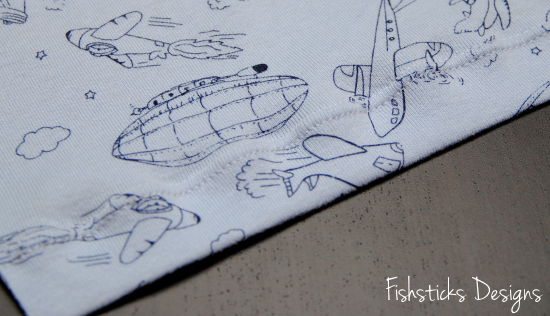 What you really want, though, is hems that look like this:
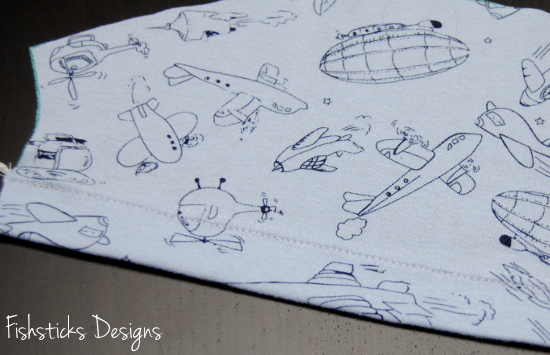 That wasn’t too hard was it?
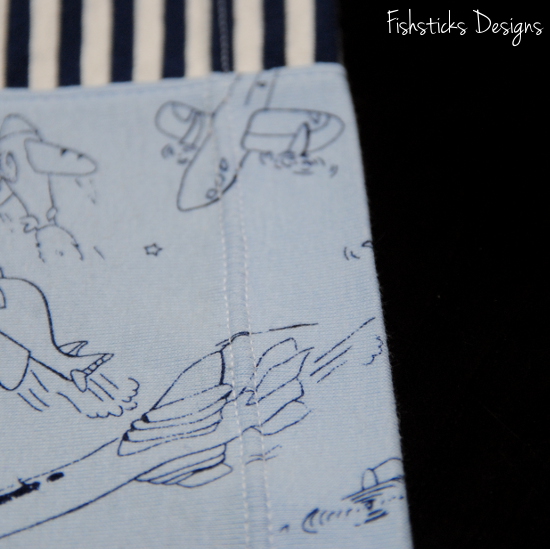
The Sweet Baby Sleep Bag Pattern at Sew Mama Sew
 I’m guest posting over at Sew Mama Sew this morning with a free pattern for sweet new babies! You can hop over to check out the Sweet Baby Sleep Bag pattern right here: Sweet Baby Sleep Bag Pattern + Tutorial, and be sure to Pin it or bookmark it for all those future baby showers. It’s such a practical gift, and it’s a quick and easy sew that looks a lot more complicated than it really is!
Oh, and if you sew one, please share it, especially if it’s modeled on a sweet new baby. New baby pictures make my heart melt!
Handmade Christmas – Quick Pillow Cover Tutorial
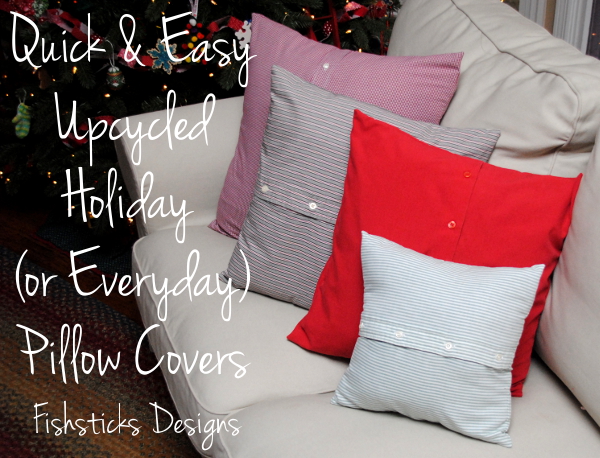 With Christmas less than two weeks away and my sewing barely begun, I needed a quick and simple project this past weekend to give our livingroom a little extra Christmas cheer. A few new toss pillow covers in Christmas red and green made from thrifted button-down shirts filled that need quite nicely! In colors to match your decor, these pillow covers would actually work as beautifully year-round as they do for the holidays. Want to make a few of your own? Just read on.
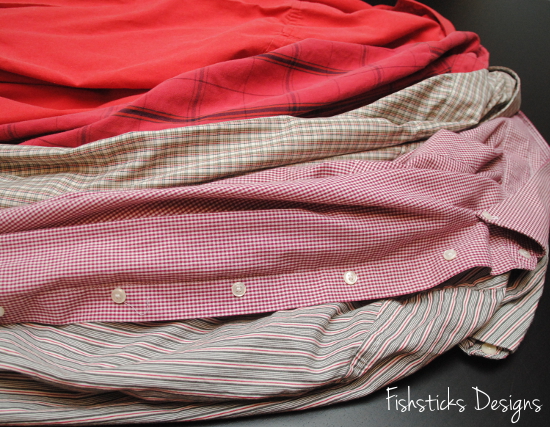 To get started, you need a pile of men’s button-down shirts. I found all of these at our local Goodwill store for around $2 a piece. For larger pillows, of course, you’ll need larger shirts. You also need toss pillows. I used the ones that were already on my sofa.
 The first step is to remove the pocket from the shirt that you’re working with. Just grab your handy seam ripper and carefully rip it off. (If you cut the stitches on the pocket side rather than the shirt side, you run less risk of damaging the shirt.) Once the pocket is off, if you have tiny needle holes remaining, either spray them down with water from a spray bottle and press well with a hot steam iron, or place a damp cloth over the area with the holes and press well with your steam iron. Cut the front and back of the shirt apart.
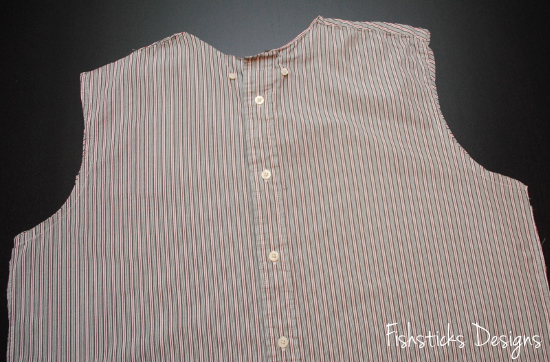 Measure your pillow. Mine measured 17″ square. Most shams are made to the exact size of the pillow, but since I like mine to be just a little bit snug, I’m going to make my sham 16 1/2″ square. Because I’m using a 1/2″ seam allowance, I’ll add 1″ to that measurement (seam allowance times two), and cut my front and back pieces 17 1/2″ square.
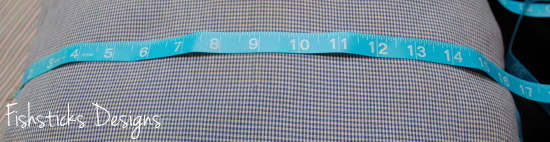 With the shirt front buttoned, measure and draw your piece. I centered my button placket, but you could place it off-center if your shirt is large enough. You will want to center the individual buttons, however. To do this, I just move my see-through ruler up and down until I have the correct full measurement and an even amount above the top button and below the bottom button. Be careful not to get the top and bottom buttons too close to your seam allowance. You want them to be at least 1 1/2″ in.
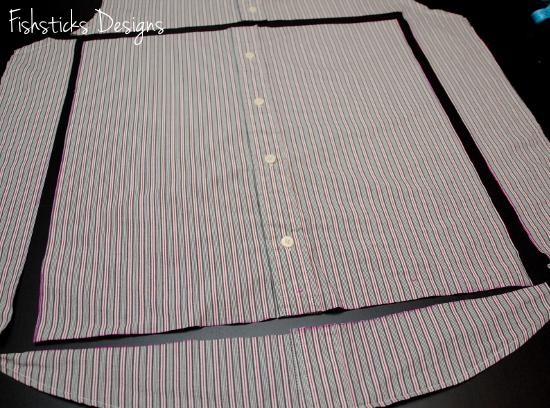 Cut a second piece from the back of the shirt for the back of your pillow sham.
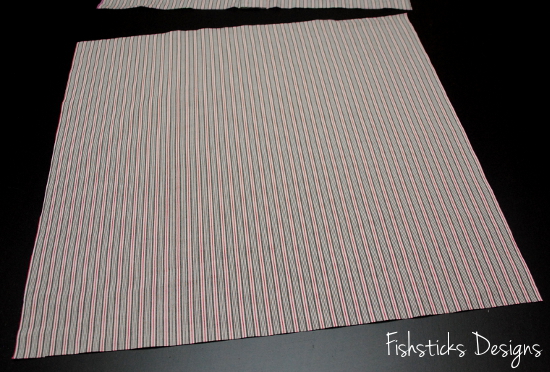 Pin the front and back pieces right sides together.
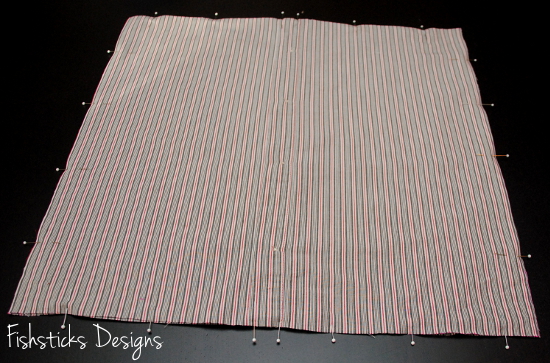 Sew all the way around at 1/2″. I serged the edges after sewing, but since no one is likely to see inside these shams, you don’t really need to.
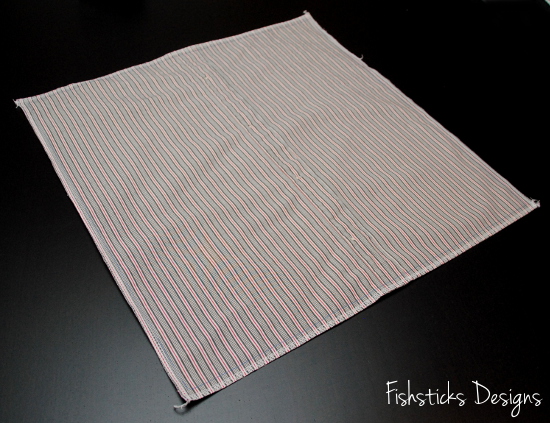 Once the two pieces are sewn together, just reach through between two of the buttons and unbutton one to turn the sham right side out. Push the corners out neatly, unbutton the cover completely, slide your pillow in, button it back up and toss it on your couch!
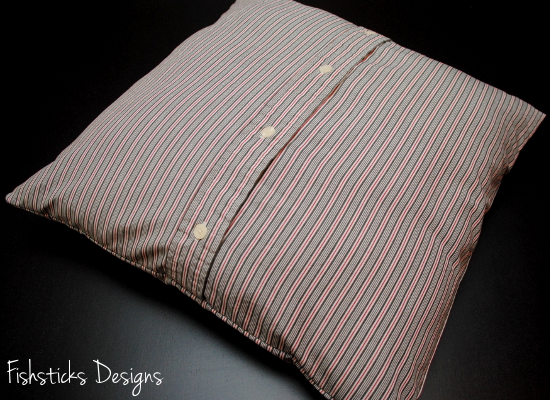
A Kitchen Gift Set Tutorial & a Huge Giveaway
 I am over at Skip to my Lou today with a tutorial for a Kitchen Gift Set for the Holiday Bake Craft Sew Along.
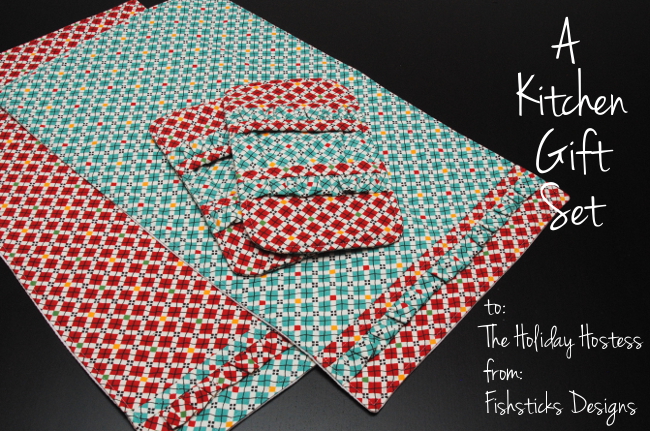
 I think you are going to love this gift set! It is perfect for any of your holiday hostesses. The set includes these sweet fold-over, oven-mitt pot holders . . .
 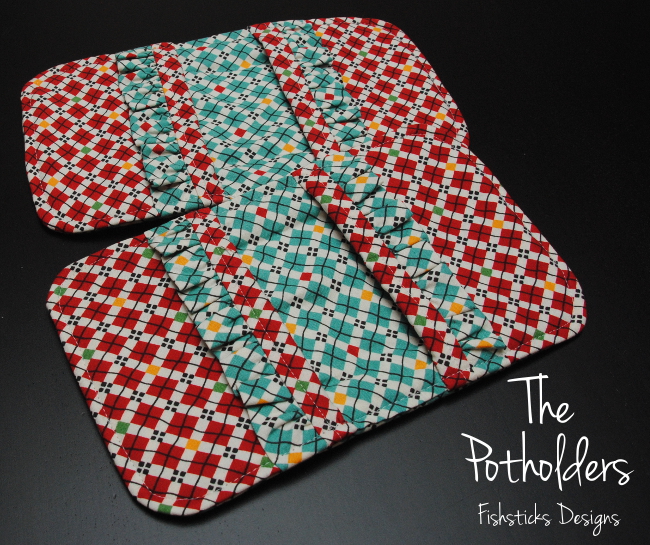 . . . and this pair of pretty, but practical dish towels.
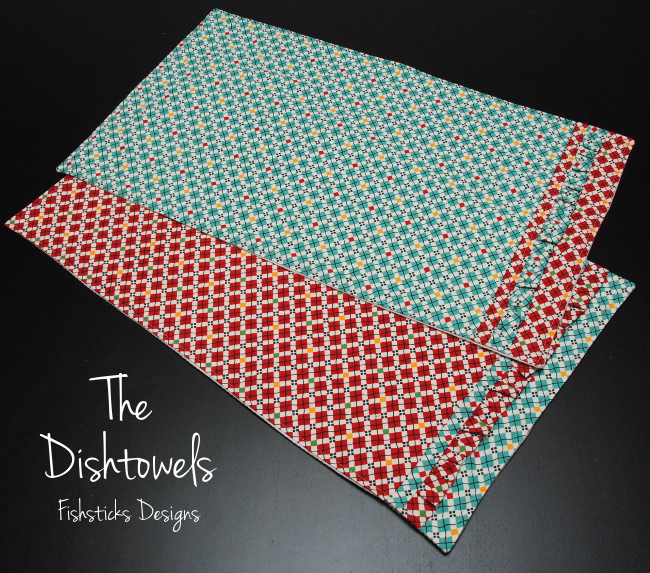 It’s a little early Christmas gift from me to you! But, wait! That isn’t all! I also get to treat you to a SEW Amazing Giveaway as part of our crafty series.
This is one AMAZING giveaway!
We are giving away a fabulous Prize Package worth more than $1000!
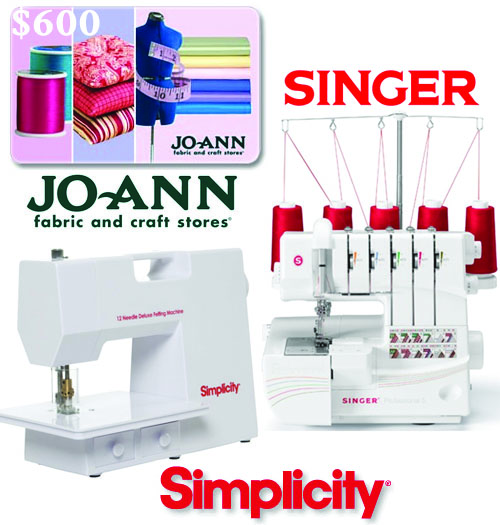 One lucky winner will receive…
$600 JoAnn Fabric and Craft Stores This will get your sewing room stocked and ready to create! Can you imagine?
This singer professional serger will bring your sewing to a whole new level. True to SINGER you will enjoy…
- 2-3-4-5 stitch capability-provides more stitch variety
- 1,300 stitches per minute-professional speed for faster results
- Fully automatic self-adjusting tension system-keeps stitches balanced and even
- Easy threading diagram-easy threading saves time
- Stitch width adjustment-keep seams strong and prevent bunching on any type of fabric.
Simplicity Deluxe Felting Machine Simplicity 12 Needle Deluxe Felting Machine creates felting with ease. Removable needles & foot pedal allow felting with greater speed and precision. Includes: power supply w/ foot pedal, 2 allen wenches, needle shaft with 12 needles inserted (sz 38 needles), 3 replacement needles, tweezers, lint brush, needle guard, instruction book. So cool!
Simply wait for RaffleCopter to load and enter there!a Rafflecopter giveaway
Be sure to check out all the fabulous sewing projects shared this month for this Holiday Bake Craft Sew series going on all month long!
Customizing a Tote Bag for Mom
This post originally appeared in The Make for Mom Series at The Shaffer Sisters in May 2013.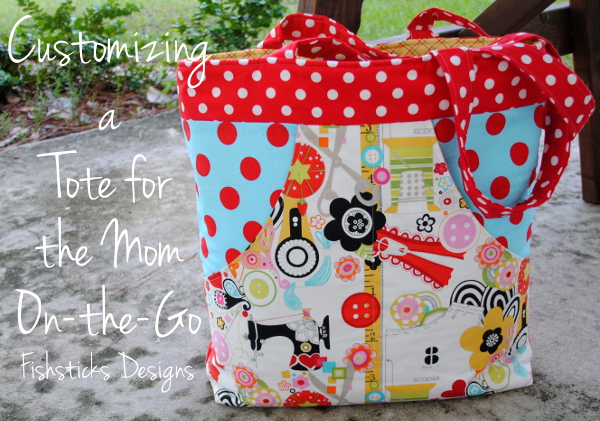 My husband and I have a habit of packing up our kids and heading out on road trips with stops in multiple states to visit friends, family and ministry supporters, and we always try to throw in some sightseeing (homeschooling on the road, right?), too. With so many stops, I need to keep myself organized. I put together this enormous tote bag with tons of pockets just before our last trip which included stops in West Virginia, Tennessee, Washington DC and Virginia. Crazy, right? This bag was such a great help!
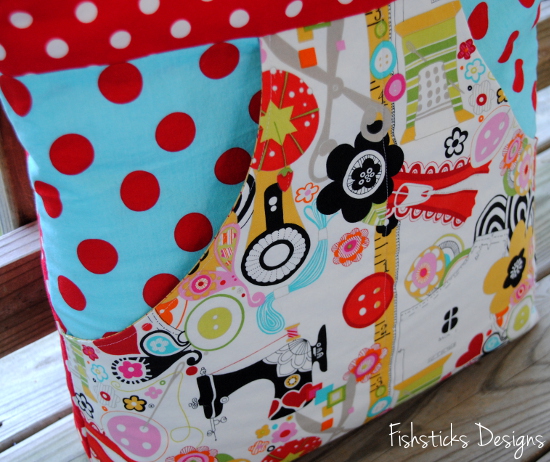 I knew just what I wanted from this bag, so I designed it exactly to my own specifications. It’s sort of huge at 16″ wide by 17″ tall by 4″ deep, but it holds everything that I need it to hold, and it looks pretty doing it!
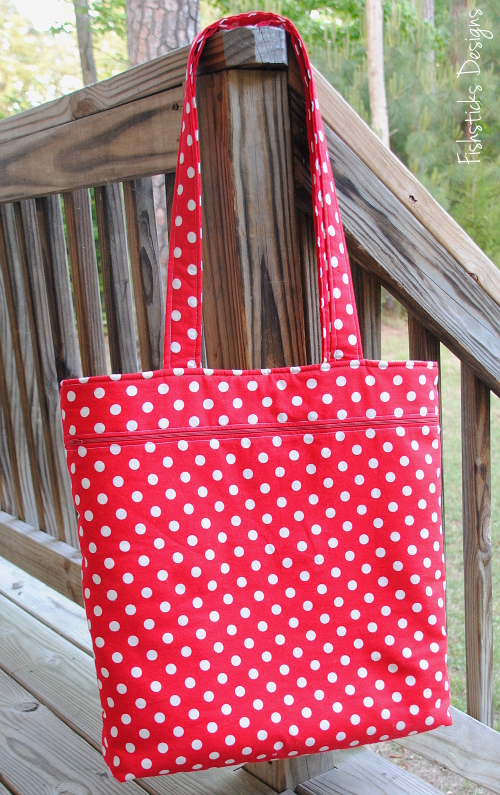 I added decorative pockets to the front and a zippered pocket on the back.
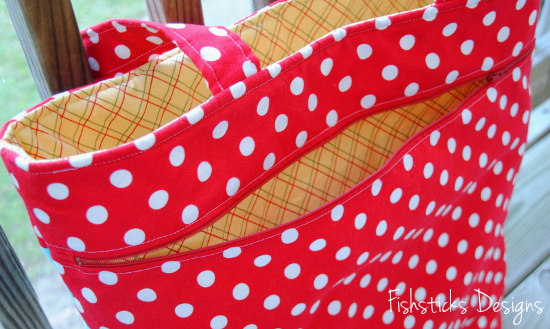 But, what I really want to show you is the inside of the bag.
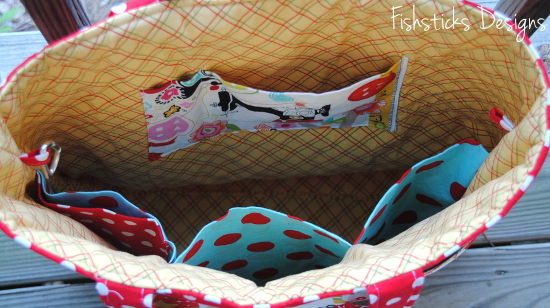 Without inside organization, the size of this bag would make everything disappear. Adding pockets and loops to the inside of any bag, though, is really simple. Once you know how to do it, you can grab your favorite tote bag pattern and customize it perfectly for you!
You’ll want to have your inner bag pieces cut and any interfacing added before starting on these little extras. Have a quilting ruler and a washable or disappearing marker handy. If you’ll be making custom-sized pockets for anything (cell phone, notebook, etc.) then have those ready to be measured, too. I’m using a 1/2″ seam allowance on everything and assuming a 1/2″ seam allowance on your bag pattern.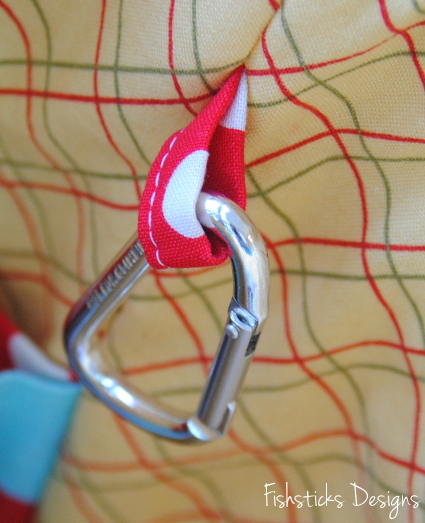 Let’s start with the loops. These little loops are really the most basic thing you can add to a bag, but you’ll be so surprised at what a difference they make! With a bag this big, you simply must have a way to clip in your keys or anything else that you need to be able to access quickly. With a loop or two sewn into the side seams and a carabiner clip, you’re good to go!
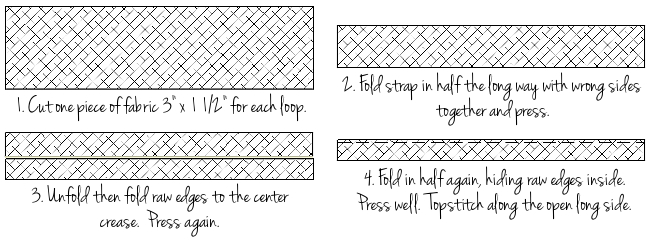 Fold your loop piece over to form a loop, matching up the raw edges. Pin in place as shown and baste it to one side of your unfinished bag inner.
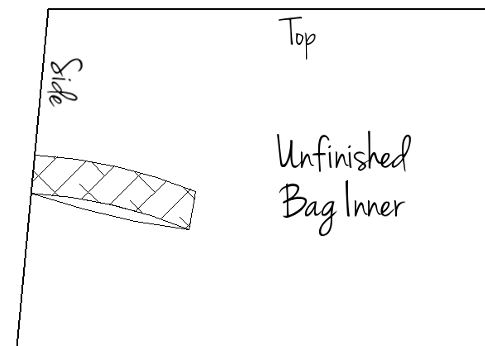 Now, let’s move on to the pockets. I designed this smaller pocket to hold a pen, a pencil and my little notebook.
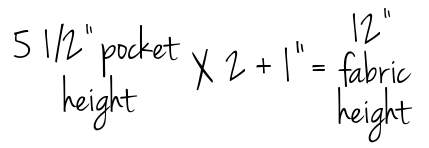
 To make your own custom-sized pocket you have to do a little math, but it’s really simple, I promise! For pens or pencils, a 1″ wide pocket is perfect. I usually make credit card or loyalty card pockets 3 1/2″ wide. (That width works for my I-phone, too.) If you have something specific, like my notebook, measure it across and add 1″ for your pocket width. My notebook is 5 1/2″ wide, so its pocket needs to be 6 1/2″ wide. With me so far? The height of your pocket should at least 3/4 of the height of the things you’re putting in it. That will keep them tucked nicely in place. For a standard pen/pencil/card pocket, I usually go with 4 1/2″ finished height. My notebook is taller, though, so I made this pocket with a finished height of 5 1/2″. Now you should have all your measurements. Here are your formulas: pocket width + pocket width + pocket width + 1″ seam allowance + 1/4″ topstitching allowance = fabric width and pocket height x two + 1″ = fabric height. Just keep in mind that you are limited by the width and height of your bag. Pretty easy, right? Here are my formulas:
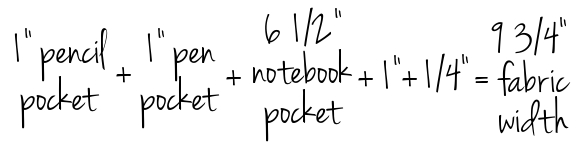
 I’m going to cut my pocket fabric 9 3/4″ wide by 12″ high (or long, I guess). Your pocket width and height may be different, though, based on what you’re putting in it. (If you want to cheat a little, for two pen/pencil pockets and two card pockets, I generally go with 10″ x 10″.) Now that you’ve survived that math, sewing the pocket is super simple. Just fold your pocket piece in half with right sides facing and match up the edges that measure the width of your pocket. (In my case, I’m matching up the 9 3/4″ edges.) Stitch along sides and bottom, leaving a 1 ½” opening in one side for turning.
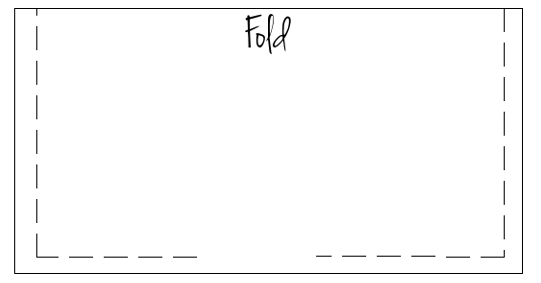 Trim your corners and turn your pocket through the opening. Press it really well. Center your pocket with the folded edge facing the top of the bag on one of your inner bag pieces. You can place it at whatever height you’d like, but I usually go with about 3 ½” to 4″ from the top edge. Topstitch around the sides and bottom 1/8″ from the edge. Once your pocket is sewn onto your bag panel, just use a quilting ruler to measure your pocket widths, then draw lines with your disappearing marker. Stitch down each line, remove the marker and your pockets are done! (A little tip here: stitch from the bottom up to avoid any puckers!)
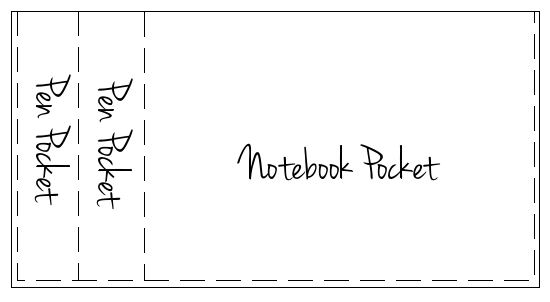 Whew! That wasn’t too hard, right? Ready for one more set of pockets for the other side of your bag?
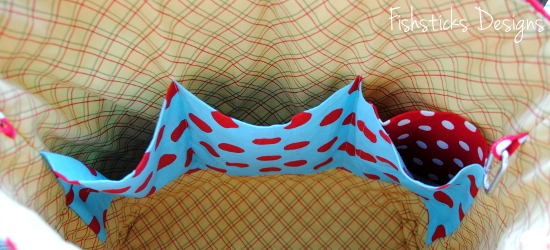 For this set of pockets, you’ll cut your fabric width the same as the width of your bag. You’ll use the same formula that we used above for your fabric height. Since I wasn’t exactly sure of what I’d be putting in these pockets but I wanted them to be pretty roomy, I went with 9″ for my finished height. The width of my bag inner piece was 21″, so I cut my pocket piece 21″ wide by 19″ (9×2+1) high. To sew this pocket, you’ll only need to stitch across the bottom edge because the sides will be tucked inside your bag’s seam allowance. Fold your fabric over with right sides together, the same way you did with the smaller pocket and stitch across the bottom edge.
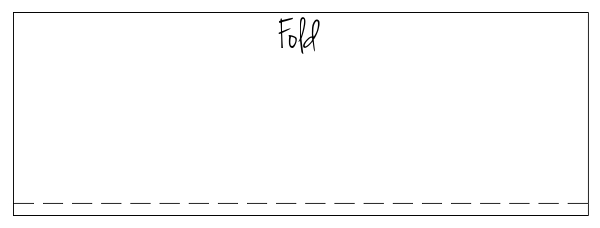 Turn your pocket through one of the short ends and press it well. You can see in the photo above that I tucked another little pocket inside this big pocket. That’s a designated spot for my cell phone. To determine the size of this pocket, simply follow those instructions for the small pocket above. Once you’ve sewn your cell phone pocket, turned and pressed it, you’ll simply topstitch it to the inside of one of your large pockets. Let’s decide on the width of your large pockets first. These pockets can be as wide as narrow as you want them. For mine, I just divided the width of my fabric into thirds. Since my fabric was 21″, that made each pocket about 7″ wide. Using this measurement to be sure my cell phone pocket didn’t end up chopped in half between two pockets, I marked a spot and topstitched my cell phone pocket inside what would become one of the pockets closest to the edge of my bag.
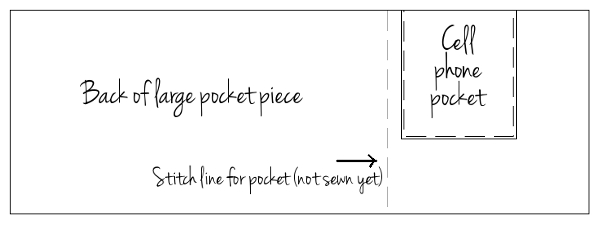 Now you’re ready to sew your large pockets to your bag. Position your pocket piece on your bag inner piece. The positioning with change depending on how tall your bag is, but I placed mine with the top edge 5 1/2″ below the top of the bag. Topstitch the bottom edge at 1/8″. Use a quilting ruler to measure your pocket widths, then draw lines with your disappearing marker. Stitch down each line, remove the marker and these pockets are done, too!
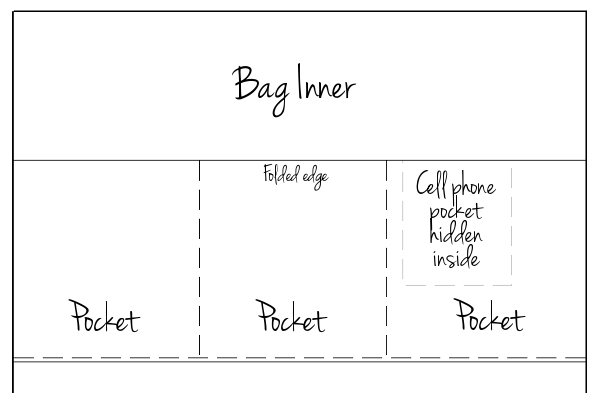 Now all that’s left is to finish your bag according to your pattern instructions. Then fill it up and go!
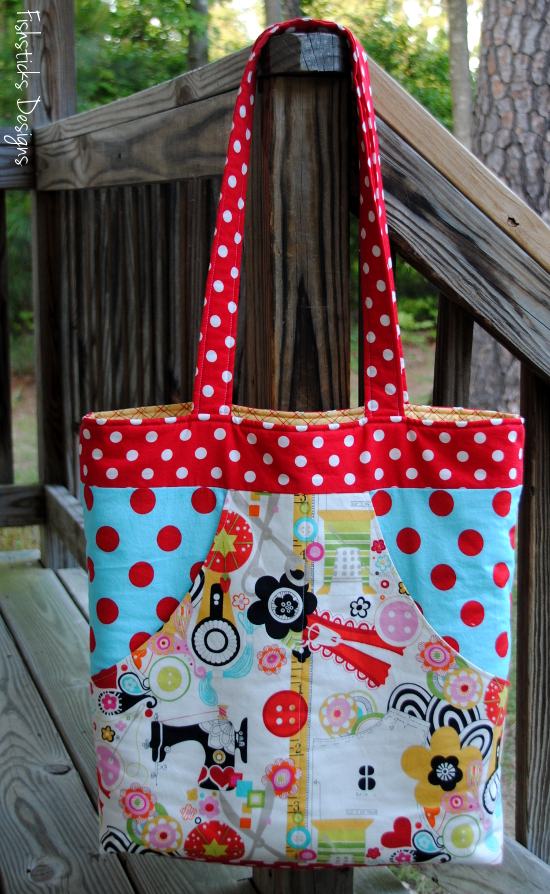
Comfy Pants for the Whole Family at Cutting Corners College!
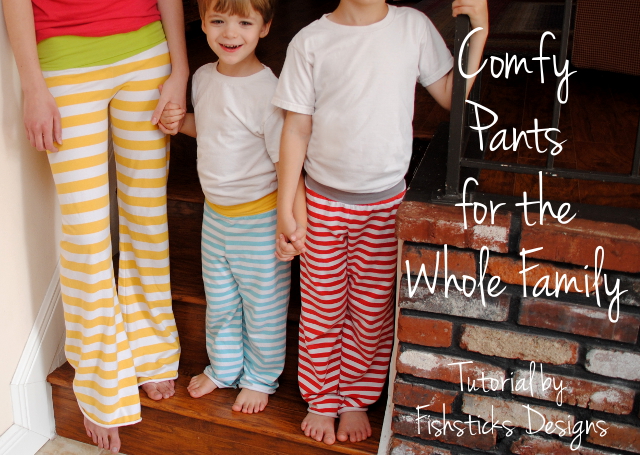 I am so, so excited to be teaching at Riley Blake’s Cutting Corners College today! I would love if you’d click over and check out my tutorial for making comfortable knit pants for your whole family. There are tips for sewing with knit fabrics, instructions for making an elastic-free waistband, and directions for making your own pattern using a good-fitting pair of pants! Just click right here: Comfy Pants for the Whole Family
Legos on the Go at Today’s Creative Blog!
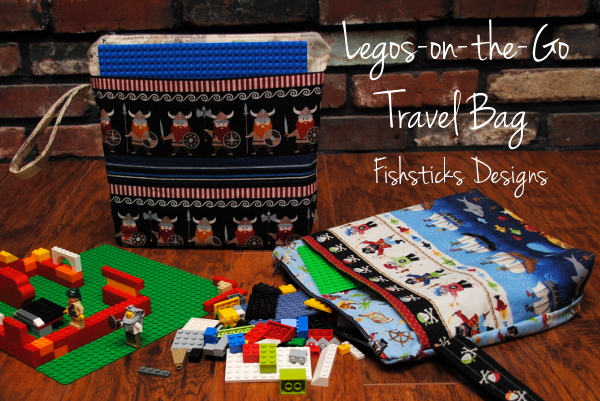 I’m guest posting today in the Celebrate Summer Series at Today’s Creative Blog! Be sure to come check out this quick sewing project that is sure to keep your Lego-loving little ones entertained wherever your summer travels take you: The Legos-on-the-Go Travel Bag Tutorial.
The No-Buttonholes-Needed Drawstring Tutorial
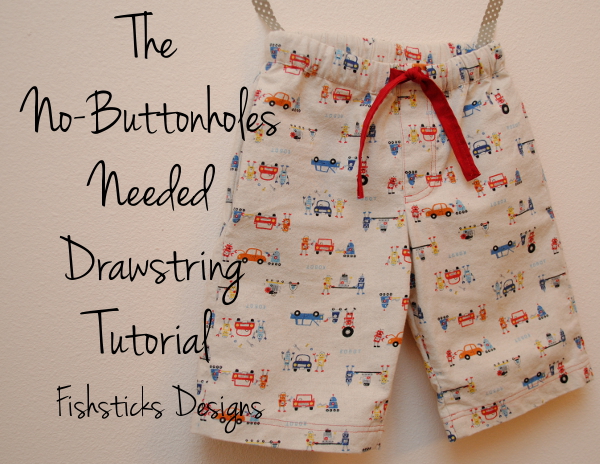 Ready to sew up some cute shorts for your little guys this weekend? As promised, here’s my No-Buttonholes-Needed Drawstring Tutorial so you can give your Mud Puddle Splashers that great boardshort look! (You can really use this tutorial with any pants pattern that uses 1″ elastic pulled into a channel that is created by folding over the top of the waist.) If you missed yesterday’s post, just click here to go back and see my cuties modeling their new shorts.
An important note here before we move on: please be careful to keep your drawstrings safe! On items sold for children here in the US, the law allows for a waist drawstring to extend only 3″ past the opening when the garment is expanded to it’s maximum width: CPSC on Drawstrings in Children’s Clothing. Also, always be sure to secure the drawstring by stitching across it at the back or side seams so that it cannot be pulled out. Finally, don’t tie knots or add toggles to the ends of your drawstring.
In this tutorial, we’ll be creating two separate channels, one on the inside for the elastic and one for the outside for your drawstring. This method does take a bit more time than just putting in a few buttonholes and feeding the elastic and drawstring through the same channel. It’s probably not something that I’d want to do every time, but it’s not difficult at all, and it adds a fun new design element to your shorts. (And, it’s a great option if your machine doesn’t have an automatic buttonholer!) Let’s get started!
To begin, you’re just going to follow the pattern instructions to completely assemble your shorts or pants except for the waistband. If you’re using the Mud Puddle Splashers pattern like I am here, skip the memory creases on the waistline.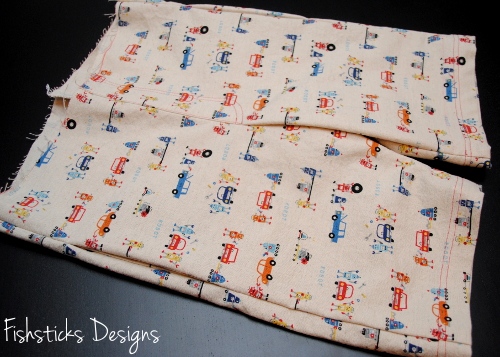 Measure the waist. (A flexible tape measure is probably a better choice for this, but mine has mysteriously disappeared.) The waistband on this pair of shorts measures about 26″ all the way around. Write this measurement down because you’ll use it again later to find the length of your drawstring.
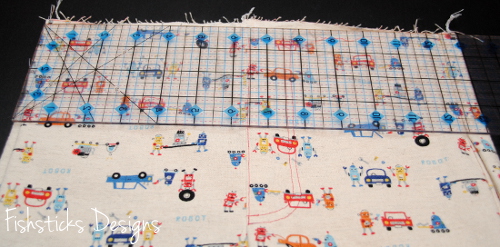 Cut a piece of fabric to make your waistband channel. This piece of fabric should measure 2″ x the measurement you just took of the waist of your pants.
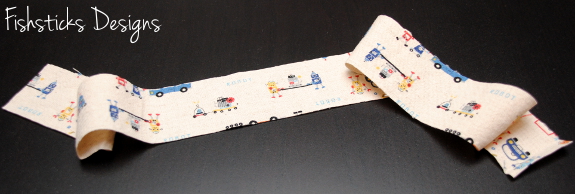 Fold in each short end 1/4″, then 1/4″ again. Press and stitch across to secure.
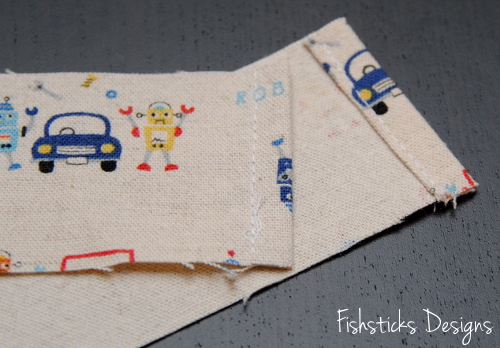 Fold up the bottom edge of the drawstring channel piece 1/4″ to the wrong side and press well all the way across. (Do not sew this down yet.)
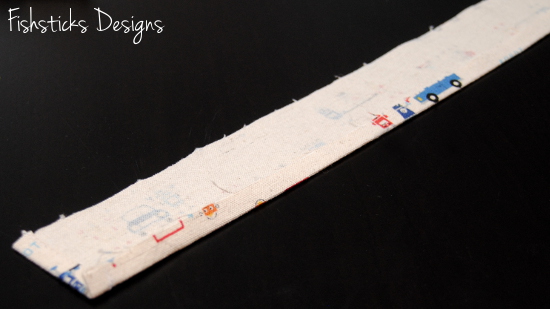 Fold the waistband of the pants down 1/4″ to the wrong side and press well all the way around. (Do not stitch this either.)
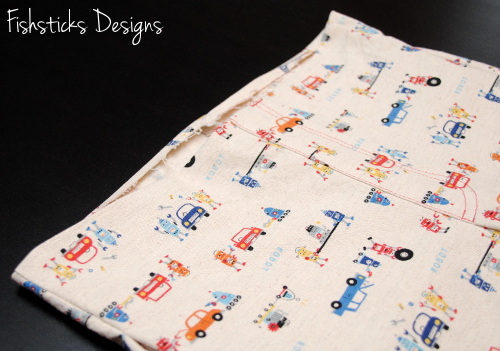 Fold your drawstring channel piece in half the long way and find the center. (I generally just press down at the center quickly with my iron, but you can also mark the center with washable or disappearing marker.) Match the center of the drawstring channel up with the back center seam of the pant. Pin in place here, right sides together, with the folded edges of the drawstring channel and the folded edge of the waistband aligned.
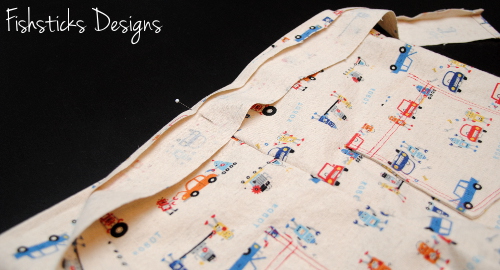 Wrap the drawstring channel around the front of the pants and pin it in place. (You only need a few pins for this step because you’re going to re-pin along the lower raw edge before sewing.) The front ends of the drawstring channel should fall about 1″ apart or 1/2″ from the center front seam of the pants. (Mine are a little further apart because my waistline measurement wasn’t as accurate as it would have been with a flexible tape measure.)
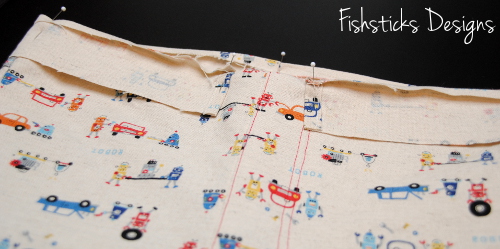 Pin the lower raw edge of the drawstring channel evenly all the way around the pants.
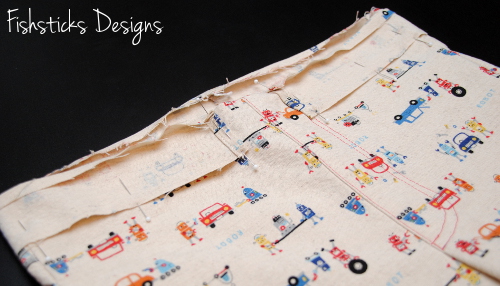 Stitch the lower edge of the drawstring channel in place 3/8″ from the raw edge as shown.
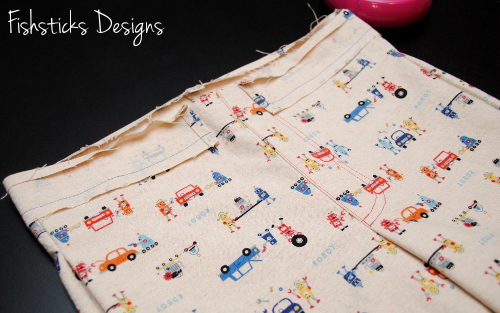 Fold the drawstring channel down away from the top of the waistband and press all the way around.
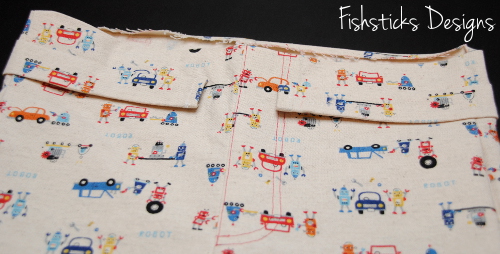 Fold the waistband down inside the pants. Fold the top 1/8″ of the drawstring channel to the inside, as well. This will make the bottom of the inside elastic channel fall slightly lower than the bottom edge of the drawstring channel, in turn making it much easier to catch both edges with one row of stitching. Press the waist really well before moving on.
 If you’re adding a size tag, now is the time to pin it in the back edge of the elastic channel. (I leave this pin in place and just sew over it.)
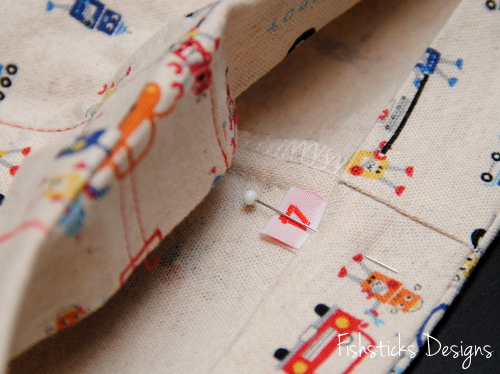 On the outside of the pants, pin the bottom edge of the drawstring channel and the bottom edge of the inside elastic channel in place all the way around. Feel through and make sure the the bottom edge of the elastic channel is falling slightly lower than the bottom edge of the drawstring channel.
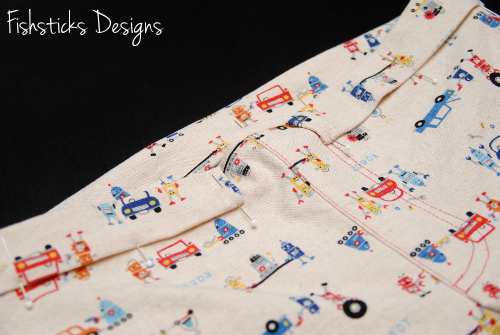 Stitch along the edge of the bottom of the drawstring channel catching the bottom edge of the elastic channel inside. You’ll be leaving the space between the ends of the drawstring channel open for now to insert the elastic. (If you plan to use a drawstring without elastic, you can go ahead and sew all the way across the front of the pants, closing up the elastic channel inside.)
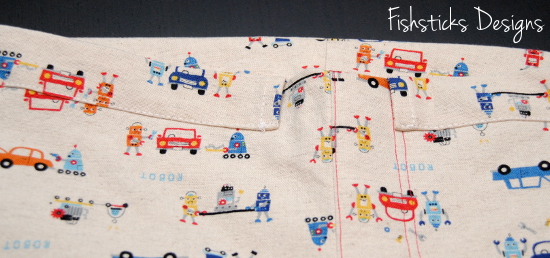 Insert elastic into the elastic channel on the inside of the pants according to the measurements given on your pattern. Sew the opening between the two ends of the drawstring channel shut.
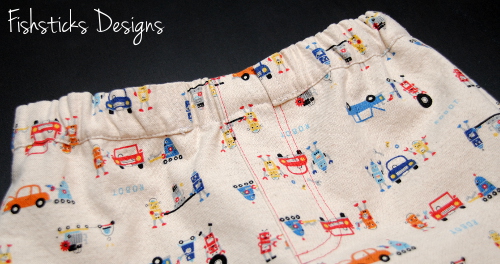 Now you’re ready to make your drawstring. You have a couple of options here. You can make a drawstring that goes all the way around the waistline. If you choose this option, you’ll cut one long length of fabric and finish both ends. In this tutorial, I’m going to show you how to make a drawstring with a small amount of elastic at the back. This will make it so that your child can pull the shorts on and off without having to untie them every time. (For larger sizes, you may have to increase the length of the elastic at the back so that pulling on and off is easy.)
The width of your drawstring pieces is going to be 1 3/4″. There’s a simple formula to figure out the length that you need your fabric. Feel free to skip the explanation and just use the formula below. Start with the measurement that you used for the length of your drawstring channel (the waist circumference)(26″, in my case), add 6″ for safe drawstring length, and add 1″ for 1/2″ seam allowance at each end. For a drawstring without elastic, this is the measurement that you’ll use. In my case, that would be 26″+6″+1″=33″. To create our drawstring with it’s elastic section, we’re going to divide that measurement in half for our two drawstring pieces (33″/2=16 1/2″). The elastic piece is going to add 2″ total, 1″ on each side, so I’m going to subtract another inch from that measurement (16 1/2″ – 1″ = 15 1/2″). Still with me?
THE FORMULA: Add 7″ to the waist circumference. Divide that measurement in half. Subtract 1″.
Cut two pieces 1 3/4″ x this measurement.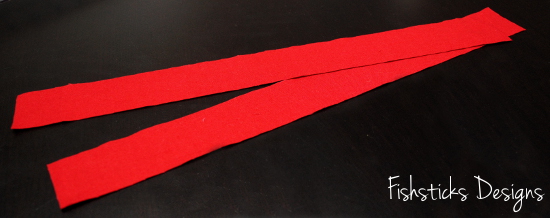 On both drawstring pieces, fold each long edge 1/4″ in to the wrong side and press well.
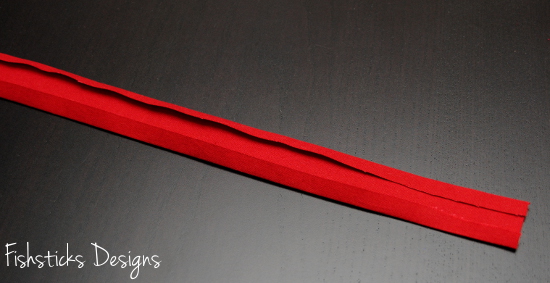 Fold one short end of each piece over so that the right sides are together. Pin and stitch across the folded end of each drawstring piece 1/2″ from the raw edge.
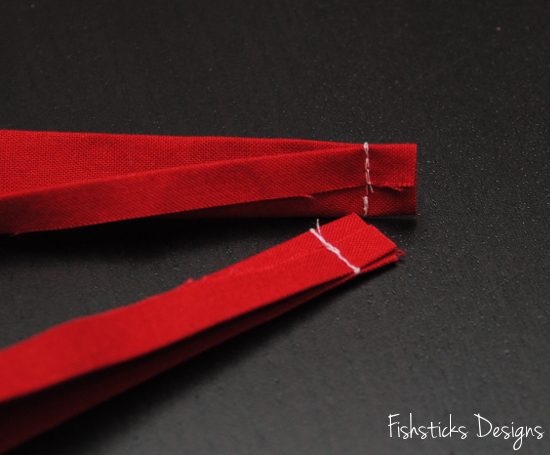 Turn the sewn ends so that the wrong sides are together.
 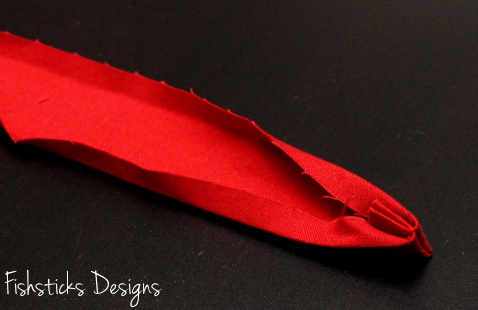 Tuck the raw edges neatly inside and press all the way up. Pin and topstitch the open long edge closed on both drawstring pieces.
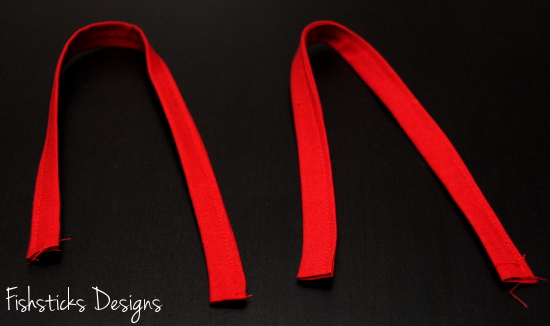 Cut one piece of 1″ elastic 4″ long.
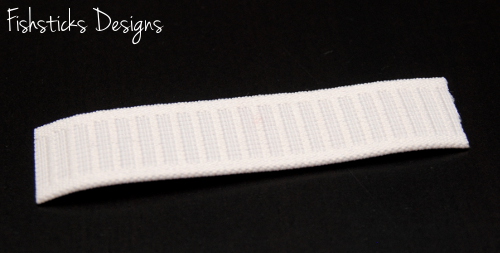 Overlap the raw edges of each drawstring piece 1″ on opposite sides of the elastic. Stitch in place.
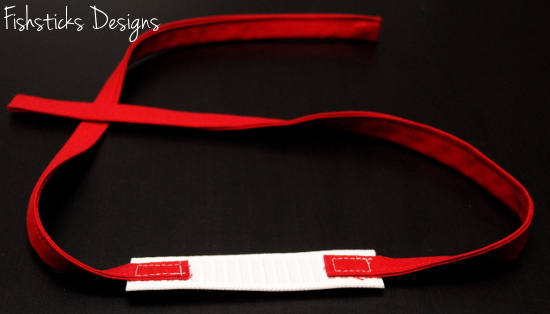 Pull the drawstring through the drawstring channel. Center the elastic piece at the back of the pants.
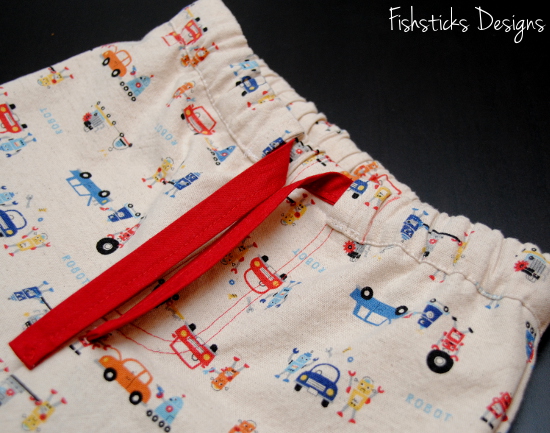 Stitch the drawstring in place at the back seam of the pants to keep it safely inside its channel.
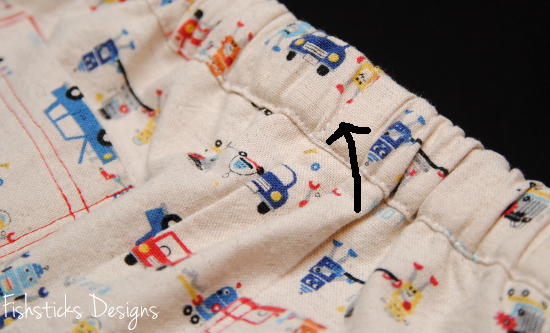 Tie up the drawstring, and you’re done!
 If you use this tutorial, I’d love to see! Feel free to add a link in the comments or add your picture to the Fishsticks Designs Flickr group!
The Bibs in All Sizes Tutorial
 I mentioned that I had a Thank-You gift for all of the hard work that you guys put into sewing bibs for last month’s Dinner for Two project, and here it is!
 I’ve sized the Big Kid Snap Bib down to Infant and Toddler sizes and put all the sizes (even the Grown-Up Bib) into one pdf file! I even added the Serged in Seconds Tutorial. Bibs in all sizes, all in one place! What more could you ask?
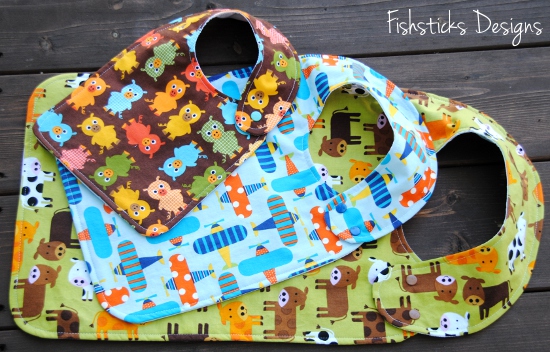 Find the pattern download right here: The Bibs in All Sizes Pattern.


