Sewing/Crafts
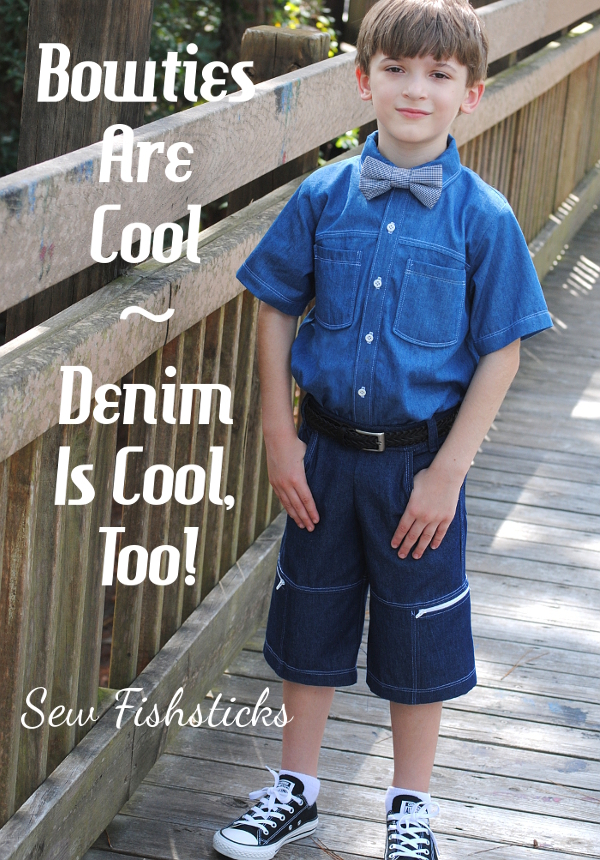
Bowties are Cool ~ Denim is Cool, Too!
 I know – Denim Week at PR&P is over! I’m running behind. I spent quite a bit of last week working on upcoming new patterns and Quilt Market samples, and then my site was down unexpectedly for a little while. I am happy to report that I did finish up Jamie’s outfit, though, and he got the bowtie that he wanted!
We’re sort of big Doctor Who fans around here. The 11th Doctor is my personal favorite … “I will always remember when the Doctor was me.” I love that Jamie thinks bowties are cool. For the record, though, I asked him which Doctor was his favorite. “David Tennant,” he said. I tried to convince him that surely he was mistaken, “But, Matt Smith wore the bowtie!” “Well, David Tennant is my favorite, but I really like Matt Smith’s bowtie!”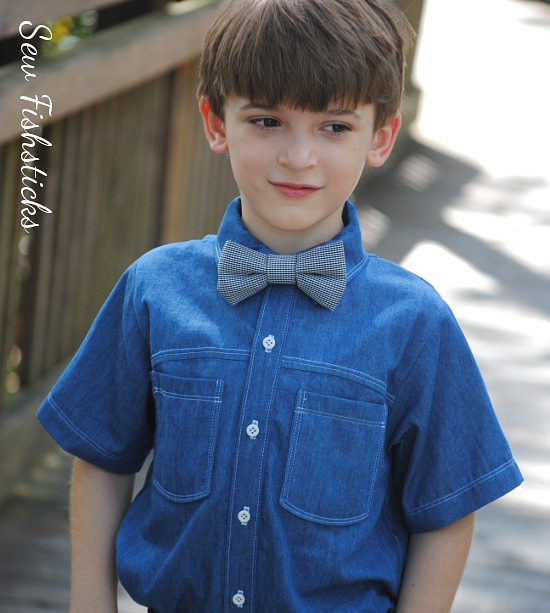 Since I’m still sewing along with the Project Run & Play challenges, and last week was the Denim Challenge, Jamie got a whole denim outfit. I did a quick Pinterest search when I was first starting on this outfit, and I found tons of denim shirts with jeans … even a few with bowties! That was great encouragement to go with my plan of a denim button-down top with jean shorts.
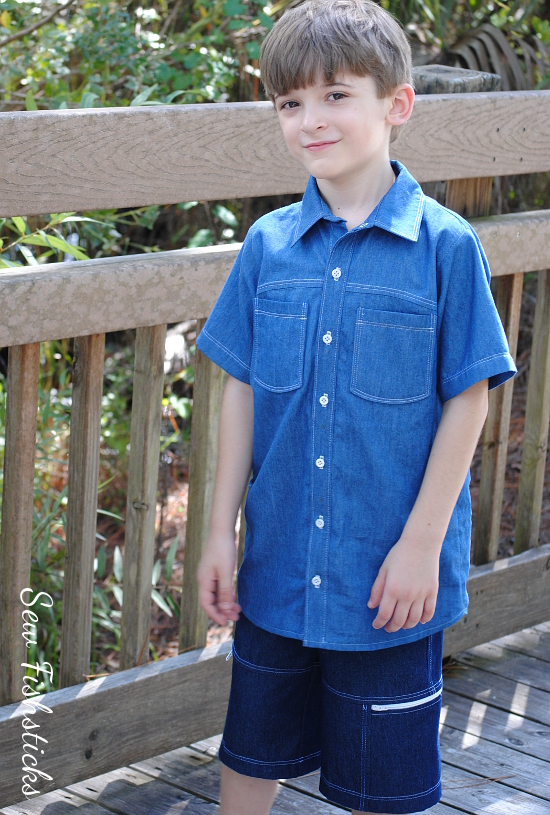 For the top, I started again with my Everyday Camp Shirt. This time I added a high curved yoke and pockets with curved bottoms on the front. I narrowed the collar like I did with Charlie’s shirt last week, and put in that same collar stand, too. I cut the button placket separately to give it more definition, and added a curved yoke on the back. I also gave the top a shirt-tail hem.
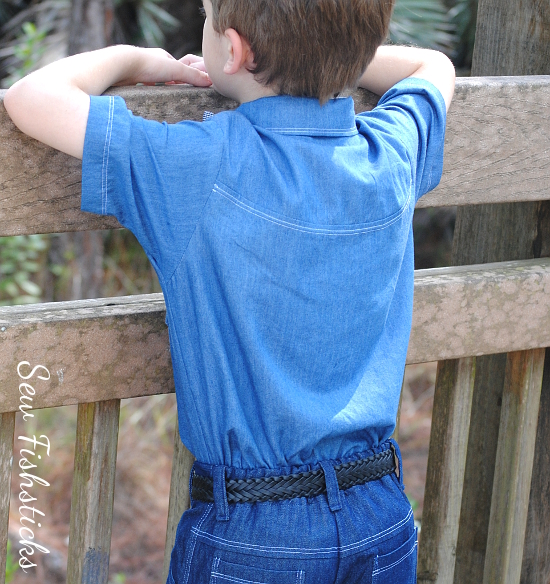 This button-down has a ton of topstitching. Topstitching seems to be my personal theme for this PR&P season!
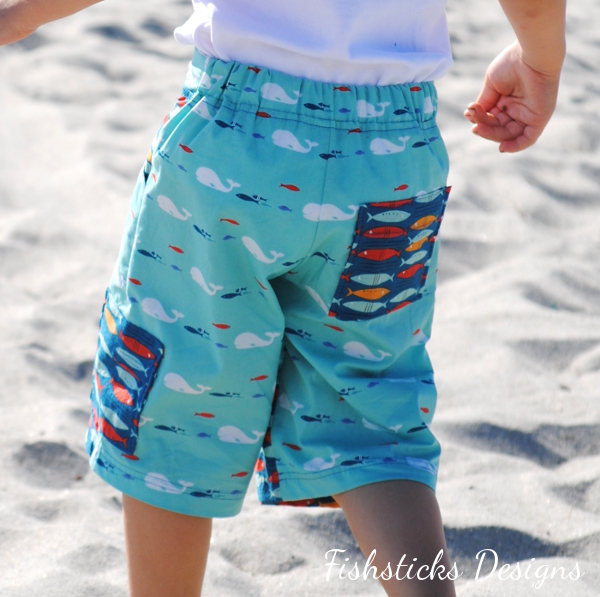
 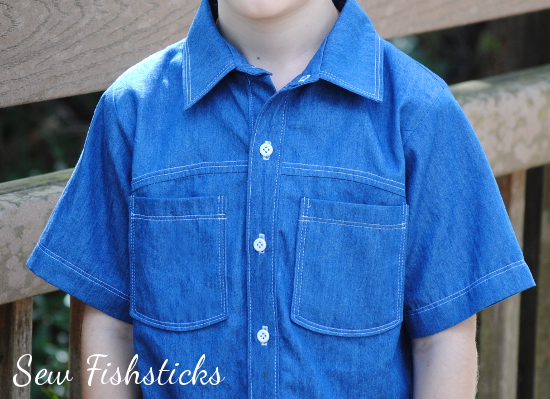 Because my sweet Australian followers so kindly asked me to go ahead with doing a tutorial for that side zipper-pocket on the Sand & Sidewalk Boardshorts, I used that pattern again, primarily because I wanted to take photos of the pocket process, but also because I really love this pattern! I added the belt loops this time, but skipped the extra topstitching on the front pockets. On the back, I added a curved yoke to mimic those on the shirt, and I used those same curved-bottom pockets. I really like all the curves in this outfit!
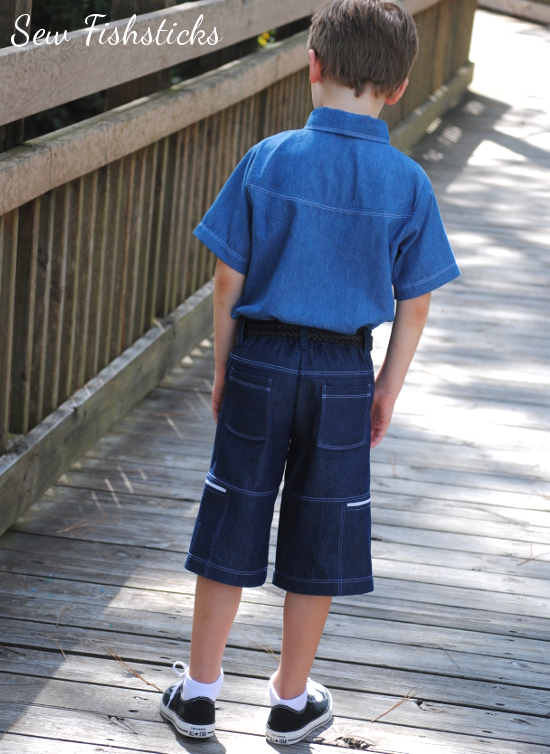 I have all the photos done, so hopefully, I’ll have that pocket tutorial ready for you in the next few days!
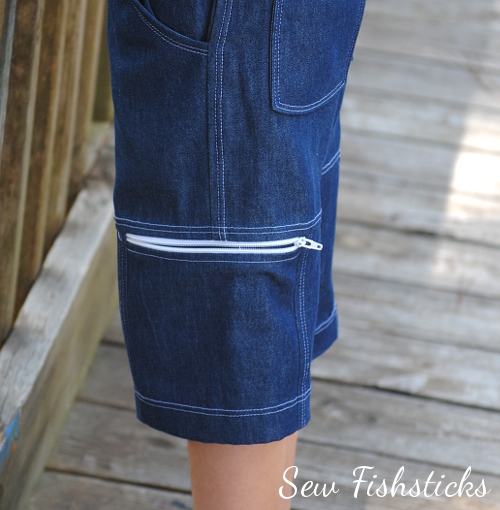 Of course, this outfit works really well without the bowtie, too. And, I think that it’ll be worn far more often this way than with the tie … maybe? Hmmm … I suppose I’ll have to wait and see what Jamie decides!
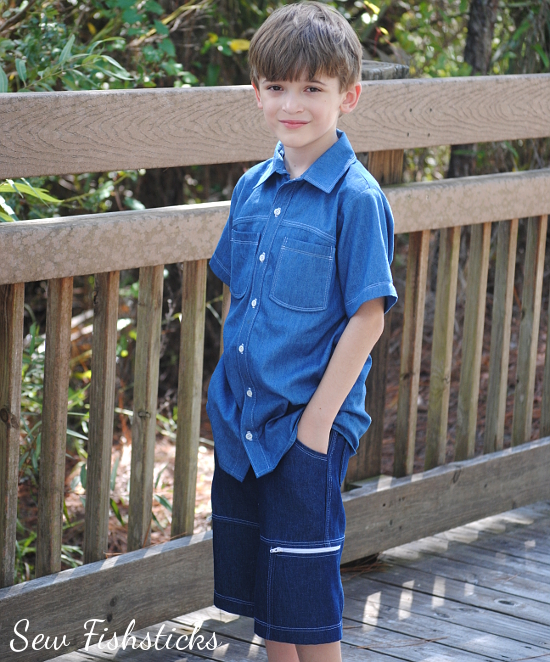 You may be able to tell from my pictures that Jamie is almost always very serious and thoughtful. Getting him to smile for pictures is nearly impossible! (Isn’t it cool how children from the same family can be so different?)
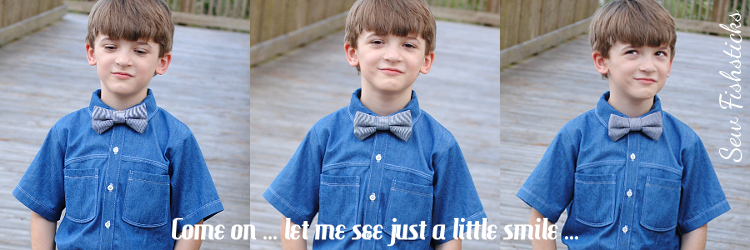 On to my signature look. Hopefully, I’ll have that one done and posted before the week is up!
Fabric in the top is from Joann fabrics.
Fabric in the shorts is from Robert Kaufman Fabrics.
The bowtie fabric and the buttons on the shirt are upcycled from thrifted men’s tops. (The buttons are from one of the shirts that I used for last week’s look!)
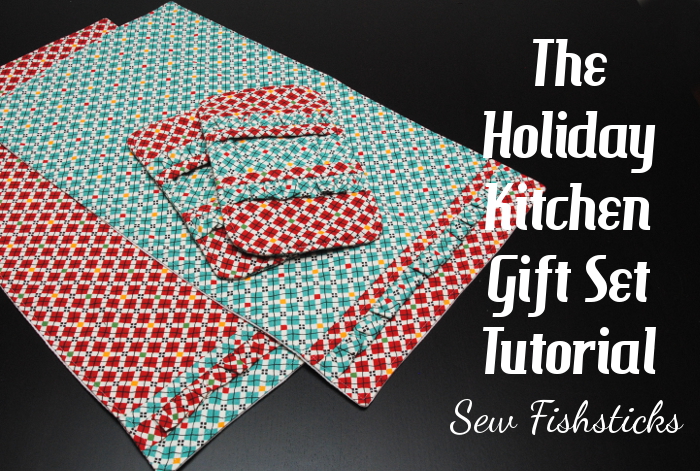
The Holiday Kitchen Gift Set Tutorial
 Thanksgiving and Christmas are right around the corner! I know, I know, I’m not sure that I’m ready to hear that either, but I love making handmade gifts, and every year I think if I just get started sooner, I won’t be sewing until 1 a.m. on December 25th! Maybe I’ll actually start early this year? At least I can help you start early! This tutorial is one that I shared at Skip to My Lou last year for the Holiday Bake, Craft and Sew-along, but I just finished putting the whole thing together for you in PDF form to make it easy to download, print and sew!
To download the tutorial, just click here: Holiday Kitchen Gift Set. Be sure to save the file to your computer before you print the pattern.
In case you prefer to read the tutorial here on my blog, here it is for you:
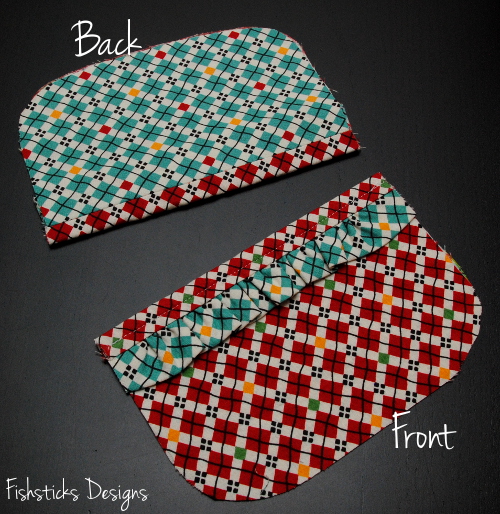
Are you looking for the perfect thank-you gift for all of those holiday party hostesses? The Kitchen Gift Set might be just what you need! The set includes fold-over, oven-mitt potholders (my favorite kind) and matching dishtowels.
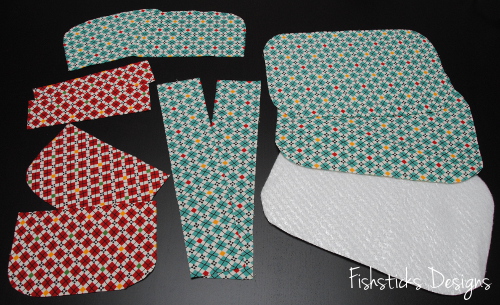
You’ll be able to get two matching potholders and two coordinating dish towels from one yard each of two coordinating cotton prints. You’ll also need 1/4 yard of Insul-Bright or another insulating fleece for the potholders and 1 yard of absorbent cotton fabric for the backing of the dishtowels (diaper fabric, waffle weave, pique, huck toweling, etc.)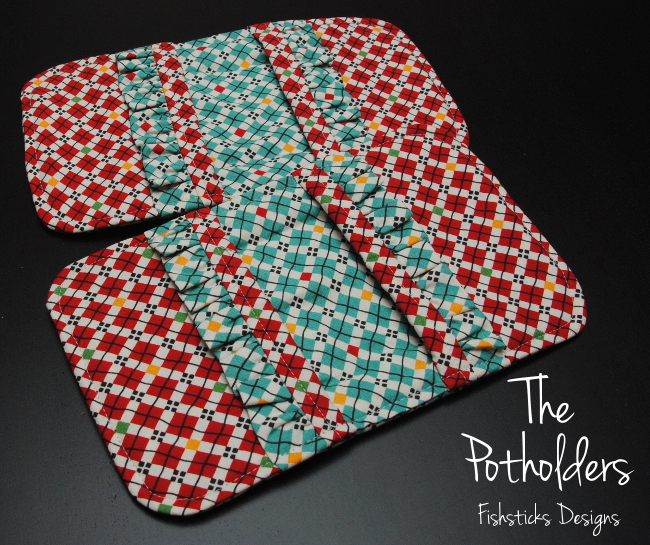 Let’s start with the potholders! You’ll need the pattern pieces found here: Potholder Pattern Pieces. (Be sure to print that “actual size” and check the measurement of the 2 1/2″ square.) Cut out all of your pieces. For each potholder, you’ll cut 2 pocket pieces of Fabric A, 2 pocket pieces of Fabric B, 2 base pieces of Fabric B, 2 base pieces of Insul-Bright, 2 trim pieces – 7″ x 2″, and 2 ruffle pieces – 12″ x 2 1/2″.
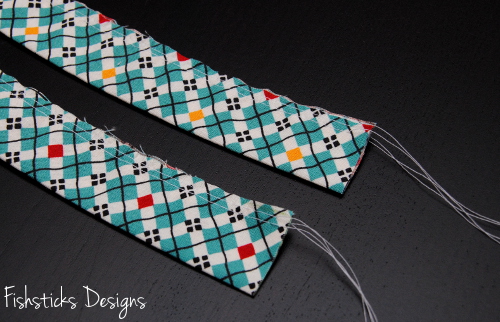
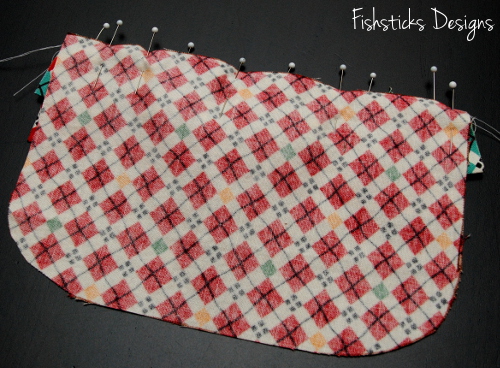
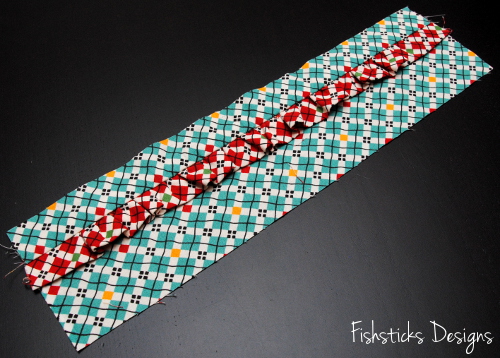
 Fold each of your ruffle pieces over with the wrong sides together and match up the long edges. Press well.
 Sew two rows of basting stitches (the longest stitching your machine allows) along the long raw edges — one at 1/8” and one at 1/4”—leaving the threads on each end 2 to 3 inches long.
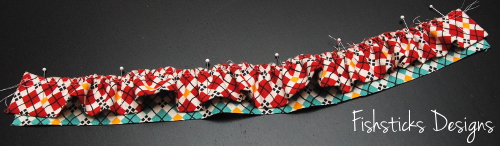
 Pull the bobbin threads from each end to gather each ruffle until it is the same length as the trim piece.
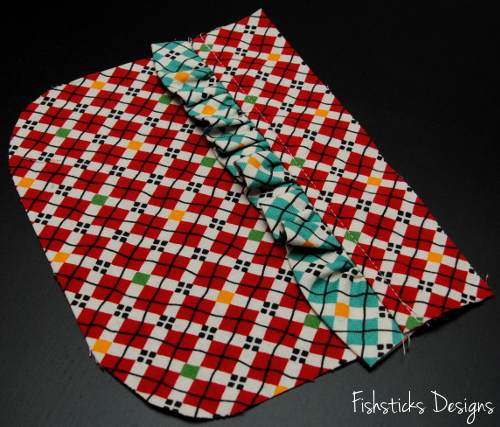
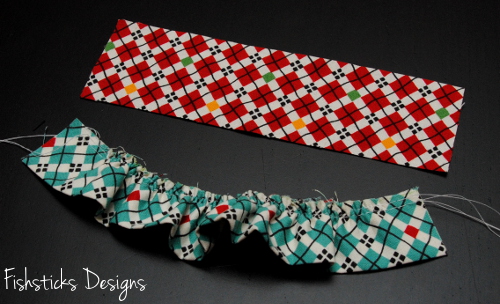 Set one ruffle aside. Pin the gathered edge of the remaining ruffle to the right side of one trim piece along one of the long edges. Check to make sure that your gathers are evenly divided. (You can baste here if you’d like.)
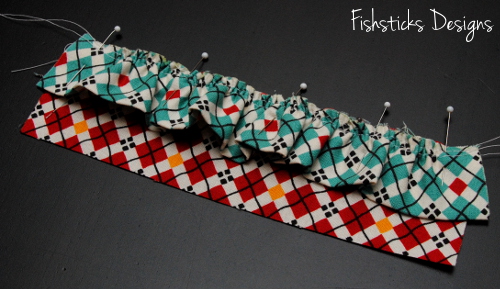 Place one of the Fabric A pocket pieces on top so that the right sides of the trim piece and the pocket piece are together and the ruffle is sandwiched between. Line up the edges as shown and pin in place.
 Sew the pinned edge.
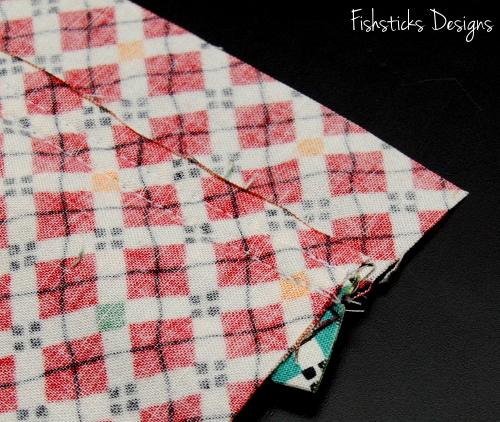
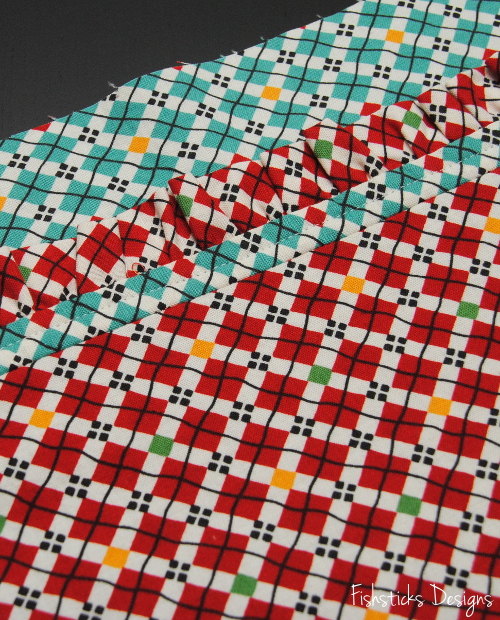
 Flip the pieces to the right side and press the ruffle towards the curved edge of the pocket piece while pressing the seam allowance in the opposite direction. Topstitch 1/4″ from the top edge of the ruffle.
 If you find that you have small spots on each side where the ruffle sticks out. Just flip the pocket piece over and trim those off.
 Pin the long edge of one Fabric B pocket piece to the remaining raw edge of the trim piece with the right sides together. Sew the pinned edge.
 Flip the pieces apart and press the seam allowance toward the ruffle.
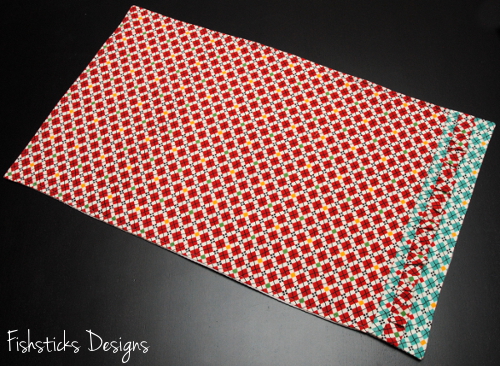
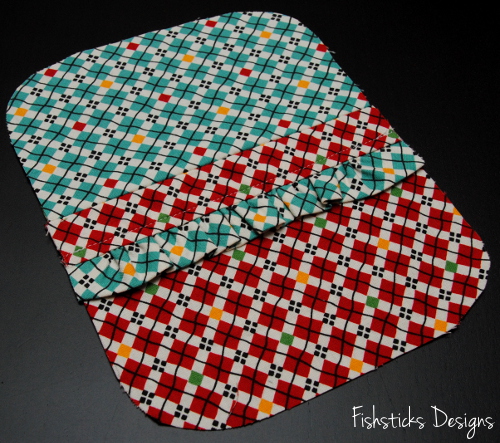 Fold the pocket over so that the wrong sides are together and the curved edges are all lined up. Press well. Follow the same steps to assemble the remaining pocket.
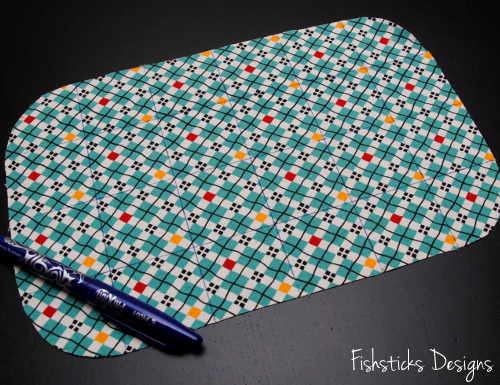
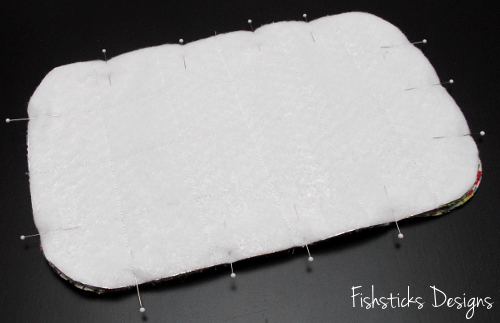
 Set your pocket pieces aside for now. Take one of your base pieces and draw a quilting grid on the right side of it. I used one of my Frixion pens to do this, but you can use a washable or disappearing marker, as well. I placed my lines 1 3/4″ apart, starting from the center in each direction.
 Pin this piece on top of the two layers of Insul-Bright.
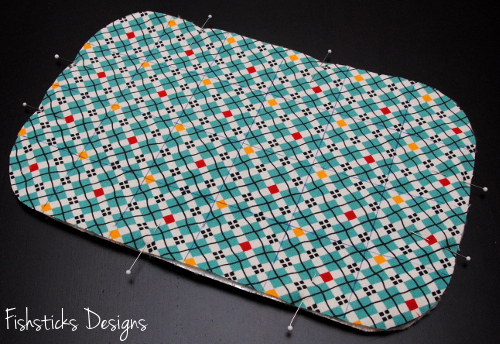 Stitch down each line, starting with the center line and working out. (If your machine has a walking foot, use it for this step and the remaining steps to help keep your fabrics from slipping while you’re sewing.)
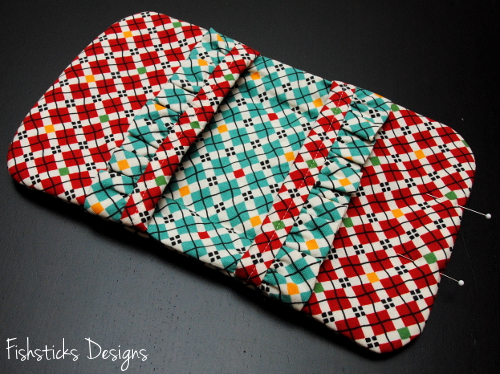
 Place your finished pocket pieces on top of the remaining base piece, lining up the curved edges as shown.
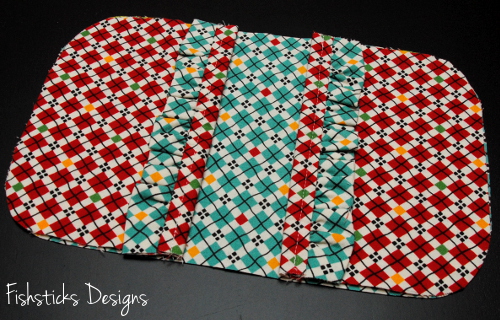 Flip the quilted base piece/Insul-bright over on top of these so that the right sides are together and the pocket pieces are sandwiched between. Pin in place.
 Stitch all the way around, leaving an opening for turning in one short end. Clip or trim the curves before turning right side out.
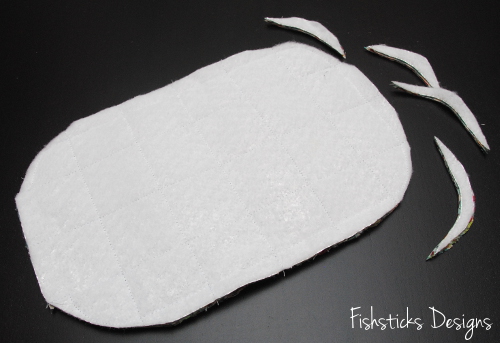 Turn through the opening and push the corners out neatly. Tuck the raw edges of the opening in and press well. Pin the opening closed.
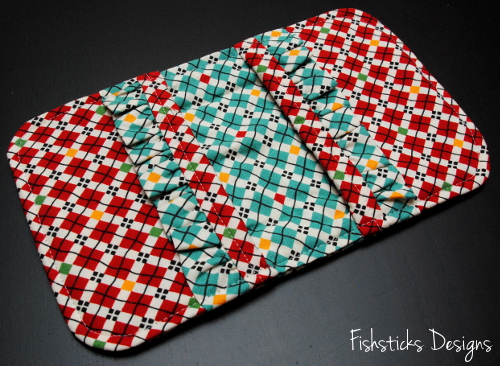
 Topstitch all the way around at 1/4″. (In addition to using your walking foot for this step, a denim needle will help to prevent skipped stitches when going over the thick areas.) Your first potholder is done! Now you just need to make it a mate.
 Let’s move on to the dish towels!
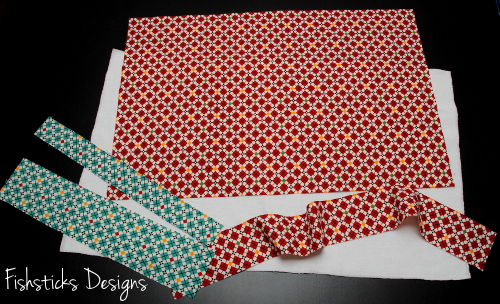
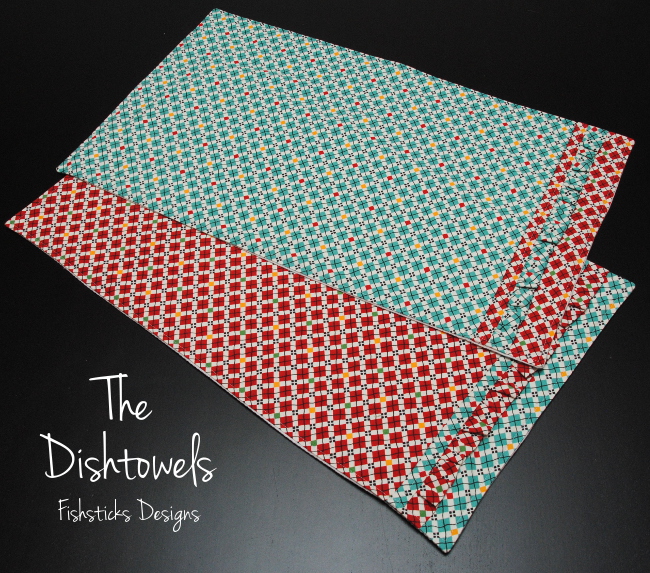 Start by cutting out your pieces. You’ll need a layer or two of absorbent fabric. (I’m using two layers of diaper cloth from Joanns. Be sure to wash and dry all of your fabrics before getting started!) For each dishtowel, you’ll cut these pieces: 1 or 2 layers of absorbent fabric – 23 1/4″ x 14″ (if you cut two layers, you’ll treat them as one from here on), 1 Fabric A main piece – 21″ x 14″, 1 Fabric A ruffle piece – 22″ x 2 1/2″, 1 Fabric B large trim piece – 3″ x 14″ and 1 Fabric B small trim piece – 1 1/2″ X 14″.
 Follow the same steps that you used for the potholders above to create your ruffle.
 Pin the gathered edge along one long edge of the smaller trim piece on the right side.
 Place the larger trim piece on top so that the right sides are together and the ruffle is sandwiched between. Line up one of the long raw edges of the larger trim piece with the pinned edges of the ruffle and smaller trim piece and pin in place. Sew along the pinned edge.
 Flip the pieces over to the right sides. Press the ruffle towards the larger trim piece with the seam allowance in the opposite direction, but do not topstitch yet.
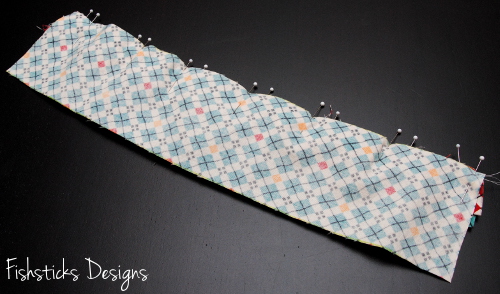
 Line up the remaining long raw edge of the smaller trim piece along one short edge of the main towel piece with the right sides together. Pin and sew.
 Flip the pieces apart and turn to the wrong side. Press this seam allowance over the seam allowance from the ruffle.
 Flip back over to the right side and topstitch 1/4″ from top of the ruffle.
 Place the finished top face down on your absorbent layers so that the right sides are facing. Pin.
 Stitch all the way around, leaving a 4″ opening in one side for turning. Clip the corners.
 Turn the towel through the opening. Push the corners out neatly and tuck the raw edges of the opening inside. Press well and topstitch all the way around at 1/4″. Your dish towel is done! Make a second one if you’d like, and your Kitchen Gift Set will be ready to gift to your favorite hostess!
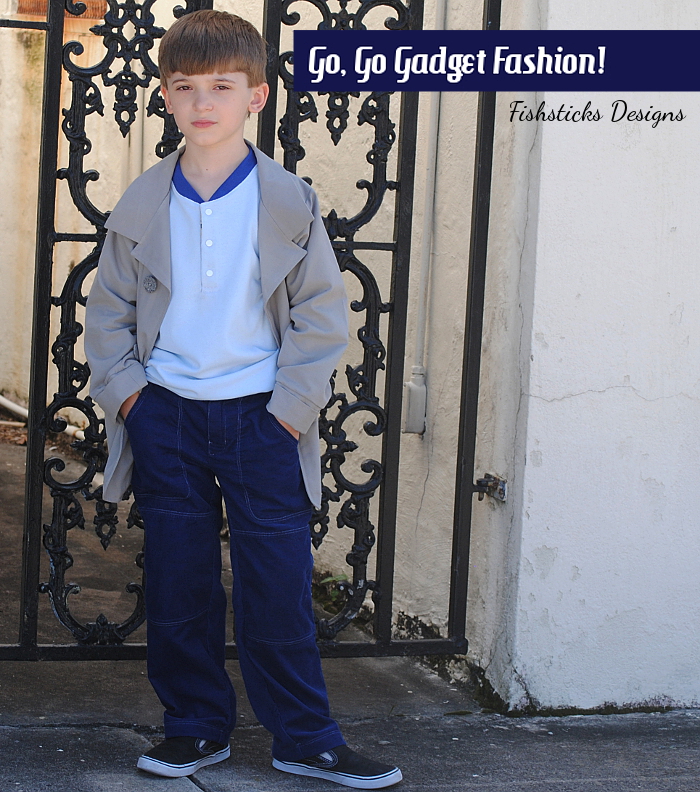
PR&P Week One: Go, Go Gadget Fashion!
 I am so excited to be competing in Season 10 of Project Run & Play! To read more about PR&P and find out how you can join in the sew-along, just click here. To see all of this week’s designer looks and vote for your favorite, click right here! Read on for tons of pictures and more details about my first week look.
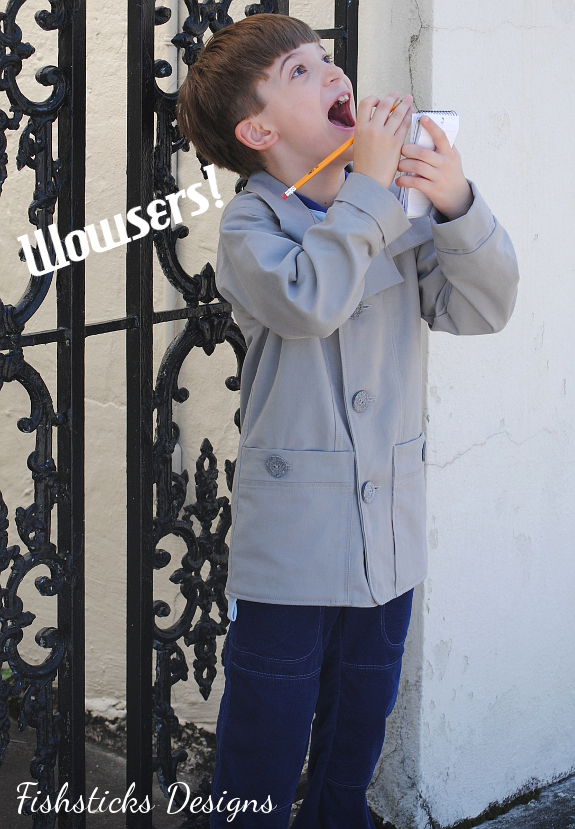
As a child of the 1980s, I was really excited about the Project Run & Play theme for Week 1 – 80s Cartoon-Inspired Looks! I was 10 in 1980, and I graduated high school in 1988, so I have fond memories of so many 80s cartoons! The big problem came when I had to pick just one! What a hard choice! I knew that I wanted to make this an everyday outfit, and I didn’t want the outfit to look costume-y or really feature any specific characters. With those things in mind, I narrowed it down to a few choices. From there, since I was sewing for my seven-year-old, I enlisted his help to make the final decision. Jamie’s choice? Inspector Gadget!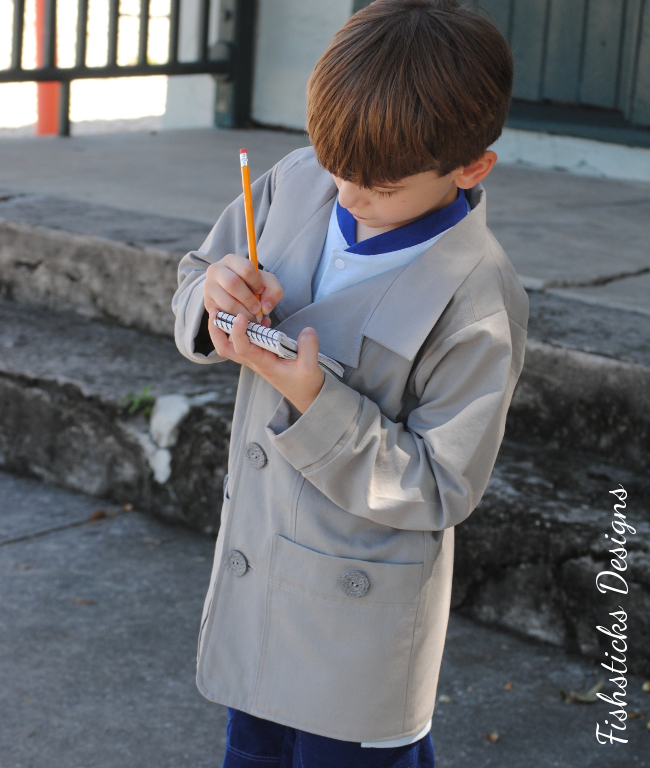 My Go, Go Gadget Fashion ensemble is an everyday outfit inspired by Gadget’s own classic inspector’s wardrobe, but with hidden accents that represent his robotic gadgets! I thoroughly enjoyed designing and sewing this outfit, and Jamie loves it! (His favorite part is the jacket. He didn’t want to take it off, and it was in the 80s here in Florida on the day of our photo shoot!)
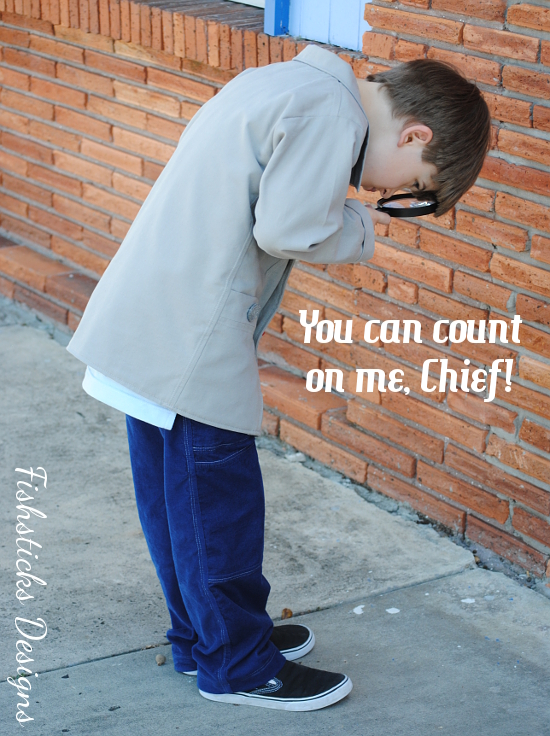
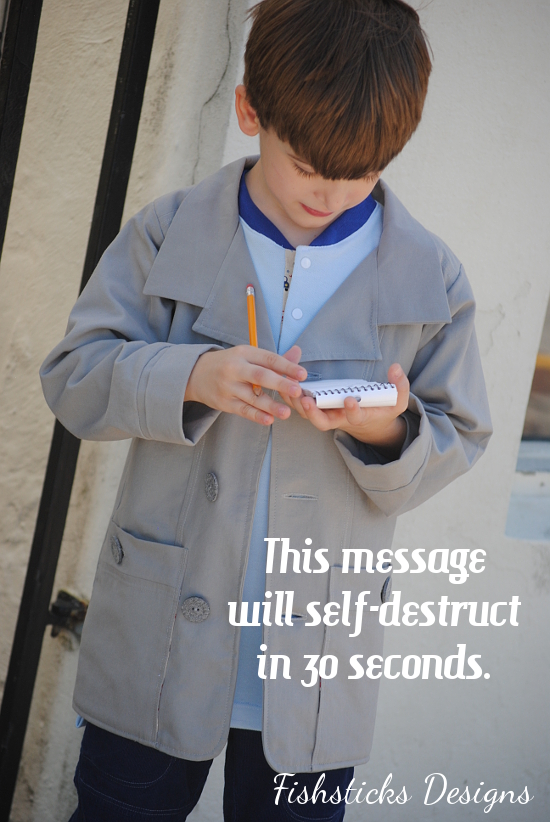
The set is made up of three pieces – jacket, top and pants. I designed the jacket with a trench coat style fit, but with a shorter length to make it more practical for my little guy.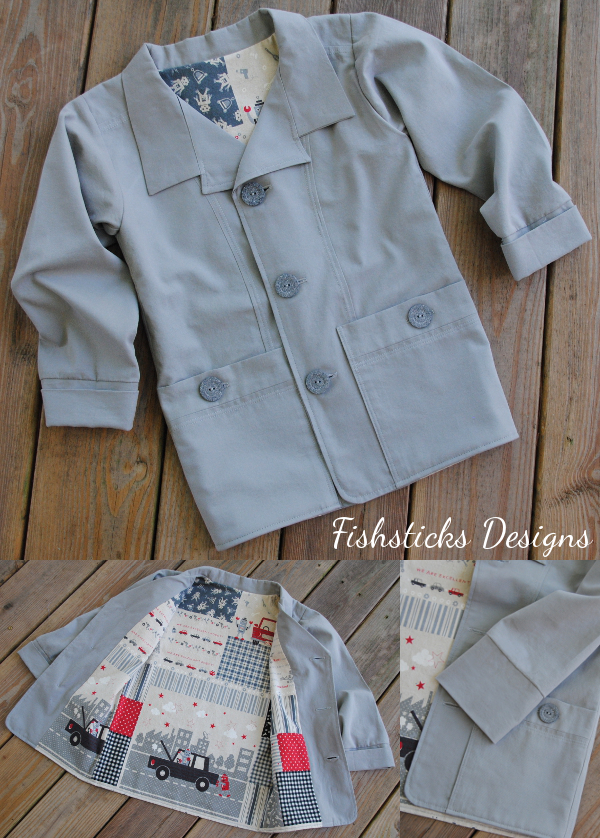 The jacket outer is sewn with a soft gray cotton twill, and it’s fully lined with a cotton and linen blend robot print. The cuffs fold down for extra growing room.
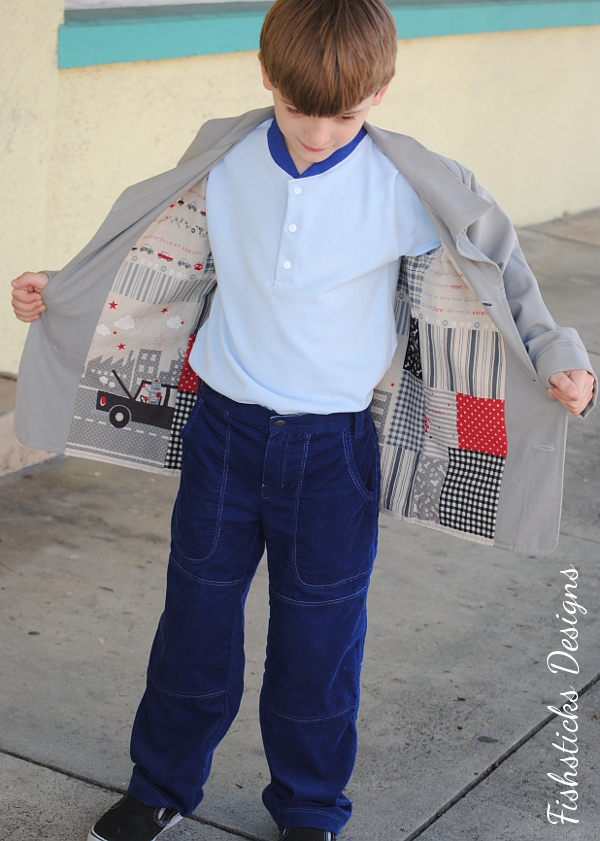 The front plackets feature a gentle curve at the top, and they’re finished with rows of twin topstitching in matching thread. Actually, there is a lot of topstitching in this jacket — in the pants, too! I love the detail that it adds. I’ve said before that I think topstitching is like ruffles for boys.
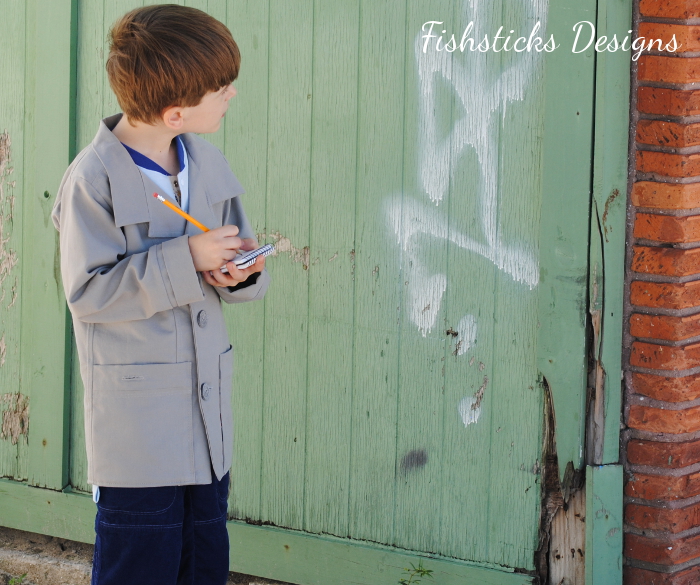 The two front pockets are big enough to hold Inspector Jamie’s notepad, pencil, magnifying glass and anything else that he might need for his investigative work! They also button up to keep everything safe inside.
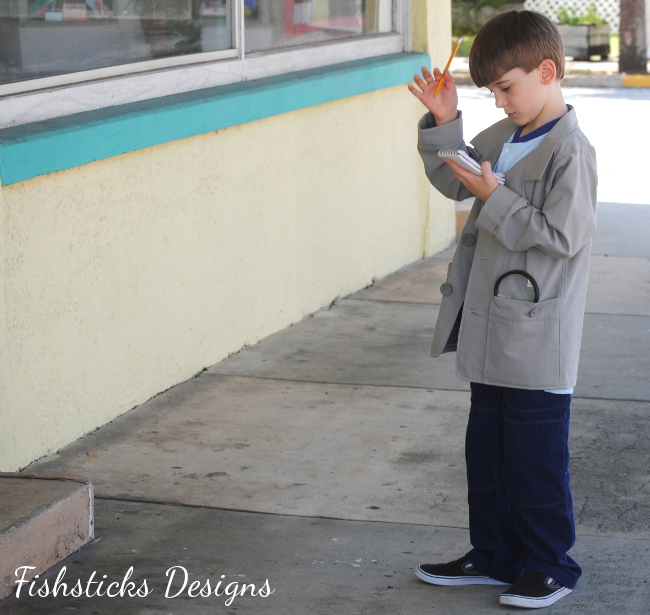 The 1 1/8″ buttons have a really cool mottled gray coloring, and they’re eco-friendly because they’re made of recycled cotton.
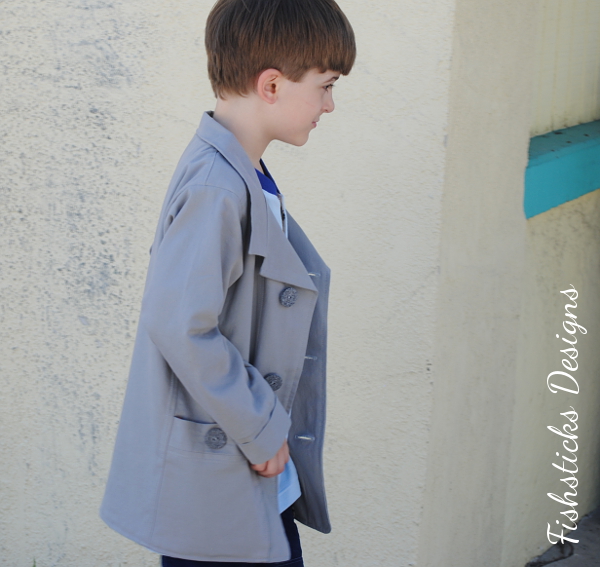 The Henley-style top is constructed of light blue cotton pique fabric. Inspector Gadget’s shirt is white, but Inspector Jamie is tough on white clothes, and he lives in a house with well water that doesn’t get along well with white for very long. I love the look of the light blue mixed with the gray of the jacket and the dark blue of the pants.
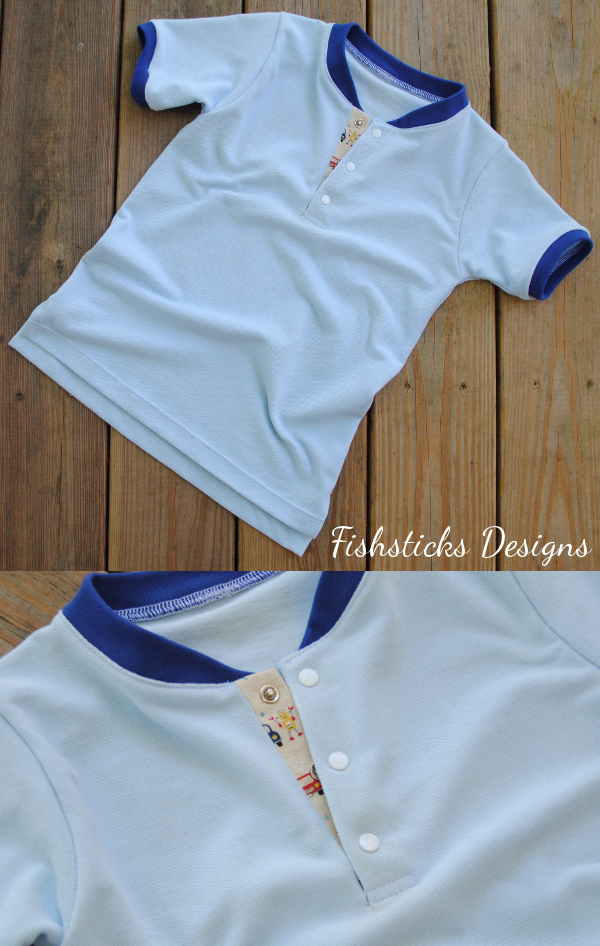 The traditional Henley collar is sewn with 1X1 cotton/spandex ribbing, and the placket inset features more cotton/linen robot fabric. Isn’t that little yellow robot peeking out just adorable?
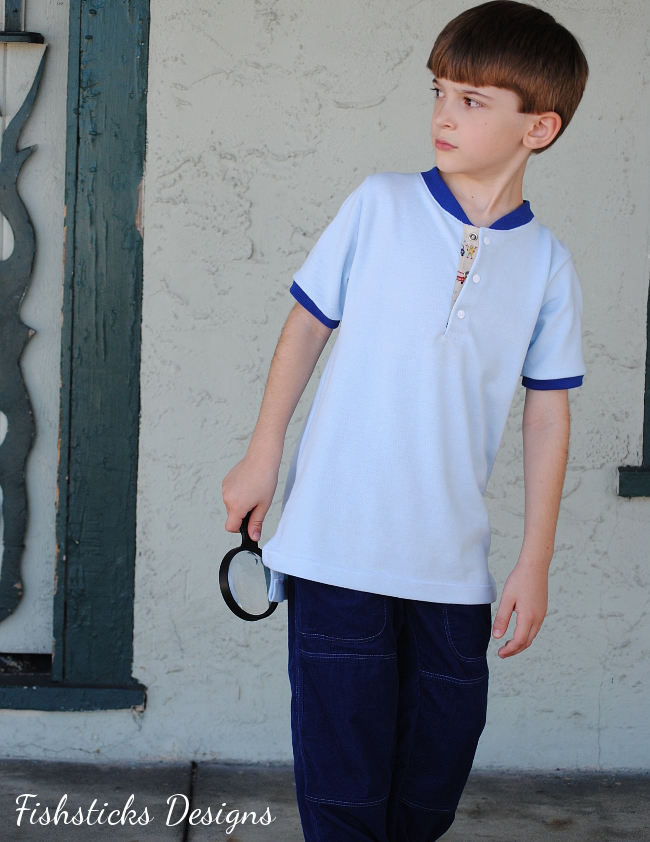 I finished the placket with white metal snaps. (See the little scratch on Jamie’s cheek in the picture below. It’s the result of momma leaving a pin in the shirt when he first tried it on! Have you ever done that? I felt so bad, but he seemed rather excited when I told him that we would just say that it was a scar from his past detective work.)
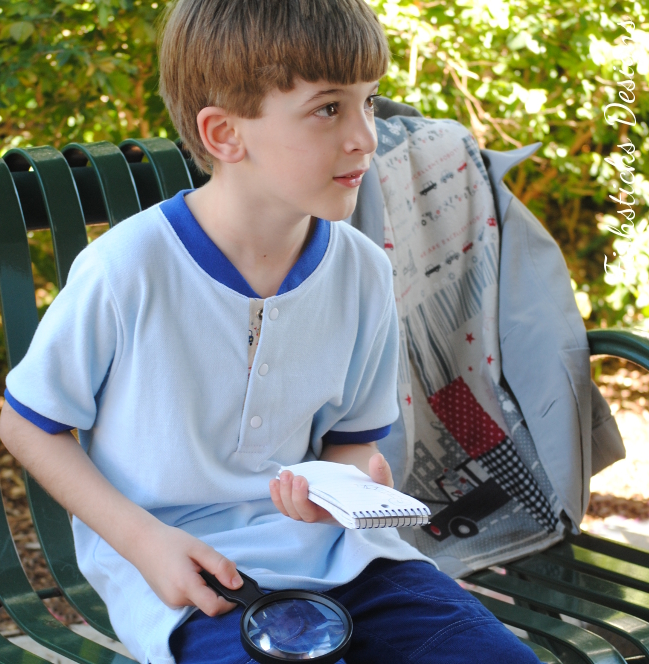 I cut the back of this top longer than the front, and I added in side vents.
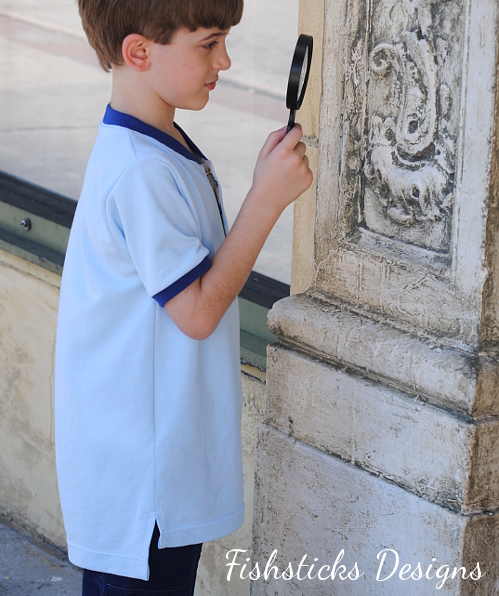 The fine-wale cotton corduroy pants wrap up this outfit in comfortable, modern style. A zippered fly hides more tiny robots on the fly shield and the inside of the waistband. The waistband also features functional belt loops.
  Two huge front pockets provide more storage room, and double knees give longer-lasting wear. The coordinating topstitching on the pockets and the knee panels gives more great detail.
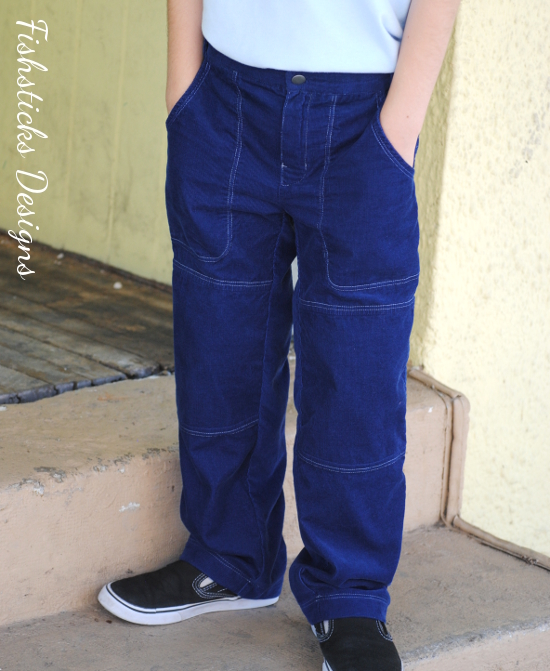 Jamie is tall and thin and generally wears slim sizes in ready-to-wear pants, so elastic in the backwaist gives him a comfortable fit. The back yoke and pockets finish the pants off nicely.
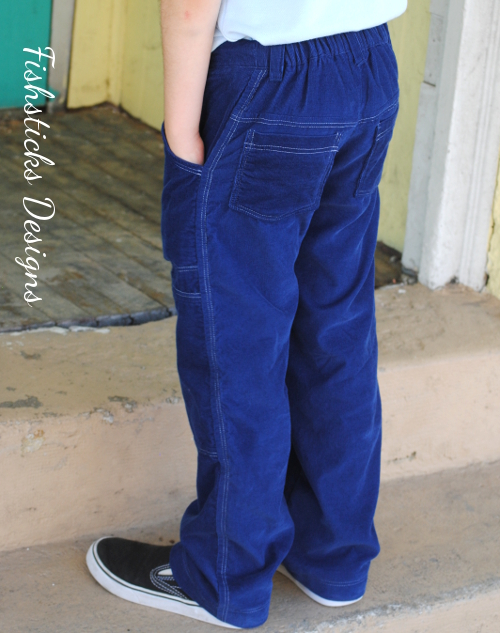 I think this outfit accomplished all of my goals: Inspector Gadget-inspired, comfortable everyday wear, and loved by the receiver! I happen to think he’s quite handsome in it, too!
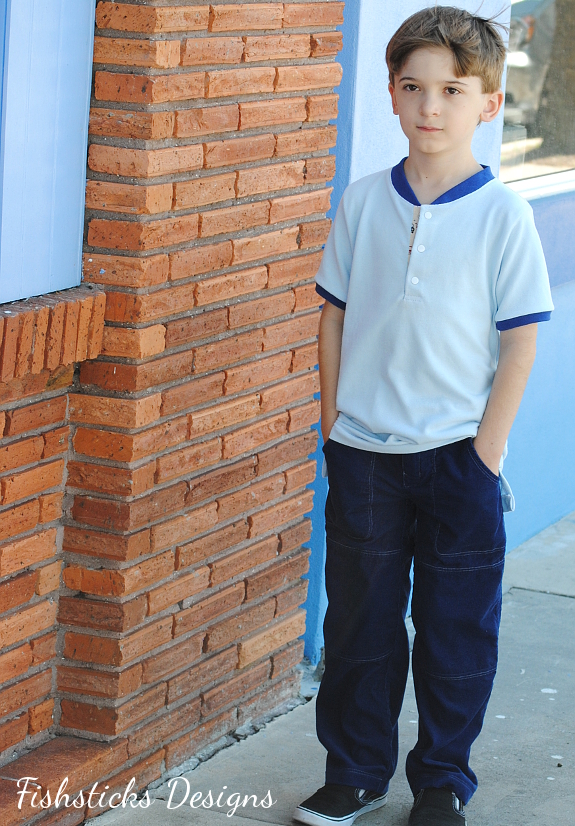 Jamie planned out the props for this photo shoot himself, and he had a lot of fun with it!
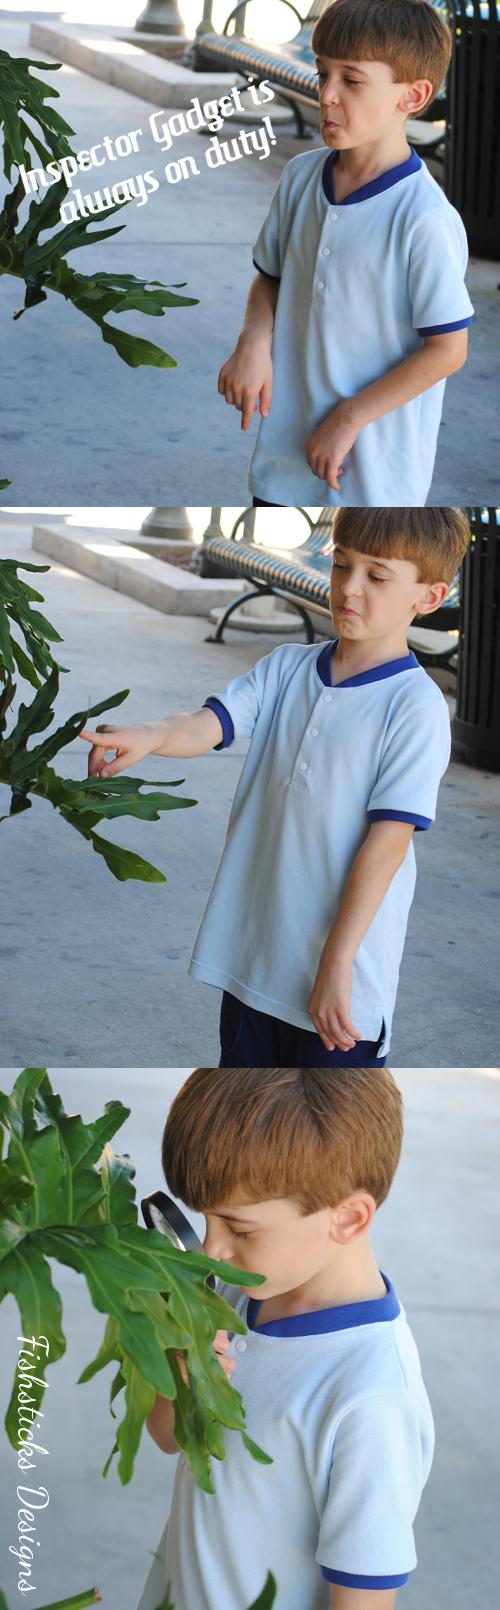
 All patterns are self-drafted.
Jacket fabrics: Gray Cotton Twill by Fabric Finders from Southern Seams, Robot Cotton Linen by Kokka from Sew Me a Song, Recycled Cotton Buttons by Green Earth from Joann Fabric.
Shirt fabrics: Light Blue Cotton Pique upcycled from a thrifted Old Navy polo, Ribbing from Joann Fabric, Robot Cotton Linen by Kokka from my stash.
Pant fabrics: Royal Blue Fine Wale Corduroy from Hobby Lobby.
Thank you so much for dropping in to visit and reading about my Go, Go Gadget Fashion Look! Don’t forget to go vote: Project Run & Play – Week 1!
RBD Flannel Showcase Blog Tour: Reversible Button Bibs
 I’m up on the Riley Blake Designs Flannel Showcase Blog Tour! Over the next few months, sewing bloggers will be featuring some of their favorite ways to use flannel fabric in handmades, all using Riley Blake’s great selection of cotton flannel fabrics. RB’s flannel fabric is a favorite here in our house because it has that wonderful soft brushed feel, and it stays that way wash after wash.
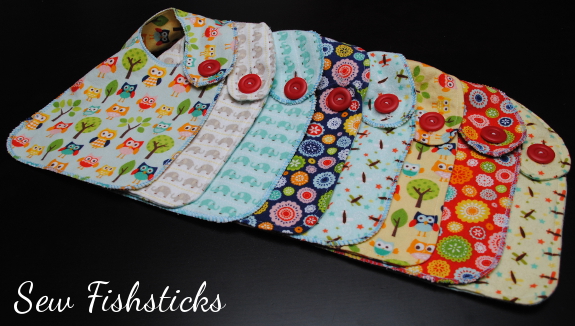 Because it’s 100% cotton and thicker than quilting cotton fabrics, flannel is not only soft, but it’s absorbent, too. That makes it a great choice for those sweet and darling but very drool-ly and spit-uppy babies! Anyone who has spent time with a newborn knows that a collection of absorbent drool bibs makes life much cleaner and drier. Thankfully, bibs are quick and simple to sew, so you can have a stack done in no time, and making them reversible for two looks in one is just as easy. I thought I’d take advantage of the blog tour and show you how!
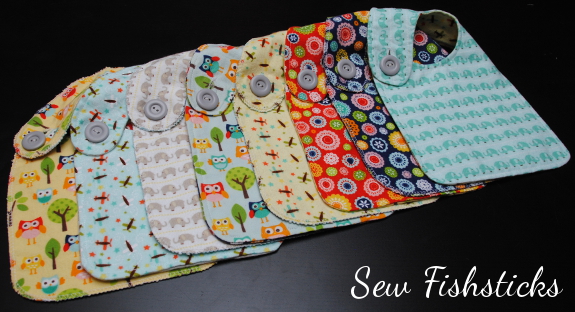 We’re going to start with my free Bibs in All Sizes pattern. To download the pattern, just click here, scroll down to the red link at the bottom of the post and click again. Be sure to save the file to your computer before printing the pattern. In order to make these reversible, I replaced the waterproof backing with another layer of flannel. If you wanted to make these waterproof, though, you could hide a waterproof fabric inside. Follow the instructions for cutting out and assembling your bib, either sewing it with your machine or serging it. (I’m using the infant size here, but toddler, big kid and adult sizes are all included in the free pattern.)
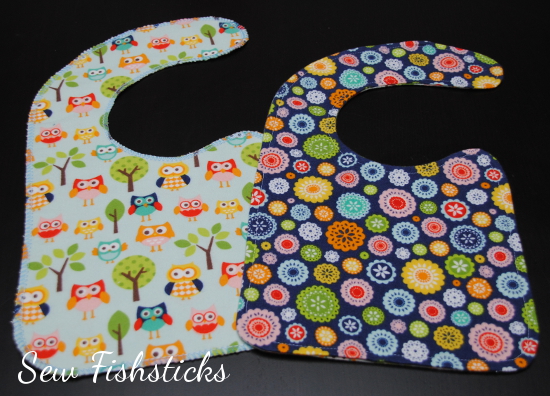 From here, we’ll be adding buttons for fastening rather than the snaps called for in the pattern. For these bibs, I used Riley Blake’s Matte Finish Buttons in Gray and Red.
Measure in from the end of the snap strap ½” on the Infant Size (1″- Toddler, 1 ½”- Big Kid Bib) and mark the center point. This will be the beginning of your button hole. Draw a vertical straight line 1/4″ longer than the width of your button to mark your button hole. Stitch your button hole. (Refer to your machine’s manual for using your automatic button hole attachment.)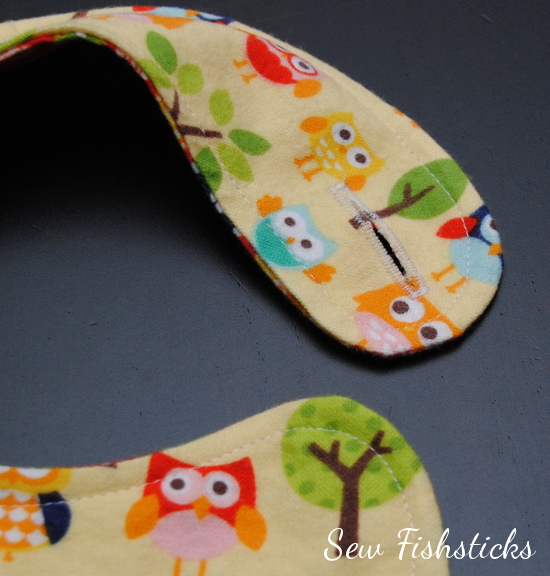 We’re going to sew two buttons back to back so that each side has it’s own button. When you do this, you have to add some space between the buttons to keep them from being too tight. (If you just sewed them back to back without some wiggle room, you wouldn’t be able to pull the buttons through the button hole.) If you have a chopstick (or what I often refer to as a corner-poker-outer) handy, that will work beautifully! Place the chopstick on the front side of the bib, centered on the little hump where you’ll be sewing your buttons.
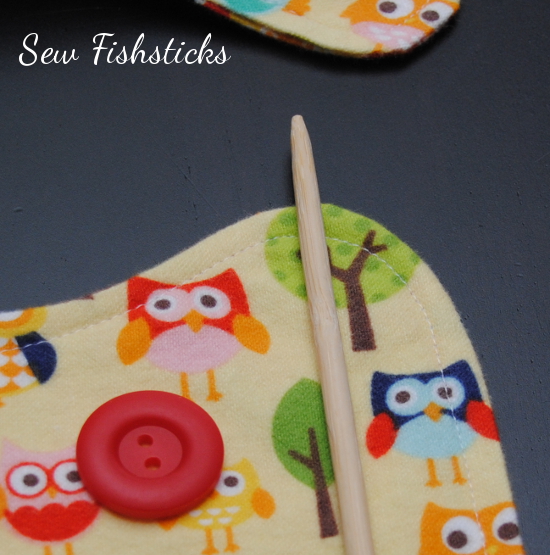 Place the first button on top of the chopstick, just below your topstitching or serger threads. Grab your hand needle and thread, and thread the needle, pulling the thread ends through so that you’ll be stitching with two thread lengths at once. Tie a generously-sized knot in the end of your thread. Pull the thread through from the back into one hole in the button, out the opposite hole and back through to the back of the bib. Be sure that your knot is snug against the back of the bib.
 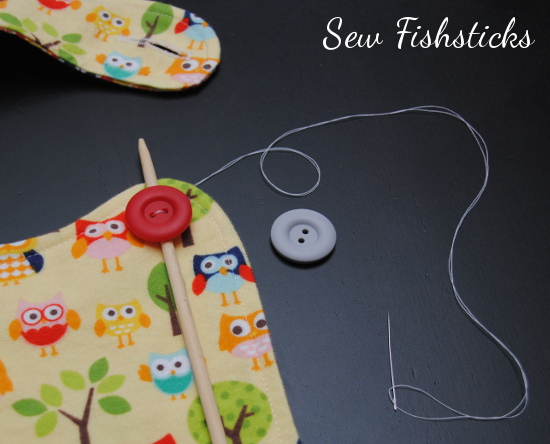 Slide your second button onto the needle and pull it all the way down against the back of the bib, lining it up behind your first button. Poke the needle through the opposite hole in the back button and through the matching hole on the front button.
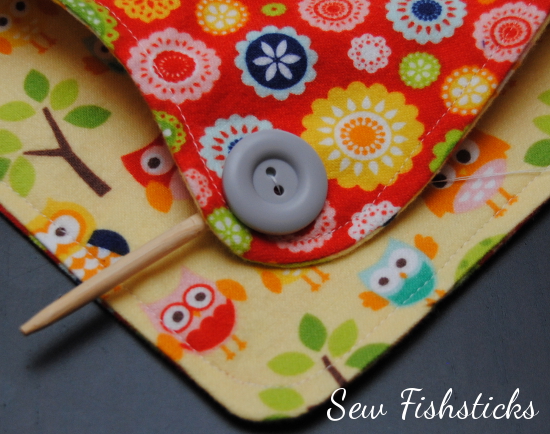 Continue stitching through the two buttons with the chopstick between until your button is well secured. (An important safety note: These buttons must be attached securely and firmly. Be sure to check them regularly. Never ever leave a baby or child alone or sleeping while wearing a bib.)
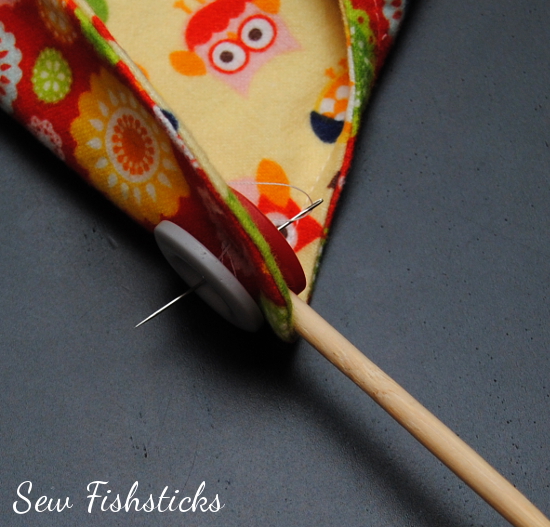 Pull out the chopstick and slide the needle under the threads in the back. Tie a knot around these threads and knot again several times. Trim away the extra thread.
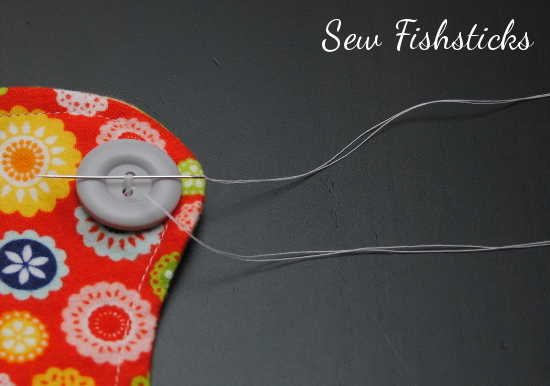 Button your bib on the front side ….
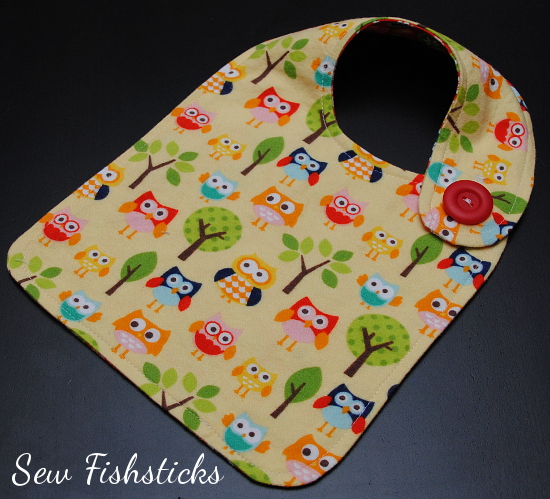 …or flip it over and button it on the other side!
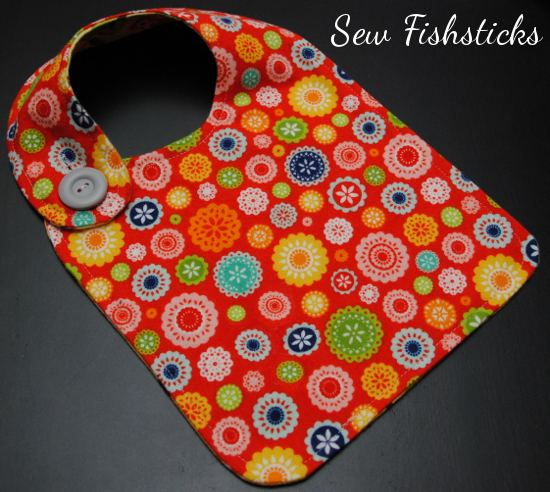
9/9 Quiltscapes
9/12 Fishsticks Designs
9/23 Sassy Quilter
9/26 Simple Simon & Co.
9/30 Fabric Mutt
10/3 Just Let Me Quilt
10/7 Jedi Craft Girl
10/10 Rose and Odin
10/14 Sew We Quilt
10/17 Haberdashery Fun
10/21 Leigh Laurel Studios
10/24 The Cottage Mama
10/28 Flannel Queen
10/31 Lucy Blaire
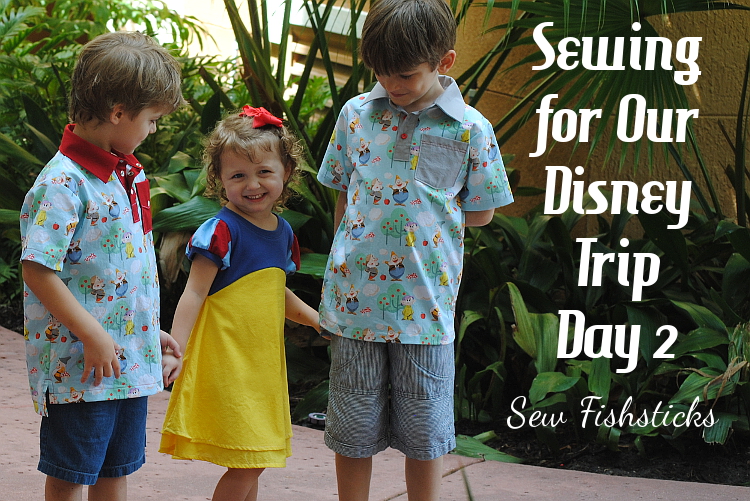
Sewing for Our Disney World Trip ~ Day 2
 I’m a little behind in sharing our Day 2 Disney outfits because I misplaced my second camera card! The funny thing is that I know where I put it, but it’s not there. Hmmm … We’ll just have to make do with the pictures that I do have.
I ran across the Seven Dwarfs fabric at Joann Fabrics while we were visiting with out-of-town family last month and thought it was so cute! I couldn’t resist grabbing a few yards to bring home for the boys! I was really hoping to find Snow White fabric to coordinate with it for Katie’s outfit, but a thorough online search turned up nothing at all. That ended up being just fine, though, because I love how Plan B turned out — meet the Playhouse Dress a la Snow White!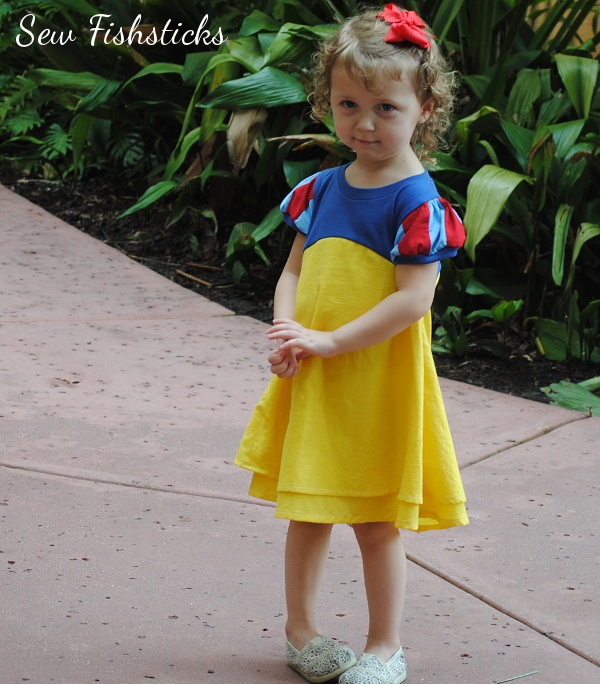 Katie is so slim, I opted to make the Playhouse Dress a size smaller than her ready-to-wear size with added length. For the Snow White sleeves, I pieced 2″ strips of red and light blue Kona cottons, then I cut and sewed them according to the pattern instructions. To add a little more drama to the skirt, I made it a double-layer with the top skirt slightly shorter. The dobby fabric that I used was really thin, so doubling it up kept it from being see-through, too.
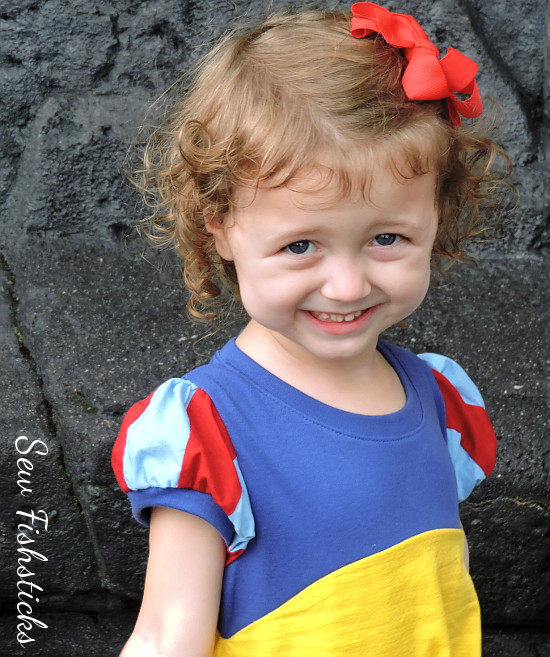 For Charlie and Jamie, I experimented a little with a tunic idea that I’ve been mulling over for a while. We got so many compliments on these shirts at Disney. I’m sure that I’ll be re-visiting this one with some minor modifications!
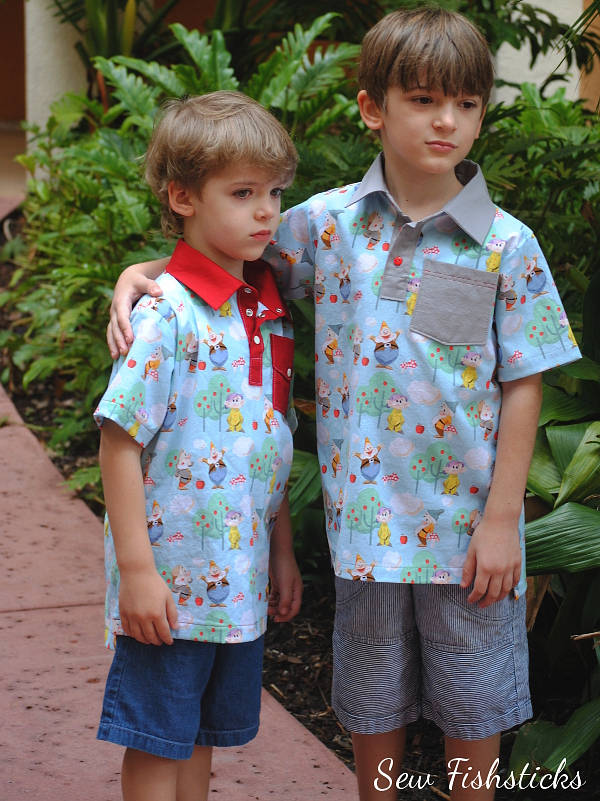 On Jamie’s shirt, I used the pocket from my Everyday Camp Shirt and tiny buttons on the placket. My next versions of these will definitely have narrower collars. These worked just fine, though, since everything Disney is a bit over-the-top! (Both boys are also wearing mama-made shorts — Inside or Out Pocket Pants on Charlie and Sand & Sidewalk Boardshorts on Jamie. They’re wearing Undercover Bottoms Boxer Briefs, too, but you obviously can’t see those!)
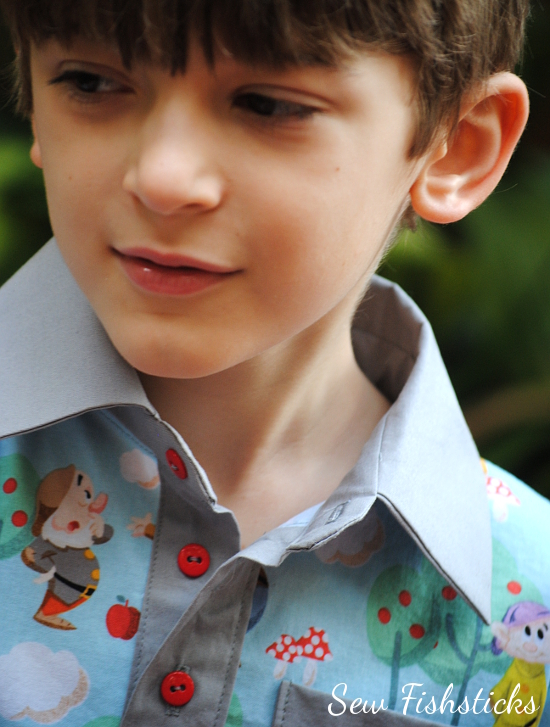 The pocket on Charlie’s shirt is similar to the faux flap pockets that I used on Jamie’s shirt for Disney Day One, and I finished his placket with metal snaps. Both shirts have a side slit and a slightly longer back than front. (You can see that best in the picture at the very top of this post.)
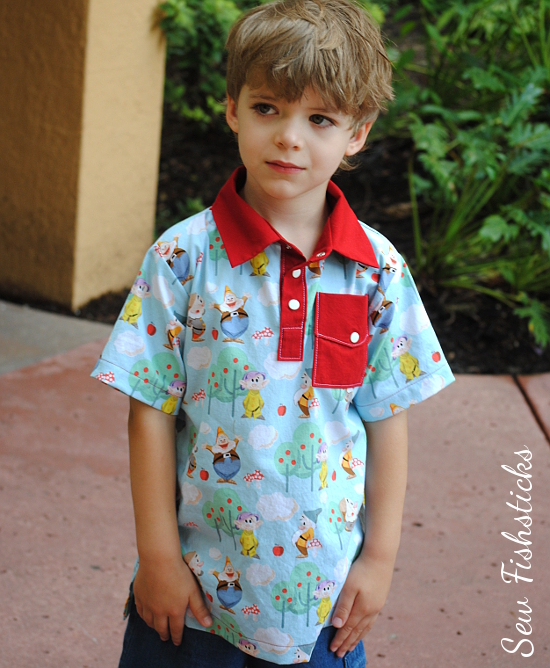 I thoroughly enjoyed sewing these outfits, and the kids loved wearing them. It was so nice to have unique Disney-themed clothing for them to wear on our trip. I’d love to hear your thoughts! Do you sew for vacations? special trips? special occasions? I tend to only do so if I know that what I’m sewing will be used later … my practical mindedness is usually the deciding factor. (The Mickey shirts that I sewed for the boys have already been worn again this week. As for these Seven Dwarfs tunics, I’m thinking of whipping up some Pajama Party PJ pants to match and turning them in fall jammies.)
Sewing for Our Disney World Trip ~ Day 1
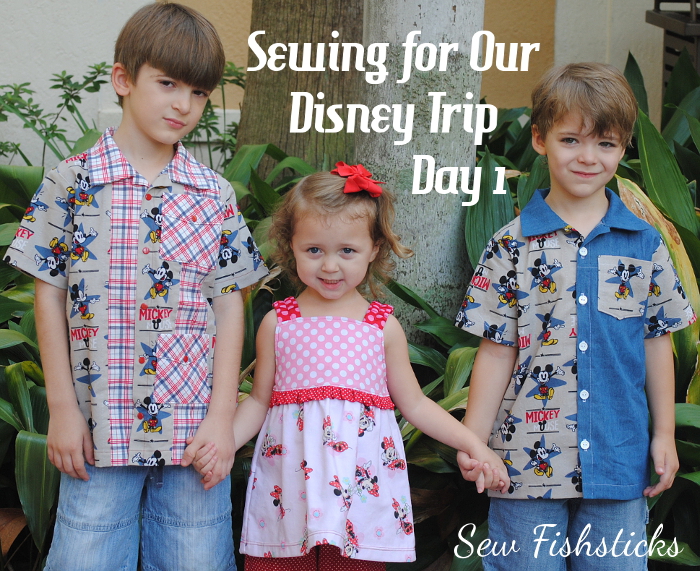 We took a short trip to Disney World this past weekend for Night of Joy, and I couldn’t pass up the opportunity to sew cute outfits for our two youngest boys and our granddaughter! (A few people pointed out to me that I am crazy sewing up all of this right before competing in Project Run & Play, but I really love sewing for these little people, and I’ve been so busy with other work stuff lately, I just had to do it! If you’re popping over from PR&P this morning, a huge “Welcome to Fishsticks!”)
We spent two days/nights at the Magic Kingdom, so each of the little ones got two outfits. I’ll share their second day Disney clothes later this week! For the first day, I went with a Mickey and Minnie theme.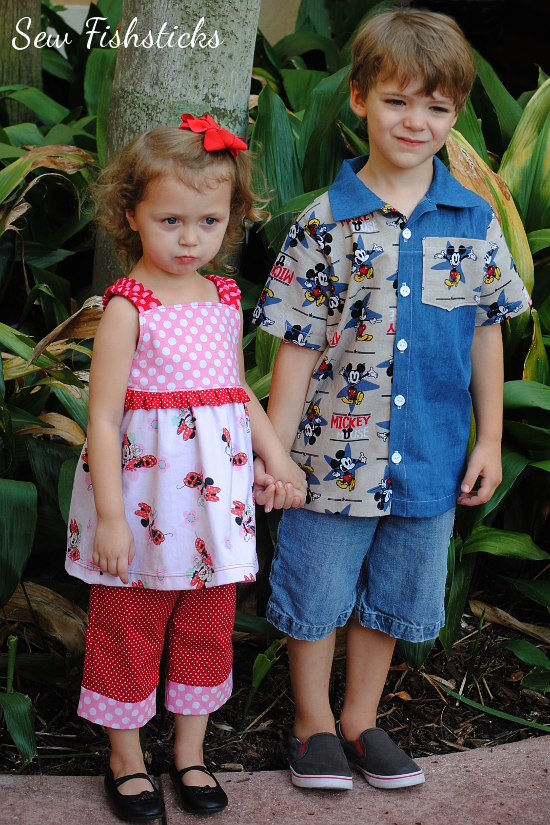 I used my Katie J. Jumper pattern for Katie’s top with a few simple modifications. I started by shortening the pattern to shirt-length using a top with the length that I wanted as a guide. I also added an extra ruffle between the bodice and the skirt. To do that, I just cut a strip of fabric the same width as the top of the skirt piece by 3″. Then, I folded it in half with the wrong sides together and pressed it well. I gathered the raw edges of the ruffle and attached it to the bottom edge of the bodice at the same time that I attached the skirt. It’s a really simple addition that adds a really cute extra feminine detail!
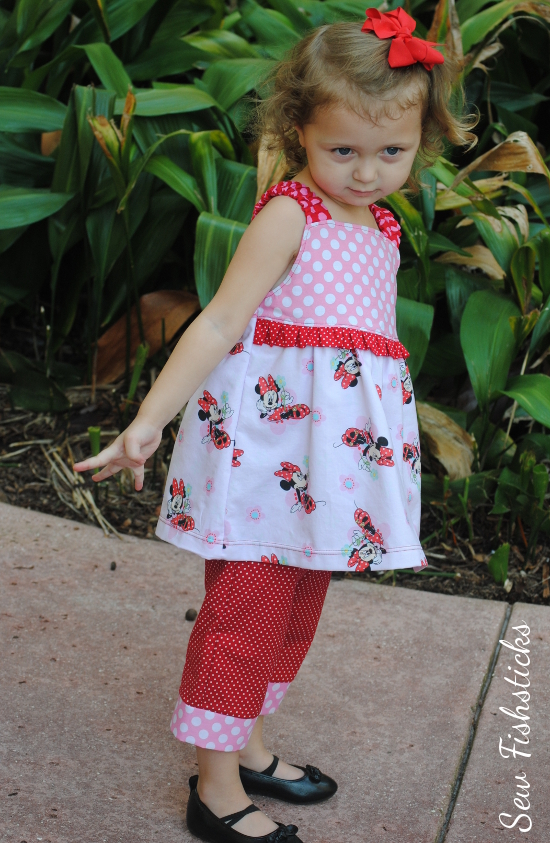 For Katie’s pants, I shortened the narrow version of my Sand & Sidewalk Skate Pants to capri length and added a simple band at the bottom edge instead of the hem. Because I was running out of time, I sewed them with no pockets, and I had them done in a flash!
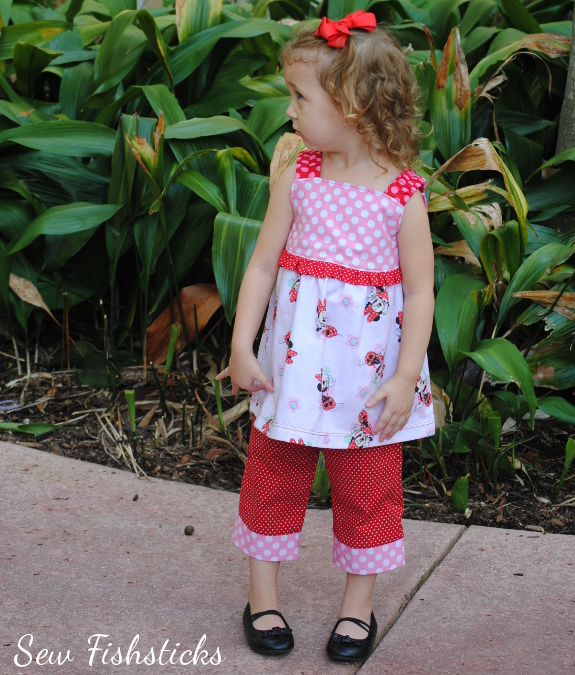 The boys’ tops began with my Everyday Camp Shirt pattern. (They’re both in the big kid sizes now! Eek! They’re growing up too fast.)
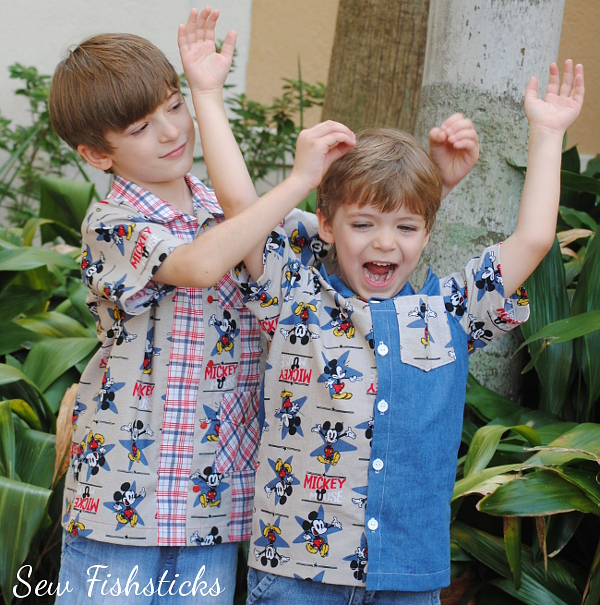 (Jamie was giving Charlie “Mickey Mouse ears”.) I mixed a light chambray fabric with the Mickey fabric for Charlie’s shirt, colorblocking it on the front by cutting the two front pieces in different fabrics.
 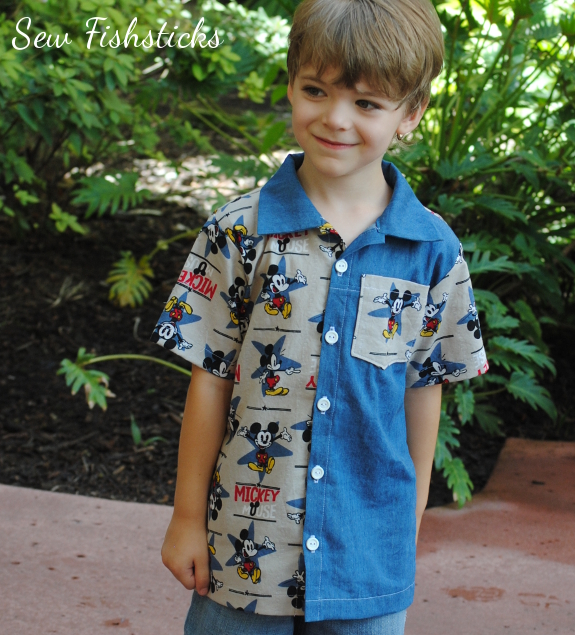 On the back, I added a yoke to show off more Mickeys. Since I made Jamie’s shirt first, and my Mickey fabric was running a little low, piecing Charlie’s shirt together with the second fabric helped stretch it further. The chambray fabric was left over from another project, so I got to use up some of my fabric stash, too!
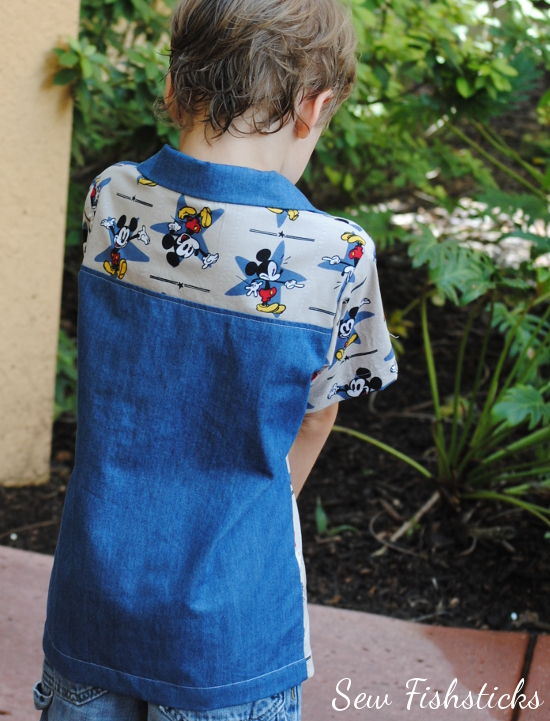 The design of Jamie’s shirt was inspired by the Cuban-style guayabera top.
 I pieced the pocket side of the shirt using that classic guayabera stripe and added pockets with faux flaps. The flaps are sewn down, and the pocket opens at the top like a traditional shirt pocket. I like that it gives the look of a flap but cuts down on ironing!
 I pieced the opposite side of the shirt a little differently so that center strip of Mickeys is nicely framed, and I skipped the second row of pockets.
Jamie’s shirt is finished with metal snaps, and Charlie’s shirt above is finished with 1/2″ buttons. The Mickey and Minnie fabrics and the chambray were all purchased at Joann Fabrics. The plaid fabric on Jamie’s shirt is a Riley Blake Designs print, and the dots are from Michael Miller Fabrics.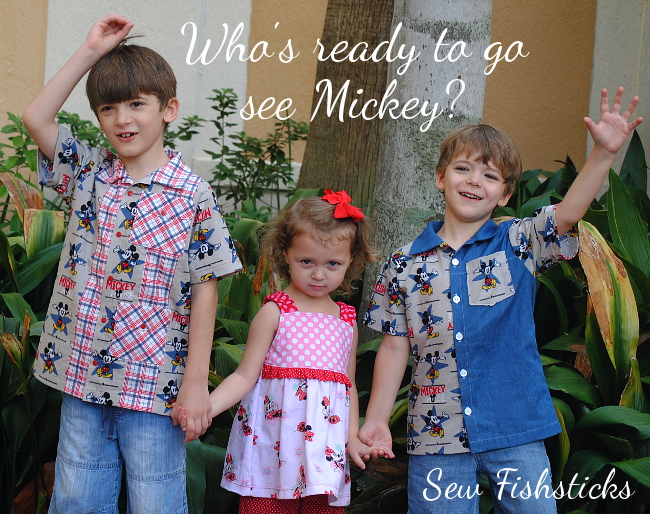 Our plan was to visit with Mickey as soon as we got to Disney so that we could get some quick pictures while everyone was still clean! Katie wasn’t exactly excited about seeing him in person, though.
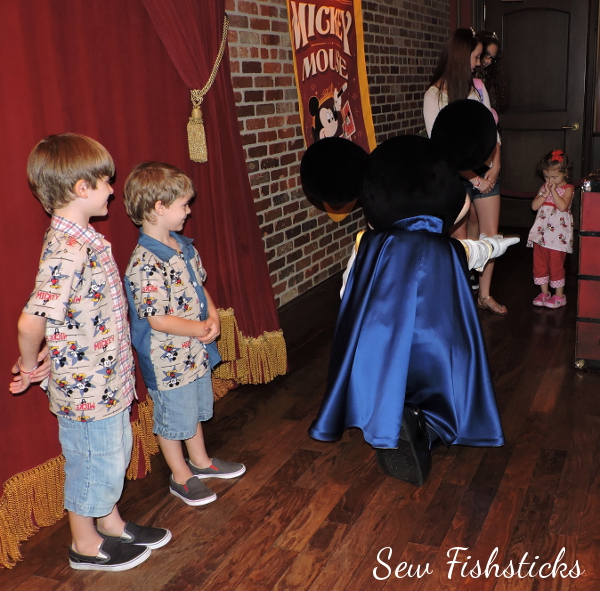 Thankfully, her two little uncles managed to coax her over close enough to snap a few photos.
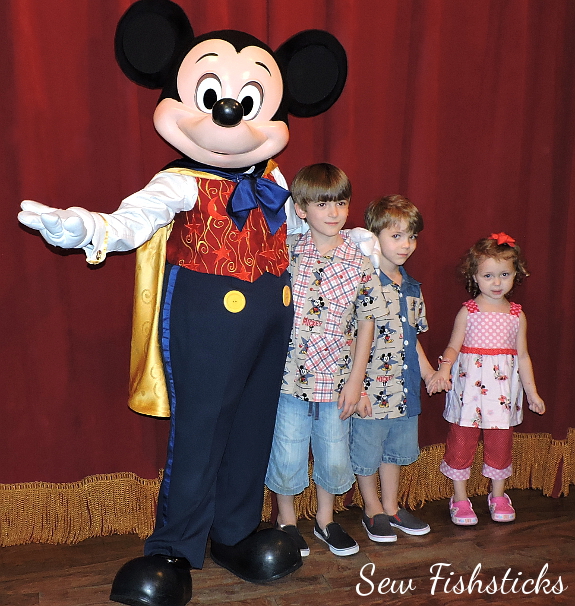 We had a blast at Disney that evening, but we also got drenched in the pouring rain, so the remainder of our pictures look mostly like this one:
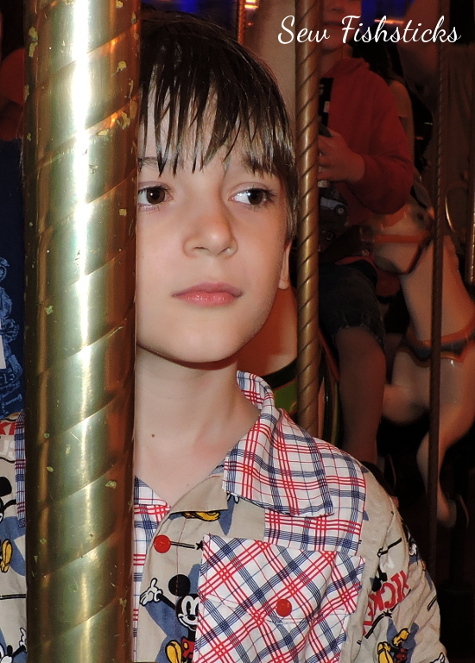 Thankfully, our second night was much drier! Those pictures will be coming on Wednesday morning. In the meantime, though, if you want a peek, just pop over to my Instagram feed: Fishsticks on Instagram. (Feel free to follow me there! You might get some little peeks of my PR&P sewing later this week, too!)
Indygo Junction’s Newest Book: Dimensional Denim
 Amy Barickman of Indygo Junction recently released a new book called Dimensional Denim, and I got to check it out! Here’s what Amy says about the book, “I was inspired to create this book after I noticed the recent trend for textural home decor and accessory items. While trend shopping I saw more and more items that created texture and interest through fabric manipulation.” The creative ideas in the book combine beautifully with Indygo Junction’s Crossroads Denim, but the book includes some great ideas for recycling old blue jeans, too!
I’ve worked with Crossroads Denim before, and it’s wonderful for denim pants, skirts and jackets, but I hadn’t really thought about using it for home decor projects. My husband and I recently finished a bench that we upcycled from our youngest daughter’s old bed, and since it really needed a toss pillow, that’s what I chose to make!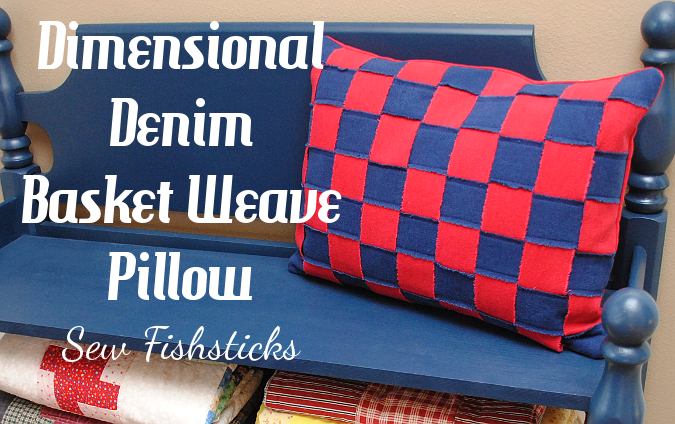 Because of the vintage look of the bench, I thought the Basket Weave Pillow would be just perfect here. I used two colors of Crossroads Denim – Fire Red and Weathered Indygo. (I sort of wish that I’d thrown in some French Vanilla, too, for even more color and interest. The book has instructions for making this pillow in two colors or three.)
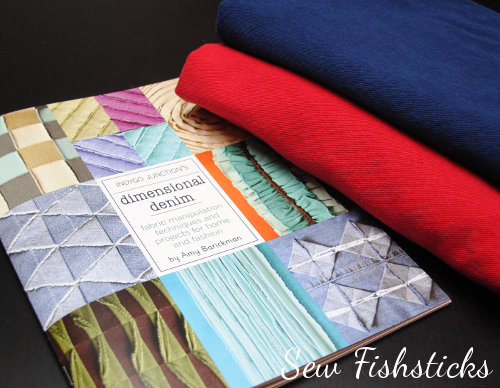 My favorite part of this project might have been tearing those strips. There’s something so satisfying about the ripping sound and that perfectly straight line that you get when you tear along the grain. I got a little carried away, and ended up with plenty of strips for a future project – maybe a vintage-y fabric checker board?
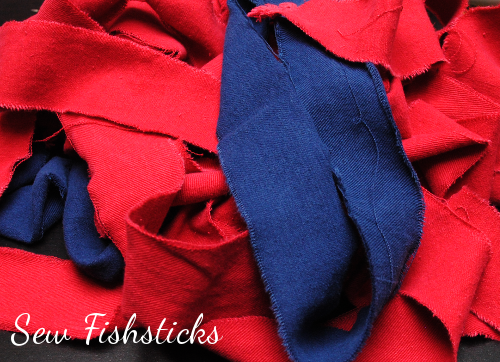 Amy says, “A simple woven design is probably one of the first craft projects most children make in school.” Whether or not you learned this technique in grade school, it really is easy enough that a child could do it, and the end product has a lovely dimensional look.
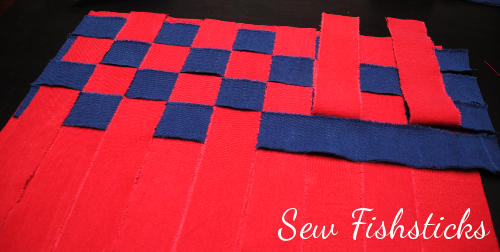 I did have to do a little math to come up with the right length and quantity of strips for my pillow since I was reusing an odd shaped one that I already had on hand. Amy includes all of the details for making a 19″ x 19″ pillow with three fabrics, so you don’t have to do math if you don’t want to. One of the things I really like about the book is that each section teaches you the technique first, followed by an actual project, but it also offers ideas for using that technique for your own projects. It sort of gives you freedom to expand on what you’ve learned!
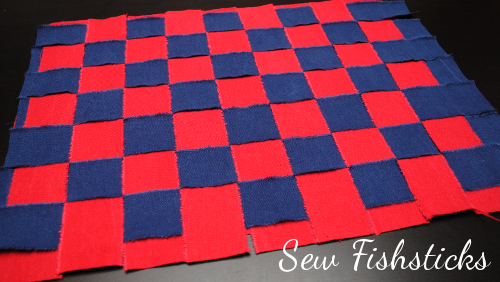 I modified the stitching on my pillow just a little bit because I was afraid my rough and tumble boys might just grab those woven strips and pull them apart. Instead of stitching the X pattern that Amy recommends on random blocks, I topstitched down the torn edges of all of my blue sections and left the red ones loose. Hopefully, those red loops won’t end up being home to too many little action figures. I’m sure that they’ll hold up beautifully, though, if they do!
I adore my finished pillow!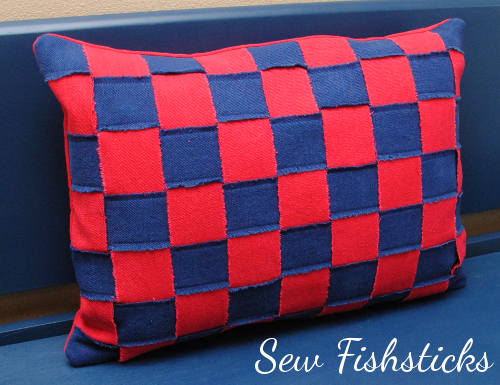
You can enter to win your own copy of Dimensional Denim by clicking over to the Indygo Junction blog, or you can grab a copy right now for 30% off using code DDBT14 at checkout! Be sure to follow along with the rest of the blog tour schedule below!
8/4 Indygo Junction
8/4 Kollabora
8/5 Amy Barickman
8/6 Fishsticks Designs
8/7 Cool2Craft
8/8 The Sewing Loft
8/11 Nancy Zieman
8/12 Skip to My Lou
8/13 Inventive Denim
8/14 Whipstitch
8/15 Coats and Clark
You can find Crossroads Denim at all of these online stores:
The Sew in Style Book Tour, Giveaway & a Dolly Tardis Dress!
 My youngest daughter and I get to share a new book with you today, and it’s a great one for those of you who have girls learning to sew! Samantha and I met Erin Hentzel at Spring Quilt Market in Pittsburgh while we were setting up our booth, and we enjoyed chatting with her about sewing and the sewing industry and her newly released book!
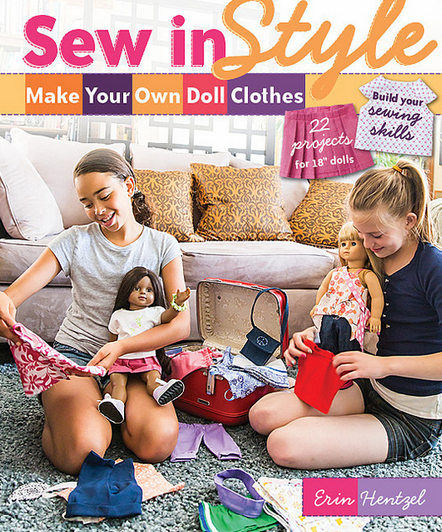 Sew in Style – Make Your Own Doll Clothes was written to teach girls to sew for their own 18″ dolls, and it does a beautiful job of doing just that. At 16, Samantha is probably a little older than the target audience, but she gladly pulled her well-loved American Girl Samantha Doll out of storage and started planning as soon as she saw the book. (Her Samantha Doll is not making an appearance here because when I say “well loved” I mean she looks like she slept with a little girl who loved her very much for many, many years! Instead, we opened up an AG Doll that we picked up on sale a few years ago and kept for some special little girl that we have yet to meet. Is that a little odd? I just know that we’ll meet someone someday who will just be overjoyed with this doll.)
 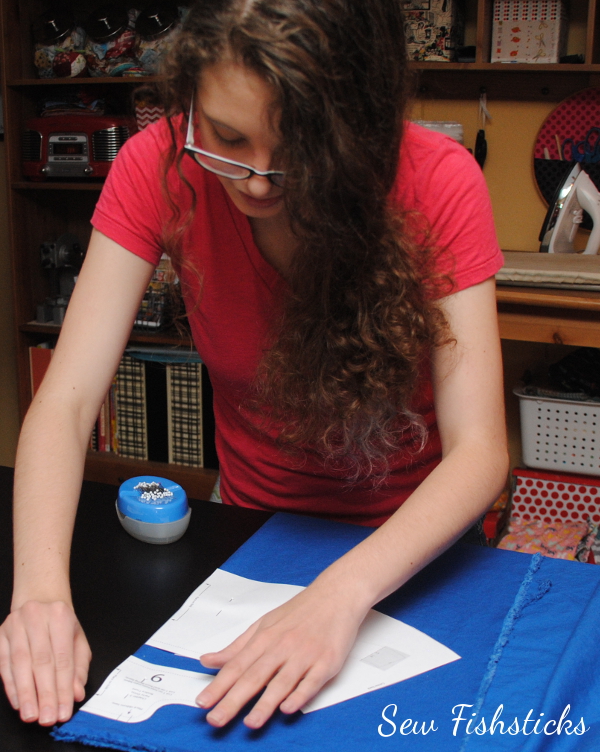 C&T Publishing sent us an eBook copy of the book for this review. This was my first time using one of their eBooks, and I really appreciated the layout. It’s super easy to find what you need, and all of the full-size patterns are included in easy-to-print-and-tape-together format. Samantha scrolled through the book on the computer, and then we printed just the pages she needed.
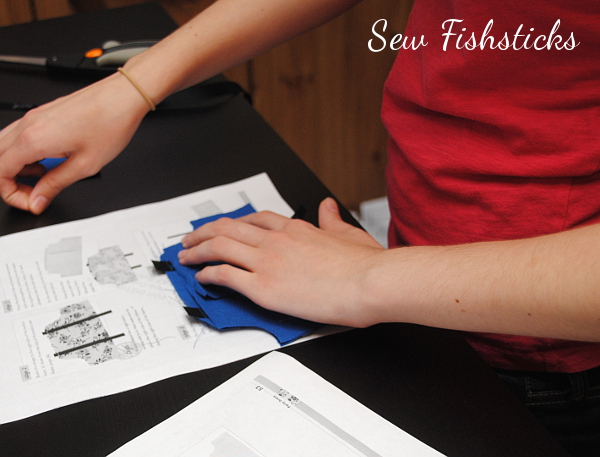 My favorite thing about this book is that I just handed it all over to Samantha and let her go with it. The beginning of the book teaches basic sewing skills with plenty of tips and guidance. Really, the only thing I helped with was brainstorming how to turn the book’s Party Dress into a Tardis Party Dress!
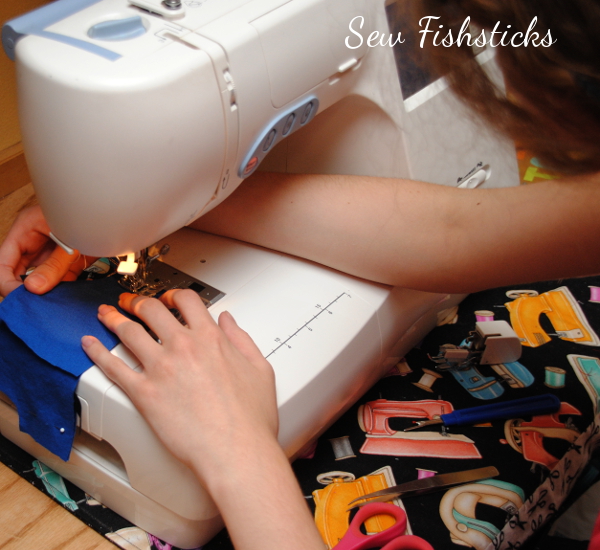 Things have been a little bit Doctor Who crazy around here lately. We started watching the Doctor a few months ago as a family, and I feel like I’m raising a houseful of Whovians at the moment. My two little guys run around the house now battling invisible Daleks and opening things with imaginary sonic screwdrivers, and my teenagers amuse themselves by turning pieces of furniture into police boxes:
Samantha’s idea for designing a dolly Tardis dress did not surprise me at all!
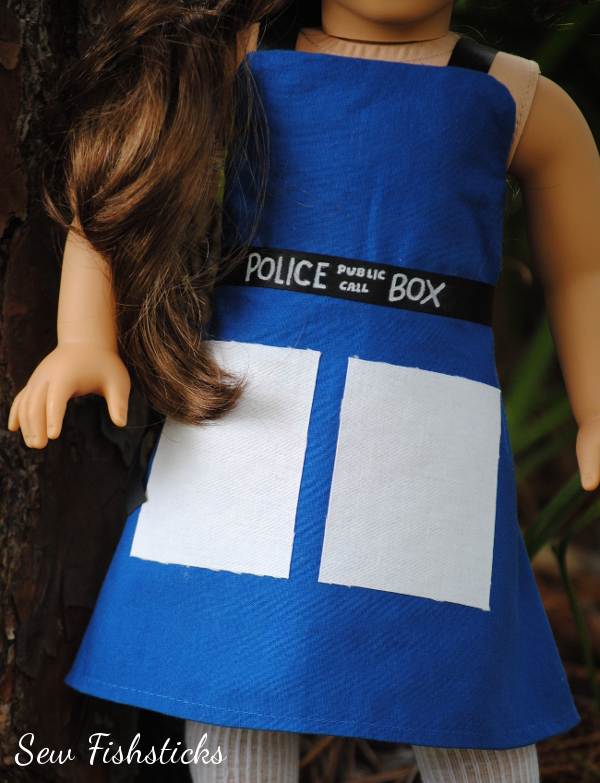 To make this dress, Samantha chose the closest-to-Tardis blue Kona cotton that she could find and black ribbon. She used a white paint pen to inscribe the words “Police Public Call Box” on the ribbon, and she used Wonder Under to iron on the white window patches. I think it turned out really well! What do you think? (We even think that if this particular doll had red hair, she could pass as Amy Pond, and the irony of this whole thing is amusing since Doctor Who is a British series and this is an American Girl Doll.)
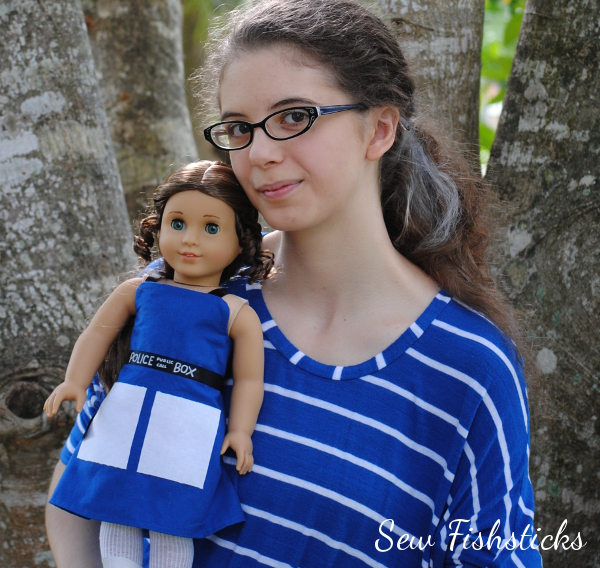 Giveaway is closed! And the winner is lucky #13! Comment #13 was from Heidi K! Congratulations!
Giveaway ends July 27th, 2014 at 8:00 PM EST. Giveaway is open to U.S and international residents who are 18 years of age or older. One entry per person. Winner will be selected by Random.org. Winner will be announced using the winner’s public username on or before 12:00 PM EST on August 1st, 2014. Prize will be emailed to the winner who must be contactable via email. Email addresses will never be shared.
Katie’s Cowgirl Dress & Third Birthday Party
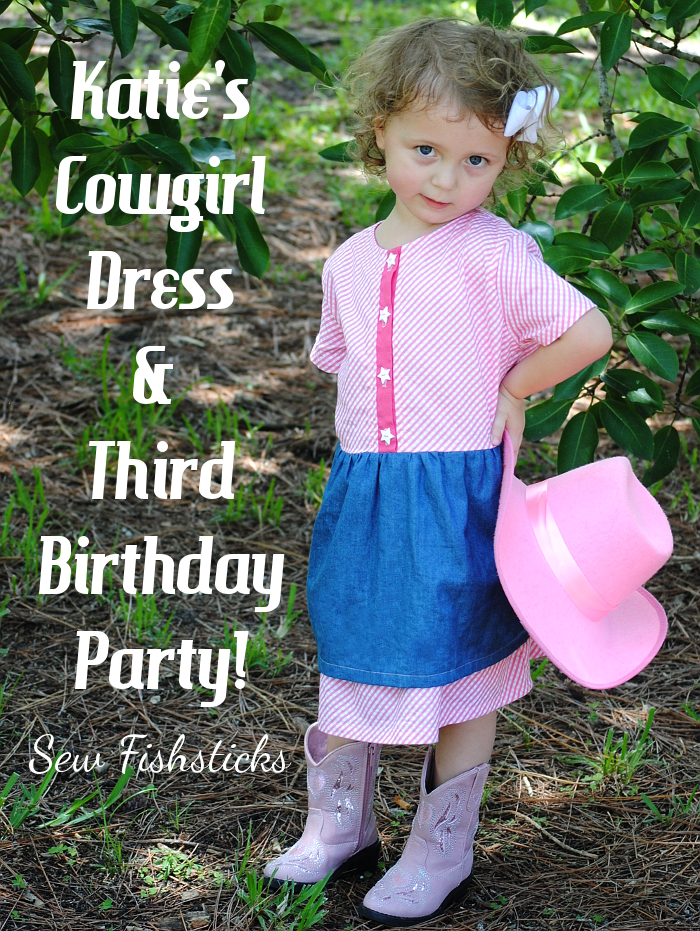 Our granddaughter, Katie, turned three this month, and we celebrated last weekend with a Sheriff Callie-inspired birthday party. It’s sort of a given that I’ll get to sew her party dress (YAY!), and I had so much fun with this one!
 Katie’s momma shared with me ahead of time that they were planning for her to wear pink boots and a pink hat, so pink was definitely the color. I took Charlie with me to shop for fabric and buttons a couple of weeks ago. I was picturing a pink gingham and chambray mix, so I was thrilled to run across this Riley Blake bias-print gingham fabric at The Quilt Place.
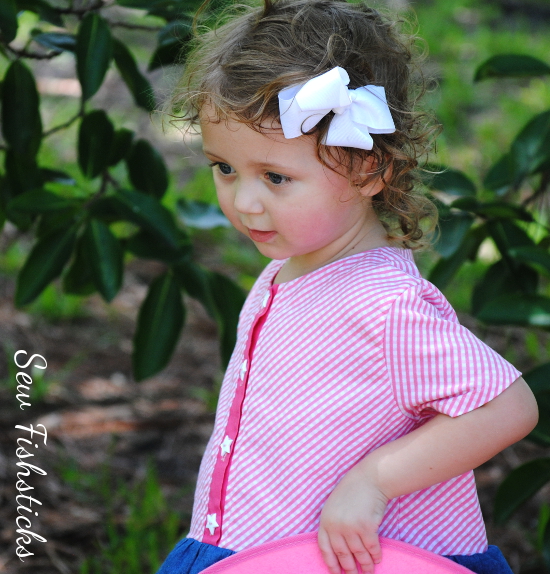 Charlie picked out the white star buttons at Hancock Fabrics, and the chambray fabric was a Joann Fabrics purchase. (We really did drive all over town for all of the supplies! Charlie was sort of done after finding the buttons, but the promise of a cake pop and chocolate milk got us through our last stop without a tantrum. Four-year-olds need something to look forward to! Actually, we all do — I enjoyed the coffee break, too.)
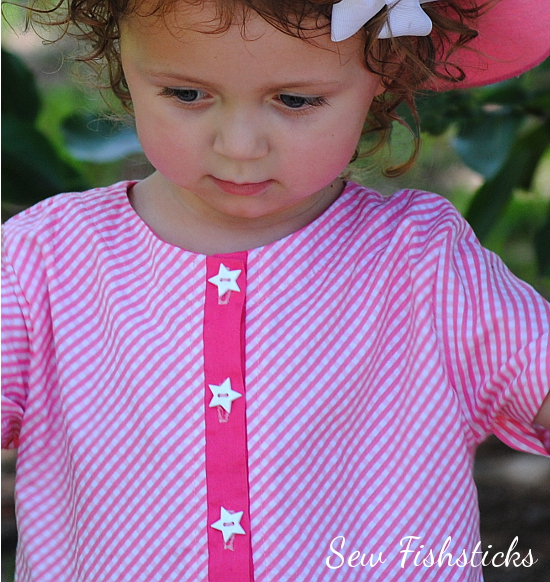 I used the top from my in-progress shirtdress pattern (It’s with my testers right now!), and combined it with a gathered two-layer skirt. (Adding a gathered skirt to a top is easy-peasy stuff. Just measure the width of the bottom of your top, cut your skirt about 1 1/2 times that width by whatever length you want, gather and attach it. That makes sense, right? Maybe I’ll do a tutorial later.)
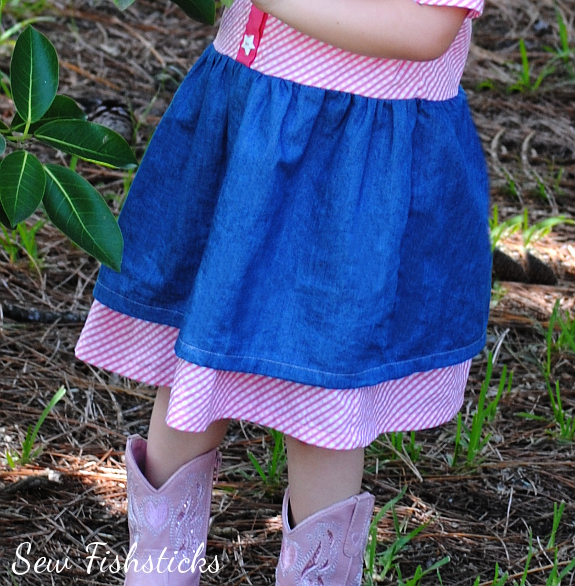 We all had to laugh a little because we put a lot of planning into Katie’s party last year with decorations and pretty food: Katie’s 2nd Birthday. I got a notice a few weeks ago that I’d been given a PartyPail.com award for Best Decorations!

Pretty cool, huh?
This year, our party was a little less Pinterest-worthy and a bit more let’s-just-have-fun! Of course, there’s nothing at all wrong with doing things either way. Both definitely have their advantages.
Katie’s friends enjoyed bouncing in the bounce house that was so kindly provided by a close family friend.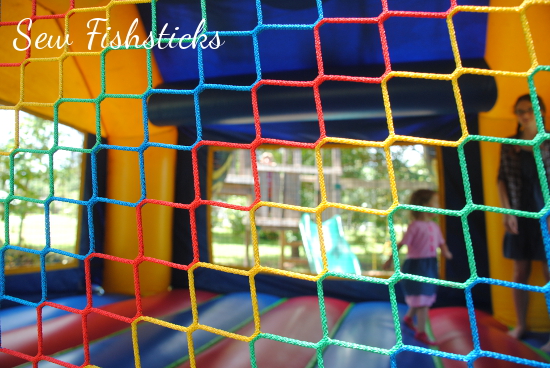 There was a slight misunderstanding, though. Our friend thought that the party was for one of our boys, so the bounce house was a monster truck! Hahahaha! Thankfully, Katie loved it!
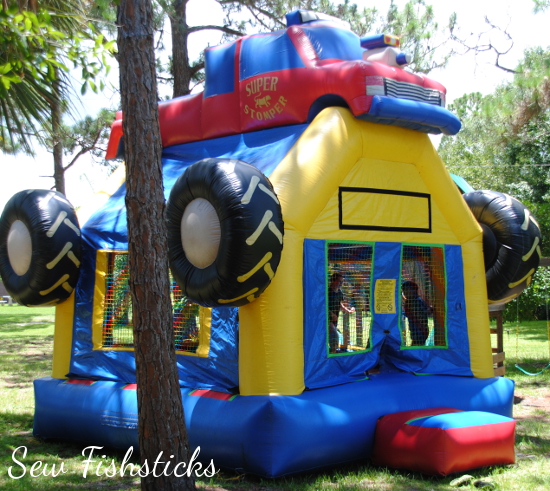 We kept the snacks simple and served iced water with fruit to drink. (It was really, really hot, so we all drank tons of water!)
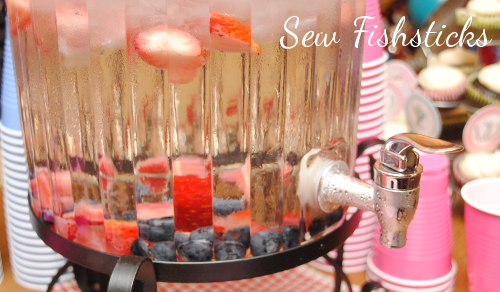 Katie was thrilled with the simple printable Sheriff Callie cupcake toppers that we found at EasyPartyPrintables.
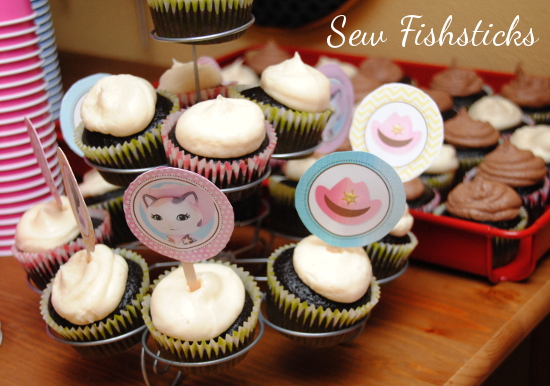 And, of course, she had a blast opening presents …
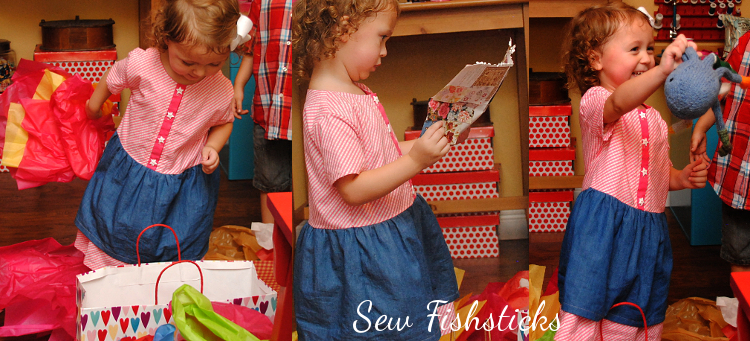 … and eating cake!
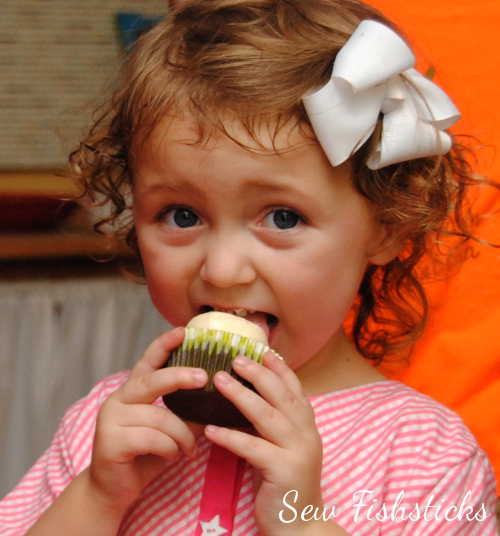 I’d say it was a pretty successful party! Happy birthday, Katie! I pray that your next year is full of lots of love, loads of fun and plenty of new discoveries.
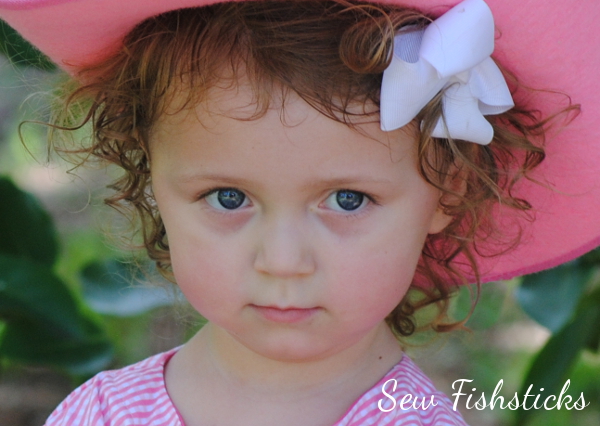 I was planning to link up with Challenge Create: Geometric Week at Skirt Fixation, but I totally missed the deadline! Next week, I am planning ahead better so I can join in for Knit Week. You should, too! You can still pop over to Skirt Fixation and vote for your favorite contestant and your favorite sew-along entry: Challenge Create: Geometric Week. Oh, and a quick huge, “Thank you!” to all of you who voted for my winning Custom Linen Handbag last week!
Also, Kids Clothes Week starts on Monday! Are you joining in? I have a few things planned!
Introducing the Sand & Sidewalk Boardshorts and Skate Pants!
 I can’t wait for you guys to read all about my latest pattern release! This one has already become a wardrobe staple for my two little guys, and I hope it will do the same for you! Allow me to introduce the Sand & Sidewalk Boardshorts and Skate Pants pattern! (As you go through, be sure to click on the images for larger pop-up versions.)
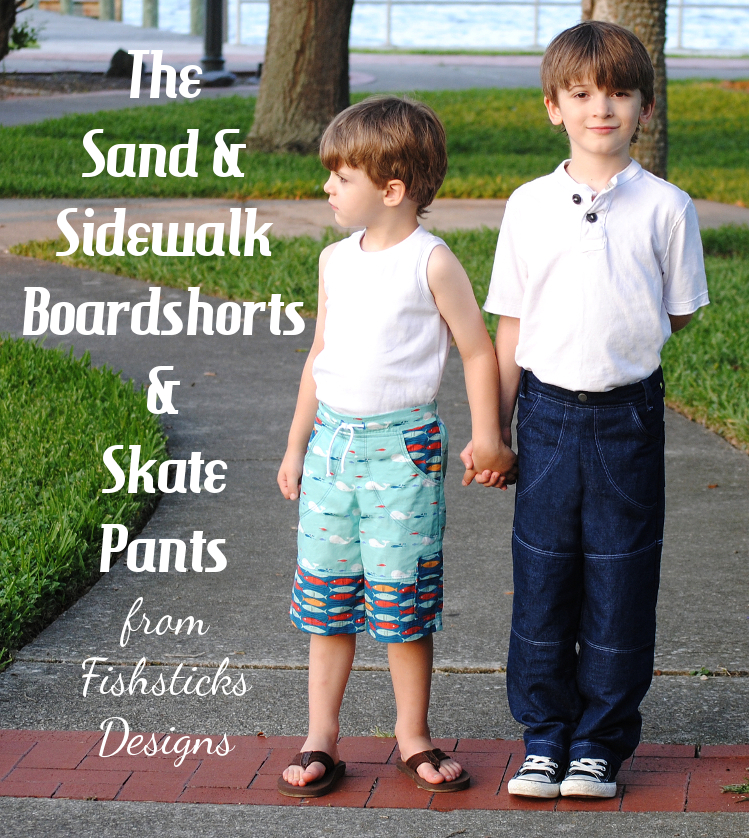
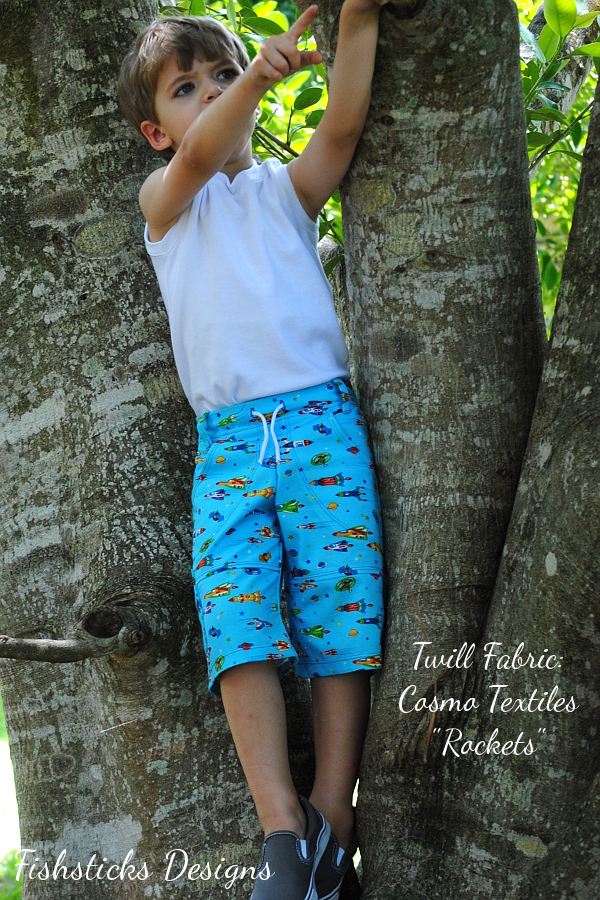 You can sew this pattern in both pants length and boardshort length. The boardshorts are designed to fall just below the knee, and the front of the leg is done in two parts for a stylish, modern look.
 Both the boardshorts and the skate pants feature an abundance of detailing provided by topstitching! It’s like ruffles and rick rack, only for boys! When you’re sewing for boys, it’s those little details that give your sewing that beautifully finished look. Don’t be worried that it’s hard, though. I’ll walk you through each step. (If you need a little extra help using a twin needle, be sure to check out my tutorial here: Using a Twin Needle.)
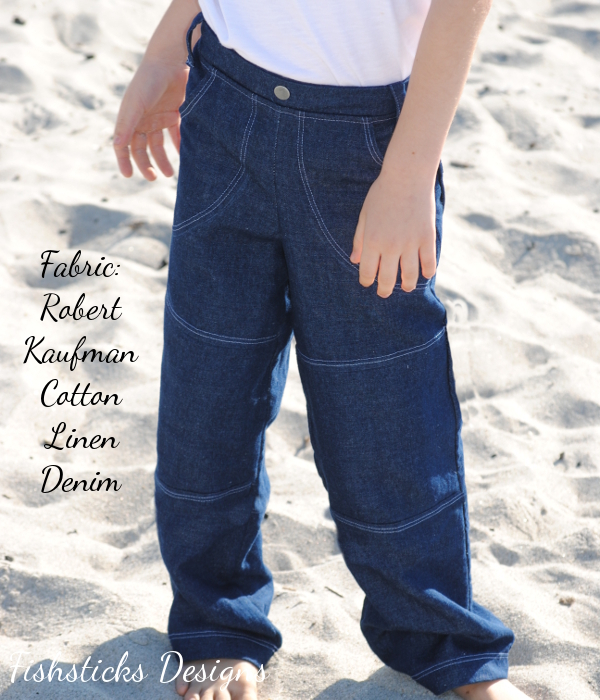 This pattern has a slimmer fit through the hips than traditional elastic-waist pants for a more updated look. The fit is slightly wider than a skinny jean fit but narrower than a straight jean. A measurement chart and multiple suggestions are included to help you choose the perfect size!
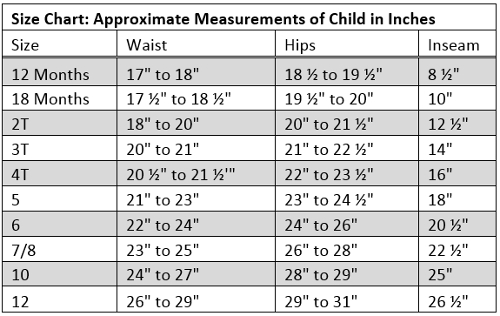 The skate pants include a double-knee panel which is great for making pants more durable for little boys.
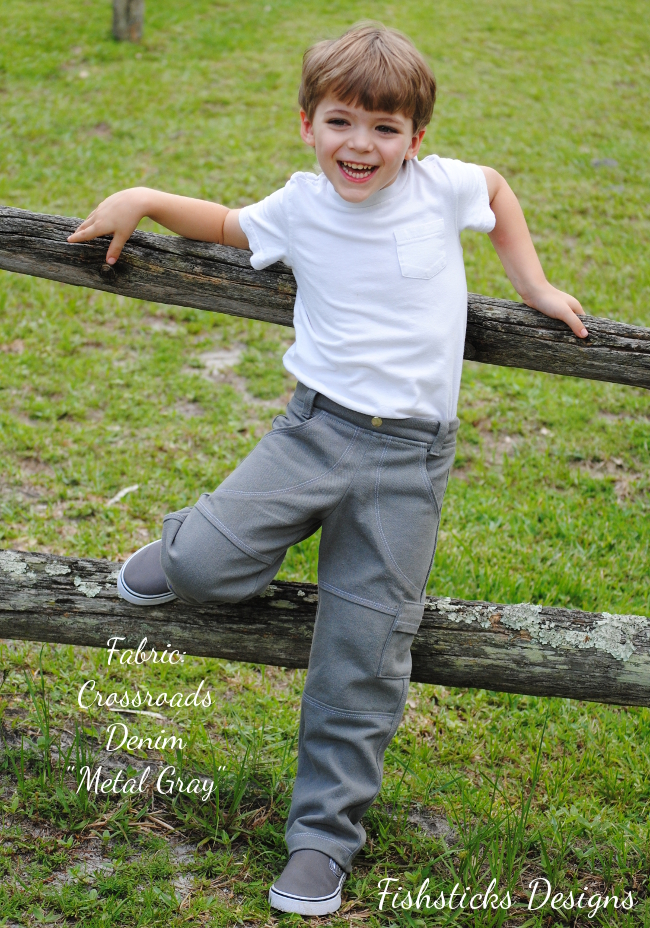 The pants pattern has two leg-width options.
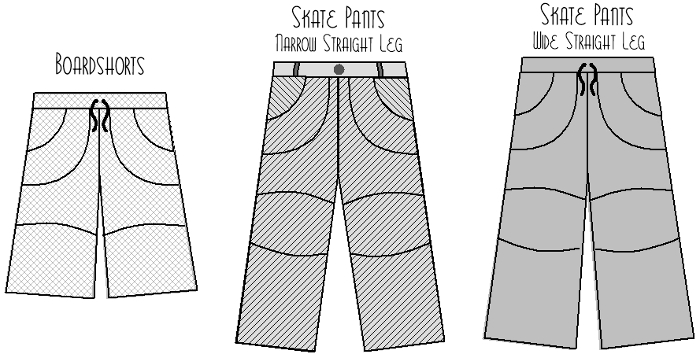 While both are straight legs, the narrower option tapers in slightly at the thigh for a closer fit through the leg, and the the wider option falls straight down through the thigh and the leg for a looser fit in the leg.
 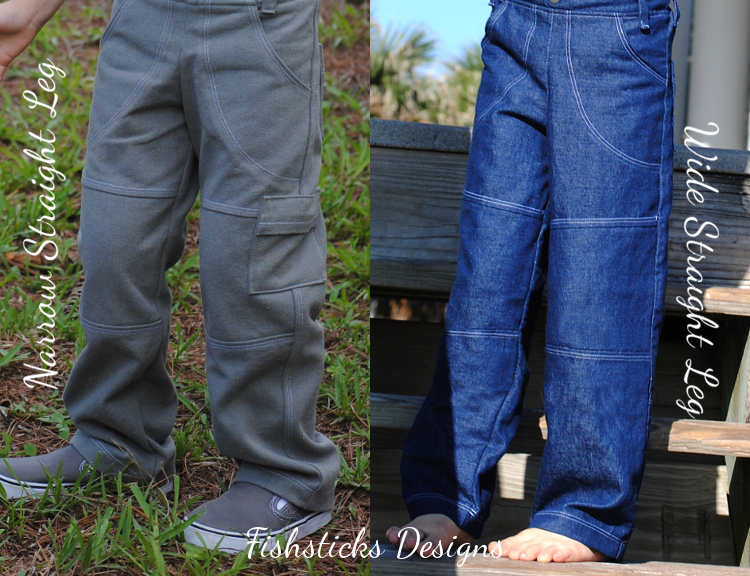 These pants and shorts have a whole list of mix-and-match features so that you can customize them just the way you like, and so that you can sew the pattern over and over, getting a different look each time. For the waistband, you can choose belt loops and a faux snap or a drawstring pulled through buttonholes or eyelets.
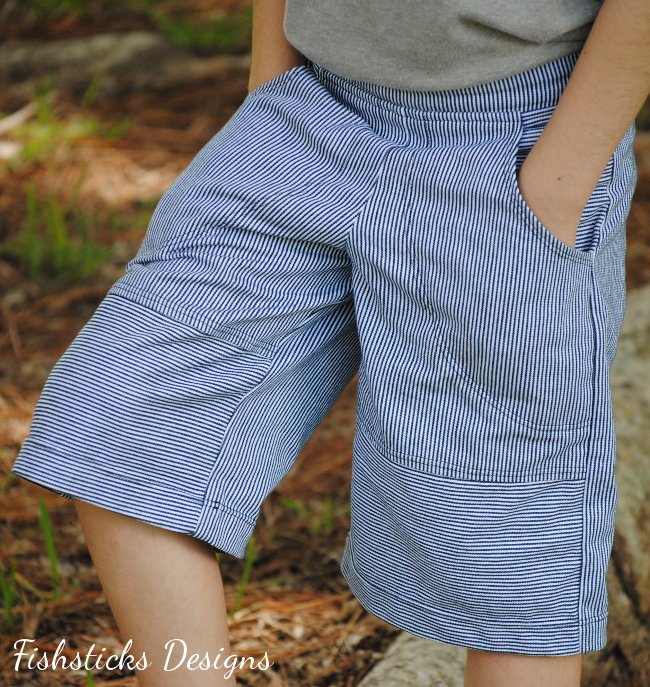
 The unique one-piece cargo pocket can be used for back pockets …
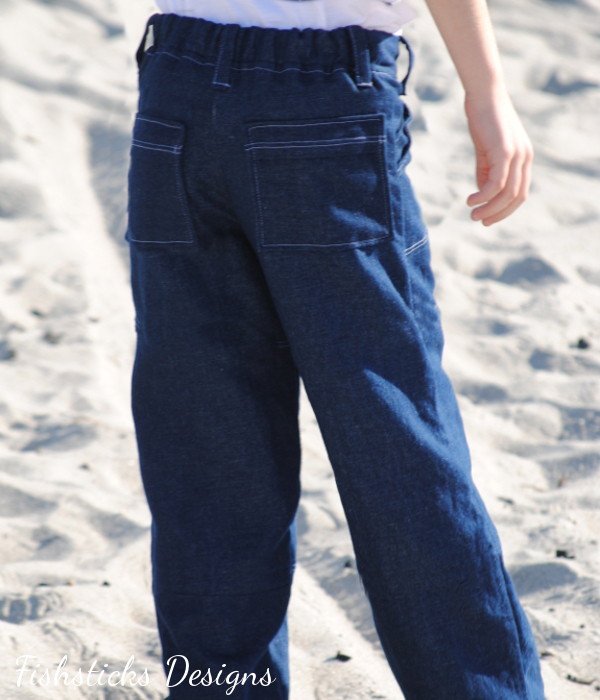 …or placed on the side seam.
 For even more interest, you can mix and match fabrics or try cutting the knee panel across the grain.
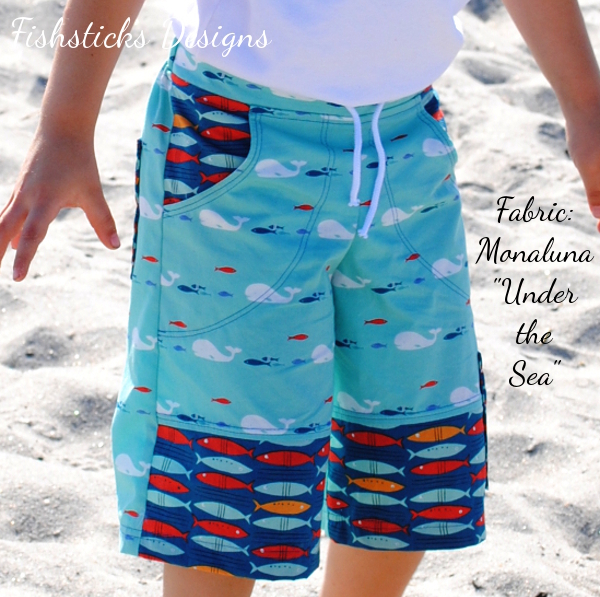
 Finally, the flat front/elastic-back waistband gives these bottoms a clean look and a comfortable fit.
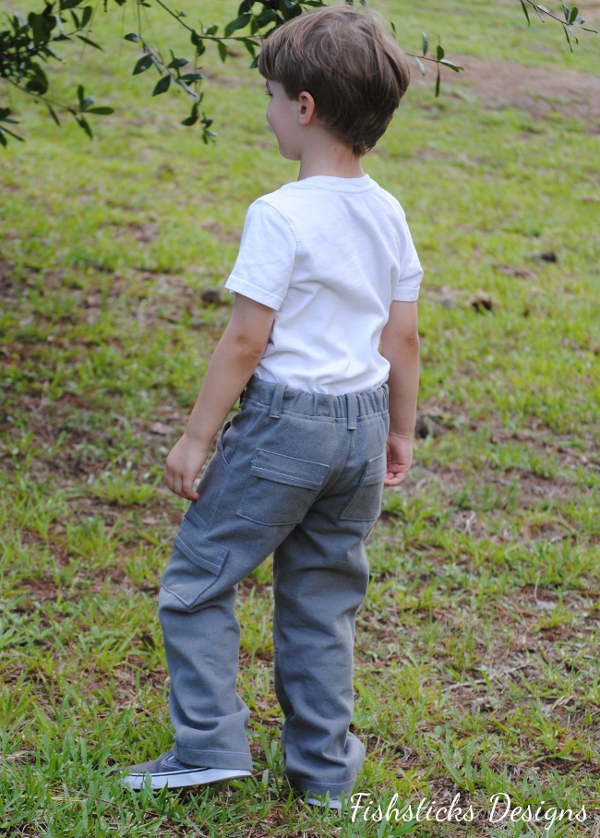 Where will your little guy wear his Sand & Sidewalk Boardshorts or Skate Pants first? Will he spend the day on the beach or perhaps take off to the local skate park? Maybe, like my little guys, he’ll hang out in the trees or spend the day exploring his own backyard. You can grab your own copy of the PDF pattern right here: The Sand & Sidewalk Boardshorts and Skate Pants or visit your local quilt shop for the paper version of the pattern!